

Adobe Premiere: explora el concepto de cámara lenta
El concepto de cámara lenta resulta natural en cualquier vídeo no por la reducción de velocidad en sí, sino por el objetivo de resaltar los detalles esenciales. Es más satisfactorio y tranquilizador conocer todos los detalles de cómo va a suceder algo o cómo se hace. Con la ayuda de Adobe Premiere podrás hacerte una idea de la edición y la creación de efectos en cámara lenta, pero puede resultar mucho más complicado para cualquier principiante. Sigue leyendo para conocer todos los detalles relacionados con Adobe Premiere.

Parte 1. Cómo producir videos en cámara lenta en Adobe Premiere
El software de edición de vídeo como Adobe Premiere Pro se utiliza ampliamente tanto en ordenadores Mac OS como en Windows. Con Premiere Pro CS6 o versiones posteriores es posible editar vídeos, anuncios, otros tipos de películas, proyectos de televisión y vídeos para Internet. Es una aplicación de edición de vídeo con muchas funciones, que también está disponible como parte del conjunto de aplicaciones Adobe Creative Cloud. Premiere Pro se utiliza con frecuencia junto con otros programas como After Effects y Photoshop en proyectos creativos. Adobe Premiere también es conocido por lograr mejoras extraordinarias en la edición de sus escenas, especialmente al ajustar la velocidad de reproducción de un vídeo. Puede crear excelentes vídeos a cámara lenta de distintas maneras y producir resultados de gran calidad. Pero, como se comentó en la introducción, productos de Adobe como Adobe Premiere pueden ser programas complejos para crear vídeos a cámara lenta, sobre todo para editores principiantes. A continuación se muestran tutoriales de ejemplo con el procedimiento para hacer vídeos a cámara lenta con este software.
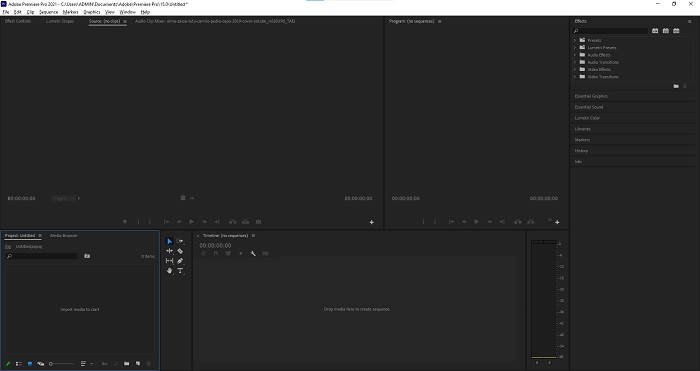
Paso 1: Abre Adobe Premiere y haz clic en Importar medios para empezar en la esquina inferior izquierda de la interfaz para transferir los archivos de vídeo desde tu ordenador al programa, o simplemente arrástralos. Otra opción es ir a la pestaña de menú Archivo en la esquina superior izquierda y seleccionar Importar.
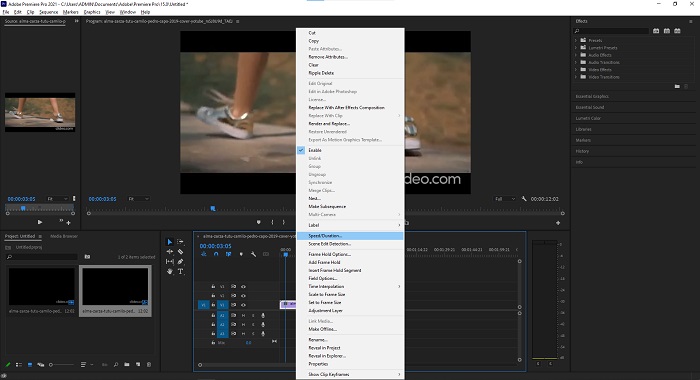
Paso 2: Haz doble clic en los archivos importados o simplemente arrástralos a la pista de vídeo. Para ajustar la velocidad del archivo de vídeo, haz clic con el botón derecho en el archivo de vídeo de la pista. Busca Velocidad/Duración y haz clic. Después, crea la cámara lenta reduciendo el porcentaje de velocidad normal, que es 100.
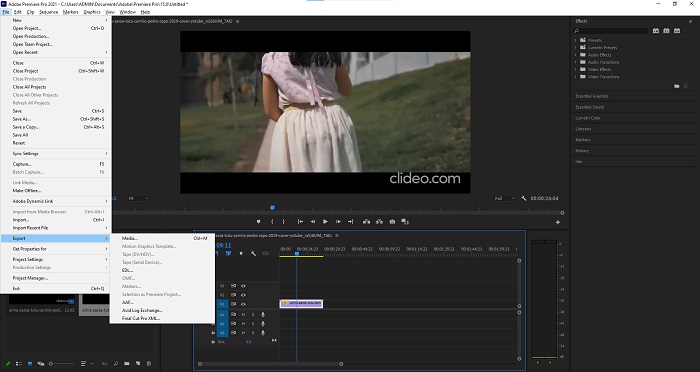
Paso 3: Guarda el vídeo convertido yendo a la pestaña de menú Archivo en la parte superior izquierda. Luego haz clic en Exportar y elige en qué tipo de formato quieres convertir tu archivo de vídeo.
Parte 2. Cómo hacer videos en cámara lenta sin conexión usando Video Converter Ultimate
A diferencia de Adobe Premiere Pro, que es tan complicado de usar debido a sus numerosas herramientas que resultan poco familiares para cualquier usuario principiante, Video Converter Ultimate es el mejor software fácil de usar que cualquiera puede manejar y que ofrece herramientas increíbles para editar vídeos. Una de sus funciones destacadas, Video Speed Controller, tiene la capacidad de crear un vídeo a cámara lenta con una calidad excelente en menos de un minuto de tiempo de conversión. Para que puedas experimentar este programa tan útil que puede resolver tu problema, a continuación se presentan los pasos que debes seguir:
Paso 1: Puedes descargar Video Converter Ultimate haciendo clic en el botón Descarga gratis. Una vez finalizada la descarga, localízalo en tu escritorio e inícialo a continuación.
Descarga gratuitaPara Windows 7 o posteriorDescarga segura
Descarga gratuitaPara macOS 10.7 o posteriorDescarga segura
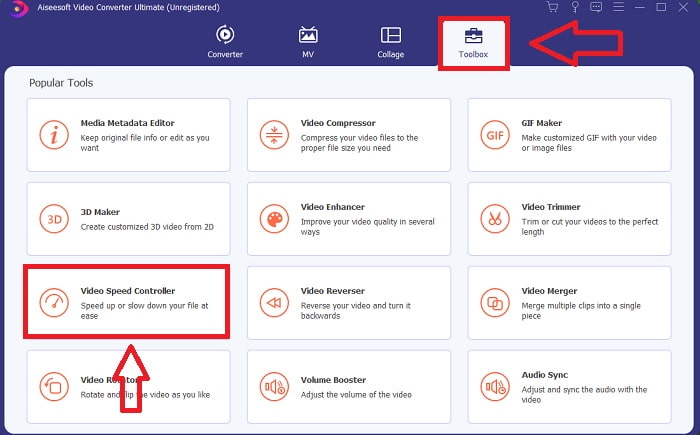
Paso 2: Debes ejecutar el programa después de haberlo instalado en el escritorio de tu ordenador. La interfaz del programa aparecerá la primera vez que lo abras. Elige Video Speed Controller en la pestaña Toolbox.
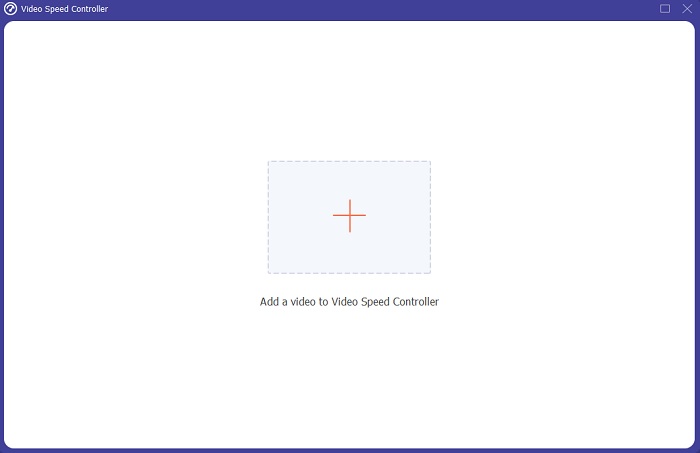
Paso 3: Para cambiar la velocidad de reproducción de tu videoclip, simplemente arrastra o haz clic en el botón + al añadir archivos desde tu ordenador.
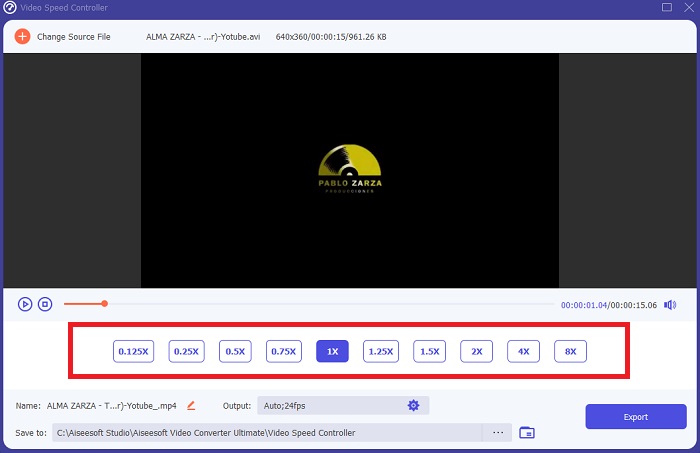
Paso 4: Selecciona los tipos de velocidad que vas a usar para editar la velocidad de reproducción de tu videoclip o crear un vídeo a cámara lenta a partir de un vídeo a velocidad normal para empezar a editar la velocidad de reproducción de tu clip.
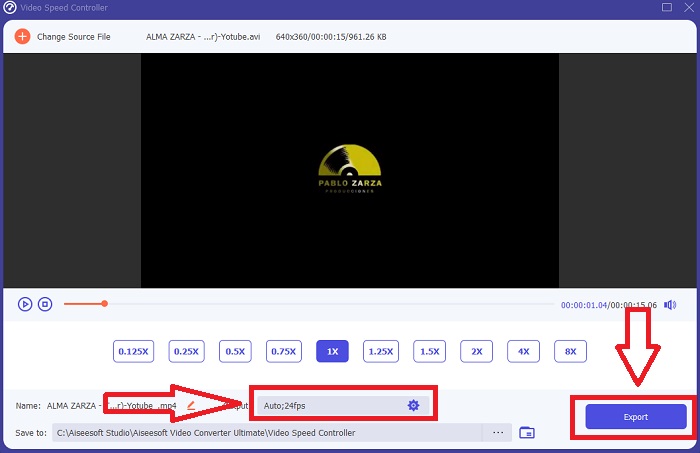
Paso 5: Cuando termines de ajustar la velocidad de reproducción del vídeo, el archivo estará listo para subirse; antes de eso, puedes plantearte cambiar la calidad del resultado ajustando la resolución, la tasa de fotogramas, etc. Haz clic en Exportar cuando el archivo esté listo.
Relacionado:
Parte 3. Cómo hacer videos en cámara lenta en línea usando Kapwing
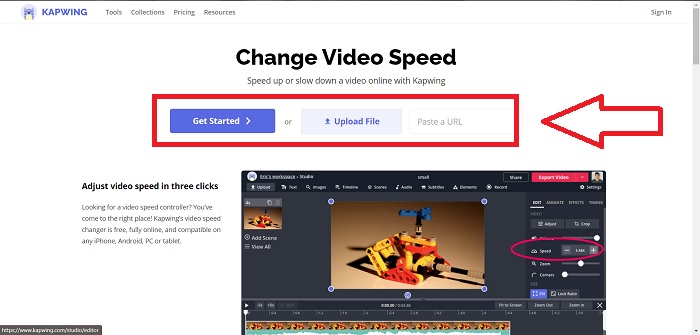
Acelera o ralentiza vídeos rápidamente con este acelerador de vídeo online gratuito. No necesitas mucha experiencia en edición de vídeo para crear vídeos atractivos en cámara lenta, time‑lapse y a hipervelocidad que puedas subir a YouTube o compartir en redes sociales. Sube un vídeo o introduce una URL para empezar. Además de AVI y MP4, Kapwing también admite los formatos de archivo de vídeo MP4, MOV y 3PG. Para los vídeos a cámara lenta se puede bajar hasta 0,25x; la velocidad máxima disponible es 4x. Siéntate y relájate mientras lees los pasos para usar esta herramienta online.
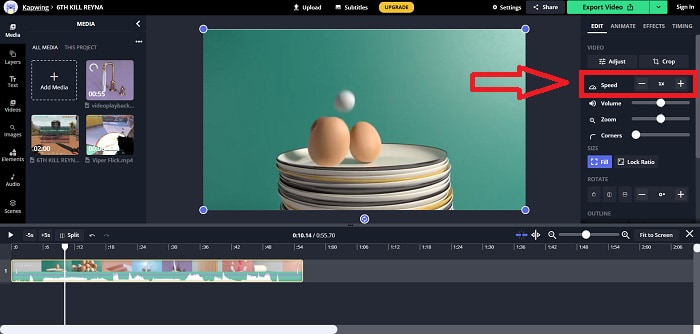
Paso 1. Abre cualquier navegador online y busca Kapwing. En la interfaz, puedes empezar haciendo clic en Get Started. O puedes continuar seleccionando tu videoclip haciendo clic en Upload File. Además, hay otra opción en la que puedes introducir enlaces de vídeo de otros sitios web y continuar con la edición.
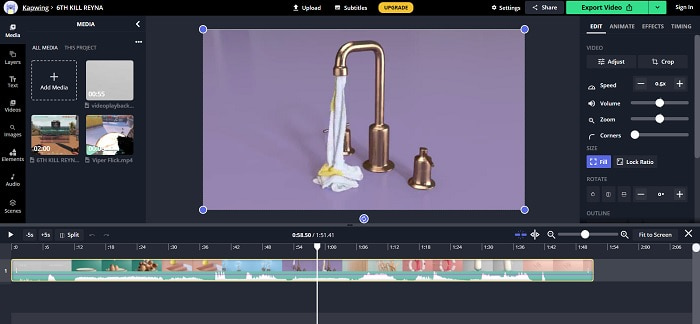
Paso 2. Haz clic en el vídeo de la pista de vídeo, ve a la pestaña de edición Speed y ponlo a cámara lenta haciendo clic en el signo -. Esto reducirá la velocidad del vídeo en 0,25.
Paso 3. Para subir tu vídeo convertido, haz clic en Export Video y transfiérelo al destino que desees en tu ordenador.
Parte 4. Preguntas frecuentes sobre cómo hacer videos en cámara lenta en Adobe Premiere
¿Qué formatos admite Adobe Premiere Pro?
Con Adobe Premiere Pro, puede trabajar con una amplia variedad de formatos de video, como MP4, AVCHD/H.264/H.265, MPEG-1 y MPEG-2, MOV, FLV y AVI.
¿60 fps es bueno para cámara lenta?
Un factor importante que afecta la apariencia general de un video es su velocidad de fotogramas, que también tiene un impacto en la apariencia realista del video. Esta idea tiene una fuerte conexión con la forma en que percibimos naturalmente el universo. La creación de videos en cámara lenta o la grabación de secuencias de videojuegos requiere velocidades de fotogramas superiores a 30 fps. A medida que avanza la tecnología, más teléfonos inteligentes ahora pueden grabar videos a 60 cuadros por segundo.
¿Qué hacer si Adobe Premiere Pro no funciona?
Las preferencias de Premiere Pro se pueden restablecer a sus valores predeterminados para solucionar fallas, lo que Adobe recomienda con frecuencia. Sus preferencias se 'desechan' cuando hace esto. Esto restaurará su configuración a su configuración original de fábrica. Puede hacerlo manteniendo presionada la tecla Alt mientras inicia Premiere Pro.
Conclusión
A fin de cuentas, aprendemos que no importa cuán bueno sea Adobe Premiere Pro, no puede ser el software recomendado para algunos usuarios que no tienen experiencia en edición. Recomendamos usar Video Converter Ultimate por sus herramientas de características accesibles que pueden recortar, cortar, poner filtros, fusionar, etc. Una de sus útiles herramientas disponibles en Video Speed Controller es que puede hacer videos en cámara lenta o ajustar la velocidad de reproducción de el video. Las herramientas en línea pueden ser una plataforma más fácil de usar que Adobe Premiere Pro. Sin embargo, no puede producir una salida de mejor calidad que Video Converter Ultimate.
-
 Las 6 mejores fusiones de AVI: cómo unir archivos de video AVI en Windows y Mac
 Cuando desee unir videos AVI para un DVD, puede conocer las características de los 6 mejores ensambladores de AVI, incluidas las herramientas en línea gratuitas, así como los programas de escritorio del artículo.
-
 [Guía] 2 métodos definitivos para unir videos MXF de Sony X70
 Si ha tomado algunos videos MXF de Sony X70, ¿cuáles son los mejores métodos para unir archivos MXF? Aquí están los 2 métodos eficientes para combinar los videos con alta calidad.
-
 Cómo cortar y fusionar canciones en línea: las 4 mejores formas que debe saber
 Cuando desee cortar y fusionar canciones en línea para crear una pieza musical, puede obtener más información sobre las 4 mejores herramientas en línea para recortar las canciones y combinar archivos del artículo.