


Kuvan terävöittäminen nopeasti Photoshopissa - Täydellinen opas, joka sinun on tiedettävä
Parhaan asiantuntijoiden suosittelemalla kuvanmuokkausohjelmalla voit viedä jokaisen kuvasi uudelle tasolle. Adobe Photoshop on ollut pisimpään luotettava ohjelmisto, jonka voit ladata Windowsille, Macille, iOS:lle ja Androidille. Sen kehittäjän Adoben ansiosta se on tuonut kuvanmuokkauksen jo äärimmilleen ja mullistanut sen. Edistyneiden ominaisuuksiensa takia uudet käyttäjät kuitenkin usein arkailevat editoria sen käyttöliittymän ja yleisen toiminnallisuuden vuoksi. Se voi vaikuttaa vaikealta käyttää, mutta ei ole – etenkään kun on kyse kuvan terävöittämisestä. Tässä käymme läpi kattavan oppaan siitä, kuinka terävöidät kuvan nopeasti Photoshopissa.

Osa 1. Täydellinen opetusohjelma kuvan terävöittämisestä Photoshopissa [3 tehokasta terävöintitapaa]
Photoshop-kuvien terävöittäminen saattaa hämmentää niitä, jotka eivät ole käyttäneet tätä ohjelmaa. Mutta ennen kuin siirrymme opetusohjelmaan, sinun on ladattava Adoben virallinen ohjelmisto. Valitse oikea latauspainike, jotta se näkyy työpöydälläsi. Jos et ole ladannut tätä ohjelmaa työpöydällesi, voit käyttää sen ilmaista kokeiluversiota, mutta jos olet suorittanut kokeilun loppuun, sinun on ostettava kuukausi- tai vuosisopimus. Seuraavan kaiken jälkeen jatka valitsemiisi vaiheisiin alla sisällytettäviin tavoihin.
1. tapa. Kuinka tehdä kuvasta terävä Photoshopissa käyttämällä ylipäästöä:
Highpass-toiminnolla voit korostaa kuvan ja käyttää kuvaan suodatinta, joka voi auttaa sinua terävöittämään Photoshopiin lataamasi valokuvan reunoja. Voit seurata alla lisäämäämme opetusohjelmaa oppiaksesi soveltamaan ja käyttämään ylipäästöjä kuvissasi.
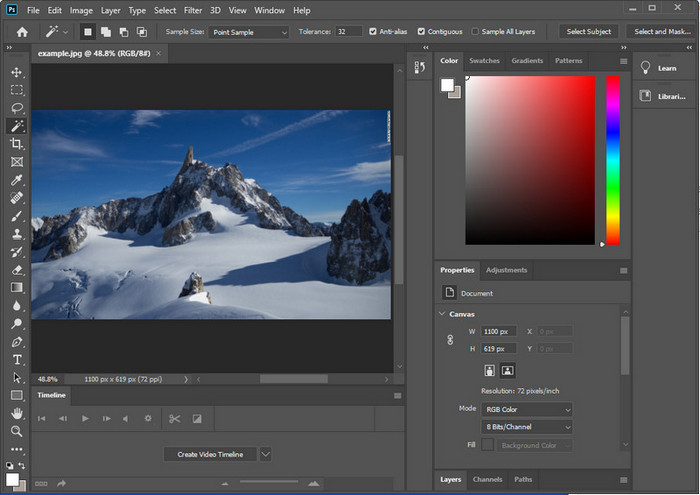
Vaihe 1. Käynnistä ohjelma, napsauta File (Tiedosto) ja paina Open (Avaa) ladataksesi kuvan ja aloittaaksesi sen terävöittämisen.
Vaihe 2. Monista Photoshopiin tuomasi kuvan taso.
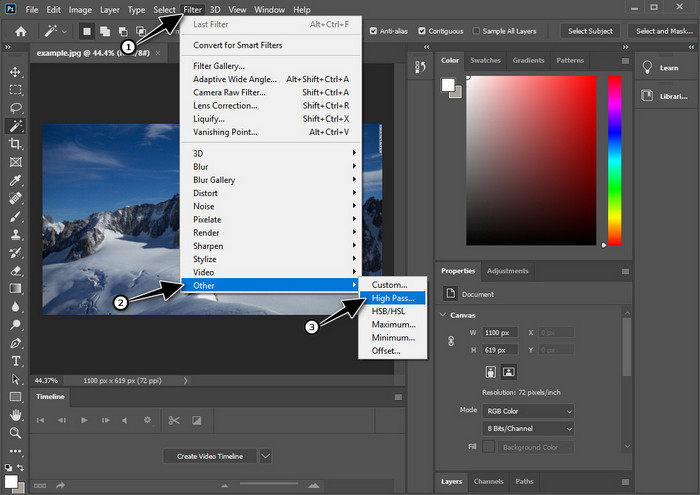
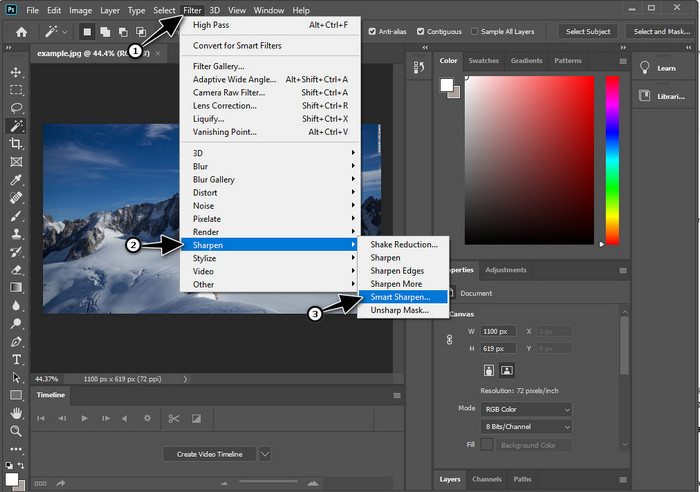
Vaihe 3. Ylävalikosta napsauta Filter (Suodatin), valitse Other (Muu) ja sitten High Pass. Älä huolestu, jos kuvasta tulee harmaa – näin käy, kun lisäät siihen High Pass -suodattimen.
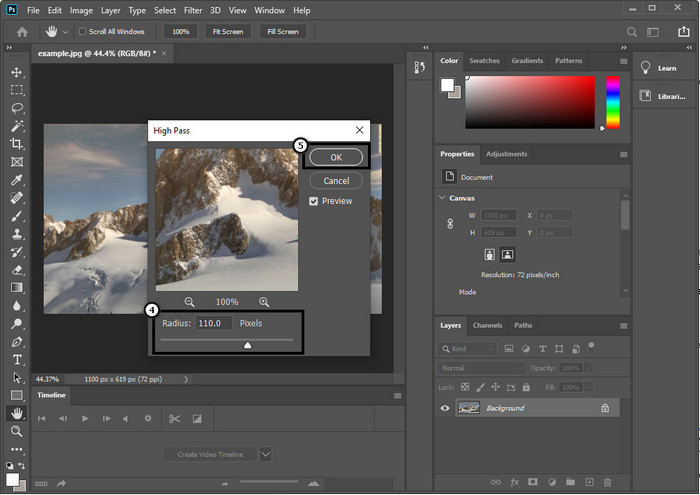
Vaihe 4. Näytölle ilmestyy ponnahdusikkuna, jossa voit alkaa vetää liukusäädintä säteen suurentamiseksi ja saadaksesi kuvaan paremmat yksityiskohdat. Paina sitten OK tallentaaksesi asetuksen.
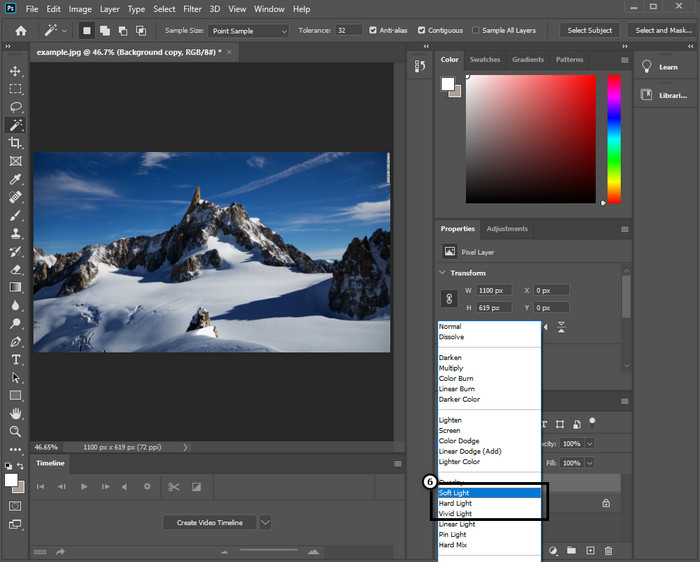
Vaihe 5. Palaa tasoon, napsauta pudotusvalikkoa ja valitse, minkälaisen valon haluat lisätä kuvaan – vaihtoehtoina on esimerkiksi Soft Light, Hard Light ja Vivid Light – terävöitystä varten. Toista vaiheet 3 tähän vaiheeseen asti, jos haluat terävöittää kuvaa vielä lisää.
2. tapa. Kuinka tehdä kuvan terävämpi Photoshopissa Smart Sharperilla:
Smart Sharpen on tehokas ominaisuus, johon pääset käsiksi Adobe Photoshopissa terävöittääksesi kaiken kuvassasi. Tämä ominaisuus ei ole täysin automaattinen ratkaisu, vaan sinun on säädettävä joitakin parametreja, jotta kaikki näyttäisi riittävän terävältä. Jos siis haluat käyttää tätä ominaisuutta Adobessa, voit seurata alta löytyviä vaiheita.
Vaihe 1. Kun olet lisännyt terävöitävän kuvan, napsauta Filter-valikkoa (Suodatin).
Vaihe 2. Valikosta, joka avautuu, valitse Sharpen (Terävöi) ja sitten Smart Sharpen.
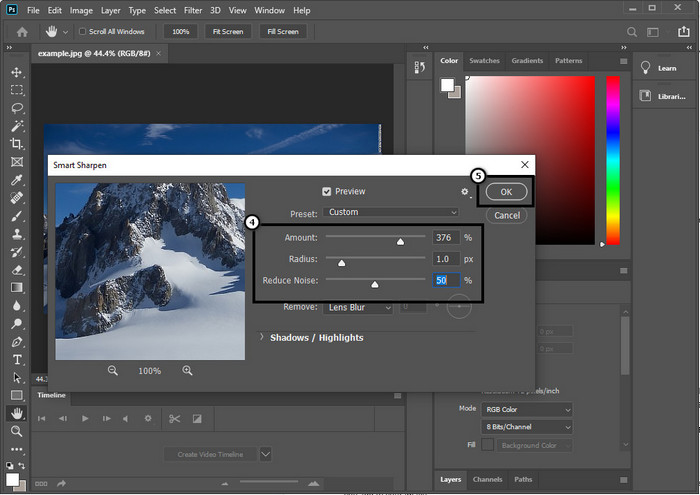
Vaihe 3. Säädä Amount- ja Radius-arvoja (terävöinnin voimakkuus ja säde) mieltymystesi mukaan ja napsauta OK tallentaaksesi muutokset. Näin yksinkertaisesti olet terävöittänyt kuvan tämän ohjelman terävöitystyökalulla.
3. tapa. Kuvan terävöittäminen valokuvassa säätämällä kirkkautta ja kontrastia:
Toisin kuin esittelemämme kaksi tapaa, kirkkaus ja kontrasti keskittyvät lataamasi kuvan korostamiseen, jotta se näyttää yksityiskohtaisemmalta, kuten teroitustyökalut tekevät. Harvat käyttäjät tietävät tämän vaihtoehdon, joten jos haluat käyttää tätä vaihtoehtoa ja alkaa terävöittää saamaasi kuvaa, noudata alla olevia ohjeita.
Vaihe 1. Kun olet ladannut kuvasi Photoshopiin, jatka napsauttamalla Image-valikkoa (Kuva).
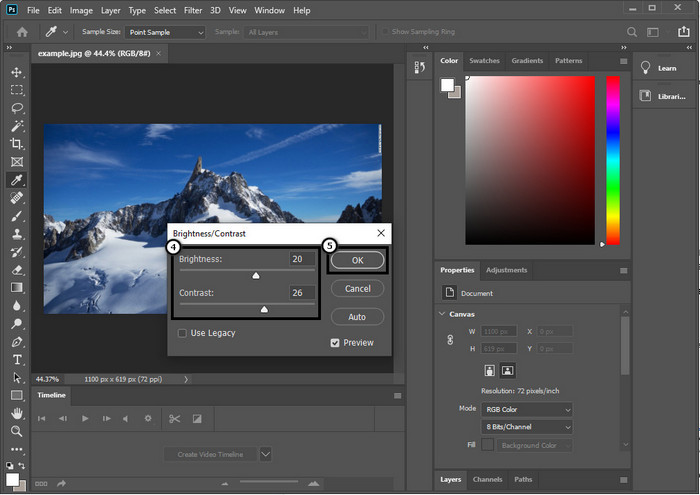
Vaihe 2. Useita vaihtoehtoja tulee näkyviin; valitse Adjustment (Säädöt) ja sitten Brightness and Contrast (Kirkkaus ja kontrasti).

Vaihe 3. Säädä kirkkautta ja kontrastia vetämällä liukusäädintä ja paina OK tallentaaksesi kuvaan tekemäsi muutokset.
Aiheeseen liittyvää:
Yksinkertainen opas: Näin lisäät vesileiman videoon Photoshopissa nopeasti
Osa 2. Paras vaihtoehto Photoshopille kuvan terävöittämiseen verkossa [ilmainen palvelu]
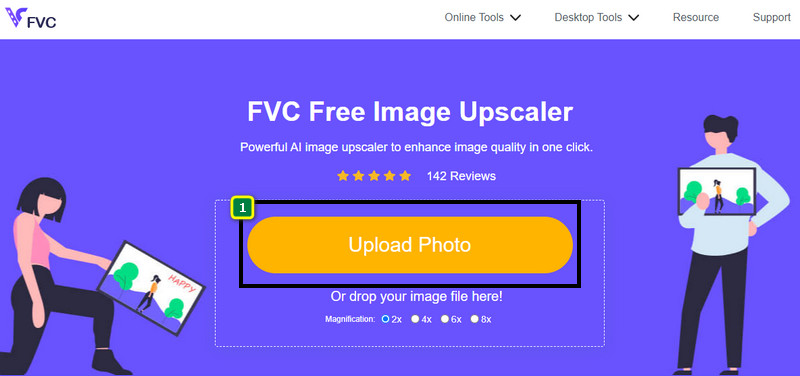
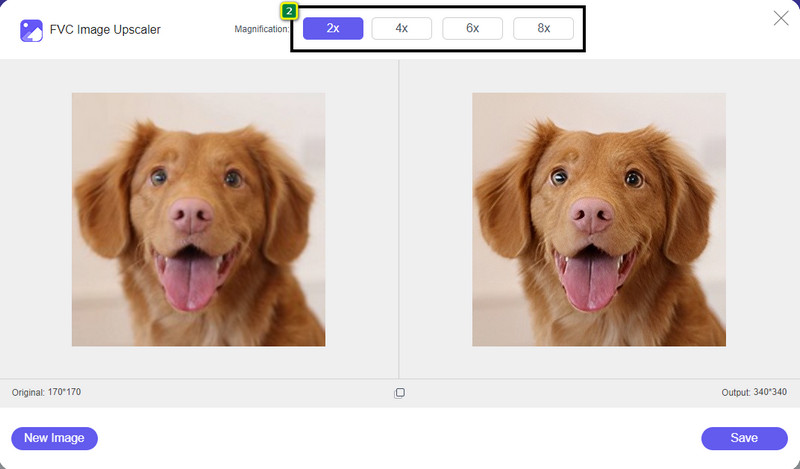
Kuinka terävöidä sumea kuva Photoshopissa ilman sovellusta? Voit käyttää FVC Free Image Upscaler -työkalua. Tämä verkkotyökalu säästää sinut monimutkaisilta toimenpiteiltä. Lataa kuva, ja anna ohjelman tekoälyteknologian hoitaa työ puolestasi. Sinun ei myöskään tarvitse ostaa ohjelmiston lisenssiavainta tai premium-versiota, koska työkalu on ilmainen kaikille käyttäjille, joiden täytyy muokata kuviaan nopeasti. Vaikka et olisi muokkausammattilainen, pystyt silti terävöittämään kuvasi noudattamalla alla annettuja vaiheita.
Vaihe 1. Napsauta tätä linkkiä avataksesi verkkotyökalun ja terävöittääksesi valokuvasi.
Vaihe 2. Sivustolla sinun tulee painaa Upload Image (Lataa kuva) lisätäksesi kuvan, jonka haluat terävöittää. Näytölle avautuu kansioikkuna; valitse kuva ja napsauta sitten Open (Avaa) ladataksesi sen.
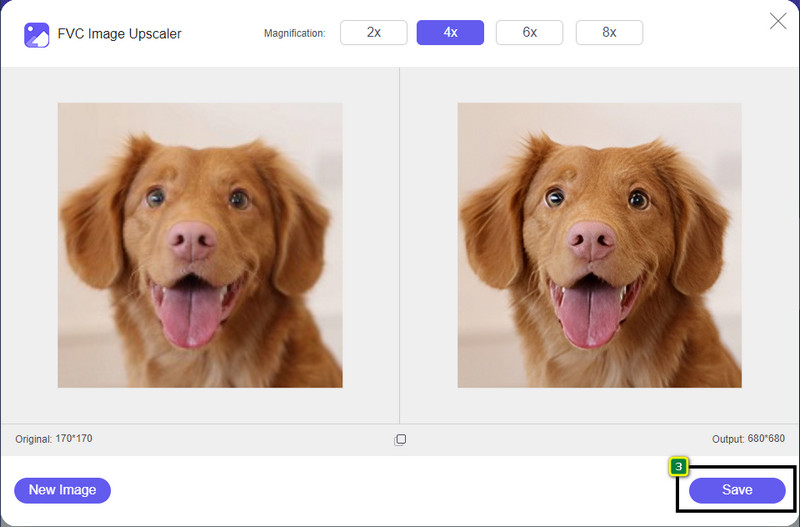
Vaihe 3. Näet erilaisia suurennusvaihtoehtoja, joiden avulla voit terävöittää kuvaa helposti tekoälyteknologian tukemana.
Vaihe 4. Alaosassa napsauta Save-painiketta (Tallenna) ladataksesi terävöitetyn kuvan paikalliselle levyllesi.
Osa 3. Usein kysytyt kysymykset kuvien terävöittämisestä Photoshopissa
Mitä minun pitäisi tehdä, jos Photoshopin ilmainen kokeilujakso on päättynyt?
Jos haluat jatkaa tämän Adoben kehittämän ammattimaisen kuvankäsittelyohjelman käyttöä, sinun on ostettava tilaus jatkaaksesi editorin käyttöä. Mutta jos haluat kokea samankaltaiset muokkausominaisuudet kuin Photoshopissa, aloita käyttämällä työkalua FVC Free Image Upscaler.
Mitä voin tehdä Photoshopilla?
Voit tehdä täällä lukuisia kuvien ja videoiden muokkaustoimintoja, joita toinen editori ei tarjoa. Se on täydellinen kuvankäsittelyohjelma, jonka avulla voit luoda uskomattomia asioita, kuten muuttaa 2D-kuvan 3D:ksi ja paljon muuta. Tämä ohjelmisto on kuitenkin hieman monimutkainen, ja sinun on vietävä aikaa sen käytön hallitsemiseen.
Mistä voin ladata Photoshopin?
Adobe Photoshop tukee Windows 10:tä 64-bittisellä tai uudemmalla ja Mac 10.15 Catalinaa tai uudempaa. Se tukee myös mobiiliversiota, Photoshop Express Photo Editoria.
Johtopäätös
Tämän oppaan avulla, jossa kerromme kuinka terävöidä kuva Photoshopissa, voit nyt terävöittää kuviasi helposti eri tavoilla käyttäen parasta editoria. Entä jos ilmainen kokeilujakso päättyy, mutta haluat silti terävöittää kuvan? Mitä sinun pitäisi tehdä? Älä huolestu, sillä olemme lisänneet verkossa toimivan vaihtoehdon, jonka avulla kuvan terävöittäminen on helpompaa ja ilmaista niin kauan kuin sinulla on internet-yhteys – tämä työkalu on FVC Free Image Upscaler.
-
 Tee Photo HD parhailla tavoilla, joita voit löytää markkinoilta
 Mietitkö tai haluatko tehdä HD-valokuvan? Voit seurata alla lisäämäämme opetusohjelmaa erilaisilla ratkaisuilla, joita voit käyttää.
-
 4 parasta kuvanlaadun alentajaa, joita voit käyttää verkossa ja offline-tilassa
 Nämä kuvanlaadun vähentäjät voivat auttaa sinua heikentämään kuvan laatua joistakin syistä. Jos tarvitset sellaisen, lue tämä artikkeli!
-
 Virallisia tapoja skaalata kuva 4k-tarkkuuteen käytännön opetusohjelman avulla
 Jos haluat skaalata kuvan 4k-tarkkuuteen, tarvitset laitteellesi ohjelmiston. Jos sinulla ei ole sellaista, sinun on valittava tähän sisällyttämämme työkalu.