


Suosituin AMV -näytön tallennin Windows- ja Mac -tietokoneille
Actions Media Video tunnetaan myös nimellä AMV. Se on videotiedostomuoto, joka on erityisesti kehitetty korvaamaan MP4 yleismaailmallisena formaattina, jota voidaan toistaa useimmille mediasoittimille. Jos tunnet AVI -muodon, tämä on muokattu ja parannettu versio siitä. Tämä tiedostomuoto sisältää pakatun videon. AMV-muoto on suunniteltu mahdollistamaan taloudellisesti valmistetut pelaajat ja laitteet toistamaan videoita. Alkuperäinen renderoitu tiedosto on kuitenkin alhainen, koska kuvataajuus on alhainen. Tästä huolimatta voit silti pitää sitä hyvänä vaihtoehtona, kun tuotat videon.
Vertailun vuoksi voit myös harkita näytönauhuriin turvautumista, jonka avulla voit vaivattomasti tehdä videoita AMV‑tiedostomuodossa. Todellisuudessa on olemassa lukuisia työkaluja, jotka pystyvät tähän. Toisaalta kyseessä ei aina tarvitse olla AMV‑tiedosto. On vain hyvä tietää, että tällainen tiedostotyyppi on nykyään olemassa. Tämän vuoksi listasimme joitakin .amv‑videotallentimia sekä Android‑laitteille että tietokoneille. Voit tutustua alla olevaan luetteloon saadaksesi lisätietoja.

Osa 1. Suosituin online -AMV -tallennin
1. FVC Free Screen Recorder
Kun puhumme verkossa ilmaiseksi käytettävistä työkaluista, mieleesi saattaa tulla rajallisuus, vesileimat ja tietoturvariskit. Vaikka näin usein onkin, kaikki ilmaiset näytönauhurit eivät ole samanlaisia. Jotkut ovat rikkoneet tämän kaavan ja tarjonneet ratkaisuja näihin ongelmiin. FVC Free Screen Recorder on yksi niistä. Tämä työkalu antaa sinulle varmasti enemmän vapautta näytön nauhoittamiseen. Säädettävän tallennuskehyksen ansiosta voit valita haluamasi kuvasuhteen ja personoida tallenteesi. Myös bittinopeus on säädettävissä. Bittinopeus on tärkeä, koska sen avulla voit muokata renderöitävän videosi laatua. Tästä erinomaisesta työkalusta on vielä paljon opittavaa.
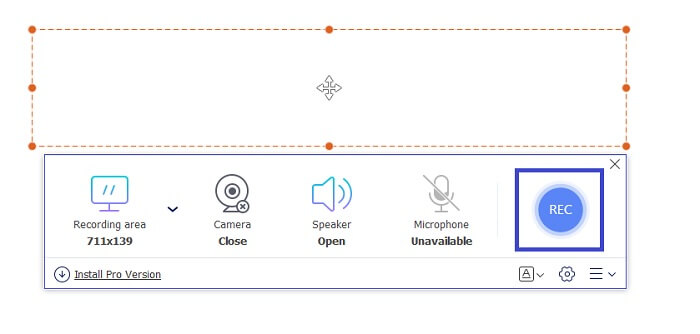
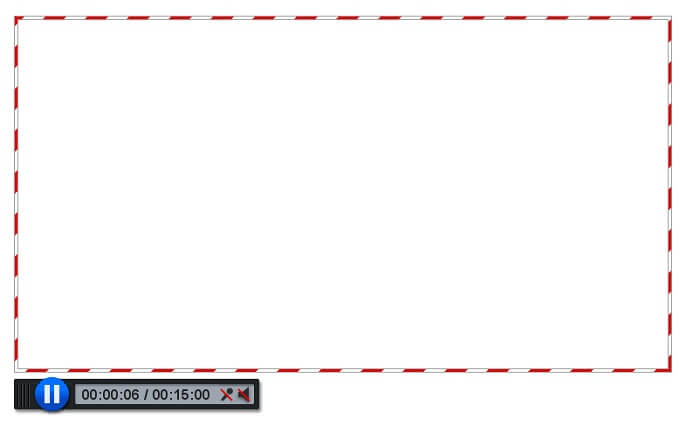
Vaihe 1. Avaa sovellus vierailemalla virallisella verkkosivulla https://www.free-videoconverter.net/free-screen-recorder/. Napsauta Start Recording ‑painiketta käynnistääksesi sovelluksen.

Vaihe 2. Kun työkalu on käynnistynyt, säädä tallennuksen kuvasuhdetta siirtämällä katkoviivakehystä, kunnes saat haluamasi videokoon. Napsauta sitten REC aloittaaksesi tallennuksen.
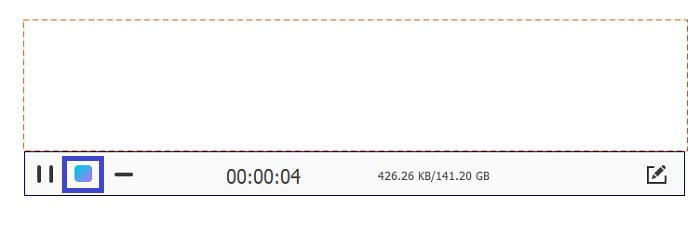
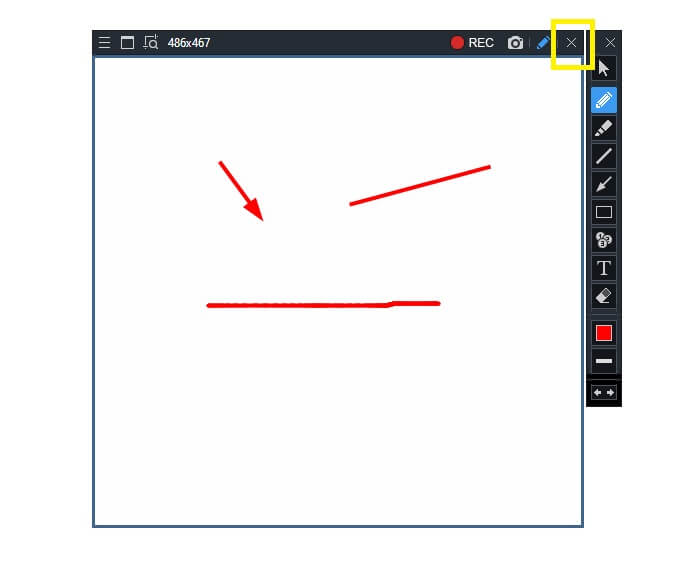
Vaihe 3. Tallennuksen aikana napsauta kynäkuvaketta ottaaksesi käyttöön reaaliaikaisen annotoinnin, jolloin voit lisätä muotoja, viivoja ja tekstiä. Kun olet valmis tallennuksen kanssa, napsauta sininen neliö ‑painiketta lopettaaksesi tallennuksen.
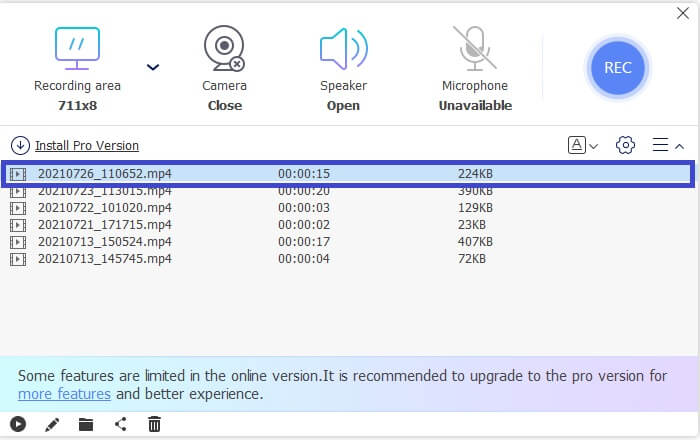
Vaihe 4. Nähdäksesi tallentamasi tiedoston, napsauta tiedoston nimeä käyttöliittymän alaosassa. Toista se kaksoisnapsauttamalla.
Plussat
- Rajoittamaton tallennus.
- Ei kestorajaa.
- Säädettävä bittinopeus korkealaatuista videolähtöä varten.
- Videon leikkaus tuettu.
Haittoja
- Siitä puuttuu automaattisesti luotu tekstitys.
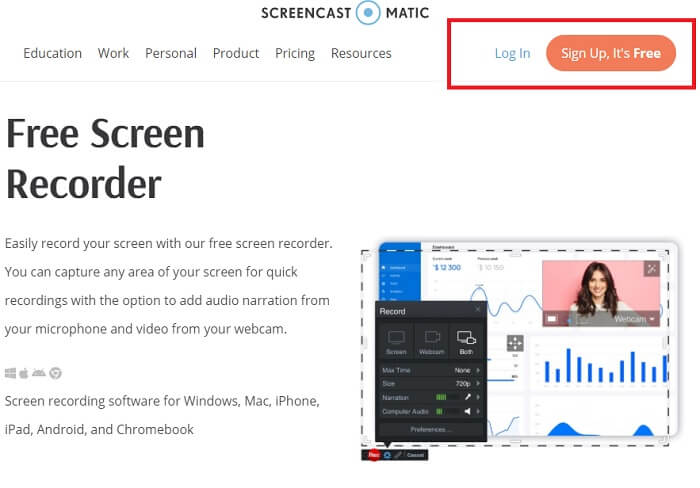
2. Screencast-O-Matic
Mukauta tallenteesi Screencast-O-Maticin avulla ja koe sekoitus ja yhteensopiva näytön tallenteiden tuonti- ja tallennettujen videoiden kanssa. Puhumattakaan siitä, että se on online -työkalu, joka voi ottaa kuvakaappauksen, antaa sinun piirtää näytölle automaattisilla tekstityksillä ja tallentaa ääntä samanaikaisesti. Voit lisätä kerronnan tai tekstityksen videon tallennuksen aikana. Tämä on hyödyllistä lähinnä video -opetusohjelmien tekijöille ja niille, jotka säästävät rahaa. Tämän ilmaisen sovelluksen ainoa haittapuoli on rekisteröintiprosessi. Se on pitkä. Tässä välissä voit käyttää sitä.
Vaihe 1. Siirry työkalun etusivulle ja rekisteröi tili.
Vaihe 2. Rekisteröitymisen jälkeen päädyt sivulle, jossa sinulta kysytään, mitä haluat tehdä. Valitse Make a Recording.

Vaihe 3. Työkalu tulee sitten näkyviin. Aloita tallennus napsauttamalla punaista REC‑painiketta. Lopetat tallennuksen napsauttamalla samaa painiketta.
Jos et ole tyytyväinen näiden kahden hämmästyttävän ilmaisen sovelluksen ominaisuuksiin, voit jatkaa seuraavan sinulle tarjotun työkalun lukemista. Tällä kertaa puhumme premium -työkaluista, jotka voit ladata tietokoneellesi.
Osa 2. Työpöydän AMV -tallennin
1. FVC -näytön tallennin
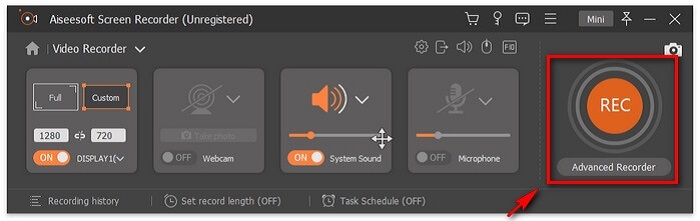
Ensimmäinen työpöytätyökalu on FVC Screen Recorder. Se pystyy tallentamaan tietokoneen näytön, järjestelmän äänen ja kaappaamaan online -suoratoiston ilman taustamelua. Työkalu tallentaa tietokoneen järjestelmän äänen, mikä tarkoittaa, että äänenlaatu on erittäin tyydyttävä. Laajasti tuettujen muotojen lisäksi tämä työkalu tukee online -pelien suoratoiston kiihdytystekniikkaa. EI vesileimaa, vain laadukas tallennus. Saat parhaan hyödyn vain käyttämällä tätä työkalua. HD -laatu, häviötön ääni, tasainen tallennus suoratoiston aikana ja kiihtyvyys. Kaikki mitä tarvitset tallennustarpeisiisi, on täällä. Lisäksi on olemassa ikkunan lukitusominaisuus, jonka avulla voit tallentaa vain tietyn ikkunan. Lisäksi työkalua on helppo käyttää, aloita napsauttamalla alla olevaa painiketta.
Ilmainen latausWindows 7:lle tai uudemmalleTurvallinen lataus
Ilmainen latausmacOS 10.7:lle tai uudemmalleTurvallinen lataus
Vaihe 1. Napsauta Video Recorder ‑painiketta aloittaaksesi tallennuksen.
Vaihe 2. Aloita tallennus ja lisää annotointeja näytölle tallennuksen aikana.
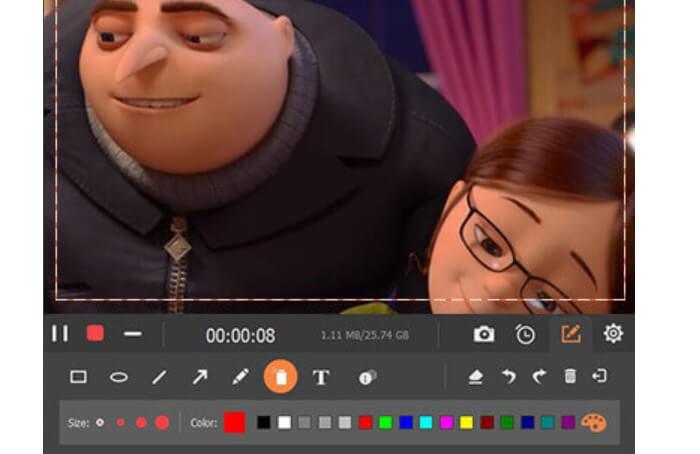
Vaihe 3. Lopuksi lopeta tallennus napsauttamalla Red Square ‑painiketta.

Vaihe 4. Nyt näyttöön avautuu uusi ikkuna. Valitse Re-Record tai Save.
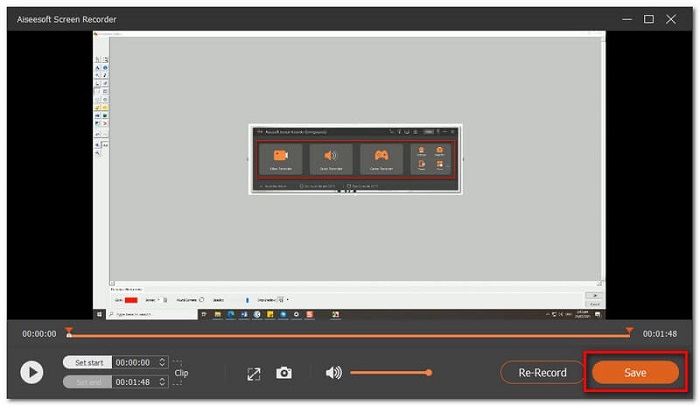
Vaihe 5. Etsi tallennettu tiedosto seuraavasta avautuvasta ikkunasta.

2. Bandicam
Lopuksi meillä on Bandicam. Se on yksi luotettavimmista työkaluista näytön tallennuksessa. Yksi johtuu siitä, että työkalulla on erittäin suora käyttöliittymä. Kaikki tarkistettavat asetukset ja ominaisuudet näkyvät yhdellä näytöllä. Kun käynnistät työkalun, näet heti kaikki asetukset ja ominaisuudet. Itse asiassa käyttäjäystävällisen käyttöliittymän todellinen määritelmä. Jopa aloittelija tällaisessa tekniikassa voi helposti selviytyä. Voit näyttää, mitä sanotaan, tässä miten voit käyttää sitä.
Vaihe 1. Siirry työkalun viralliselle sivustolle ladataksesi ja asentaaksesi sovelluksen.
Vaihe 2. Napsauta REC‑painiketta käyttöliittymän oikeassa yläkulmassa. Tämän jälkeen työkalu pyytää sinua säätämään tallennuskehyksen kokoa.
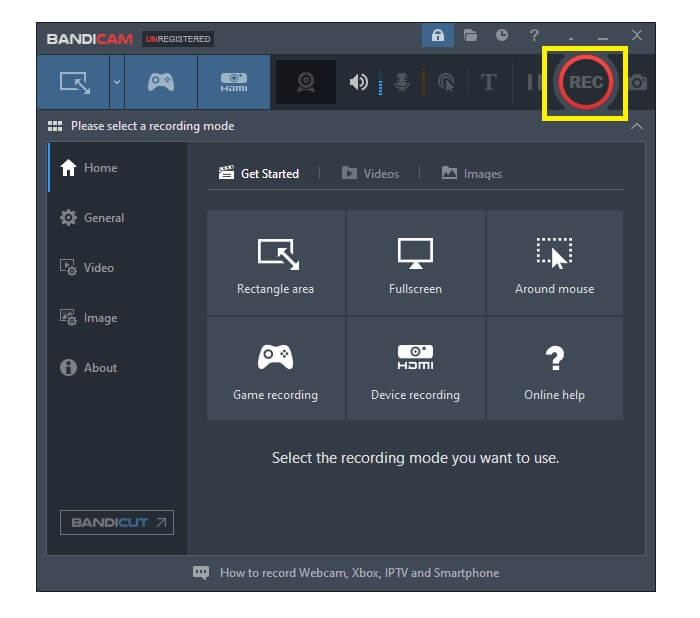
Vaihe 3. Tämän jälkeen aloita annotointi tallennuksen aikana. Lopeta tallennus napsauttamalla oikeassa yläkulmassa olevaa X‑painiketta.
Kaikki kirjoitetut työkalut ovat todella hyödyllisiä. Bandicam edustaa yksinkertaisuutta ja käytettävyyttä. Samaan aikaan Screencast-O-Matic on monipuolinen. Toisaalta FVC Screen Recorder voi tarjota sekä ilmaisia että premium -työkaluja, jotka ylittävät luetellut työkalut kokonaan. Lukitusikkuna -ominaisuus on erityisesti etu, koska se mahdollistaa moniajon ja tehokkuuden. Mikään muu näytön tallennin ei pysty tähän kykyyn, se on vain FVC -näytön tallentimen kanssa.
Lue lisää:
1. Kuinka muuntaa MP4 AMV‑muotoon
2. Kuinka pakata suuret AMV‑tiedostot
Osa 3. Usein kysytyt kysymykset AMV Recorderistä
Miksi en voi avata AMV -tiedostoa tietokoneellani?
Syitä siihen on useita. Yleisin on kuitenkin se, että tiedostosta puuttuu sopiva ohjelmisto tietokoneellasi. Lataa yksi verkossa.
MP4 Player ei toista muotovirhettä, ja kuinka korjata se?
Tämä on yksinkertaista. Vaihda .amv‑tiedosto uudempaan versioon. Muunna se. Jos haluat muuntaa sen, seuraa alla olevaa ohjetta:
1. Siirry tähän linkkiin https://www.free-videoconverter.net/free-online-video-converter/.
2. Avaa käynnistysohjelma ja lataa tiedostosi.
3. Valitse haluamasi muoto. Kun olet valmis, tiedosto renderöidään pian.
4. Napsauta latauspainiketta saadaksesi tallennetun tiedoston.
Miten voin liittää tiedoston ohjelmistoon?
Tämän voi tehdä kahdella tavalla. Ensimmäinen on valita AMV‑tiedosto, napsauttaa Valitse oletusohjelma ja sitten Browse. Toinen tapa on rekisteröidä tiedosto Windows‑rekisteriin.
Johtopäätös
Lopuksi AMV on hyvä tietää muoto, jota voit harkita, mutta ei suositella niille, jotka etsivät laadukkaita videoita. Lisäksi AMV -näytön tallentimien luettelo ei rajoitu pelkästään AMV: hen, vaan se voi tuottaa enemmän formaatteja, kuten MP4, MOV ja paljon muuta.
-
 Viisi parasta parasta hiiri- ja näppäimistötallenninta Windowsille ja Macille
 Tässä on viisi parasta hiiren ja näppäimistön tallenninohjelmaa, jotka voivat tallentaa hiiren liikkeet ja näppäimistön napsautukset ja toistaa tapahtumat.
-
 Suosituimmat 4 ilmaista AVI-näytön tallenninta, joiden avulla voit kaapata ruutuvideoita AVI-tiedostoina
 Jos haluat tallentaa näytön korkealaatuisissa AVI-tiedostoissa, artikkeli tunnistaa ja jakoi tämän viestin neljä parasta AVI-näytön tallenninta. Lue lisätietoja löytääksesi haluamasi.
-
 Top 6 ilmaista WAV-tallenninta, jotka ovat saatavana Windowsille ja Macille
 Parhaalla WAV-tallennusohjelmistolla, jonka jaamme tässä artikkelissa, on useita hyödyllisiä ominaisuuksia, jotka auttavat sieppaamaan ääntä ja ääntä ammattilaisten tavoin.