

Yksinkertaistettu opas vesileiman lisäämiseen Photoshopissa
Nykyään vesileiman lisäämisestä on tulossa yhä tärkeämpää. Koska niin monet ihmiset jakavat ja lataavat digitaalista sisältöä verkossa, on helppo julkaista työsi uudelleen ilman lähteen mainintaa. Vesileima auttaa suojaamaan sisältöäsi osoittamalla, että se on alkuperäistä ja omistat sen.
Jos nyt käytät Photoshopia ja mietit, voitko lisätä sillä vesileiman videoon? No kyllä! Photoshopilla voit lisätä vesileiman videoosi Aikajana-paneelin avulla. Vaikka se on pääasiassa kuvankäsittelytyökalu, se tukee myös perusvideotasoja, joiden avulla voit lisätä vesileiman koko videoleikkeen alueelle. Muista vain, että se sopii erinomaisesti lyhyisiin ja kevyisiin muokkauksiin. Jos työskentelet pidempien tai monimutkaisempien videoiden parissa, erillisen videonmuokkausohjelman käyttö voi olla tehokkaampaa.
Tässä oppaassa näytämme sinulle, miten lisäät vesileiman Photoshopissa, joten aloitetaan!

Osa 1. Kuinka luoda vesileima Photoshopissa?
Photoshopilla voit helposti luoda minkä tahansa haluamasi vesileiman. Se on loistava työkalu varmistaaksesi, että voit helposti lisätä niitä digitaaliseen sisältöösi milloin tahansa. Alla on vaiheittainen opas vesileiman luomiseen Photoshopissa:
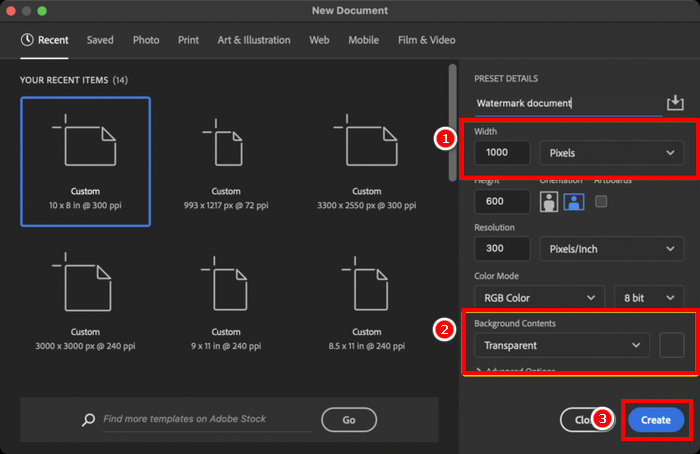
Vaihe 1. Avaa Photoshop ja luo uusi asiakirja läpinäkyvällä taustalla. On parasta, jos asiakirjan leveys on 1000 px. Kun asetukset ovat kunnossa, napsauta alla olevaa Luo-painiketta.
Vaihe 2. Käytä Tekstityökalua (Type Tool) kirjoittaaksesi nimesi tai brändisi tekstivesileimaa varten, tai käytä Sivellintyökalua (Brush Tool) piirtääksesi allekirjoituksesi. Aseta väriksi valkoinen.
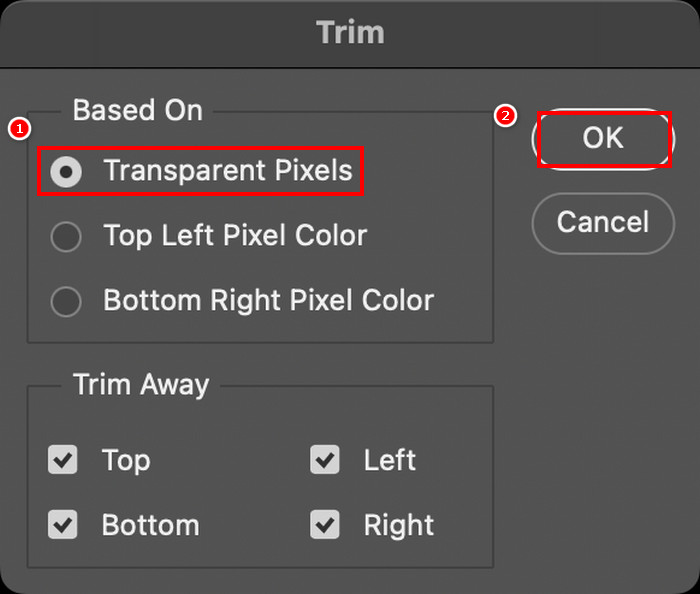
Vaihe 3. Siirry Kuva-valikkoon, valitse Rajaa (Trim), valitse Läpinäkyvät pikselit (Transparent Pixels) ja napsauta OK poistaaksesi ylimääräisen tyhjän tilan.
Vaihe 4. Avaa sitten Kirjastot (Libraries)-paneeli, napsauta Luo uusi kirjasto (Create New Library), nimeä se ja napsauta Luo.
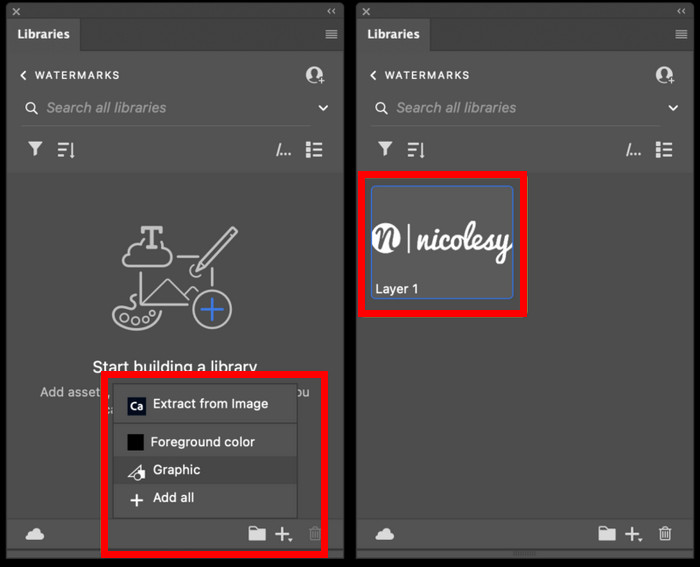
Vaihe 5. Napsauta +-kuvaketta Kirjastot-paneelissa ja valitse Grafiikka (Graphic) tallentaaksesi vesileimasi, jotta pääset siihen helposti käsiksi milloin tahansa.
Tämä on vain yksi tapa luoda vesileima Photoshopissa, mutta voit suunnitella sen vapaasti haluamallasi tavalla, olipa kyseessä sitten rohkea logo, hienovarainen allekirjoitus tai yksinkertainen nimi. Tärkeintä on tehdä siitä ainutlaatuinen ja käyttövalmis aina, kun sinun on suojattava sisältöäsi.
Osa 2. Kuinka lisätä vesileima videoon Photoshopissa?
Nyt kun tiedät, miten vesileima luodaan Photoshopissa, on aika ottaa se käyttöön. Tässä osiossa näytämme, miten voit lisätä vesileiman videoon Photoshopin perusvideonmuokkaustyökaluilla. Vaikka Photoshop ei olekaan täysimittainen videonmuokkausohjelma, se pystyy silti käsittelemään yksinkertaisia tehtäviä, kuten vesileiman lisäämistä. Huomaa kuitenkin, että Photoshop ei sovi aloittelijoille monimutkaisen käyttöliittymänsä vuoksi, joka saattaa hukuttaa käyttäjät, jotka eivät ole tottuneet siihen. Jotta saat oikean opastuksen, noudata alla olevia vaiheittaisia ohjeita:
Vaihe 1. Jos sinulla ei ole Photoshopia tietokoneellasi, lataa ja asenna se ensin. Huomaa, että tämä ohjelmisto on saatavilla sekä Windowsille että macOS:lle.
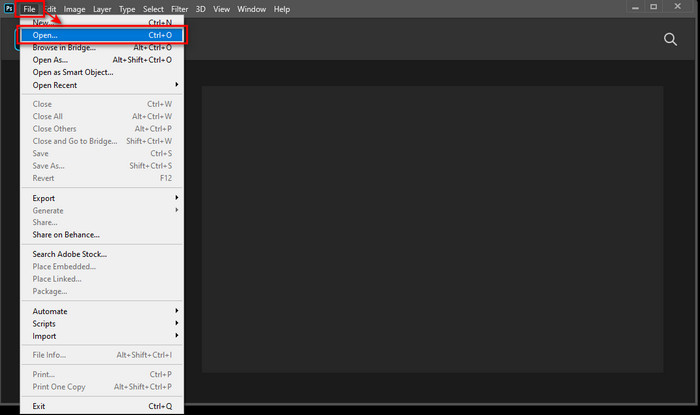
Vaihe 2. Palaa Photoshopiin ja siirry Tiedosto-valikkoon ja napsauta Avaa. Sen jälkeen etsi ja valitse video, johon haluat lisätä vesileiman. Kun tiedosto on lisätty, näyttöön tulee aikajana (Timeline).
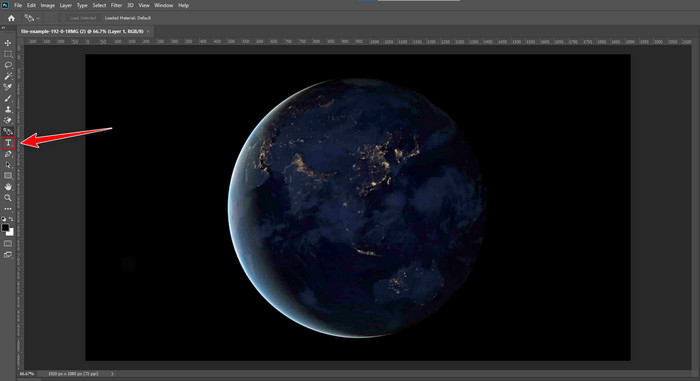
Vaihe 3. Tämän jälkeen etsi käyttöliittymän vasemmasta paneelista T-kuvake tekstityökalulle. Napsauta mitä tahansa kohtaa videossa aloittaaksesi vesileimana käyttämäsi tekstin kirjoittamisen. Ennen kuin jatkat, voit vapaasti säätää fontin tyyliä, kokoa, väriä ja muita asetuksia, jotta vesileimasi näyttää haluamaltasi.
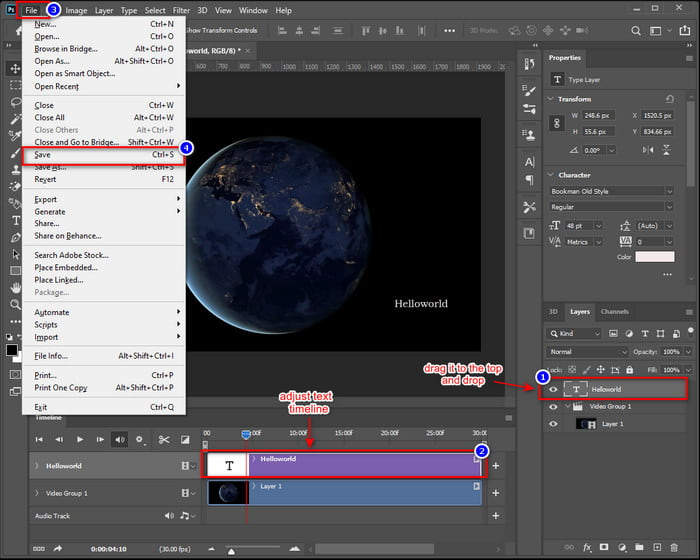
Vaihe 4. Vedä Tekstikerros (Text layer) Tasot (Layers) -paneelissa Video-ryhmän (Video Group) yläpuolelle varmistaaksesi, että se näkyy videon päällä. Palaa sitten Aikajana (Timeline) -paneeliin ja säädä tekstin kestoa vetämällä sen alkamis- tai päättymiskohtaa. Kun olet valmis, siirry Tiedosto-valikkoon ja napsauta Tallenna tallentaaksesi muutokset.
Photoshopilla voit kyllä lisätä vesileiman videoon. Ongelma on kuitenkin se, ettei se sovi kaikille. Oppimiskäyrä on jyrkkä, ja aloittelijoista käyttöliittymä voi tuntua ylivoimaiselta. Jos et ole perehtynyt siihen, miten tasot, aikajanat ja tekstityökalut toimivat Photoshopissa, niiden omaksuminen voi viedä aikaa.
Osa 3. Kuvan vesileiman lisääminen videoon Photoshopissa [Ultimate Way]
Koska Photoshop ei ole kovin aloittelijaystävällinen, kun kyse on vesileiman lisäämisestä videoon, käyttäjät voivat kokeilla vaihtoehtoisia työkaluja. FVC Video Converter Ultimate on hyvä valinta. Tämä muunnostyökalu ei pelkästään muunna videoita ja ääntä, vaan sitä voidaan myös käyttää kuvavesileiman lisäämiseen videoon.
FVC:ssä on työkalupakki, josta löydät useita hyödyllisiä ominaisuuksia, ja Video Watermark on vain yksi niistä. Tämän työkalun avulla voit helposti ladata videosi, lisätä kuvavesileiman ja sijoittaa sen haluamaasi paikkaan näytöllä. Ei monimutkaisia kerroksia tai aikajanoja, vain yksinkertainen ja käyttäjäystävällinen käyttöliittymä, joka hoitaa työn nopeasti. Se on täydellinen niille, jotka haluavat nopeita tuloksia ilman Photoshopin jyrkkää oppimiskäyrää. Alla on vaiheittainen opas kuvavesileiman lisäämiseen videoon Photoshopissa FVC:n avulla.
Vaihe 1. Lataa ja asenna ensin FVC Video Converter Ultimate tietokoneellesi. Huomaa, että se on yhteensopiva sekä Windowsin että macOS:n kanssa.
Ilmainen latausWindows 7 tai uudempiTurvallinen lataus
Ilmainen latausMacOS 10.7 tai uudempiTurvallinen lataus
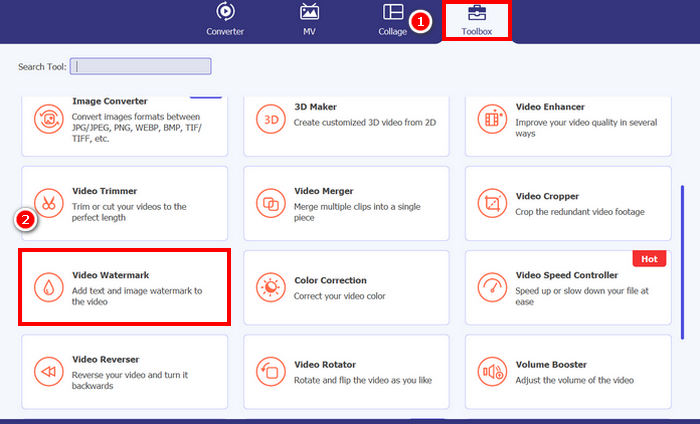
Vaihe 2. Käynnistä työkalu, napsauta Työkalupakki (Toolbox)-välilehteä ja valitse sieltä Video Watermark.
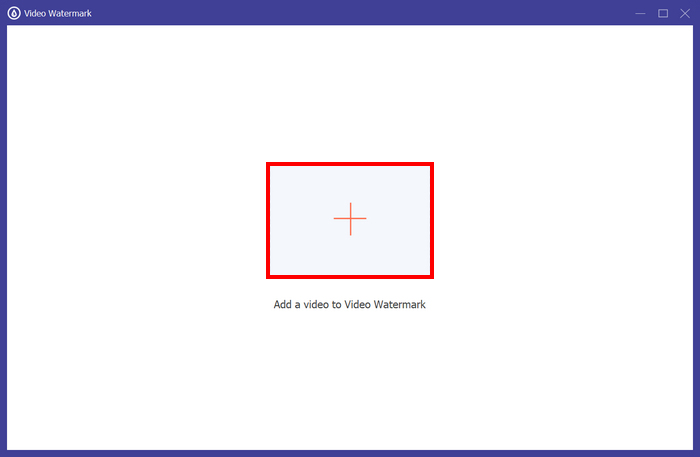
Vaihe 3. Napsauta sen jälkeen Lisää video vesileimaan (Add a Video to Video Watermark) ja valitse video, johon haluat lisätä kuvavesileiman.
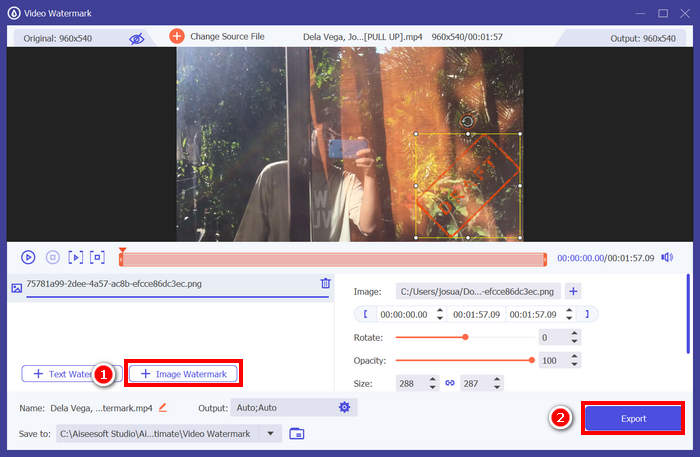
Vaihe 4. Valitse nyt + Kuvavesileima (+ Image Watermark) lisätäksesi kuvan, jota haluat käyttää videon vesileimana. Tämän jälkeen voit säätää sitä. Kun olet valmis, napsauta Vie (Export)-painiketta.
Katso, FVC Video Converter Ultimate -ohjelman Video Watermark -työkalulla voit helposti lisätä kuvavesileiman videoon. Se sopii todellakin kaikille, jopa aloittelijoille. Prosessi on yksinkertainen. Sinun tarvitsee vain ladata videosi, lisätä vesileima, säätää sen kokoa ja sijaintia, ja olet valmis.
Napsauta tästä, jos haluat lisätietoja siitä, miten voit tarvittaessa poistaa videon vesileiman.
Osa 4. Usein kysyttyjä kysymyksiä vesileiman lisäämisestä Photoshopissa
Sopiiko vesileiman lisääminen?
Kyllä, vesileiman lisääminen on yleinen ja hyväksyttävä tapa suojata sisältöä. Se on hyödyllinen digitaalisen sisällön identiteetin antamisessa alueilla, joilla sisällön kaappaaminen on yleistä.
Onko Photoshop aloittelijaystävällinen vesileimojen lisäämiseen videoihin?
Ei oikeastaan. Vaikka Photoshopilla voi lisätä vesileimoja videoihin, sen käyttöliittymä ja videonmuokkaustyönkulku voivat olla monimutkaisia aloittelijoille. Se sopii paremmin käyttäjille, jotka ovat jo perehtyneet tasoihin ja aikajanoihin.
Voinko mukauttaa vesileimani ulkoasua Photoshopissa?
Ehdottomasti. Photoshopissa voit hallita vesileimasi fonttia, kokoa, väriä, läpinäkyvyyttä ja sijaintia täysin, olipa se sitten teksti- tai kuvapohjainen.
Johtopäätös
Nyt kun tiedät, miten lisäät vesileiman Photoshopissa, on myös tärkeää ymmärtää, miksi se on hyödyllistä. Vesileiman lisääminen Photoshopissa auttaa suojaamaan videosisältöäsi ja vahvistaa omistajuuttasi. Vaikka prosessi voi aluksi tuntua monimutkaiselta, etenkin aloittelijoista, Photoshop tarjoaa joustavat mahdollisuudet luoda ja käyttää tarkasti räätälöityjä vesileimoja. Ja jos etsit helpompaa vaihtoehtoa, työkalut kuten FVC Video Converter Ultimate tarjoavat suoraviivaisemman ratkaisun. Mitä vielä odotat? Aloitetaan!
-
 5 tapaa poistaa vesileima videosta ammattimaisesti
 Haluatko poistaa vesileiman videosta, jotta se näyttää ammattimaiselta? No, lue tämä artikkeli, kun lisäämme opetusohjelman sen tekemiseen!
-
 2 hienoa sovellusta, joilla voit poistaa vesileiman MP4-videoista
 Tämä artikkeli tarjoaa sinulle yksinkertaisia ja helpoimpia tapoja poistaa vesileima MP4-videoista käyttämällä laitteitasi, kuten Windows ja Mac
-
 Poista Animotica-vesileima vietyistä videoista kolmella todistetulla tavalla
 Oletko koskaan miettinyt, voiko Animotica-vesileiman poistaa viemistäsi videoista? Tämä artikkeli tarjoaa ohjeet.