


Kako brzo izoštriti sliku u Photoshopu - potpuni vodič koji morate znati
Uz najboljeg stručnog uređivača slika možete svaku svoju fotografiju podići na višu razinu. Adobe Photoshop je najdugovječniji pouzdan softver koji možete preuzeti na Windows, Mac, iOS i Android. Zahvaljujući svom razvijatelju, tvrtki Adobe, već je predstavio i doveo uređivanje do njegovog punog potencijala. Zbog naprednih funkcija novi se urednici često boje Photoshopa, ponajprije zbog njegova sučelja i ukupne funkcionalnosti. Može se činiti teškim za korištenje, ali nije, osobito kada je riječ o izoštravanju slike. Ovdje ćemo prikazati potpuni vodič o tome kako brzo izoštriti sliku u Photoshopu.

Dio 1. Potpuni vodič o tome kako izoštriti sliku u Photoshopu [3 učinkovita načina izoštravanja]
Izoštravanje Photoshop slika moglo bi opteretiti one koji nisu koristili ovaj program. Ali prije nego što nastavimo s vodičem, morat ćete preuzeti službeni softver na Adobeu. Odaberite ispravan gumb za preuzimanje kako biste ga imali na radnoj površini. Ako niste preuzeli ovaj program na svoje stolno računalo, možete koristiti njegovu besplatnu probnu verziju, ali ako ste završili probnu verziju, morat ćete kupiti mjesečni ili godišnji plan. Nakon što sve učinite, prijeđite na korake po svom izboru koje navodimo u nastavku.
1. način. Kako učiniti sliku oštrom u Photoshopu koristeći High Pass:
Highpass vam omogućuje da istaknete sliku i primijenite filtar na sliku koji bi vam mogao pomoći da izoštrite rubove fotografije koju postavite na Photoshop. Možete slijediti vodič koji dodajemo u nastavku da naučite kako primijeniti i koristiti highpass na slikama koje imate.
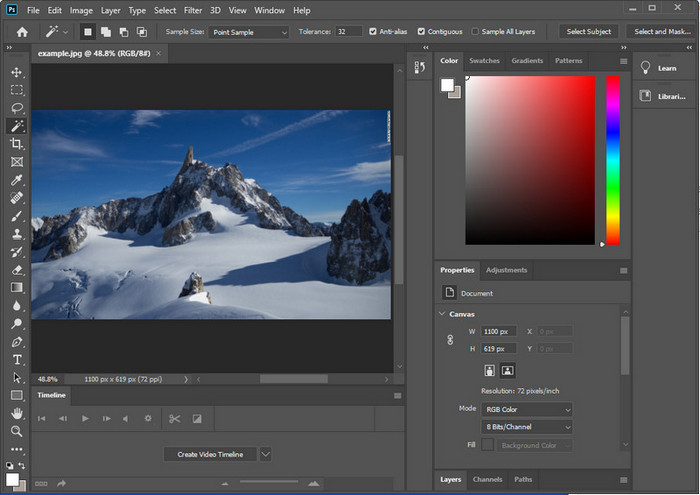
Korak 1. Pokrenite softver, kliknite File, a zatim Open kako biste učitali sliku i počeli s dodavanjem izoštravanja.
Korak 2. Duplicirajte sloj slike koju ste učitali u Photoshop.
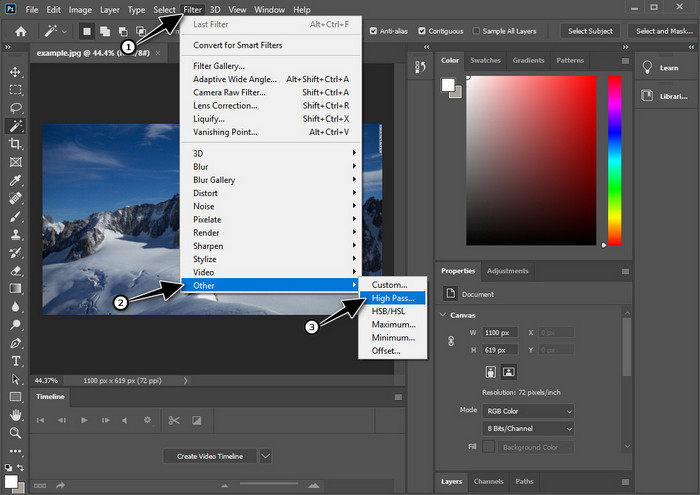
Korak 3. U gornjem dijelu kliknite izbornik Filter, zatim Other, pa High Pass. Ne trebate se zabrinuti ako vam slika posivi, jer je to normalno kada dodate High Pass na nju.
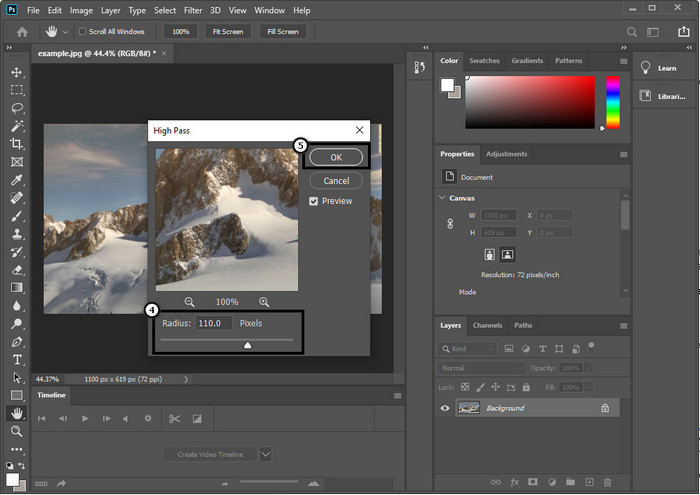
Korak 4. Na zaslonu će se pojaviti skočni prozor u kojem možete povlačiti klizač kako biste povećali radijus i dobili bolje detalje na slici. Zatim pritisnite OK da biste spremili.
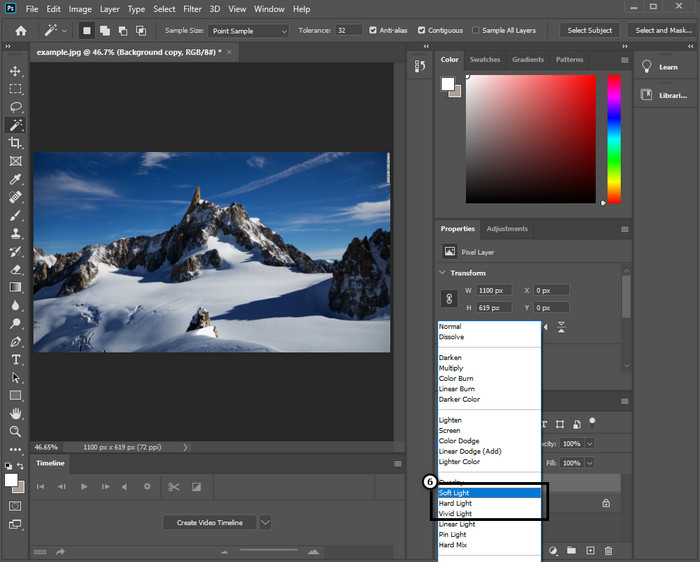
Korak 5. Vratite se na sloj, kliknite padajući izbornik i odaberite koju vrstu svjetla želite primijeniti na sliku – od soft, hard i vivid light do izoštravanja. Ponavljajte korak 3 pa sve do ovog koraka kako biste ponovno dodatno izoštrili sliku.
2. način. Kako učiniti sliku oštrijom u Photoshopu pomoću Smart Sharpera:
Smart Sharpen je učinkovita funkcija kojoj možete pristupiti u programu Adobe Photoshop za izoštravanje svega na vašoj slici. Ova funkcija nije automatsko rješenje, već trebate podesiti određene parametre kako bi sve izgledalo oštro. Ako želite koristiti ovu funkciju u Adobeu, možete slijediti sljedeće korake koje smo naveli.
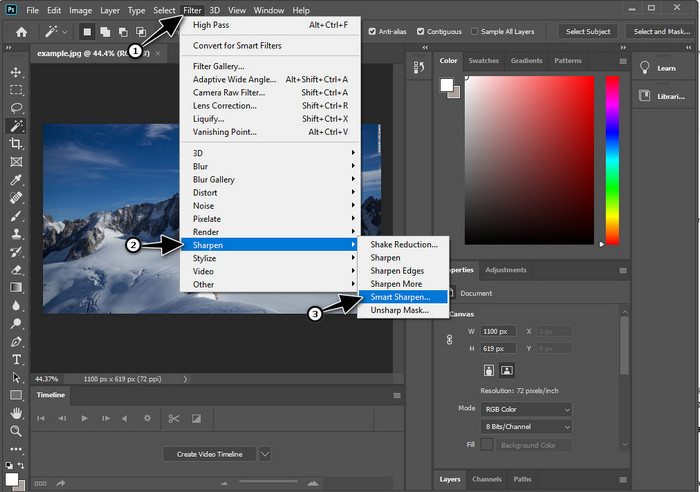
Korak 1. Nakon što ste dodali sliku koju želite izoštriti, kliknite izbornik Filter.
Korak 2. U prikazanim opcijama kliknite Sharpen, a zatim pritisnite Smart Sharpen.
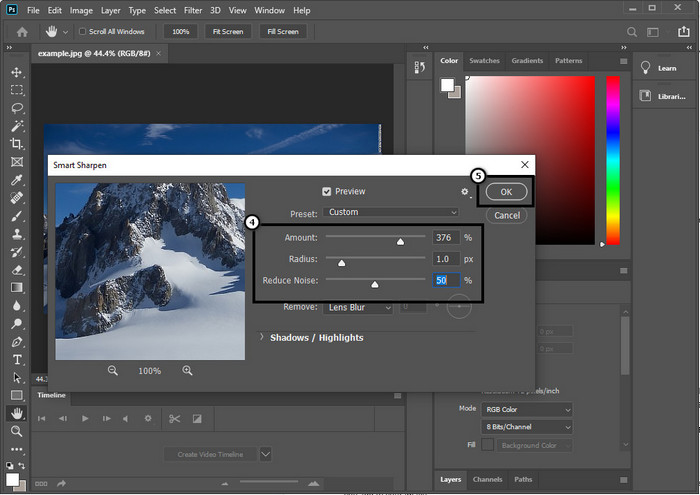
Korak 3. Podesite vrijednosti amount i radius za izoštravanje prema vlastitim željama i kliknite OK da biste spremili promjene. Tako jednostavno – ovom alatkom za izoštravanje u softveru izoštrili ste fotografiju.
3. način. Kako izoštriti sliku na fotografiji podešavanjem svjetline i kontrasta:
Za razliku od dva načina koja smo predstavili, svjetlina i kontrast fokusiraju se na isticanje slike koju prenesete kako bi izgledala detaljnije, kao što rade alati za izoštravanje. Malo korisnika poznaje ovu opciju, pa ako želite koristiti ovu opciju i početi izoštravati sliku koju imate, slijedite korake u nastavku.
Korak 1. Nakon što ste učitali sliku u Photoshop, nastavite klikom na izbornik Image.
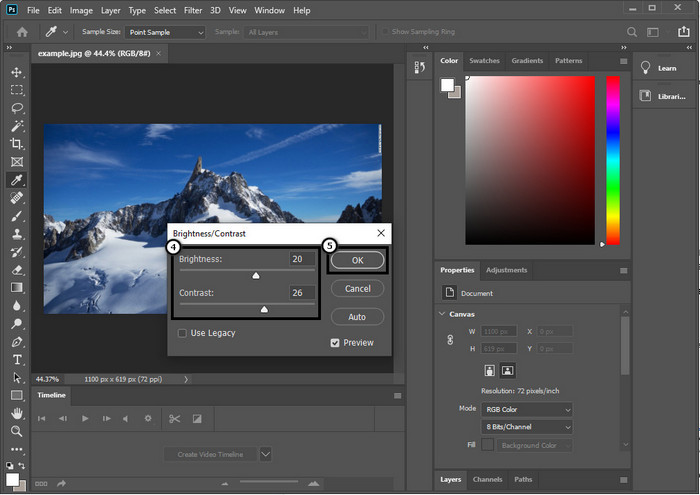
Korak 2. Pojavit će se više opcija; odaberite Adjustment, a zatim kliknite Brightness and Contrast.

Korak 3. Podesite svjetlinu i kontrast povlačenjem klizača i pritisnite OK kako biste spremili promjene koje ste primijenili na sliku.
Povezano:
Jednostavan vodič za brzo dodavanje vodenog žiga u video u Photoshopu
Dio 2. Najbolja alternativa Photoshopu za izoštravanje slike na mreži [besplatna usluga]
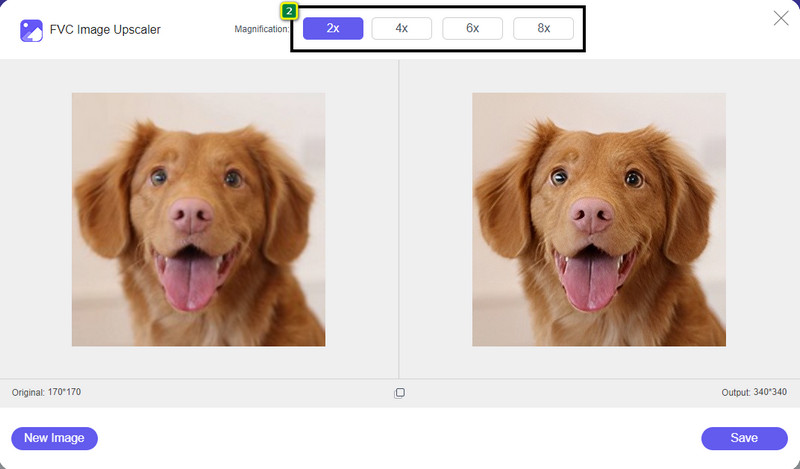
Kako izoštriti mutnu sliku u Photoshopu bez same aplikacije? Možete koristiti FVC Free Image Upscaler. Ovaj mrežni alat može vas poštedjeti kompliciranih postupaka. Učitajte sliku i prepustite posao AI tehnologiji koju ovaj softver koristi. Također ne morate kupovati licencni ključ ili premium verziju softvera jer je besplatan za sve korisnike kojima je potrebno brzo urediti svoje fotografije. Čak i ako niste stručnjak za uređivanje, i dalje možete izoštriti sliku slijedeći dolje navedene korake.
Korak 1. Trebate kliknuti ovu poveznicu kako biste otvorili web-alat i izoštrili svoju fotografiju.
Korak 2. Na web-stranici trebate pritisnuti Upload Image kako biste umetnuli sliku koju želite izoštriti. Na zaslonu će se otvoriti mapa, odaberite sliku i zatim kliknite Open da biste je učitali.
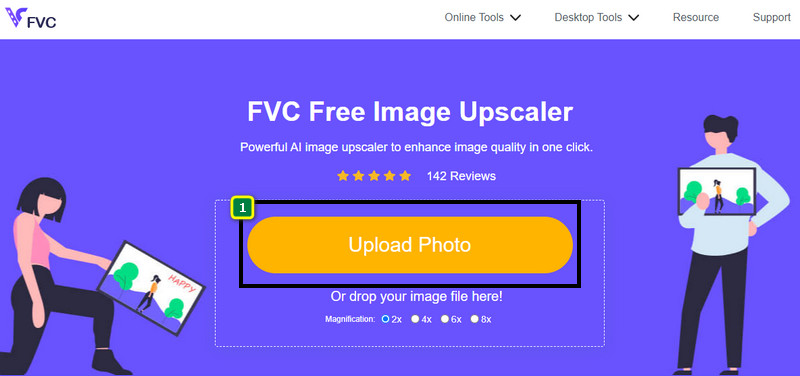
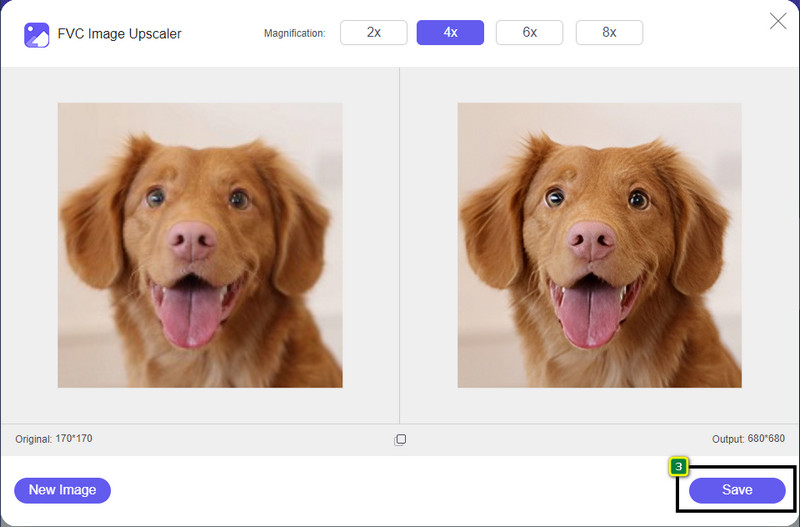
Korak 3. Bit će dostupne razne opcije povećanja slike kako biste je lako izoštrili uz pomoć AI tehnologije.
Korak 4. U donjem dijelu kliknite gumb Save da biste preuzeli izoštrenu sliku na svoj lokalni disk.
Dio 3. Često postavljana pitanja o tome kako izoštriti slike u Photoshopu
Što trebam učiniti ako besplatna probna verzija Photoshopa završi?
Ako želite nastaviti koristiti ovaj profesionalni uređivač slika koji je razvio Adobe, morat ćete kupiti paket kako biste nastavili koristiti ovaj program. No, ako želite iskusiti iste funkcije uređivanja slične Photoshopu, počnite koristiti FVC Free Image Upscaler.
Što mogu učiniti s Photoshopom?
Ovdje možete napraviti mnoštvo uređivanja slika i videa, što drugi uređivači ne nude. To je kompletan uređivač slika koji će vam trebati za stvaranje nevjerojatnih stvari poput pretvaranja 2D slike u 3D i još mnogo toga. Međutim, ovaj je softver pomalo kompliciran i morat ćete odvojiti malo vremena za svladavanje općenitog korištenja.
Gdje mogu preuzeti Photoshop?
Adobe Photoshop podržava Windows 10 sa 64-bitnim ili novijim i Mac 10.15 Catalina ili novijim. Također, podržava mobilnu verziju, Photoshop Express Photo Editor.
Zaključak
Uz vodič koji smo dodali o tome kako izoštriti sliku u Photoshopu, sada je možete jednostavno izoštriti na različite načine koristeći najbolji uređivač. Što ako vam je probno razdoblje završilo, a i dalje želite izoštravati slike? Što biste trebali učiniti? Ne trebate se brinuti jer smo dodali i mrežnu alternativu za lakše i besplatno izoštravanje slika, sve dok imate pristup internetu, a to je FVC Free Image Upscaler.
-
 Napravite HD fotografije na najbolje načine koje možete pronaći na tržištu
 Pitate se ili želite napraviti HD fotografije? Možete pratiti vodič koji dodajemo u nastavku s različitim rješenjima koja možete koristiti.
-
 4 najbolja reduktora kvalitete slike koje možete koristiti online i offline
 Ovi reduktori kvalitete slike mogu vam pomoći smanjiti kvalitetu vaše slike iz nekih razloga. Ako vam treba, pročitajte ovaj članak!
-
 Službeni načini povećanja razlučivosti slike na 4k s praktičnim vodičem
 Za poboljšanje slike na 4k trebat će vam softver na vašem uređaju. Ako ga nemate, morat ćete odabrati alat koji ovdje uključujemo.