


Rimuovi l'oggetto dalle foto con i 6 software efficaci [gratuiti]
Milioni di fotografi, anche principianti, scattano più volte la stessa scena di un tramonto, di una spiaggia, di luoghi turistici, della luna e molto altro ancora. Con le immagini possiamo esprimere chi siamo davvero. Con un semplice scatto puoi accendere la creatività di tutti e liberare il loro lato più artistico. Non sempre, però, ciò che catturiamo risulta in un’immagine perfetta; a volte dobbiamo eliminare un oggetto che non dovrebbe essere presente nella foto scattata. Ti serve uno strumento per rimuovere oggetti dalle foto? Qui ti presenteremo diversi metodi e tool che puoi usare per eliminare all’istante gli oggetti indesiderati dall’immagine che hai scattato.

Parte 1. Rimuovi oggetto dalla foto utilizzando il miglior strumento di rimozione oggetti [Servizio Web]
FVC Free Watermark Remover è la nostra prima scelta per rimuovere oggetti dalle foto online e gratuitamente. Con questo strumento puoi cancellare all’istante qualsiasi elemento che rovini la tua immagine perfetta, senza dover scaricare software sul computer e anche se non hai alcuna esperienza di questo tipo di fotoritocco. Puoi fare affidamento su questo strumento perché ti basta evidenziare l’oggetto e lui lo rimuoverà dall’immagine senza lasciare residui. Abbiamo trovato questo tool divertente ed efficace nel rimuovere elementi superflui dalla foto; se vuoi usarlo, copia i passaggi che riportiamo qui sotto.
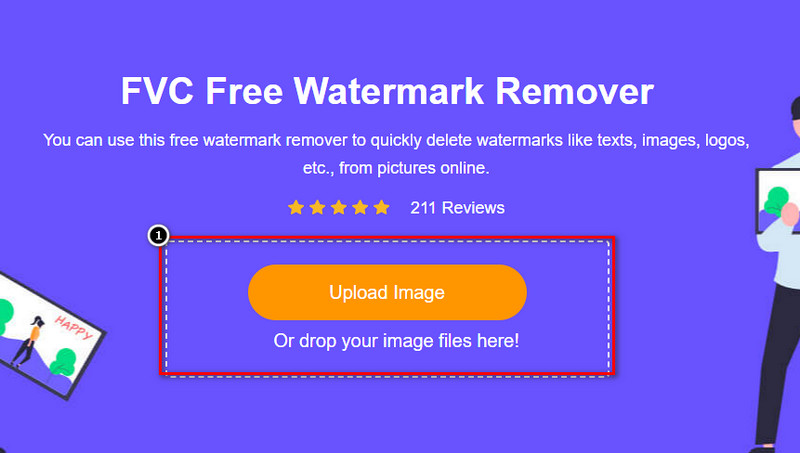
Passaggio 1. Per aprire lo strumento di rimozione oggetti sviluppato da FVC, puoi cliccare su questo link al sito ufficiale.
Passaggio 2. Fai clic su Upload Image per importare la foto che hai scattato e che contiene un oggetto indesiderato.
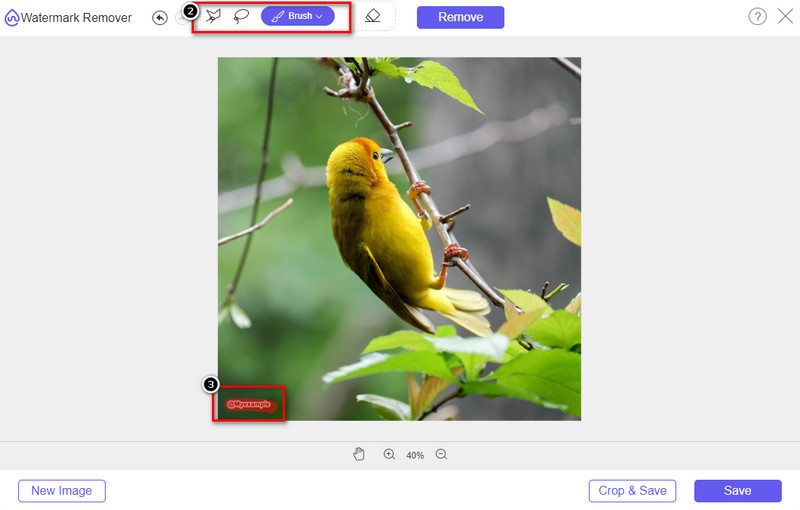
Passaggio 3. Con gli strumenti disponibili qui, dovrai evidenziare l’oggetto.
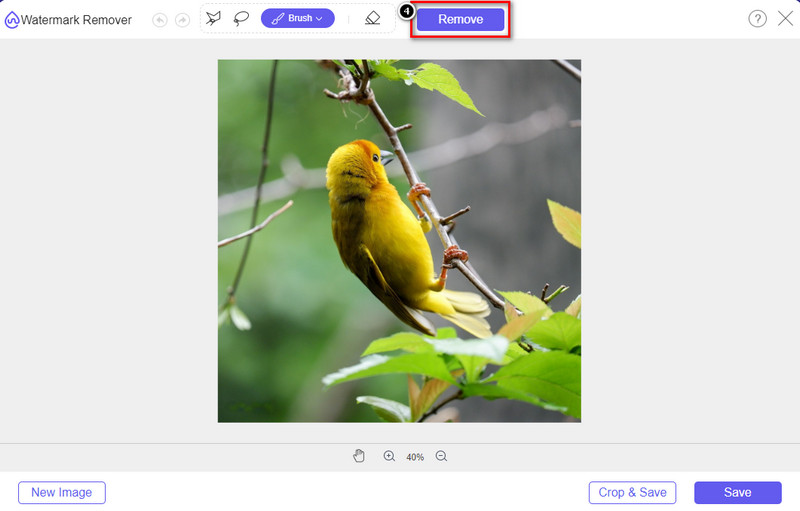
Passaggio 4. Premi il pulsante Remove per eliminare l’oggetto grazie alla tecnologia AI integrata in questo strumento.
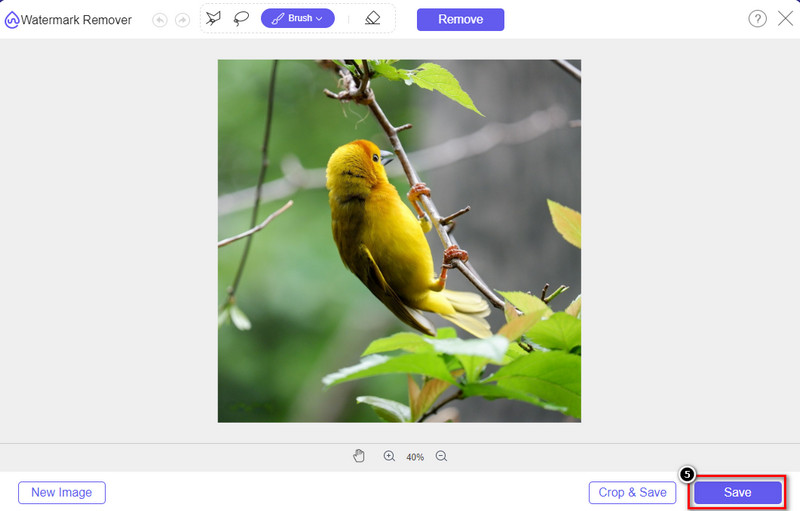
Passaggio 5. Per scaricare l’immagine perfetta che hai modificato, fai clic su Save.
Parte 2. Rimuovi oggetto dalla foto in modo professionale utilizzando programmi desktop [Windows e Mac]
Photoshop
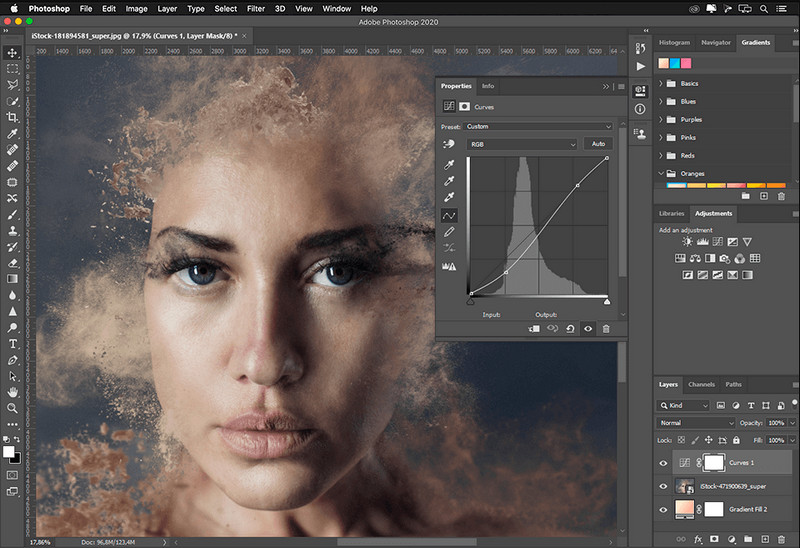
Se hai bisogno di uno strumento professionale per rimuovere oggetti dalle foto, allora Photoshop è la risposta! Questo strumento è un editor di immagini completo che Adobe ci presenta con orgoglio. Niente ti impedisce di rendere l'immagine incredibile con le sue caratteristiche e funzioni. A causa della sua popolarità tra i professionisti, molti principianti cercano di utilizzare questo software per modificare e creare le proprie immagini. Quindi, se vuoi sapere come utilizzare questo strumento professionale, puoi seguire il tutorial che aggiungiamo di seguito.
Passaggio 1. Apri il sito ufficiale di Adobe, quindi scarica Photoshop sul tuo computer.
Passaggio 2. Clicca su File e poi su Open per caricare l’immagine che devi modificare.
Passaggio 3. Nella sezione a sinistra seleziona lo strumento Magic Wand Tool per tracciare automaticamente l’oggetto presente nell’immagine.
Passaggio 4. Vai al menu Edit e seleziona Content-Aware Fill.
Passaggio 5. Una volta aperta la funzione, il watermark verrà rimosso automaticamente; quindi clicca su OK.
GIMP
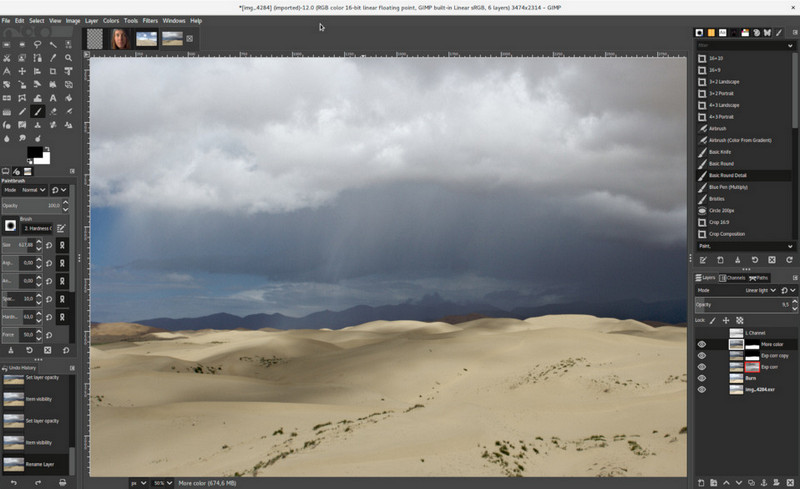
GIMP è un editor di immagini completo che puoi usare per rimuovere oggetti dalle foto su Mac, Linux e Windows in modo gratuito. È un tool affidabile, simile a Photoshop. Anche se è diventato il punto di riferimento quando si parla di alternative ad Adobe Photoshop, è comunque in pieno sviluppo attivo. Con questo strumento puoi modificare in profondità le tue immagini per renderle più attraenti per il pubblico. Inoltre, puoi personalizzare l’interfaccia per rendere il lavoro più semplice. Se stai pensando di scaricare questo tool per lavori di editing professionale, possiamo assicurarti che ti permetterà di raggiungere un risultato di alto livello. Anche se è un editor open‑source, il programma non è ancora del tutto definitivo, perché la sua interfaccia grafica è tuttora in fase di sviluppo. Se vuoi usarlo, i passaggi riportati di seguito ti guideranno nella rimozione di un oggetto da una foto con GIMP. I passaggi forniti qui sotto ti faranno da guida.
Passaggio 1. Scarica e avvia il software per poter caricare l’immagine che devi modificare. Scarica anche il plug‑in Resynthesizer.
Passaggio 2. Nella barra degli strumenti a sinistra seleziona Free Select e cambia la modalità in Add Current Selection.
Passaggio 3. Traccia ora l’oggetto che vuoi rimuovere; dopo averlo contornato con successo, premi Invio sulla tastiera.
Passaggio 4. Per usare il plug‑in che hai scaricato, vai su Filter, poi Enhance e clicca su Heal Selection.
Passaggio 5. Si aprirà una finestra di dialogo: modifica la sampling width se necessario, imposta il sample su all-around e Filling the Order su random. Premi OK per iniziare a sintetizzare l’area dell’oggetto all’interno dell’immagine.
App Foto su Mac
L’app Foto è una funzione integrata nei prodotti Apple aggiornati, come il Mac. Questa applicazione è preinstallata, quindi puoi saltare la fase di download e usarla subito. Il software non è un editor di immagini completo, perché il suo scopo principale è gestire la libreria e la visualizzazione delle foto su Mac o dispositivi iOS. Anche se non hai un editor professionale sul Mac, puoi sfruttare le sue funzioni per ottenere un risultato dall’aspetto professionale con un solo clic. Se vuoi rimuovere un oggetto usando l’app Foto, segui i passaggi che riportiamo qui di seguito.
Passaggio 1. Apri l’app Foto sul tuo Mac e seleziona l’immagine che contiene un oggetto indesiderato.
Passaggio 2. In alto a destra clicca sul pulsante Edit per iniziare a modificare l’immagine.
Passaggio 3. Nella parte destra vedrai l’opzione Retouch; cliccaci sopra per usare questa funzione.
Passaggio 4. Clicca e trascina il mouse sull’area che vuoi rimuovere.
Passaggio 5. Premi il pulsante Done per salvare le modifiche applicate all’immagine.
Parte 3. Rimuovi l'oggetto dalla foto utilizzando l'applicazione su Android e iOS
Photoshop RISOLTO
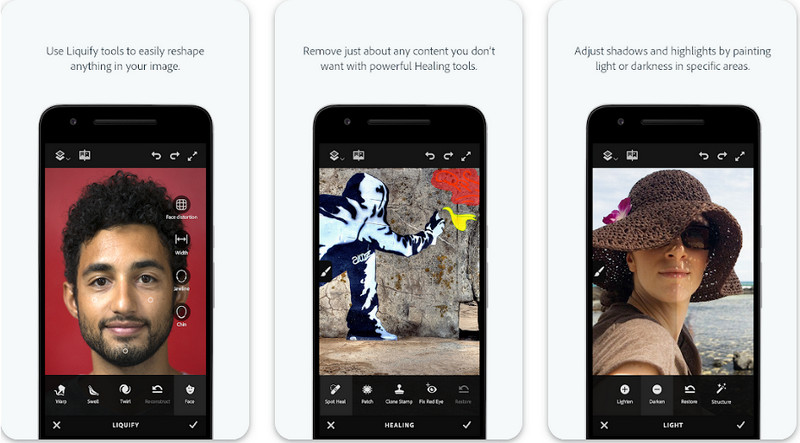
Photoshop FIX è un’app Android efficace per rimuovere oggetti dalle foto, che lavora in modo professionale pur restando facile da usare. È un’app open‑source che puoi scaricare sul tuo dispositivo dal Play Store. Anche se è open‑source, la funzione di rimozione oggetti è senza dubbio eccellente. È una delle app più scaricate sui dispositivi Android per svolgere questo tipo di lavoro. Se vuoi sapere come usarla, continua a leggere qui sotto.
Passaggio 1. Scarica l’app sul tuo dispositivo Android.
Passaggio 2. Premi On My Phone per visualizzare tutte le immagini presenti nella tua libreria. Scegli l’immagine che vuoi modificare.
Passaggio 3. Per usare la funzione di rimozione oggetti dell’app, clicca su Healing.
Passaggio 4. Qui puoi usare due opzioni per rimuovere l’oggetto. Per “spennellare via” l’elemento, scegli Spot Heal. Se vuoi invece clonare un pixel, devi scegliere Clone Stamp. Evidenzia il watermark con l’opzione che preferisci.
Passaggio 5. Salva l’immagine nel rullino fotografico, e il gioco è fatto!
Fotoritocco
Photo Retouch è un’app affidabile per rimuovere oggetti dalle foto su iPhone senza difficoltà. Anche se non sei esperto nella rimozione di elementi dalle immagini, potrai eliminarli in modo efficace. Puoi scaricare quest’app gratuitamente dall’App Store, se vuoi provarla. Inoltre, puoi rimuovere lo sfondo e il watermark dalle foto, se ti serve questa funzione. Se sei pronto a usare l’app per eliminare l’oggetto dalla tua immagine, segui i passaggi che abbiamo indicato.
Passaggio 1. Scarica l’app ufficiale, quindi avviala.
Passaggio 2. Clicca su Photo Eraser, poi su Photo. Seleziona l’immagine con lo sfondo indesiderato che vuoi rimuovere e assicurati che la foto sia presente nell’app Foto del tuo iPhone.
Passaggio 3. Nella parte inferiore seleziona l’opzione Object Removal.
Passaggio 4. Usa il pennello messo a disposizione dall’app per tracciare l’oggetto che vuoi rimuovere e clicca su GO per eliminarlo.
Correlato:
Rimuovere il watermark di Dreamstime
Rimuovere il watermark del filtro Picsart
Parte 4. Domande frequenti su come rimuovere oggetti dalle foto
Perché devo rimuovere gli oggetti dalle foto?
Ci sono molte volte in cui catturiamo qualcosa e ci sono Photobombers. Questo oggetto è un problema per la maggior parte dei professionisti su altre persone perché non mette in risalto l'immagine che catturi. Quindi, invece di riprendere l'immagine, puoi leggere i seguenti modi ideali per rimuovere l'oggetto dalla tua foto.
Posso ritagliare l'immagine per rimuovere gli oggetti?
Si, puoi. Se l'oggetto che desideri rimuovere è sul lato della foto, puoi provare a ritagliare l'immagine con il tuo editor integrato. Tuttavia, questa scelta non è un'opzione, soprattutto se l'oggetto si trova nella parte centrale o vicino all'immagine acquisita. Ritagliare l'immagine taglierà la foto, quindi è meglio pensarci due volte se vuoi provare questa opzione.
Perché non posso caricare un'immagine per rimuovere l'oggetto?
Non puoi caricare l'immagine; l'immagine è danneggiata o l'estensione dell'immagine non è supportata. Se la tua immagine è danneggiata, ci sono modi per risolverlo. Puoi trovarli sul web se lo cerchi. Di solito, potrebbe essere l'estensione del file dell'immagine; per risolvere questo problema, dovrai convertirlo.
Conclusione
Rimuovere oggetti dalla foto è facile grazie allo strumento e all'app che elenchiamo in questo articolo. Quindi, quale strumento preferisci di più? Speriamo che questa guida che aggiungiamo ti aiuti a risolvere facilmente il problema.
-
 Come convertire un'immagine a bassa risoluzione in un'immagine ad alta risoluzione online
 Se vuoi imparare a convertire le immagini a bassa risoluzione in immagini ad alta risoluzione online, allora questo articolo fa per te. Leggi tutto per sapere come.
-
 Metodi semplici su come rimuovere la filigrana Shootproof
 Rimuovi la filigrana Shootproof seguendo questi semplici metodi. Usa questi fantastici dispositivi di rimozione della filigrana per rimuovere facilmente la filigrana Shootproof dalla tua immagine.
-
 Come rimuovere la filigrana Bandicam senza sforzo [3 modi efficaci]
 Come rimuovere la filigrana Bandicam? Con gli strumenti, aggiungiamo qui saprai come affrontarlo in modo efficace!