


Come ottimizzare l'immagine per il Web utilizzando le 4 soluzioni [rapidamente]
Ottimizzare un'immagine svolge un ruolo fondamentale sul web, perché riduce il tempo di caricamento del sito. In base a studi recenti, quando le immagini non sono ben ottimizzate, quasi la metà dei visitatori abbandona subito il sito, con una perdita di traffico e di entrate. È quindi necessario imparare come farlo se vuoi ridurre il buffering e creare un sito affidabile per aumentare il traffico e ottenere maggiori guadagni in cambio. Farlo è semplice: con l’aiuto del tutorial che aggiungiamo su come ottimizzare le immagini per il web nel modo più semplice possibile.

Parte 1. Modi migliori e gratuiti per ottimizzare l'immagine online senza sacrificare la qualità dell'immagine
1. Upscaler di immagini senza FVC
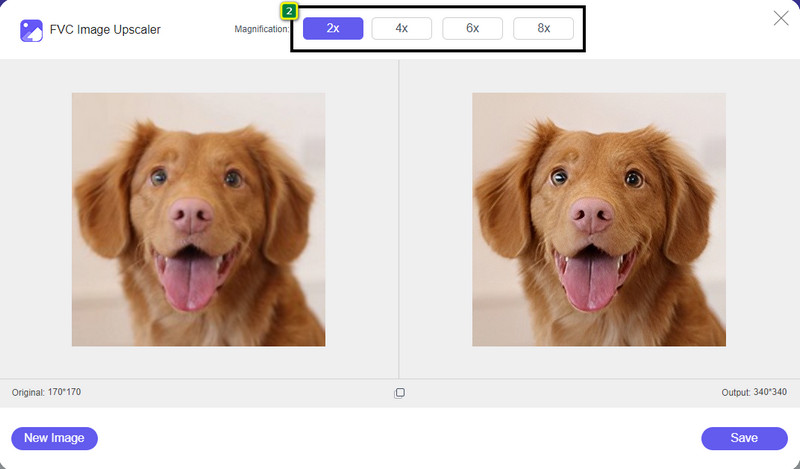
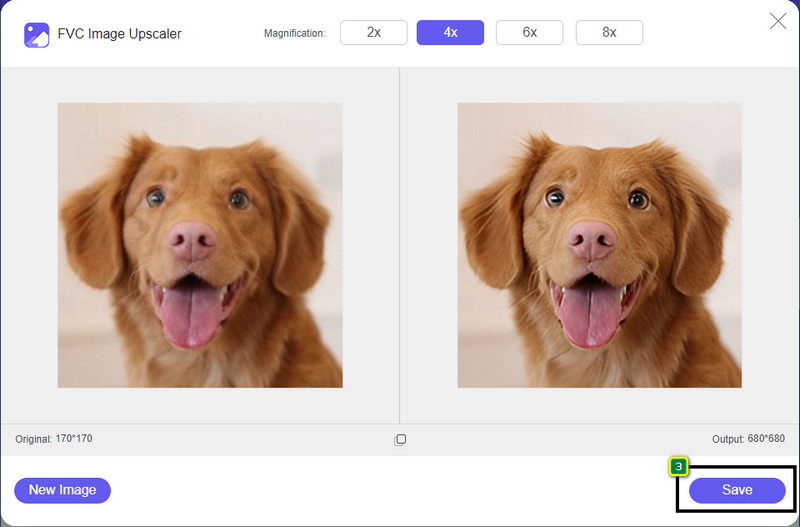
Stai cercando un modo per ottimizzare le dimensioni e il rapporto d’aspetto dell’immagine che vuoi usare sul web? FVC Free Image Upscaler è uno strumento in grado di ottimizzare le immagini grazie alla sua potente tecnologia IA. Questo upscaler può modificare le dimensioni di un’immagine senza compromettere il suo PPI dettagliato, così non sperimenterai alcuna perdita di qualità. Inoltre, questo strumento online può correggere immagini sfocate o pixelate tracciando le imperfezioni presenti. Prima di esportare l’immagine, è disponibile un riquadro di anteprima per confrontare il prima e il dopo. Quindi, se devi ridimensionare l’immagine che hai per il web, puoi seguire i passaggi che riportiamo di seguito.
Passaggio 1. Apri il sito web cliccando su questo link.
Passaggio 2. Premi Upload Image per inserire qui l’immagine che vuoi ridimensionare.
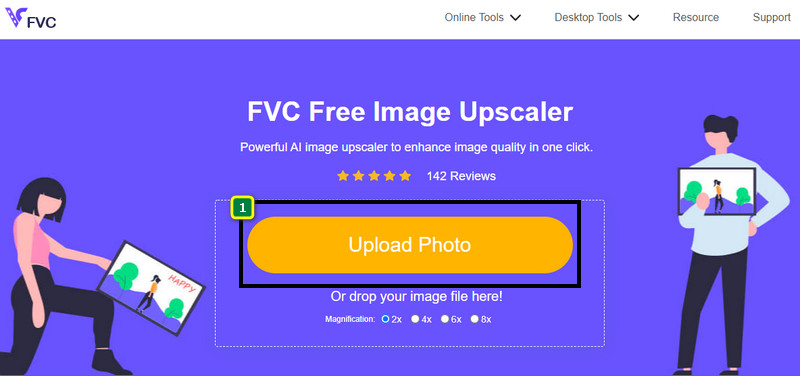
Passaggio 3. Scegli l’opzione che vuoi applicare alla tua immagine per ridimensionarla.
Passaggio 4. Premi Save per scaricare sul tuo disco locale l’immagine che hai ridimensionato.
2. Compressore di immagini senza FVC
FVC Free Image Compressor permette a chiunque di ottimizzare le immagini per il web riducendone le dimensioni del file. Consente di comprimere i formati più utilizzati sui vari siti, come PNG, JPG, SVG, BMP, ecc., con un peso inferiore a 5 MB ciascuno. Con questo strumento puoi trascinare più immagini e portarle a una dimensione ottimizzata, in modo che si carichino meglio sul web. È uno strumento basato su tecnologia IA che offre il miglior rapporto di compressione, irraggiungibile con altri compressori online.
Passaggio 1. Visita il sito ufficiale dello strumento cercandone il nome, oppure puoi cliccare su questo link per accedervi dal tuo browser.
Passaggio 2. Trascina e rilascia qui il file immagine che vuoi caricare, oppure clicca su Upload Images; si aprirà una cartella sullo schermo, fai clic sul file che vuoi comprimere e premi Open. Questo compressore può ridurre più di 40 immagini contemporaneamente.
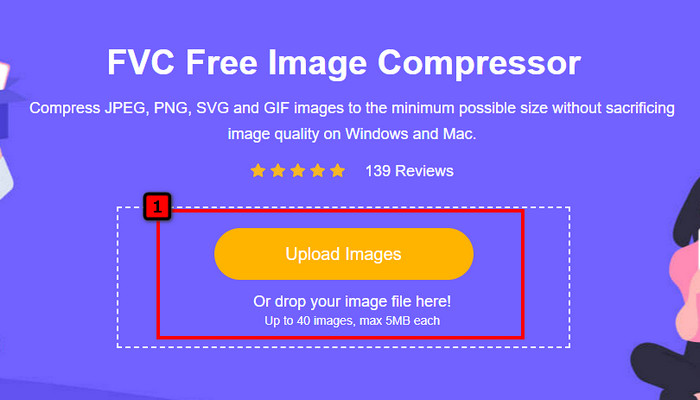
Passaggio 3. Lo strumento ridurrà automaticamente la dimensione del file dell’immagine in base all’algoritmo IA. Dopodiché, fai clic su Download per esportare la versione compressa dell’immagine.

3. TinyPNG
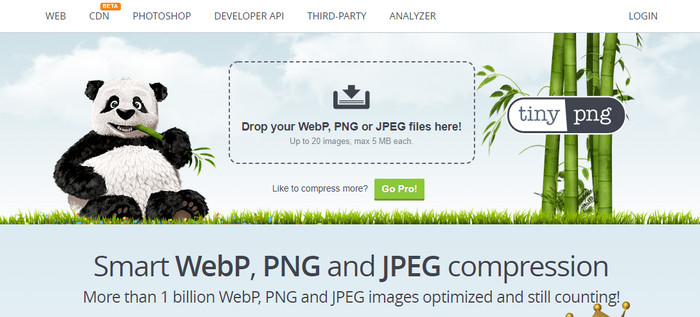
TinyPNG è un software online molto diffuso e affidabile che puoi usare per ottimizzare le immagini. È un compressore che riduce automaticamente le dimensioni dell’immagine fino al 75 % della dimensione originale. Puoi caricare le immagini dal tuo Dropbox se non si trovano sul disco locale. Non avrai difficoltà a imparare come usare questo compressore di immagini, grazie alla semplicità con cui è stato progettato dallo sviluppatore.
Sebbene sia facile da usare, i formati supportati qui sono solo PNG e JPG e non c'è nient'altro. Quindi, se vuoi comprimere BMP, GIF, SVG e altri file che hai, non puoi farlo qui perché non supporta il suddetto formato. Tuttavia, questo è facile da usare; puoi seguire i passaggi che aggiungiamo.
Passaggio 1. Apri il motore di ricerca e trova il sito ufficiale di TinyPNG.
Passaggio 2. Clicca sull’icona di importazione per caricare l’immagine che vuoi comprimere; questo strumento è in grado di elaborare 20 immagini contemporaneamente.
Passaggio 3. Attendi il processo di compressione, quindi fai clic sul pulsante Download per salvare la versione compressa dell’immagine che hai caricato qui.
Parte 2. Ottimizza l'immagine offline utilizzando il software professionale su Windows e Mac
Photoshop è in grado di svolgere entrambe le attività che abbiamo menzionato nella prima parte: ridimensionare le foto e ridurne il peso. Anche se questo strumento non è stato creato specificamente per questo compito, può comunque eseguirlo come funzionalità avanzata aggiuntiva. Con esso puoi iniziare ad aggiungere filtri o modificare l’immagine in base alle tue idee. L’unico limite è la tua immaginazione e il livello di difficoltà nell’usare questo software.
A differenza dello strumento online che abbiamo menzionato, non avresti bisogno di una connessione Internet per utilizzare questo software una volta scaricato sul tuo dispositivo. Tuttavia, dovrai acquistare il software per usarlo, quindi se vuoi vedere come ottimizzare l'immagine per il web su Photoshop, c'è un'istruzione che aggiungiamo di seguito, che ti consente di ridimensionare e ridimensionare l'immagine.
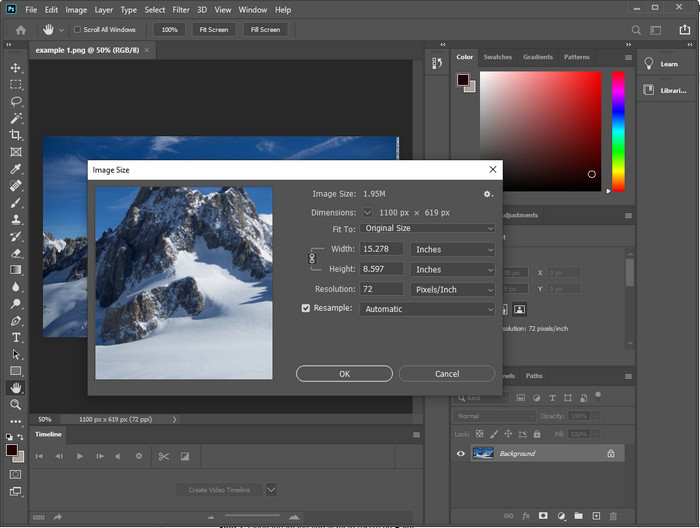
Passaggio 1. Scarica e avvia il software sul tuo desktop per iniziare a usarlo.
Passaggio 2. Carica l’immagine che vuoi modificare, poi vai al menu Image e clicca su Image Size. Modifica le misure in base alle tue specifiche e poi fai clic su OK per salvare le modifiche. Se non vuoi cambiare il rapporto d’aspetto o le dimensioni dell’immagine, è meglio saltare il passaggio 2.
Passaggio 3. Clicca sul menu File e premi Save as. Una finestra di dialogo apparirà sullo schermo. Scegli la dimensione del file che vuoi ottenere, quindi premi OK per avviare l’esportazione dell’immagine.
Parte 3. Domande frequenti su come ottimizzare l'immagine per il Web
Qual è il miglior formato immagine per il web?
È meglio utilizzare un'immagine con estensione PNG e JPG perché questi formati sono noti per essere ben ottimizzati su diversi siti Web. Tuttavia, a volte sarà necessario ottimizzarlo ridimensionando o ridimensionando l'immagine, ed è qui che lo strumento che abbiamo aggiunto qui è venuto in aiuto.
Che porta maggiori dettagli sul web; PNG o JPG?
Entrambe le immagini raster funzionano bene sul sito Web; si caricano più velocemente e ottimizzano i siti web. Tuttavia ci sono ancora differenze tra questi due formati, ad esempio quando si desidera utilizzare la fotografia pura senza trasparenza per il Web, il formato di riferimento deve essere JPG o JPEG. Ma se vuoi avere la trasparenza a 1 bit sul tuo Web con grandi dettagli, PNG è qui per aiutarti.
Cambiare la dimensione dell'immagine peggiora la qualità?
Se comprimi eccessivamente un’immagine, è possibile ottenere una qualità scadente, ma questo è evitabile se non la sovracomprimi. Una volta compressa l’immagine, è meglio ridurne il peso di almeno il 45 % fino al 70 % per evitare perdite di qualità. Tuttavia, puoi utilizzare un potenziatore di immagini per aumentare la qualità dell’immagine.
Conclusione
Ora che sai come ottimizzare la tua immagine, è meglio farlo in modo da ottenere più visite e attirare molta attenzione. Con il tutorial che aggiungiamo sopra, siamo certi che potrai farlo facilmente e velocemente senza intaccare la qualità. Se devi ridimensionare o comprimere, ti consigliamo di utilizzare il prodotto FVC che includiamo qui per risolvere il problema senza scaricare alcun programma di installazione.
-
 Crea foto HD con i modi migliori che puoi trovare sul mercato
 Ti stai chiedendo o vuoi fare foto HD? Puoi seguire il tutorial che aggiungiamo di seguito con diverse soluzioni che puoi utilizzare.
-
 I 4 migliori riduttori di qualità dell'immagine che puoi utilizzare online e offline
 Questi riduttori di qualità dell'immagine possono aiutarti a ridurre la qualità della tua immagine per alcuni motivi. Se ne avevi bisogno, leggi questo articolo!
-
 Modi ufficiali per aumentare l'immagine a 4k con un tutorial pratico
 Per eseguire l'upscaling dell'immagine a 4k avrai bisogno di un software sul tuo dispositivo. Se non ne hai uno, dovrai selezionare lo strumento che includiamo qui.