


[Risolto] 4 metodi per acquisire screenshot su Android
Fare screenshot è una delle operazioni più comuni che possiamo fare oggi con i nostri telefoni. Quando vogliamo salvare un’immagine, un testo o un post che abbiamo visto sullo schermo mentre scorriamo, ne facciamo uno screenshot. Se stai usando un dispositivo Android e ti stai chiedendo come sfruttare al meglio le sue funzioni di cattura schermo, sei nel posto giusto! In questo articolo scoprirai come fare screenshot su Android in 4 modi diversi e trarre il massimo dalle potenzialità del tuo dispositivo. Continua a leggere per salvare i contenuti che ti interessano facendo uno screenshot!

Parte 1: Come acquisire uno screenshot sul telefono Android
Potresti chiedertelo, ma l'acquisizione di screenshot su Android varia davvero a seconda del produttore del dispositivo e della versione del sistema operativo. Quindi, se sei un utente Android e non sai quale metodo utilizzare quando vuoi fare uno screenshot, controlla i passaggi seguenti:
Metodo 1: utilizzo dei pulsanti hardware
Il modo più comune per acquisire screenshot su un dispositivo Android è utilizzare il suo hardware o i pulsanti fisici. È il metodo più conosciuto utilizzato per acquisire screenshot su Android grazie alla sua accessibilità e praticità.
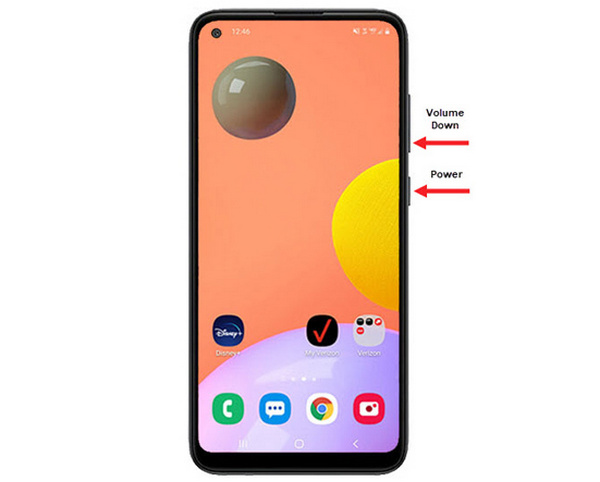
Passaggio 1. Per prima cosa, sul tuo telefono Android premi contemporaneamente i pulsanti Volume giù e Accensione. Tienili premuti finché lo screenshot non viene acquisito.
Passaggio 2. Successivamente, accedi al tuo screenshot dall’app Galleria.
Quindi, se i tuoi pulsanti hardware funzionano correttamente, puoi seguire questo metodo per acquisire facilmente screenshot sul tuo Android.
Metodo 2: utilizzo delle scorciatoie
Oggi alcuni dispositivi Android dispongono di una funzione di screenshot integrata nel pannello delle impostazioni rapide, utile per acquisire rapidamente uno screenshot.
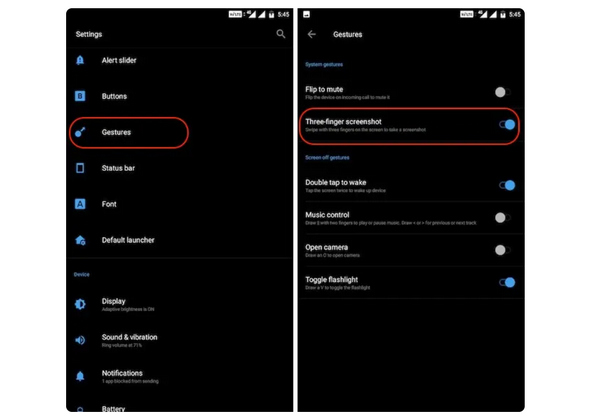
Passaggio 1. Per prima cosa, sul tuo telefono Android vai su Impostazioni. Scorri un po’ verso il basso e seleziona l’opzione Gesti o Pulsanti.
Passaggio 2. Da lì, cerca l’opzione Screenshot e attivala.
Passaggio 3. Infine, per fare uno screenshot usando questa funzione, scorri semplicemente verso il basso con tre dita sullo schermo che vuoi catturare.
Questo metodo è il migliore quando non vuoi premere i pulsanti per fare uno screenshot. Tuttavia, è necessario prima configurarlo nelle impostazioni. Quindi, se non lo conosci, segui semplicemente i passaggi precedenti.
Metodo 3: utilizzo dell'Assistente Google
Nel frattempo, se il tuo telefono Android dispone di un Assistente Google, puoi utilizzarlo per acquisire facilmente uno screenshot.
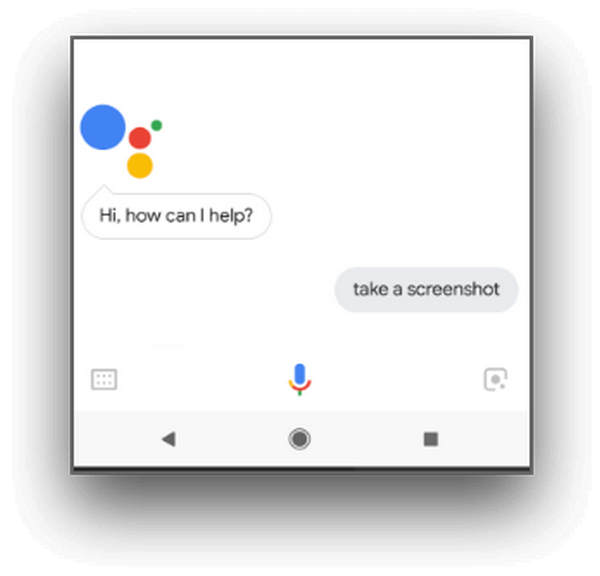
Passaggio 1. Per prima cosa devi attivare l’Assistente Google premendo il tasto Home oppure usando il comando vocale dicendo OK, Ehi Google.
Passaggio 2. Una volta attivato, dì Fai uno screenshot oppure Screenshot.
Nota: Dovrebbe apparire un’animazione oppure dovresti sentire un suono che indica che lo screenshot è stato acquisito.
Passaggio 3. Puoi accedere al tuo screenshot dall’app Galleria del telefono, nella cartella Screenshots.
Nota: Questo non è disponibile su tutti i dispositivi Android; se però il tuo telefono dispone dell’Assistente Google che permette di fare screenshot tramite comando vocale, ti basta seguire questi passaggi.
Parte 2: Come acquisire screenshot su tablet Android
Se possiedi un tablet Android e se ti stai chiedendo come fare uno screenshot utilizzandolo, ecco come fare:
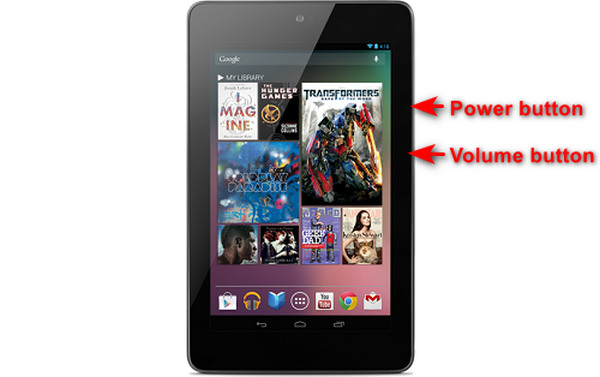
Passaggio 1. Sul tuo tablet Android, premi contemporaneamente il pulsante Accensione e il pulsante Volume giù e tienili premuti per qualche secondo.
Nota: Dovresti ricevere una notifica che conferma che lo screenshot è stato acquisito.
Passaggio 2. In seguito, accedi al tuo screenshot dal Galleria del tablet, nella cartella Screenshots.
Se questo metodo non funziona sul tuo tablet Android, la prossima cosa che devi fare è utilizzare app di terze parti dal Google Play Store per poter acquisire screenshot.
Parte 3: Come acquisire screenshot su Android con un computer
Se vuoi fare uno screenshot su Android usando un computer, magari perché nessuno di questi metodi funziona sul tuo telefono, il miglior strumento che puoi usare è FVC Screen Recorder. Questo strumento è progettato per catturare screenshot dello schermo di qualsiasi telefono che venga duplicato sul computer, quindi è perfettamente compatibile con i dispositivi Android. Usando la funzione Phone Recorder, gli utenti possono fare screenshot su Android tramite computer senza alcuna difficoltà. Inoltre, rispetto ad altri strumenti di terze parti disponibili oggi, questo software ha un’interfaccia molto intuitiva e facile da usare che non ti creerà alcun problema.
Passaggio 1. Per prima cosa, scarica e apri FVC Screen Recorder sul tuo computer.
Download gratuitoPer Windows 7 o versioni successiveDownload sicuro
Download gratuitoPer macOS 10.7 o versioni successiveDownload sicuro
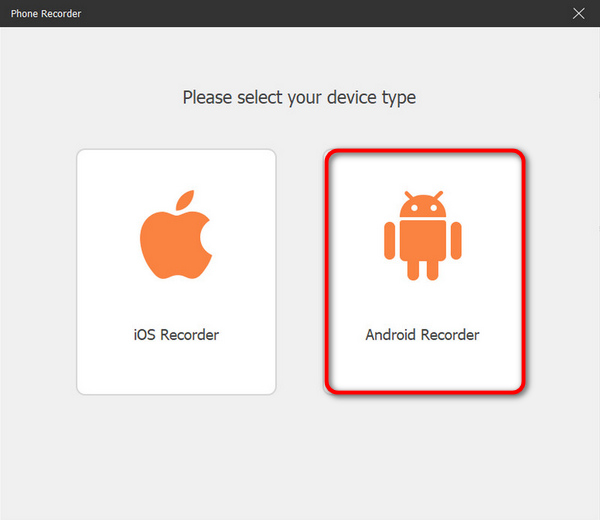
Passaggio 2. Ora fai clic sull’opzione Phone recorder. La troverai sul lato destro della finestra dello strumento, insieme alle altre 3 opzioni.
Passaggio 3. Successivamente, fai clic su Android Recorder.
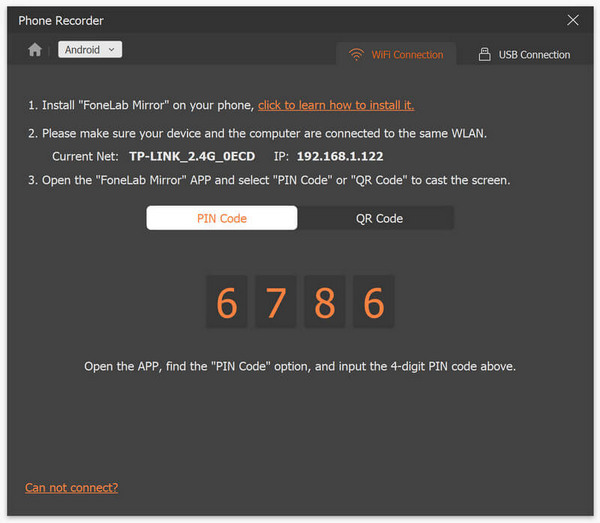
Passaggio 4. Per trasmettere lo schermo del tuo telefono, puoi farlo tramite Wi-Fi o USB. Tuttavia, se scegli il Wi-Fi, puoi facilmente proiettare il telefono sulla funzione Phone Recorder del programma sul tuo computer tramite Codice PIN o Codice QR.
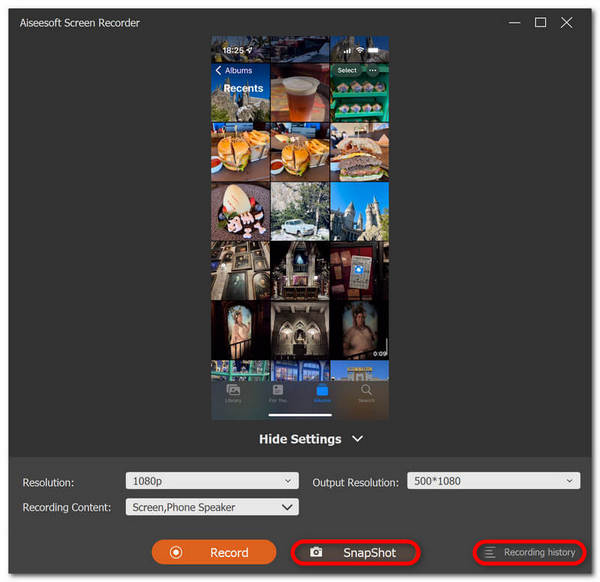
Passaggio 5. Quando il mirroring è finalmente attivato, per fare uno screenshot sul tuo computer dallo schermo Android ti basta cliccare sull’icona Snapshot.
Passaggio 6. Infine, accedi direttamente alle immagini degli screenshot nella cartella dedicata sul tuo computer Windows.
FVC Screen Recorder è uno strumento perfetto quando vuoi fare uno screenshot su Android con un computer. Usando la sua funzione di registrazione del telefono, tutto sarà facile per te, dall'impostazione di entrambi i dispositivi all'acquisizione di screenshot. Questo strumento ha tutto ciò di cui hai bisogno.
Parte 4: Come acquisire schermate a scorrimento su Android
Se desideri acquisire uno screenshot di una pagina web o di una lunga conversazione su Android in un colpo solo, invece di acquisire una serie di screenshot, procedi nel seguente modo:
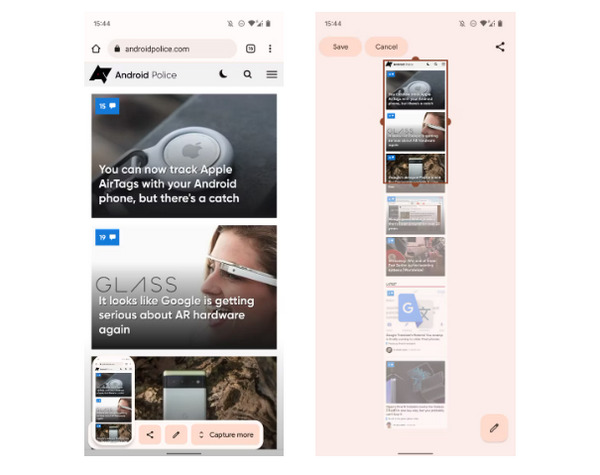
Passaggio 1. Per prima cosa, sul tuo telefono Android fai uno screenshot.
Passaggio 2. Poi tocca il pulsante Capture More dopo aver toccato l’anteprima dello screenshot.
Nota: Quando usi la finestra per estendere uno screenshot, il sistema mostra una lente di ingrandimento per una maggiore precisione.
Passaggio 3. Infine, tocca Salva per salvare il tuo screenshot.
Non farai più una serie di screenshot solo per mostrare l'intera pagina web o l'intera conversazione sugli screenshot.
Parte 5: domande frequenti sull'acquisizione di screenshot su Android
Posso cambiare la cartella degli screenshot predefinita sul mio dispositivo Android?
SÌ. Se lo desideri, puoi modificare la cartella degli screenshot predefinita. Tutto quello che devi fare è creare una nuova cartella o selezionare una cartella diversa per i tuoi screenshot sul tuo telefono Android.
Come fare uno screenshot su un telefono Android se i suoi pulsanti hardware non funzionano?
Innanzitutto, se ti stai chiedendo se puoi comunque fare uno screenshot se i pulsanti hardware del tuo telefono Android non funzionano, la risposta è sì. Quindi, in casi come questo, è meglio utilizzare uno strumento di registrazione dello schermo di terze parti come FVC Screen Recording, che consentirà agli utenti di acquisire screenshot sul proprio telefono Android semplicemente utilizzando la funzione di registratore del telefono.
Posso annotare o modificare gli screenshot sul mio dispositivo Android?
SÌ. Puoi annotare o modificare screenshot e foto sul tuo dispositivo Android. Questo può essere fatto direttamente dopo aver acquisito uno screenshot utilizzando le funzionalità di modifica integrate. Puoi aggiungere testo, disegni, frecce e forme ai tuoi screenshot, nonché ritagliare, ridimensionare e applicare filtri.
Conclusione
Ed ecco fatto. Fare screenshot sul tuo Android è ormai un gioco da ragazzi. Devi solo capire quale metodo è più adatto al tuo dispositivo e tutto funzionerà alla perfezione. Quindi scegli il metodo che preferisci e inizia a catturare i tuoi momenti memorabili con Android già da oggi!
-
 Come acquisire facilmente schermate su Mac con questa guida di base
 Vuoi fare uno screenshot sul tuo Mac ma non sai come fare? Ti abbiamo preso! Ti mostreremo i modi più semplici e veloci per eseguire screenshot e salvare immagini del tuo schermo.
-
 Come acquisire facilmente schermate su Mac con questa guida di base
 Vuoi fare uno screenshot sul tuo Mac ma non sai come fare? Ti abbiamo preso! Ti mostreremo i modi più semplici e veloci per eseguire screenshot e salvare immagini del tuo schermo.
-
 Cattura facilmente uno screenshot di un video con questa guida di base [2024]
 Scopri come acquisire facilmente screenshot dai video con questi semplici metodi. Segui la nostra guida e inizia subito a acquisire screenshot dei tuoi video preferiti!