


Panduan Terbaik untuk Menggunakan AI untuk Menajamkan Imej pada Komputer dan Mudah Alih
Pernahkah anda mempunyai imej yang kelihatan kusam dan tidak hidup? Mungkin foto anda kurang ketajaman dan kejelasan. Tetapi tahukah anda? Terdapat banyak aplikasi penajam imej yang boleh anda temui di internet. Anda tidak memerlukan penyelesaian desktop yang mahal untuk menajamkan imej anda. Anda akan menemui banyak aplikasi yang boleh membantu anda menajamkan imej hanya dengan mencarinya di internet. Namun, anda tidak perlu mencari lagi kerana kami menyenaraikan alat penajam imej terbaik dan mengajar anda cara menggunakannya. Baca artikel ini hingga habis untuk belajar cara menajamkan imej secara percuma dalam talian atau luar talian.

Bahagian 1. Bagaimana Menajamkan Imej Secara Dalam Talian Percuma tanpa Tanpa Daftar
Walaupun begitu, terdapat banyak aplikasi untuk menajamkan imej; adalah disyorkan agar anda menggunakan alat yang selamat dan paling mudah. Itulah sebabnya kami mencari pengasah imej terbaik dan menyenaraikannya hanya untuk anda. Selain itu, kami akan menunjukkan kepada anda cara menggunakan alat pengasah imej ini.
Tajamkan Gambar melalui FVC Free Image Upscaler
FVC Free Image Upscaler ialah alat terbaik untuk menajamkan imej. Jika anda sedang mencari alat AI untuk menajamkan imej, maka FVC Free Image Upscaler ialah alat yang anda perlukan. Selain itu, ia menyokong pelbagai format imej seperti PNG, JPG, JPEG dan BMP. Dengan teknologi AI (Kecerdasan Buatan), anda boleh menambah baik imej sehingga pembesaran 2x, 4x, 6x dan 8x. Apa yang lebih hebat tentang alat dalam talian ini ialah anda boleh mengaksesnya pada semua pelayar web, termasuk Google, Firefox dan Safari.
Tambahan pula, ramai pemula lebih suka menggunakan alat ini kerana ia mempunyai antara muka pengguna yang mudah. Selain itu, walaupun ia adalah aplikasi dalam talian, ia mempunyai proses penajaman yang cepat, menjadikannya mudah untuk digunakan. Anda juga boleh pratonton imej output anda sebelum memuat turunnya ke peranti anda. Jadi, jika anda ingin menggunakan alat ini untuk menajamkan imej anda, ikut arahan mudah di bawah.
Bagaimana untuk menajamkan imej menggunakan FVC Free Image Upscaler:
Langkah 1. Buka pelayar anda, dan cari FVC Free Image Upscaler pada kotak carian. Anda juga boleh klik pautan tersebut terus ke halaman utama mereka.
Langkah 2. Kemudian, klik butang Upload Photo pada antara muka utama untuk mengimport imej yang anda ingin tajamkan.
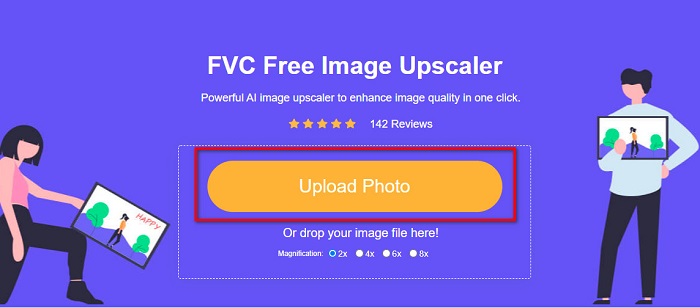
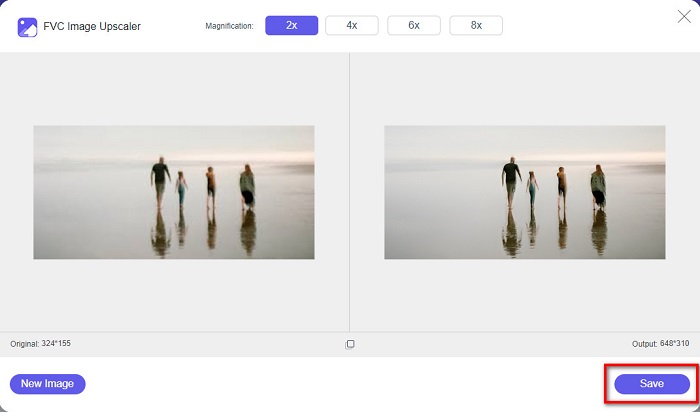
Langkah 3. Seterusnya, pilih pratetap magnification yang anda mahukan untuk imej anda. Anda boleh memilih antara pembesaran 2x, 4x, 6x dan 8x. Selepas itu, anda akan melihat pratonton output anda.

Langkah 4. Akhir sekali, untuk menyimpan imej output anda, klik butang Save. Aplikasi akan menyimpan imej anda ke folder komputer secara automatik dan pantas.
Dan itu sahaja! Semudah itu, anda boleh meningkatkan bahagian kabur imej anda dengan mudah dan menambah ketajaman padanya.
Tajamkan Imej dengan VanceAI
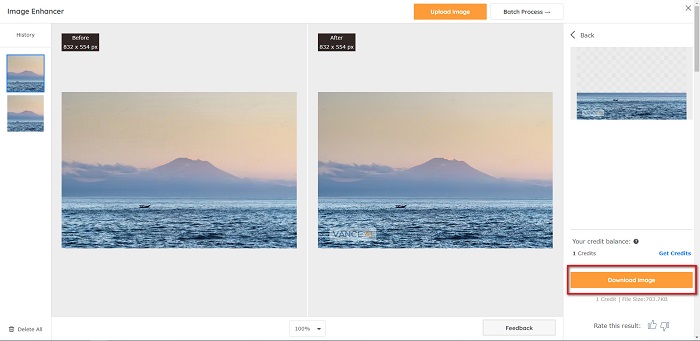
VanceAI ialah penajam imej dalam talian yang boleh anda gunakan jika anda mahu menajamkan imej atau menambah kejelasan padanya. Memang apabila anda menambah ketajaman pada imej, ia akan kelihatan lebih baik. Oleh itu, jika anda mahu menajamkan imej dengan cepat, VanceAI ialah alat yang patut digunakan. Selain itu, anda boleh menggunakannya secara percuma pada hampir semua pelayar web, seperti Google dan Safari. Ia juga akan menambah baik bahagian kabur pada imej anda secara automatik hanya dengan beberapa klik. Dengan antara muka yang mudah digunakan, pengguna baharu juga pasti boleh menggunakan aplikasi ini. Apa yang lebih menarik ialah ia menyokong format imej yang paling biasa, seperti JPG, JPEG dan PNG. Walau bagaimanapun, apabila anda menajamkan imej menggunakan VanceAI, ia akan meninggalkan tanda air pada imej anda.
Cara menajamkan imej kabur menggunakan VanceAI:
Langkah 1. Pada pelayar anda, cari VanceAI, kemudian pergi ke halaman utama mereka. Pada antara muka utama, klik butang Upload Image untuk memuat naik imej yang anda mahu tajamkan.
Langkah 2. Selepas memuat naik imej anda, klik butang Start to Process di sudut kanan bawah antara muka.
Langkah 3. Akhir sekali, anda akan melihat pratonton output imej anda. Kemudian, klik butang Download Image untuk memuat turun imej yang telah ditajamkan.
Tajamkan Imej Kabur menggunakan PineTools
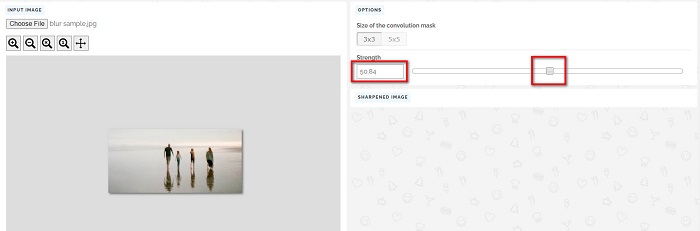
PineTools ialah satu lagi aplikasi penajam imej dalam talian yang boleh anda gunakan dengan mudah. Dengan antara muka yang ringkas, pengguna baharu juga boleh menggunakan alat ini untuk membaiki kualiti gambar. Anda boleh melaraskan kekuatan atau ketajaman imej menggunakan pilihan peluncur. Selain itu, anda boleh memilih saiz topeng konvolusi imej antara 3x3 dan 5x5. Apa yang lebih bagus tentang aplikasi dalam talian ini ialah anda boleh mengaksesnya pada hampir semua pelayar web, termasuk Google dan Safari. Kekurangan PineTools ialah ia mengandungi banyak iklan yang mungkin mengganggu anda semasa menajamkan imej. Walau bagaimanapun, ramai pengguna baharu tetap menggunakan alat ini kerana ia mudah digunakan.
Bagaimana untuk menajamkan imej kabur menggunakan PineTools
Langkah 1. Mula-mula, cari PineTools pada pelayar anda, dan klik halaman yang membawa ke laman webnya. Kemudian, klik butang Choose Files pada antara muka pertama untuk memuat naik foto yang anda mahu tajamkan.

Langkah 2. Kemudian, pada panel Sharpen, gerakkan mini box ke tahap kekuatan atau ketajaman yang anda inginkan untuk imej anda.
Langkah 3. Seterusnya, klik butang Sharpen di bawah antara muka untuk menajamkan imej anda. Jika anda mahu menyimpan imej output, klik format imej yang anda kehendaki, dan ia akan disimpan pada peranti anda.
Bahagian 2. Cara Menajamkan Imej pada Windows/Mac
Cara Menajamkan Imej dalam Photoshop
Adobe Photoshop ialah perisian penyuntingan imej yang berkuasa dan digunakan secara meluas yang digunakan oleh ramai individu di seluruh dunia. Ia adalah untuk pemula dan profesional, dan ia mengandungi banyak ciri yang membolehkan individu mengedit imej dengan tepat dan kreatif. Daripada pelarasan mudah kepada reka bentuk yang rumit, Photoshop membolehkan anda menghidupkan idea anda. Penapis penajamannya membantu dalam membuat gambar kelihatan lebih tajam dengan mengubah suai kontras dan butirannya. Mengasah foto dalam Photoshop adalah mudah dan tidak akan merosakkan yang asal kerana lapisan dan penapisnya yang canggih—sesuai untuk imej media sosial, fotografi komersial dan reka bentuk grafik.
Langkah 1. Klik Layers panel > Filter menu > Convert for Smart Filters.

Langkah 2. Pilih Sharpen > Unsharp Mask di bawah Filter.
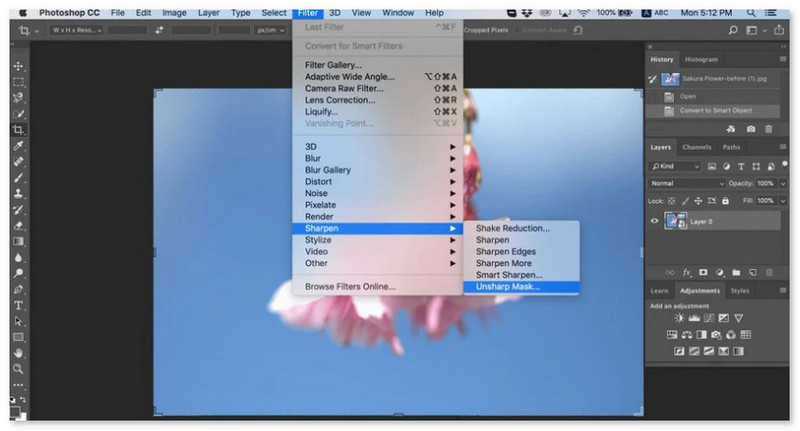
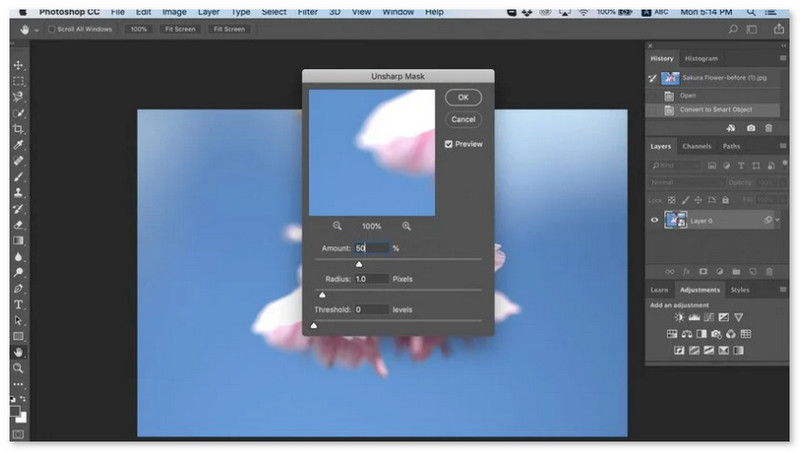
Langkah 3. Laraskan tetapan dan klik OK.
Bagaimana untuk Menajamkan Imej dalam GIMP
Tidak seperti aplikasi tajamkan imej yang dibentangkan di atas, GIMP ialah alat luar talian yang boleh anda gunakan jika anda ingin menajamkan imej anda atau meningkatkan kualitinya. Tambahan pula, ramai profesional menggunakan alat ini untuk menajamkan imej dan memperbaikinya. Ramai orang mengiktiraf alat ini sebagai alternatif kepada Adobe Photoshop. Ia menyokong hampir semua format imej, seperti PNG, JPG, JPEG, WebP dan BMP. Selain itu, ia mempunyai banyak ciri penyuntingan yang boleh anda gunakan, termasuk ubah suai foto, menukar gubahan dan banyak lagi. Tetapi kelemahan aplikasi ini ialah ia mempunyai antara muka yang sukar digunakan, menyukarkan pemula untuk menggunakannya.
Namun begitu, jika anda seorang profesional dalam banyak aplikasi penyuntingan foto, anda pasti akan mendapati GIMP alat yang hebat untuk menajamkan imej.
Bagaimana untuk menajamkan imej dalam GIMP:
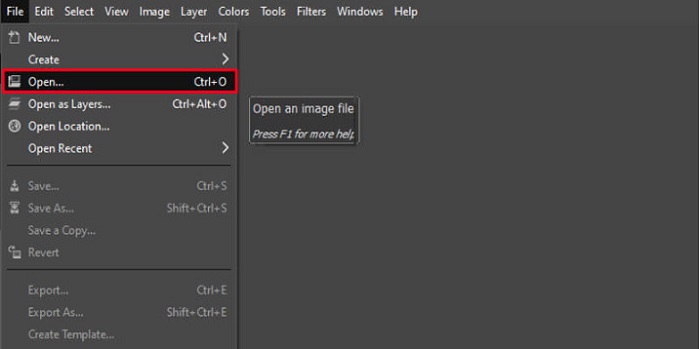
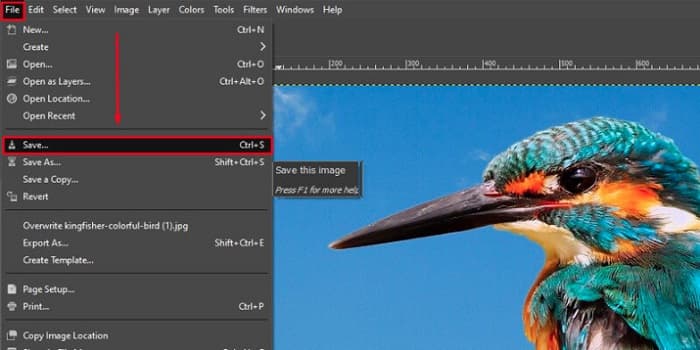
Langkah 1. Muat turun penajam imej GIMP pada peranti anda. Pada antara muka utama perisian, import imej anda dengan mengklik File > Open.
Langkah 2. Kemudian, buat lapisan pendua dengan mengklik butang Layer > Duplicate. Anda juga boleh menggunakan kekunci pintasan untuk menduplikasi lapisan. Tekan Shift + Ctrl + D dan lapisan akan diduplikasi.
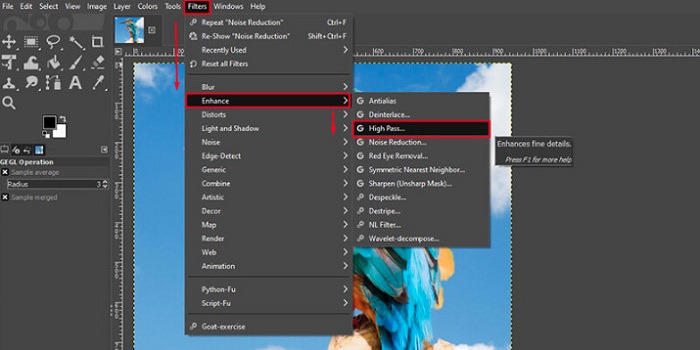
Langkah 3. Seterusnya, kita akan mengurangkan hingar dengan pergi ke Filter > Enhance > Noise Reduction. Kemudian, kita akan gunakan pilihan High Pass untuk menerapkan ketajaman yang diingini. Pergi ke Filters > Enhance > kemudian pilih pilihan High Pass.
Langkah 4. Selepas itu, kita akan gunakan pilihan Vivid Light untuk mencerahkan imej dan menambah butiran. Pergi ke Option dalam bahagian mod dan tukar Normal kepada Vivid Light.
Langkah 5. Cipta lagi satu lapisan pendua untuk sentuhan akhir, kemudian pergi ke Filters > Enhance > Sharpen (Unsharp Mask). Selepas itu, anda boleh melaraskan Radius, Amount dan Threshold imej anda. Kemudian, tekan Ctrl + S pada papan kekunci untuk menyimpan output.
Itu sahaja! Jika anda antara mereka yang mencari cara untuk menajamkan imej dengan GIMP, maka inilah panduan untuk anda. Hanya ikut langkah ini untuk meningkatkan kualiti imej menggunakan GIMP.
Bahagian 3. Cara Menajamkan Gambar pada iPhone/Android
Picwand AI Photo Editor ialah editor berkuasa yang membantu anda mengedit gambar anda dengan AI. Anda boleh mengedit terus di tapak web Picwand atau memuat turunnya pada peranti iPhone atau Android anda. Terdapat banyak ciri pintar seperti membesarkan gambar, memotong latar belakang, mengekstrak objek dan menjelaskan gambar, semuanya kerana AI canggih. Betulkan imej kabur, ubah suai gambar lama atau hapuskan perkara yang tidak diingini dengan Picwand dan selesaikan dengan cepat dan tepat. Antara mukanya yang ringkas menjadikannya sesuai untuk sesiapa sahaja tanpa mengira pengalaman mereka.
Langkah 1. Buka aplikasi dan pilih AI Image Upscaler.
Langkah 2. Muat naik imej dan pilih faktor pembesaran yang dikehendaki.
Langkah 3. Ketik ikon muat turun untuk mengeksport.

Bahagian 4. Soalan Lazim tentang Cara Menajamkan Imej Kabur
Adakah terdapat aplikasi untuk membetulkan gambar berpiksel?
Ya. Anda boleh menggunakan image upscaler untuk melaraskan piksel imej anda. Salah satu alat terbaik untuk membaiki gambar berpetak (pixelated) ialah PIXLR. Ia juga bagus untuk menghilangkan kabur pada imej anda.
Adakah GIMP percuma?
GIMP ialah aplikasi penyuntingan imej yang tersedia pada Windows, Mac dan Linux. Ia adalah aplikasi percuma untuk digunakan, di mana anda boleh menukar kod sumbernya. Walau bagaimanapun, anda mesti membeli apl itu untuk mengakses ciri penyuntingannya yang lain.
Bolehkah saya menajamkan imej menggunakan Canva?
Nasib baik, Canva mempunyai ciri di mana anda boleh menambah ketajaman pada imej anda. Jadi, Canva mungkin alat yang sesuai untuk anda jika anda mempunyai imej kabur.
Kesimpulannya
Kami berharap kami telah menjawab soalan anda tentang cara menajamkan imej. Terdapat 7 cara untuk melakukannya dengan baik dan pantas iaitu menggunakan Video Converter Ultimate, PhotoShop, VanceAI dan sebagainya. Selain itu, jika anda mencari alat yang benar-benar percuma, anda boleh alihkan perhatian anda kepada FVC Free Image Upscaler. Ia ialah alat dalam talian 100% yang percuma sepenuhnya.
-
 4 Pengurangan Kualiti Imej Teratas Anda Boleh Gunakan Dalam Talian & Luar Talian
 Pengurang kualiti imej ini boleh membantu anda mengurangkan kualiti imej anda atas sebab tertentu. Jika anda memerlukannya, anda baca artikel ini!
-
 Cara Rasmi untuk Meningkatkan Imej kepada 4k Dengan Tutorial Hands-On
 Untuk meningkatkan imej kepada 4k, anda memerlukan perisian pada peranti anda. Jika anda tidak mempunyainya maka anda perlu memilih alat yang kami sertakan di sini.
-
 Cara Mengedit Kejelasan Foto Menggunakan Apl Percuma & Berbayar
 Bagaimana untuk mengedit kejelasan foto? Soalan ini akan dijawab semasa anda membaca artikel ini dan kami akan menambah petua yang perlu anda ketahui!