


Cum să optimizați imaginea pentru web folosind cele 4 soluții [rapid]
Optimizarea unei imagini joacă un rol esențial pe web, deoarece reduce timpul de încărcare al site-ului. Conform studiilor recente, atunci când imaginile nu sunt bine optimizate, aproape jumătate dintre vizitatori părăsesc imediat site-ul, ceea ce înseamnă mai puțin trafic și venituri mai mici. Este necesar să înveți cum să faci acest lucru dacă vrei să reduci bufferingul și să creezi un site fiabil, pentru a crește traficul și, în consecință, veniturile. Implementarea este ușoară; cu ajutorul tutorialului pe care îl adăugăm despre cum să optimizezi imaginea pentru web în cel mai simplu mod posibil.

Partea 1. Cele mai bune și gratuite modalități de a optimiza imaginea online fără a sacrifica calitatea imaginii
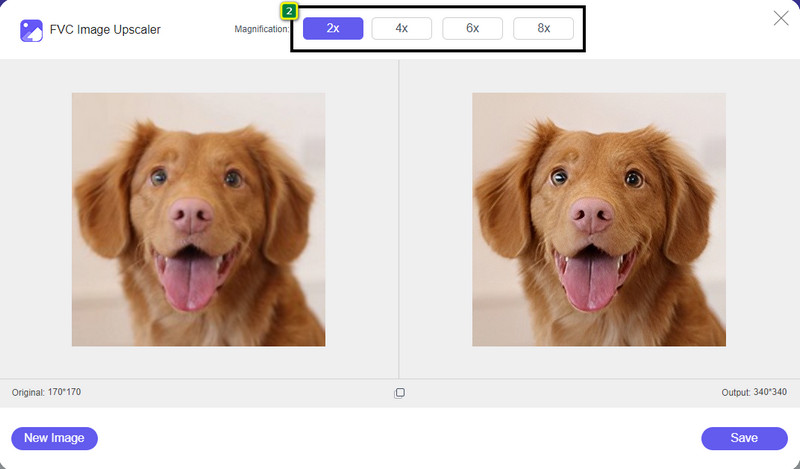
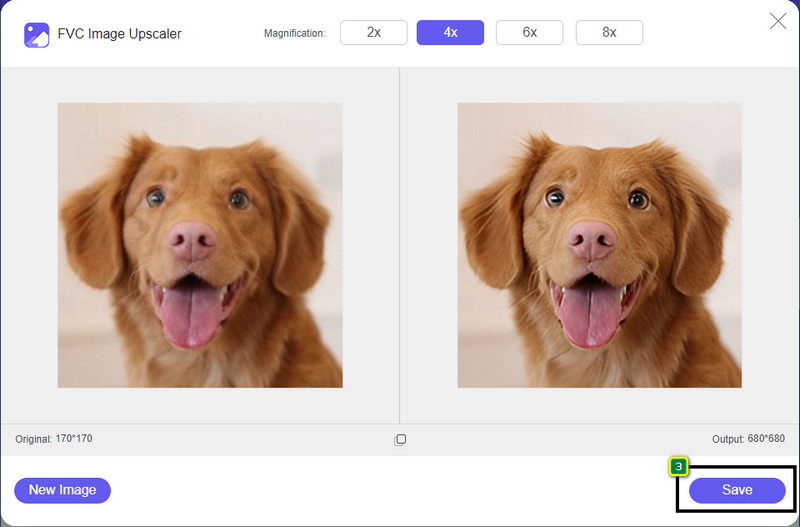
1. FVC Free Image Upscaler
Cauți o modalitate de a optimiza dimensiunea și raportul de aspect al imaginii pe care vrei să o folosești pe web? FVC Free Image Upscaler este un instrument capabil să optimizeze imaginile cu ajutorul tehnologiei sale AI puternice. Acest upscaler poate modifica dimensiunea unei imagini fără a compromite densitatea detaliilor (PPI), astfel încât să nu apară pierderi de calitate. De asemenea, acest instrument online poate repara imaginile neclare sau pixelate, identificând și corectând imperfecțiunile. Înainte de a exporta imaginea, există un panou de previzualizare pentru a compara versiunea de dinainte și de după. Așadar, dacă trebuie să redimensionezi imaginea pe care o ai pentru web, poți urma pașii pe care îi prezentăm mai jos.
Pasul 1. Deschide site-ul făcând clic pe acest link.
Pasul 2. Apasă pe Upload Image pentru a încărca poza pe care vrei să o redimensionezi aici.
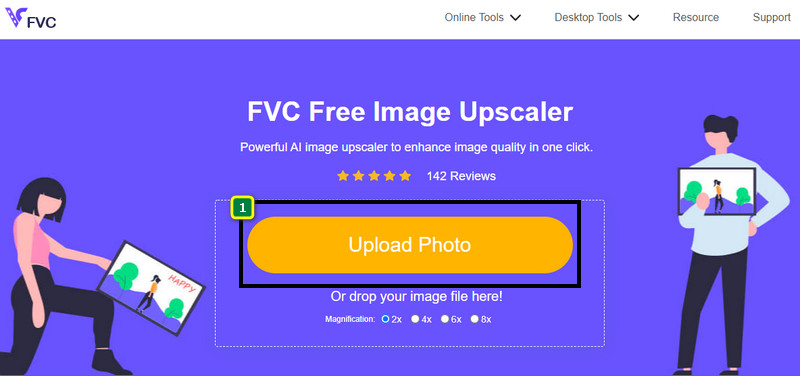
Pasul 3. Alege opțiunea pe care vrei să o aplici imaginii tale pentru a o redimensiona.
Pasul 4. Apasă pe Save pentru a descărca pe dispozitivul tău imaginea redimensionată.
2. FVC Free Image Compresor
FVC Free Image Compressor le permite tuturor să optimizeze imaginile pentru web prin reducerea dimensiunii fișierului. Îți permite să comprimi formate populare folosite pe diferite site-uri, precum PNG, JPG, SVG, BMP etc., fiecare mai mic de 5 MB. Cu ajutorul lui poți micșora dimensiunea mai multor imagini pentru ca acestea să se încarce mai rapid pe web. Este un instrument bazat pe inteligență artificială care oferă cel mai bun raport de comprimare, greu de obținut cu alte compresoare online.
Pasul 1. Vizitează site-ul oficial al instrumentului căutându-i numele sau poți da clic pe acest link pentru a-l accesa în browserul tău web.
Pasul 2. Trage și plasează fișierul de imagine pe care vrei să-l încarci aici sau poți face clic pe Upload Images; un folder va apărea pe ecran, dă clic pe fișierul pe care vrei să-l comprimi și apasă pe Open. Acest compresor poate micșora dimensiunea a peste 40 de imagini în același timp.
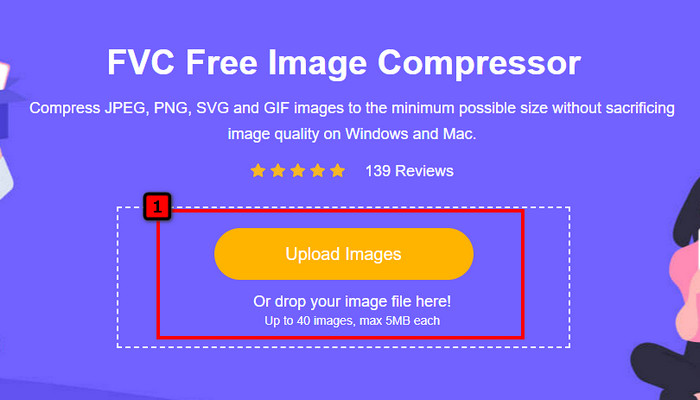
Pasul 3. Instrumentul va micșora automat dimensiunea fișierului imaginii pe baza algoritmului AI. După aceea, apasă pe Download pentru a exporta versiunea comprimată a imaginii.

3. TinyPNG
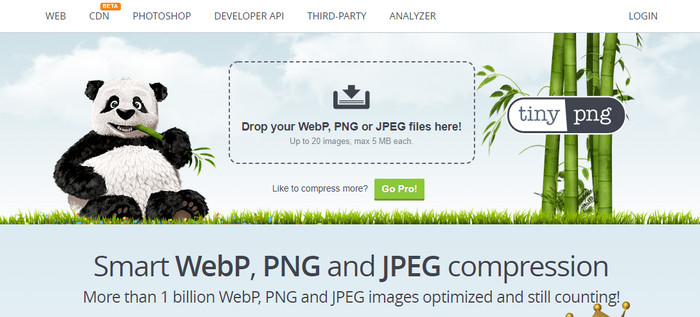
TinyPNG este un software online popular și de încredere pe care îl poți folosi pentru a optimiza imaginile. Este un compresor care reduce automat dimensiunea imaginii până la aproximativ 75% din dimensiunea originală. Poți încărca imaginile din Dropbox dacă nu sunt salvate local. Nu vei întâmpina dificultăți în a învăța cum să folosești acest compresor de imagini datorită modului simplu în care a fost conceput.
Deși este ușor de utilizat, formatul acceptat aici este doar PNG și JPG și nu există nimic altceva. Deci, dacă doriți să comprimați fișierele BMP, GIF, SVG și mai multe fișiere pe care le aveți, nu o puteți face aici, deoarece nu acceptă formatul menționat. Cu toate acestea, acesta este ușor de utilizat; poți urma pașii pe care îi adăugăm.
Pasul 1. Deschide motorul de căutare și găsește site-ul oficial TinyPNG.
Pasul 2. Fă clic pe pictograma de import pentru a încărca imaginea pe care vrei să o comprimi; acest instrument poate procesa 20 de imagini în același timp.
Pasul 3. Așteaptă finalizarea procesului de comprimare, apoi fă clic pe butonul Download pentru a salva versiunea comprimată a imaginii pe care o încarci aici.
Partea 2. Optimizați imaginea offline folosind software-ul profesional pe Windows și Mac
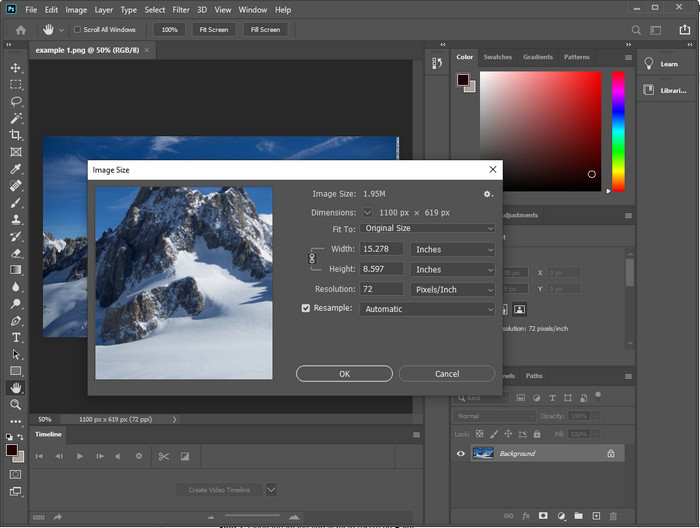
Photoshop este capabil să efectueze ambele sarcini menționate în prima parte: redimensionarea și comprimarea imaginilor. Deși acest instrument nu a fost creat special pentru această sarcină, poate totuși să o îndeplinească, ca parte a funcțiilor sale avansate suplimentare. Cu el poți începe să adaugi filtre sau să editezi imaginea în funcție de ideile tale. Singura limitare este imaginația ta și faptul că acest software poate fi dificil de folosit.
Spre deosebire de instrumentul online pe care l-am menționat, nu veți avea nevoie de o conexiune la internet pentru a utiliza acest software după ce l-ați descărcat pe dispozitiv. Cu toate acestea, va trebui să achiziționați software-ul pentru a-l utiliza, așa că, dacă doriți să vedeți cum să optimizați imaginea pentru web pe Photoshop, există o instrucțiune pe care o adăugăm mai jos, care vă permite să reduceți și să redimensionați imaginea.
Pasul 1. Descarcă și lansează software-ul pe desktop pentru a începe să-l folosești.
Pasul 2. Încarcă imaginea pe care vrei să o editezi, apoi mergi la meniul Image și fă clic pe Image Size. Modifică dimensiunile conform specificațiilor tale, apoi fă clic pe OK pentru a salva modificările. Dacă nu vrei să schimbi raportul de aspect sau dimensiunea imaginii, este mai bine să sari peste pasul 2.
Pasul 3. Apasă pe meniul File și selectează Save as. O fereastră de dialog va apărea pe ecran. Alege dimensiunea de fișier pe care vrei să o obții, apoi apasă pe OK pentru a începe exportul imaginii.
Partea 3. Întrebări frecvente despre cum să optimizați imaginea pentru web
Care este cel mai bun format de imagine pentru web?
Mai bine folosiți o imagine cu extensia PNG și JPG, deoarece se știe că aceste formate sunt bine optimizate pe diferite site-uri web. Cu toate acestea, uneori va trebui să-l optimizați reducând sau redimensionând imaginea, care este locul în care instrumentul pe care l-am adăugat aici a venit să vă ajute.
Ceea ce aduce mai multe detalii pe web; PNG sau JPG?
Ambele imagini raster funcționează bine pe site; se încarcă mai repede și optimizează site-urile web. Cu toate acestea, există încă diferențe între aceste două formate, cum ar fi atunci când doriți să utilizați fotografie pură fără transparență pentru web, formatul dvs. de plecare trebuie să fie JPG sau JPEG. Dar dacă doriți să aveți transparență de 1 bit pe web cu detalii deosebite, PNG este aici pentru a vă ajuta.
Schimbarea dimensiunii imaginii face calitatea proastă?
Dacă comprimi excesiv o imagine, este posibil ca aceasta să aibă o calitate slabă, însă acest lucru poate fi evitat dacă nu exagerezi cu comprimarea. Odată ce comprimi imaginea, este mai bine să îi reduci dimensiunea cu aproximativ 45% până la 70% pentru a evita pierderea vizibilă de calitate. Totuși, poți folosi un instrument de îmbunătățire a imaginilor pentru a crește calitatea imaginii.
Concluzie
Acum că știi să-ți optimizezi imaginea, mai bine o faci astfel încât să câștigi mai multe vizite și să atragi multă atenție. Cu tutorialul pe care îl adăugăm mai sus, suntem siguri că o poți face ușor și rapid fără a afecta calitatea. Dacă trebuie să redimensionați sau să comprimați, vă recomandăm să utilizați produsul FVC pe care îl includem aici pentru a rezolva problema fără a descărca niciun program de instalare.
-
 Faceți fotografii HD cu cele mai bune moduri pe care le puteți găsi pe piață
 Te întrebi sau vrei să faci fotografii HD? Puteți urma tutorialul pe care îl adăugam mai jos cu diferite soluții pe care le puteți utiliza.
-
 Top 4 reduceri de calitate a imaginii pe care îi poți folosi online și offline
 Acești reduceri de calitate a imaginii vă pot ajuta să reduceți calitatea imaginii din anumite motive. Dacă ai nevoie de unul, citești acest articol!
-
 Modalități oficiale de a îmbunătăți imaginea la 4k cu un tutorial practic
 Pentru a mări imaginea la 4k, veți avea nevoie de un software pe dispozitiv. Dacă nu aveți unul, va trebui să selectați instrumentul pe care îl includem aici.