


İpuçları ve Püf Noktaları ile Bir Dakikadan Daha Kısa Bir Sürede Fotoğrafın Netliği Nasıl Düzenlenir
Her fotoğraf tutkunları, çektikleri görüntünün diğer fotoğrafçıların kareleri arasında en iyi görünen fotoğraf olmasını ister. Farklı tekniklerle bunu kolayca yapabilir, keskinleştirebilir ve yoğun renkler ekleyerek görüntüyü daha detaylı hâle getirebilirsiniz. Peki ya görüntüye hafif bir çıtırlık katmak isterseniz? Ya da her şeyi yumuşatmak mı istersiniz? İşte bu noktada devreye berraklık (clarity) girer. Clarity ile, görüntünüzde orta tonları ve kontrastı ayarlayarak görünümü etkileyici kılan o ekstra vurguyu verebilirsiniz. Bunu nasıl yapacağınızı öğrenmek ister misiniz? Öyleyse buraya eklediğimiz bilgileri okuyun ve fotoğrafların netliğini (clarity) nasıl düzenleyeceğinizi öğrenin.

Bölüm 1. Görüntüleri Yükselterek Çevrimiçi Fotoğraf Netliğini Ücretsiz Olarak İyileştirme
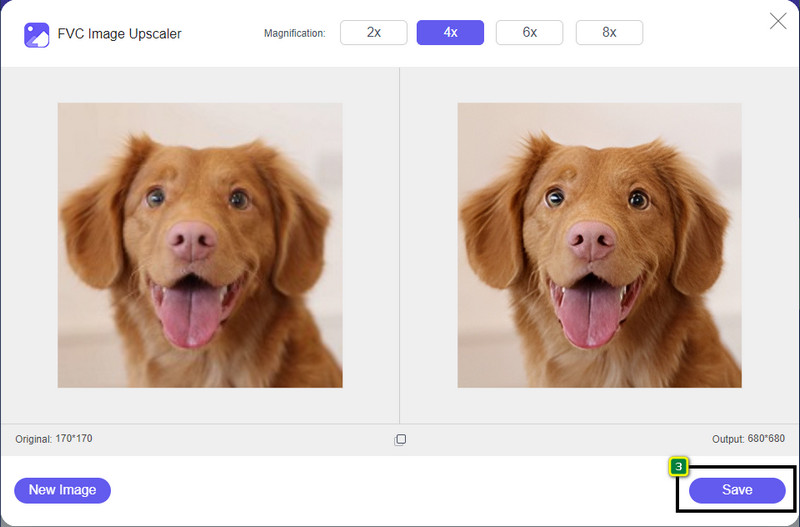
FVC Free Image Upscaler, masaüstünüze herhangi bir dosya indirmeden tarayıcınızda kullanabileceğiniz en iyi fotoğraf netleştirme (clarity) uygulamasıdır. Bu uygulama, fotoğraf kalitesini düzeltebilir ve daha önce hiç görmediğiniz kadar etkileyici bir şekilde fotoğraf kalitesini artırır. Teknik konularda çok bilgili olmasanız bile, bu yazılımı nasıl kullanacağınızı bir dakikadan kısa sürede çözebilirsiniz. Bu yazılımı denemek isterseniz, aşağıya eklediğimiz öğreticiyi (tutorial) takip edebilirsiniz.
Adım 1. Bu upscaler’ın resmi web sitesine gitmek için bu bağlantıya tıklayın.
Adım 2. Netliğini artırmak istediğiniz görüntüyü içe aktarmak için Upload Image düğmesine tıklayın. Ardından bir klasör açılacak; buradan dosyayı bulup Open düğmesine basın.

Adım 3. Görüntü yüklendikten sonra, görüntünüzün netliğini artırmak için kullanmak istediğiniz seçeneği belirleyin.

Adım 4. Netliği iyileştirdikten sonra, burada geliştirdiğiniz görüntüyü indirmek için Save düğmesine tıklayın.
Bölüm 2. Photoshop'ta Fotoğrafların Netliği Nasıl Hızla Artırılır
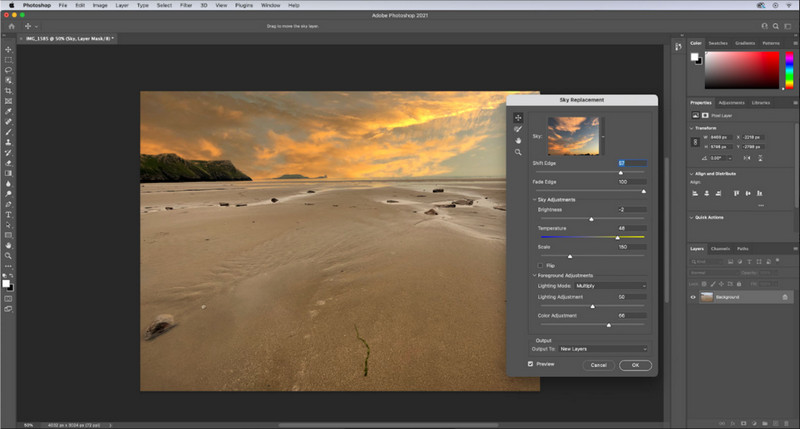
Cihazınızda profesyonel bir araç istiyorsanız Adobe Photoshop, indirmeniz gereken fotoğraf netleştirme (clarity) uygulamasıdır. Bu araç, görüntüyü daha iyi göstermek için seçeneklerini ayarlayarak, fotoğrafınıza bakacak insanları etkilemenizi sağlayan kapsamlı düzenleme özellikleri sunar. Bu yazılımın sunduğu performansı sağlayabilecek yazılım pek yoktur. Görüntünüzün netliğini artırmak için kontrastı ve orta tonları ayarlamanız gerekir. Bunu nasıl yapacağınızı bilmek ister misiniz? Aşağıda verilen öğreticiyi uygulayın.
Adım 1. Adobe Photoshop’u indirin ve yazılımı açın. Görüntüyü yüklemek için File ve ardından Open seçeneğine tıklayın.
Adım 2. Üst kısımdan Image menüsüne tıklayın, altından Adjustment seçeneğini, ardından Brightness/Contrast seçeneğini seçin.
Adım 3. Ekranınızda bir ileti kutusu belirecektir; görüntünün kontrastını, kaydırıcıyı sürükleyerek değiştirin. Kontrastı artırmak veya azaltmak için kaydırıcıyı dilediğiniz gibi hareket ettirebilirsiniz; bu da netliği etkileyebilir.
Adım 4. Görüntünüzde yaptığınız değişiklikleri kaydetmek ve otomatik olarak uygulamak için OK düğmesine basın.
Bölüm 3. Bir Dakikadan Kısa Bir Sürede Adobe Lightroom'da Bir Fotoğrafın Netliği Nasıl Artırılır
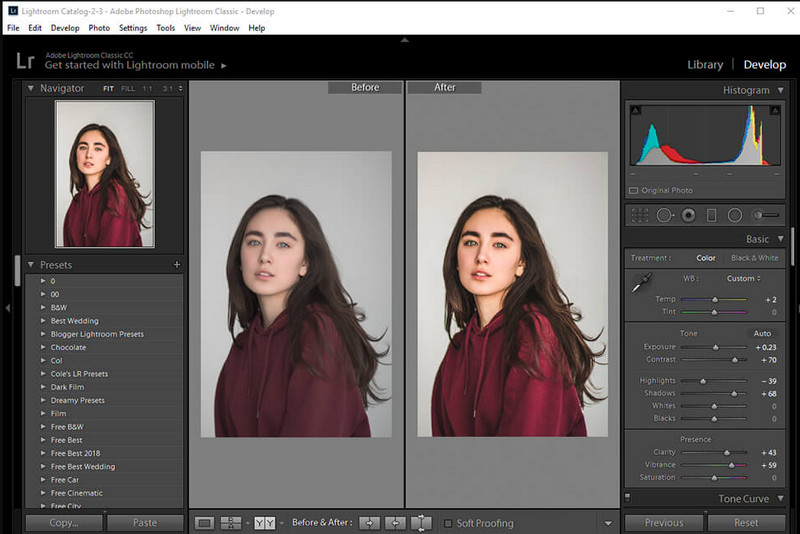
Photoshop’un aksine, Adobe Lightroom, görüntü kalitesini artırmak ve netliği yükselttiğinizde fotoğrafınızdaki renkleri daha detaylı, düşürdüğünüzde ise daha yumuşak hâle getirmek için kullanabileceğiniz güçlü bir clarity seçeneğine sahiptir. Photoshop ve Lightroom, Adobe tarafından geliştirildiği için profesyonel bir çıktı alacağınız neredeyse 0% garantilidir. Fotoğraflara clarity eklemek ve ham görüntünün rengini iyileştirmek için aşağıdaki adımları takip edebilirsiniz.
Adım 1. Adobe’nin resmi yazılımını indirin ve kurun, ardından yazılımı başlatıp istediğiniz görüntüyü yükleyin.
Adım 2. Görüntünüze clarity eklemeye başlamak için seçeneklerin açılacağı Develop modülünü açın.
Adım 3. Presence (Varlık) bölümünün altında, clarity sliderını istediğiniz yüzdeye doğru hareket ettirin. Görüntünüzü orijinalinden daha detaylı ve daha iyi göstermek için diğer ayarları da dilediğiniz gibi düzenleyebilirsiniz.
Bölüm 4. Fotoğrafların Netliğini Düzenlemeyle İlgili Bilmeniz Gereken İpuçları
Artık web'de ve çevrimdışı olarak kullanabileceğiniz en iyi fotoğraf netliği uygulamasına sahip olduğunuza göre, aşağıdaki bilgiler size bir görüntünün netliğini ayarlama konusunda ipuçları verecektir.
İpucu 1. NETLİK KONUSUNDA AŞIRI BOŞALTMAYIN!
Bununla ne demek istiyoruz? Bu araçlar, görüntünüze çok fazla netlik katmaz, çünkü grenli bir görüntüye dönüşecektir. Herkes grenli bir görüntüye sahip olmaktan hoşlanmaz, bu yüzden çok fazla büyütmeyin. Ayrıca, görüntünün bulanık görünmesini önlemek için netliği maksimum potansiyeline düşürmeyin.
İpucu 2. Kontrast ve Netlik Aynı Değildir
Kontrast ve netlik genellikle aynı şey olarak bilinir, ancak değildir. Bir görüntünün netliğini ayarlarsanız, o görüntünün orta tonunu ve ardından belirli bir bölgeyi ayarlarsınız. Kontrast kullanırsanız, genel görüntüyü değiştirir, vurgular ve gölgelersiniz.
İpucu 3. Eklemeden Önce Görüntülerdeki Netliğin Amacını Bilin
Birçok görüntü düzenleyici, netlik, pozlama, gama ve daha pek çok şey gibi görüntüyü iyileştirmek için ince ayar yapabilecekleri bu seçenekleri inceledi. Bu nedenle, yeni bir kullanıcıysanız, görüntüye uygulamadan önce netliğin amacını bilmek daha iyidir. Ayrıca, netlik hakkındaki bilgileri okursanız, görüntünün daha iyi görünmesi için ince ayar yapmanın doğru seçenek olup olmadığını anlayacaksınız. Değilse, netlik eklemeyin.
İpucu 4. Netliği Büyük Ölçekte Kullanın
Küçük ölçekli bir görüntüyle uğraşıyorsanız, netliğini değiştirmek yerine keskinleştirmek daha iyidir. Fotoğrafınızın kenarlarını daha kolay ve daha iyi keskinleştirmenize yardımcı olacaktır. Ancak sahip olduğunuz görüntüyü büyük ölçekli olarak değerlendirirseniz, netliği kullanmanız daha iyi olur.
Bölüm 5. Fotoğrafların Netliği Nasıl Düzenlenir Hakkında SSS
Netlik ekledikten sonra resmim neden grenli oluyor?
Netliği 100%'ye ayarladıysanız, grenli bir görüntü elde etme olasılığı şüphesiz ki olacaktır. Yüzdeyi 40%'den 70%'ye ayarlamanızı öneririz; tercihinize göre daha yükseğe çıkabilirsiniz.
Fotoğraflara netlik katmak için bir düzenleyiciye ihtiyacım var mı?
Gerçekten de, resminize netlik katmak için bir yazılım indirmeniz veya kullanmanız gerekecektir. Birçok yazılım, netliği ayarlayabileceğini söylüyor, ancak bunlara kanmayın. Görüntünüzün netliğini değiştirip eskisinden daha detaylı hale getirebileceklerini kanıtladığımız için bu yazıda eklediğimiz yazılımı kullanabilirsiniz.
Netleştirmek için görüntüye kontrast ekleyebilir miyim?
Evet, daha net ve daha prezentabl hale getirmek için görüntüye kontrast ekleyebilirsiniz. Ancak tüm resmi etkilemek yerine daha kesin olmak istiyorsanız, netliğini ayarlamak daha iyidir.
Sonuç
Bu makalenin, eklenen farklı araçlar ve adımlarla fotoğraflardaki netliği nasıl düzenleyeceğinizi öğrettiğini umuyoruz. Harika bir iş çıkardığımızı düşünüyorsanız, bize aşağıdan 5 yıldız verirseniz çok seviniriz. Bu makaleyi okuduğunuz için teşekkür ederiz!
-
 Görüntünün Çözünürlüğü Nasıl Artırılır [Geliştirmenin 5 Yolu]
 Resminizin çözünürlüğü düşük olduğu için sorun mu yaşıyorsunuz? Artık endişelenme! Burada size görüntünün çözünürlüğünü nasıl artıracağınızı öğreteceğiz.
-
 En İyi Geliştiricilerle iPhone Fotoğraf Çözünürlüğünü Daha İyi Hale Getirin
 iPhone fotoğraf çözünürlüğünü iyileştirmeye mi ihtiyacınız var? Pekala, bu yazıda kullanabileceğiniz en iyi araçları ve bilmeniz gereken diğer püf noktalarını ele alıyoruz!
-
 Çevrimiçi ve Çevrimdışı Eski Fotoğraf Restorasyonu [Kolay Adımlar]
 Eski bir fotoğrafı geri yüklemek mi istiyorsunuz? Bu araçlarla eski fotoğraf restorasyon sürecini bileceksiniz. En basit yöntemleri öğrenmek için bu gönderiyi okuyun.