


Jak zmenšit velikost videa v Premiere Pro? Vhodné metody použití
Komprese videa má řadu výhod, které mohou výrazně zlepšit váš zážitek ze sledování. Zmenšuje a komprimuje velikost souboru videa, takže je rychlejší nahrát, stáhnout a sdílet. Tato technika je užitečná, pokud máte omezený úložný prostor nebo pomalé připojení k internetu. Kromě toho může komprimace videa zlepšit kvalitu odstraněním nepotřebných dat a zlepšením jeho jasnosti. Tato funkce znamená, že si můžete vychutnat zážitek ze sledování ve vyšší kvalitě, aniž byste museli obětovat rychlost nebo úložný prostor.
Jedním z nejznámějších nástrojů pro kompresi videa je Adobe Premiere Compress Video. Tento nástroj uživatelům umožňuje nejjednodušším způsobem zmenšit velikost souboru jejich videa. V tomto článku či příspěvku si rozebereme metody a alternativy tohoto nástroje při zmenšování videosouborů.

Část 1. Komprimace videa s premiérou
Adobe Premiere Pro je editační software, který je založen na časové ose a nelineární při editaci video souborů. Má mnoho funkcí pro úpravu videa, ale protože diskutujeme o kompresi videa, zaměříme se na tyto funkce a související funkce. Adobe Premiere Pro má vestavěný Media Encoder, který umožňuje komprimovat vaše videa bez obětování kvality. Můžete si vybrat nebo vybrat z řady předvoleb nebo upravit nastavení. Jeho možnost kódování Bitrate vám umožní specifikovat data použitá za sekundu ve vašem videu. V závislosti na vašich potřebách si můžete vybrat z kódování s variabilním nebo konstantním datovým tokem. A konečně, Adobe Premiere Pro má také řadu nastavení exportu, která vám umožní dále přizpůsobit kompresi videa. Můžete si vybrat z různých formátů souborů, rozlišení a dalších. Podívejte se na jednoduchý průvodce níže, kde se dozvíte, jak komprimovat video pomocí tohoto editoru.
Krok 1. Protože budeme mluvit o komprimování videosouborů v Premiere Pro, přeskočíme v těchto krocích některé části úprav. Předpokládáme, že jste již své video upravili a pomocí nástroje vytvořili soubor. V tomto návodu se zaměříme především na proces exportu.
Krok 2. Otevřete okno exportu kliknutím na nabídku File. V rozbalovacích možnostech zvolte funkci Export. Poté přejděte na možnost Media, abyste se dostali k nastavení Export.
Krok 3. Zde najdete různé možnosti, jak v Premiere Pro zmenšit velikost videosouboru. Můžete použít efektivní formáty kodeků, abyste video uložili do menších souborů s lepšími video kodeky.
Krok 4. Případně můžete nastavit datový tok videa na VBR, 2 Pass. Můžete také změnit rozlišení videa a cílový datový tok, abyste snížili velikost souboru. Nakonec stiskněte nebo klikněte na tlačítko Export a uložte videosoubor.

Část 2. Bonus: Jak komprimovat zvuk v premiéře
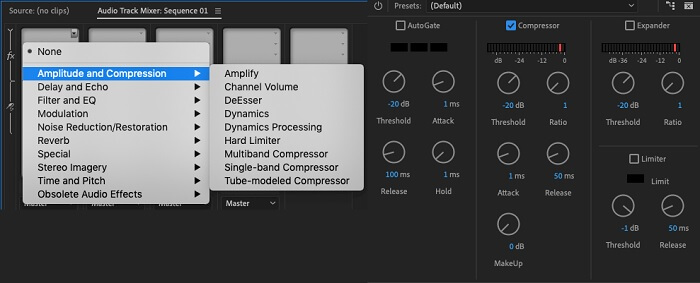
Další funkcí Adobe Premiere Pro je komprimace zvukových souborů v jeho systému. Dodává se s množstvím zvukových směšovačů, kompresních funkcí a kodeků pro zmenšení velikosti vašeho zvukového souboru. Chcete-li zjistit, jak komprimovat zvuk Premiere Pro, můžete se podívat na metody uvedené pod tímto stručným popisem.
Krok 1. Chcete‑li komprimovat zvuk v editoru videa Premiere, vyberte zvukový klip na časové ose v dolní části nástroje. Přejděte na panel nebo kartu Effects a vyhledejte efekt Loudness Radar. Efekt přetáhněte a pusťte na zvukový klip.
Krok 2. Na panelu Effect Controls upravte Target Loudness na požadovanou úroveň. Tato funkce nastaví celkovou hlasitost klipu. Menší rozsah povede k větší kompresi, zatímco větší rozsah povede k menší kompresi.
Krok 3. Pro ještě jemnější doladění komprese použijte ovladače Threshold a Ratio. Threshold (prahová hodnota) určuje bod, ve kterém začne být zvuk komprimován, zatímco Ratio (poměr) určuje míru aplikované komprese.
Krok 4. Jakmile nastavíte parametry podle svých představ, přehrajte si zvukový klip, abyste se ujistili, že zní vyváženě a přirozeně. Nakonec exportujte komprimovaný zvuk tak, že přejdete do nabídky File a zvolíte tlačítko Export. Poté přejděte na kartu Media, vyberte požadovaná nastavení exportu a klikněte na Export pro uložení komprimovaného zvukového souboru.
Část 3. Nejlepší alternativy k premiéře pro kompresi videa a zvuku
1. Video Converter Ultimate
Když se Adobe Premiere Pro nepodaří zkomprimovat vaše video a zvuk na požadovanou velikost souboru, použijte Video Converter Ultimate. Tato aplikace obsahuje velké množství funkcí, které mohou uživatelé využít ke zmenšení velikosti videosouborů. Díky pokročilému zrychlovacímu algoritmu či technologii dokáže tento nástroj komprimovat videosoubory až 30× více než běžný kompresor videa. Navíc je vybaven posuvníkem, pomocí kterého mohou uživatelé nastavit, o kolik procent chtějí velikost videosouboru zmenšit.
Další metodou, jak snížit audio a video soubory v této aplikaci, je změnit formát kvality, rozlišení a datový tok souboru. Bonusová funkce také přichází s editorem metadat, ve kterém mohou uživatelé přejmenovat soubor kromě původního videa. Zkontrolujte prosím níže uvedenou uživatelskou příručku.
Krok 1: Stáhněte si Video Converter Ultimate
Prvním krokem ke kompresi videa pomocí Video Converter Ultimate je nainstalovat aplikaci do svého počítače. Můžete kliknout na ikonu Free Download uvedenou níže a stáhnout instalační soubor. Poté jej spusťte v počítači a aplikaci nainstalujte. Po instalaci ji otevřete.
Stáhnout zdarmaPro Windows 7 nebo novějšíBezpečné stažení
Free DownloadPro macOS 10.7 nebo novějšíBezpečné stažení
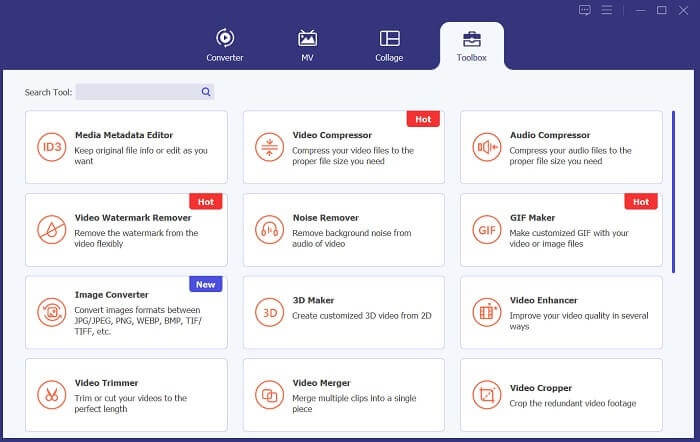
Krok 2: Otevřete Video Compressor
Jakmile máte v počítači otevřený Video Converter Ultimate, přejděte na možnost Toolbox. Vyhledejte možnost Video Compressor a spusťte tuto funkci. Importujte své soubory kliknutím na ikonu + v rozhraní.
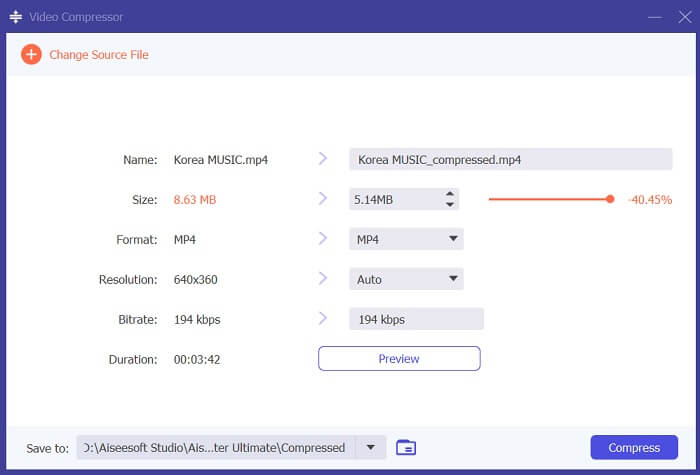
Krok 3: Komprimujte videosoubory
Nakonec upravte a pozměňte některé video parametry, abyste komprimovali svůj videosoubor. Posuňte ukazatel na pravé straně velikosti souboru nebo použijte jiné metody, jako je změna rozlišení, formátu a datového toku (bitrate). Klikněte na možnost Compress, abyste soubor uložili a zmenšili velikost videa ve svém počítači.
2. FVC Video kompresor online
Chápeme, že někdy nepotřebujete rozsáhlé nástroje ke kompresi videosouboru. Instalace různých programů nemusí být pro vás; proto doporučujeme FVC Video Compressor Online. Tato webová aplikace nabízí velmi přímočarý postup komprese videí. Umožňuje uživatelům komprimovat a zmenšovat videosoubory ve 4K kvalitě, v HD rozlišení a dalších formátech. Zároveň neohrožuje kvalitu videa. I když je video ve 4K, stále můžete zmenšit velikost souboru. Co se týče všestrannosti, tento online nástroj vyniká. Můžete komprimovat videosoubory v různých formátech, včetně MP4, FLV, MKV, MOV, AVI, WebM, 3GP, RMVB a mnoha dalších. Níže naleznete kompletní návod na komprimování videí.
Krok 1: Otevřete nástroj
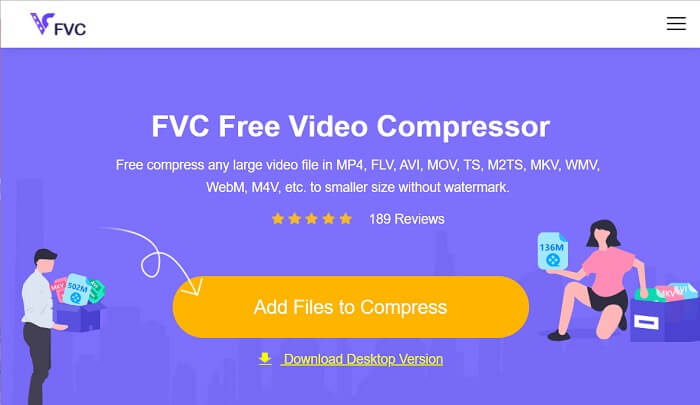
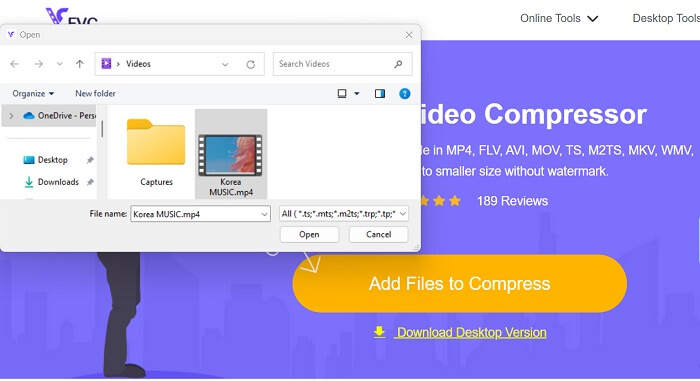
Prvním krokem ke kompresi videa online je otevřít tento nástroj ve webovém prohlížeči. K jeho vyhledání můžete použít Chrome, Firefox, Microsoft Edge, Safari a další prohlížeče. Spusťte nástroj v prohlížeči a klikněte na Add Files to Compress, abyste nainstalovali spouštěč. Tento krok je pouze pro nové uživatele; pokud již spouštěč online aplikace máte, přejděte k dalšímu kroku.
Krok 2: Importujte soubory do aplikace
Klikněte na Add Files to Compress, abyste otevřeli složku svého zařízení. Vyhledejte video, které potřebujete komprimovat, a klikněte na Open, čímž jej naimportujete nebo přidáte do online nástroje. Počkejte, dokud webová aplikace neanalyzuje vaše soubory.
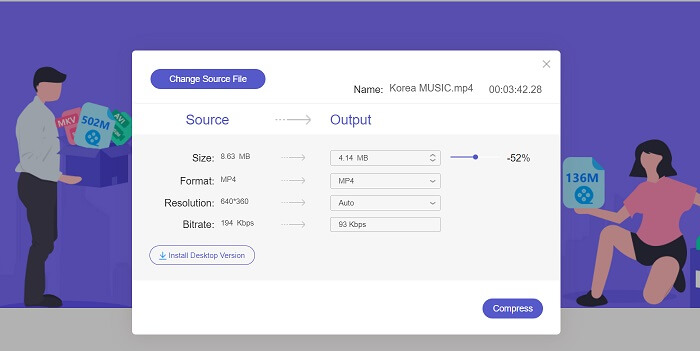
Krok 3: Komprimujte a exportujte soubory
Nakonec je třeba upravit a pozměnit různé video parametry, abyste snížili velikost souboru ve svém zařízení. Můžete také posunout procentuální ukazatel a zmenšit tak velikost videa o určité procento. Klikněte na tlačítko Compress, čímž spustíte proces a vyexportujete komprimované soubory.
Další čtení:
2 způsoby, jak komprimovat video pro YouTube
Osvědčené postupy pro vytváření zpomalených videí v Adobe Premiere
Část 4. Nejčastější dotazy O aplikaci Adobe Premiere Pro
Jak změním velikost videa v Premiere Pro?
Abyste mohli komprimovat video v Premiere, můžete použít funkci Export Settings. Vyberte videosoubor nebo klip na časové ose a poté přejděte na File > Export > Media. Odtud můžete upravit nastavení tak, abyste video zkomprimovali a zároveň zachovali kvalitu. A pokud chcete změnit velikost videa v Premiere Pro, můžete vybrat klip na časové ose a přejít na panel Effect Controls. Tam můžete upravit parametr Scale, abyste velikost videa (a tím i souboru) zvětšili nebo zmenšili.
Co je to komprese videa?
Komprese videa je proces zmenšení nebo omezení velikosti souboru videa při zachování kvality výstupu v maximální možné míře. Tento proces vyhovuje uživatelům, kteří potřebují rychle a pohodlně sdílet, stahovat, nahrávat a ukládat své soubory.
Proč komprimovat video?
Komprese videa může usnadnit sdílení a nahrávání a ušetřit úložný prostor na vašem zařízení. Tato funkce pro úpravu videa je nutností při stahování softwaru pro úpravu videa.
Ovlivní komprese videa jeho kvalitu?
Ano, komprimace videa může ovlivnit jeho kvalitu. Testování a náhled změn před jejich dokončením je zásadní, aby bylo zajištěno, že video bude po kompresi stále vypadat dobře.
Závěr
Kompresí videa by se měl naučit zabývat téměř každý video nadšenec. Nejen že vám to ušetří úložný prostor pro vaše soubory, ale také to usnadní sdílení, nahrávání a stahování videa. Existují různé možnosti, jak komprimovat videosoubory. Jednou z nejznámějších aplikací je Adobe Premiere Pro. Řešení, která jsme zde shromáždili o tom, jak komprimovat zvuk v Premiere, vám skvěle pomohou uspořádat vaše soubory. Pokud potřebujete k tomuto tématu další informace, napište nám do komentářů níže.
-
 Rychlé a snadné způsoby, jak synchronizovat zvuk a video v Adobe Premiere Pro
 Chcete vědět, jak synchronizovat zvuk a video v Premiere Pro? Pak bude tento článek vyhovovat vašim potřebám. Jak si to sami zkoušíme reálnými a jednoduchými kroky.
-
 Jak zrychlit video v Premiere Pro a s jeho alternativami
 Chcete vědět, jak používat Premier Pro ke zrychlení videa? Pak jste ve správném článku, protože poskytujeme kroky a další dostupné alternativy.
-
 Nejrychlejší způsob odstranění loga z videa v Adobe Premiere Pro
 Vyzkoušejte tyto snadné a nejrychlejší způsoby odstranění log z videa v aplikaci Adobe Premiere Pro. Tento článek vám nabídne nejlepší způsoby, jak můžete své zařízení vyzkoušet.