


4 समाधानों का उपयोग करके [जल्दी से] वेब के लिए छवि का अनुकूलन कैसे करें
वेब पर किसी छवि का ऑप्टिमाइज़ेशन करना एक अहम भूमिका निभाता है, क्योंकि इससे साइट का लोडिंग समय कम हो जाता है। हालिया अध्ययनों के आधार पर, जब छवियाँ ठीक से ऑप्टिमाइज़ नहीं होतीं, तो लगभग आधे आगंतुक तुरंत वेबसाइट छोड़ देते हैं, जिससे ट्रैफिक और राजस्व दोनों में कमी आती है। यदि आप बफरिंग को कम करना, एक भरोसेमंद वेबसाइट तैयार करना, ट्रैफिक बढ़ाना और बदले में अधिक आय पाना चाहते हैं, तो यह सीखना ज़रूरी है कि इसे कैसे किया जाए। ऐसा करना आसान है; इस ट्यूटोरियल की मदद से हम सबसे आसान तरीके से वेब के लिए इमेज को कैसे ऑप्टिमाइज़ करें यह बताते हैं।.

भाग 1। छवि गुणवत्ता का त्याग किए बिना छवि को ऑनलाइन अनुकूलित करने के सर्वोत्तम और नि:शुल्क तरीके
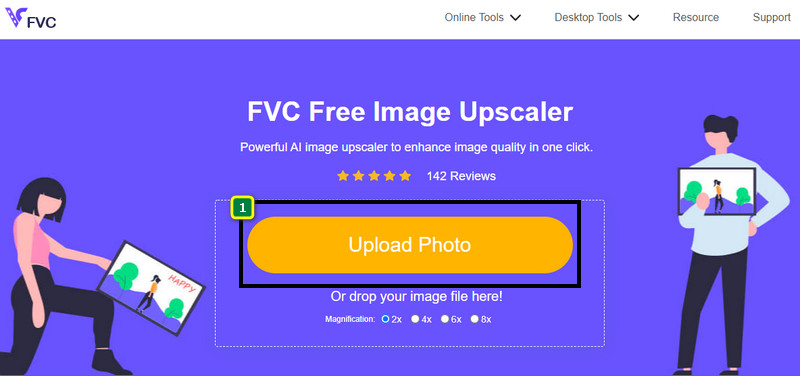
1. एफवीसी फ्री इमेज अपस्केलर
क्या आप वेब पर इस्तेमाल करने के लिए जिस इमेज का उपयोग करना चाहते हैं, उसकी डाइमेंशन और आस्पेक्ट रेश्यो को ऑप्टिमाइज़ करने का तरीका खोज रहे हैं? FVC Free Image Upscaler एक ऐसा टूल है जो अपनी शक्तिशाली AI तकनीक की मदद से इमेज को ऑप्टिमाइज़ कर सकता है। यह अपस्केलर इमेज के आकार को बदले बिना उसके PPI की डिटेल को कायम रख सकता है, ताकि आपको क्वालिटी लॉस महसूस न हो। साथ ही, यह ऑनलाइन टूल धुंधली या पिक्सेलेटेड इमेज को उन पर मौजूद खामियों को ट्रेस करके ठीक कर सकता है। इमेज एक्सपोर्ट करने से पहले यहाँ एक प्रीव्यू पेन होता है, जहाँ आप पहले और बाद की तुलना कर सकते हैं। इसलिए, यदि आपको वेब के लिए अपनी इमेज का साइज बदलना हो, तो आप आगे दिए गए चरणों का पालन कर सकते हैं।.
चरण 1. इस लिंक पर क्लिक करके वेबसाइट खोलें।.
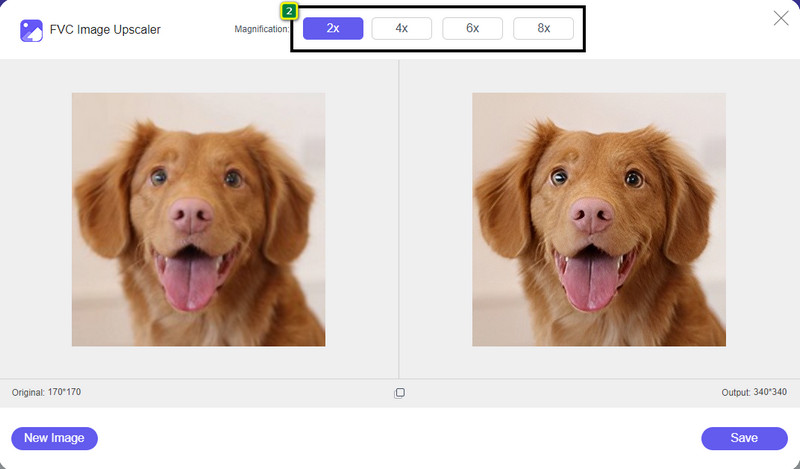
चरण 2. जिस तस्वीर का साइज बदलना चाहते हैं, उसे जोड़ने के लिए Upload Image दबाएँ।.
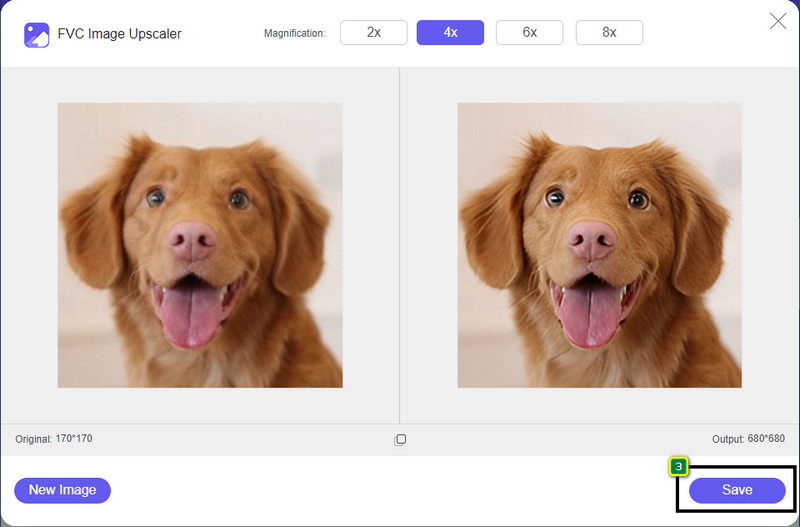
चरण 3. इमेज का साइज बदलने के लिए वह विकल्प चुनें जिसे आप अपनी इमेज पर लागू करना चाहते हैं।.
चरण 4. अपनी लोकल ड्राइव पर रीसाइज़ की गई इमेज डाउनलोड करने के लिए Save दबाएँ।.
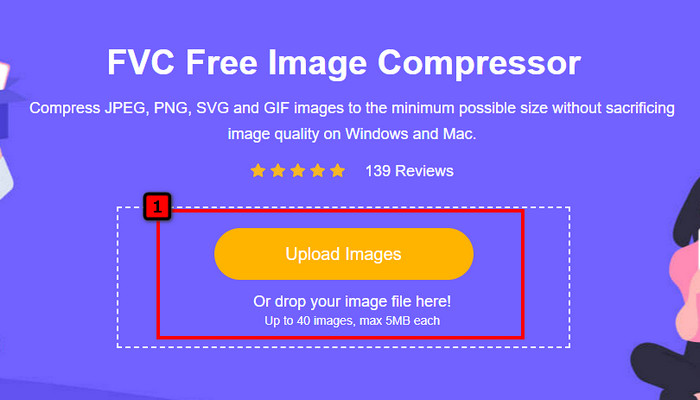
2. एफवीसी फ्री इमेज कंप्रेसर
FVC Free Image Compressor किसी भी व्यक्ति को इमेज का फ़ाइल साइज कम करके वेब के लिए उसे ऑप्टिमाइज़ करने की सुविधा देता है। इससे आप अलग‑अलग वेबसाइटों पर इस्तेमाल होने वाले लोकप्रिय फ़ॉर्मैट जैसे PNG, JPG, SVG, BMP आदि को, प्रत्येक को 5MB से कम आकार के साथ, कंप्रेस कर सकते हैं। इसकी मदद से आप एक बार में कई इमेज को छोटा कर सकते हैं ताकि वेब पर वे बेहतर तरीके से लोड हों। यह AI तकनीक वाला टूल है जो ऐसा बेस्ट कंप्रेशन रेश्यो देता है जो आप किसी और ऑनलाइन कंप्रेसर से हासिल नहीं कर पाते।.
चरण 1. टूल की आधिकारिक वेबसाइट पर जाने के लिए उसका नाम सर्च करें, या अपने वेब ब्राउज़र पर पहुँचने के लिए इस लिंक पर क्लिक करें।.
चरण 2. जिस इमेज फ़ाइल को आप अपलोड करना चाहते हैं, उसे यहाँ पर Drag and drop करें, या आप Upload Images पर क्लिक कर सकते हैं; आपकी स्क्रीन पर एक फ़ोल्डर दिखाई देगा, उसमें से जिस फ़ाइल को कंप्रेस करना है उसे चुनें और Open दबाएँ। यह कंप्रेसर एक ही समय में 40 से अधिक इमेज को छोटा कर सकता है।.
चरण 3. टूल AI एल्गोरिद्म के आधार पर इमेज के फ़ाइल साइज को अपने‑आप कम कर देगा। उसके बाद, कंप्रेस की गई इमेज का वर्ज़न एक्सपोर्ट करने के लिए Download पर क्लिक करें।

3. टाइनीपीएनजी
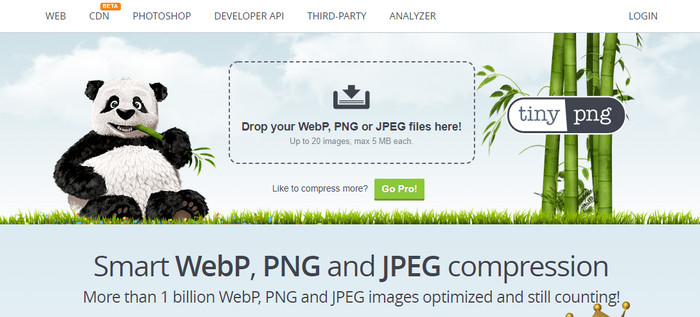
TinyPNG एक लोकप्रिय और भरोसेमंद सॉफ़्टवेयर है जिसे आप ऑनलाइन इमेज ऑप्टिमाइज़ करने के लिए उपयोग कर सकते हैं। यह एक कंप्रेसर है जो इमेज को उसके मूल आकार के लगभग 75% तक अपने‑आप छोटा कर देता है। यदि इमेज आपकी लोकल ड्राइव पर न हो, तो आप उन्हें Dropbox पर अपलोड कर सकते हैं। इस इमेज कंप्रेसर को इस्तेमाल करना सीखने में आपको कोई दिक्कत नहीं होगी, क्योंकि डेवलपर ने इसे बहुत सरल रखा है।.
हालांकि इसका उपयोग करना आसान है, यहां समर्थित प्रारूप केवल पीएनजी और जेपीजी हैं, और कुछ भी नहीं है। इसलिए, यदि आप बीएमपी, जीआईएफ, एसवीजी, और आपके पास मौजूद अन्य फाइलों को कंप्रेस करना चाहते हैं, तो आप इसे यहां नहीं कर सकते क्योंकि यह उक्त प्रारूप का समर्थन नहीं करता है। फिर भी, इसका उपयोग करना आसान है; आप हमारे द्वारा जोड़े गए चरणों का पालन कर सकते हैं।
चरण 1. अपना सर्च इंजन खोलें और TinyPNG की आधिकारिक वेबसाइट खोजें।.
चरण 2. जिस इमेज को कंप्रेस करना चाहते हैं, उसे अपलोड करने के लिए इम्पोर्ट आइकन पर क्लिक करें; यह टूल एक समय में 20 इमेज तक प्रोसेस कर सकता है।.
चरण 3. कंप्रेशन प्रक्रिया पूरी होने का इंतज़ार करें, फिर यहाँ अपलोड की गई इमेज के कंप्रेस्ड वर्ज़न को सेव करने के लिए Download बटन पर क्लिक करें।.
भाग 2। विंडोज और मैक पर पेशेवर सॉफ्टवेयर का उपयोग करके छवि को ऑफ़लाइन अनुकूलित करें
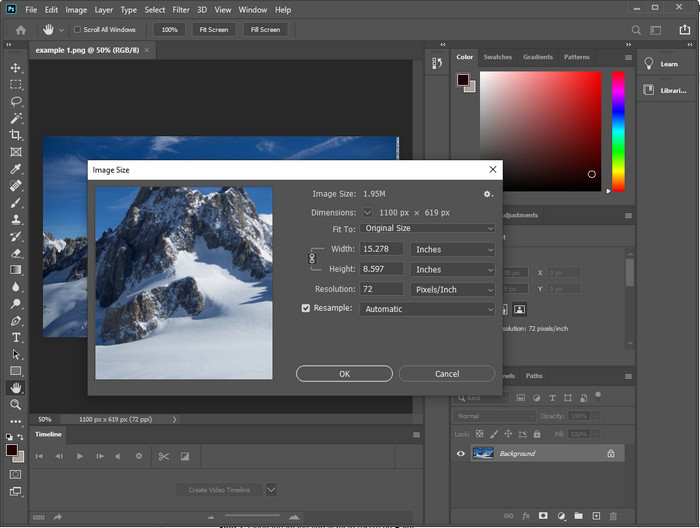
Photoshop उन दोनों कामों को करने में सक्षम है जिनका ज़िक्र हमने पहले भाग में किया था: फोटो रीसाइज़िंग और साइज कम करना। हालाँकि यह टूल मूल रूप से सिर्फ इन्हीं कार्यों के लिए नहीं बनाया गया, फिर भी यह इन्हें अपने अतिरिक्त उन्नत फीचर्स के रूप में कर सकता है। इसके ज़रिए आप अपनी सोच के अनुसार इमेज में फ़िल्टर जोड़ सकते हैं या उसे एडिट कर सकते हैं। इसकी एकमात्र सीमा आपकी कल्पना और इस सॉफ़्टवेयर को इस्तेमाल करना कितना मुश्किल लगता है, यही है।.
हमने जिस ऑनलाइन टूल का उल्लेख किया है, उसके विपरीत, एक बार जब आप इसे अपने डिवाइस पर डाउनलोड कर लेते हैं, तो आपको इस सॉफ़्टवेयर का उपयोग करने के लिए इंटरनेट कनेक्शन की आवश्यकता नहीं होगी। हालाँकि, इसका उपयोग करने के लिए आपको सॉफ़्टवेयर खरीदने की आवश्यकता होगी, इसलिए यदि आप देखना चाहते हैं कि फ़ोटोशॉप पर वेब के लिए छवि को कैसे अनुकूलित किया जाए, तो एक निर्देश है जिसे हम नीचे जोड़ते हैं, जो आपको छवि को डाउनसाइज़ और रीसाइज़ करने की अनुमति देता है।
चरण 1. सॉफ़्टवेयर को अपने डेस्कटॉप पर डाउनलोड करके लॉन्च करें और इसका उपयोग शुरू करें।.
चरण 2. जिस इमेज को एडिट करना चाहते हैं, उसे अपलोड करें, फिर Image मेन्यू में जाएँ और Image Size पर क्लिक करें। अपने स्पेसिफिकेशन के अनुसार माप (measurement) बदलें, फिर बदलाव सेव करने के लिए OK पर क्लिक करें। यदि आप इमेज का आस्पेक्ट रेश्यो या डाइमेंशन बदलना नहीं चाहते, तो बेहतर होगा कि आप चरण 2 को छोड़ दें।.
चरण 3. File मेन्यू पर जाएँ और Save as दबाएँ। आपकी स्क्रीन पर एक डायलॉग बॉक्स दिखाई देगा। जिस फ़ाइल साइज को आप हासिल करना चाहते हैं उसे चुनें, फिर इमेज को एक्सपोर्ट करना शुरू करने के लिए OK दबाएँ।.
भाग 3. वेब के लिए छवि को अनुकूलित करने के तरीके पर अक्सर पूछे जाने वाले प्रश्न
वेब के लिए सबसे अच्छा छवि प्रारूप क्या है?
बेहतर होगा कि आप पीएनजी और जेपीजी के विस्तार वाली छवि का उपयोग करें क्योंकि ये प्रारूप विभिन्न वेबसाइटों पर अच्छी तरह से अनुकूलित होने के लिए जाने जाते हैं। फिर भी, कभी-कभी आपको इमेज को छोटा या रीसाइज़ करके इसे ऑप्टिमाइज़ करने की आवश्यकता होगी, यही वह जगह है जहाँ हमारे द्वारा जोड़ा गया टूल मदद के लिए आया था।
जो वेब पर अधिक विवरण लाता है; पीएनजी या जेपीजी?
दोनों रेखापुंज छवियां वेबसाइट पर अच्छा प्रदर्शन करती हैं; वे तेजी से लोड होते हैं और वेबसाइटों को अनुकूलित करते हैं। फिर भी इन दो प्रारूपों के बीच अभी भी अंतर हैं, जैसे कि जब आप वेब के लिए पारदर्शिता के बिना शुद्ध फोटोग्राफी का उपयोग करना चाहते हैं, तो आपका पसंदीदा प्रारूप जेपीजी या जेपीईजी होना चाहिए। लेकिन यदि आप अपने वेब पर विस्तृत विवरण के साथ 1-बिट पारदर्शिता चाहते हैं, तो पीएनजी आपकी सहायता के लिए है।
क्या छवि का आकार बदलने से गुणवत्ता खराब हो जाती है?
यदि आप इमेज को ज़्यादा कंप्रेस कर देते हैं, तो उसकी गुणवत्ता खराब हो सकती है, लेकिन यदि आप ओवरकंप्रेशन से बचें तो इसे रोका जा सकता है। इमेज को कंप्रेस करते समय बेहतर है कि आप उसका साइज लगभग 45% से 70% तक ही घटाएँ, ताकि क्वालिटी लॉस से बचा जा सके। फिर भी, आप इमेज एन्हांसर का उपयोग करके इमेज क्वालिटी बढ़ा सकते हैं।
निष्कर्ष
अब जब आप जानते हैं कि अपनी छवि को कैसे अनुकूलित करना है, तो बेहतर होगा कि आप यह करें ताकि आप अधिक विज़िट प्राप्त करें और बहुत अधिक ध्यान आकर्षित करें। ऊपर दिए गए ट्यूटोरियल के साथ, हम निश्चित हैं कि आप इसे गुणवत्ता को प्रभावित किए बिना आसानी से और जल्दी से कर सकते हैं। यदि आपको आकार बदलने या संपीड़ित करने की आवश्यकता है, तो हम अनुशंसा करते हैं कि आप किसी भी इंस्टॉलर को डाउनलोड किए बिना समस्या को हल करने के लिए यहां शामिल एफवीसी उत्पाद का उपयोग करें।
-
 बाजार में उपलब्ध सर्वोत्तम तरीकों से फोटो एचडी बनाएं
 क्या आप सोच रहे हैं या फोटो एचडी बनाना चाहते हैं? आप हमारे द्वारा उपयोग किए जा सकने वाले विभिन्न समाधानों के साथ नीचे दिए गए ट्यूटोरियल का अनुसरण कर सकते हैं।
-
 शीर्ष 4 छवि गुणवत्ता रेड्यूसर जिनका आप ऑनलाइन और ऑफलाइन उपयोग कर सकते हैं
 ये छवि गुणवत्ता रिड्यूसर कुछ कारणों से आपकी छवि की गुणवत्ता को कम करने में आपकी सहायता कर सकते हैं। यदि आपको इसकी आवश्यकता है, तो आप इस लेख को पढ़ें!
-
 हैंड्स-ऑन ट्यूटोरियल के साथ इमेज को 4k तक अपग्रेड करने के आधिकारिक तरीके
 छवि को 4k तक बढ़ाने के लिए आपको अपने डिवाइस पर एक सॉफ़्टवेयर की आवश्यकता होगी। यदि आपके पास एक नहीं है तो आपको हमारे द्वारा यहां शामिल किए गए टूल का चयन करना होगा।