


फ़ोटोशॉप में छवि को त्वरित रूप से कैसे तेज करें - एक पूर्ण मार्गदर्शिका जिसे आपको अवश्य जानना चाहिए
सबसे बेहतर विशेषज्ञों द्वारा चुने गए इमेज एडिटर के साथ, आप अपनी हर तस्वीर को अगले स्तर तक प्रोसेस कर सकते हैं। Adobe Photoshop वह सबसे लंबे समय से विश्वसनीय सॉफ्टवेयर है जिसे आप Windows, Mac, iOS और Android पर डाउनलोड कर सकते हैं। इसके डेवलपर Adobe की बदौलत, इसने पहले ही एडिटिंग को उसके अधिकतम स्तर तक पेश और क्रांतिकारी रूप से बदल दिया है। इसकी उन्नत सुविधाओं के कारण, नए एडिटर इसके UI और समग्र फ़ंक्शनैलिटी से घबरा जाते हैं। इसे इस्तेमाल करना मुश्किल लग सकता है, लेकिन खासकर जब बात इमेज को शार्प करने की हो तो ऐसा नहीं है। यहाँ हम Photoshop में जल्दी से इमेज को शार्प कैसे करें पर एक पूरा ट्यूटोरियल कवर करेंगे।.

भाग 1. फोटोशॉप में इमेज को शार्प करने का पूरा ट्यूटोरियल [3 इफेक्टिव शार्पनिंग तरीके]
फ़ोटोशॉप छवियों को तेज करना उन लोगों को अभिभूत कर सकता है जिन्होंने इस कार्यक्रम का उपयोग नहीं किया है। लेकिन इससे पहले कि हम ट्यूटोरियल की ओर बढ़ें, आपको Adobe पर आधिकारिक सॉफ्टवेयर डाउनलोड करना होगा। कृपया इसे अपने डेस्कटॉप पर रखने के लिए सही डाउनलोड बटन चुनें। यदि आपने इस प्रोग्राम को अपने डेस्कटॉप पर डाउनलोड नहीं किया है, तो आप इसके निःशुल्क परीक्षण का उपयोग कर सकते हैं, लेकिन यदि आपने परीक्षण समाप्त कर लिया है, तो आपको मासिक या वार्षिक योजना खरीदनी होगी। निम्नलिखित सब कुछ के बाद, अपनी पसंद के चरणों के लिए आगे बढ़ें जिन्हें हम नीचे शामिल करते हैं।
पहला रास्ता। हाई पास का उपयोग करके फोटोशॉप पर इमेज को शार्प कैसे बनाएं:
हाईपास आपको छवि को हाइलाइट करने और छवि पर एक फ़िल्टर लागू करने की अनुमति देता है जो फ़ोटोशॉप पर आपके द्वारा अपलोड किए गए फ़ोटो के किनारों को तेज करने में आपकी सहायता कर सकता है। आपके पास मौजूद छवियों पर हाईपास को लागू करने और उपयोग करने का तरीका जानने के लिए आप नीचे दिए गए ट्यूटोरियल का अनुसरण कर सकते हैं।
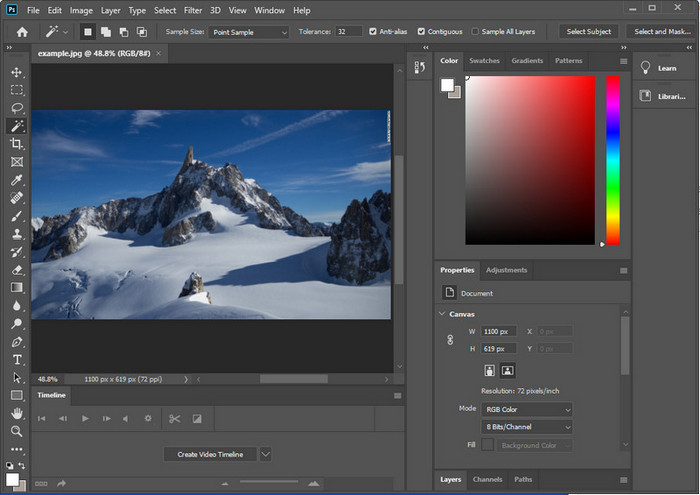
स्टेप 1. सॉफ़्टवेयर लॉन्च करें, File पर क्लिक करें और Open दबाकर इमेज अपलोड करें और शार्पनिंग जोड़ना शुरू करें।.
स्टेप 2. Photoshop में अपलोड की गई इमेज की लेयर को डुप्लिकेट करें।.
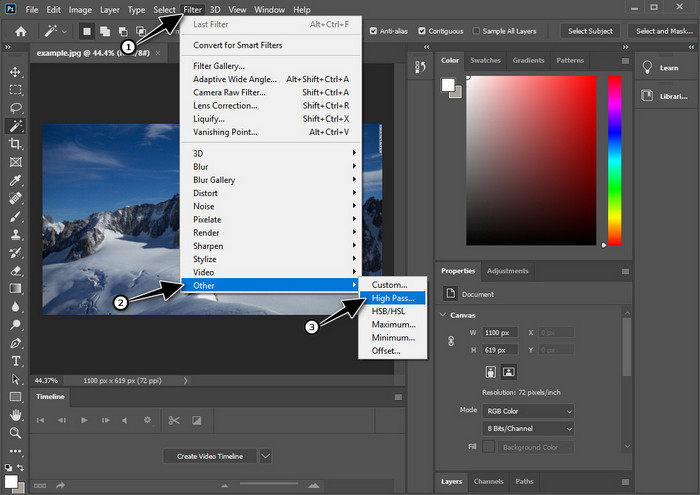
स्टेप 3. ऊपर वाले सेक्शन में, Filter मेनू पर क्लिक करें, फिर Other दबाएँ और उसके बाद High Pass चुनें। यदि आपकी इमेज ग्रे हो जाए तो चिंता की ज़रूरत नहीं है, क्योंकि हाई पास लगाने पर ऐसा होना सामान्य है।.
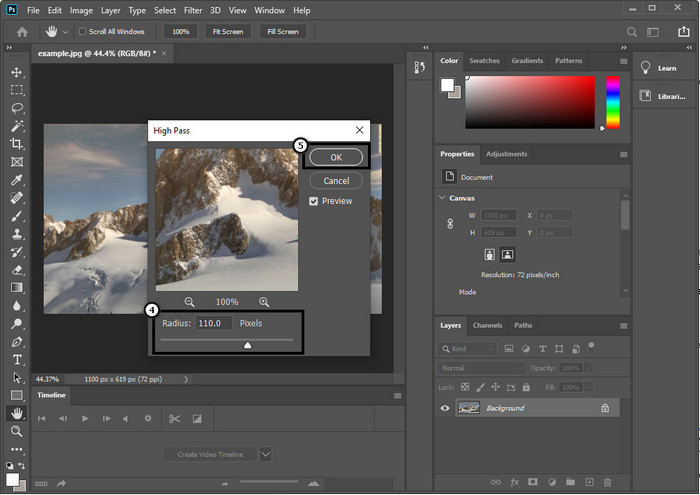
स्टेप 4. आपकी स्क्रीन पर एक पॉप‑अप विंडो दिखाई देगी, जहाँ आप slider को ड्रैग करके रेडियस बढ़ा सकते हैं और अपनी इमेज में बेहतर डिटेल्स ला सकते हैं। फिर इसे सेव करने के लिए OK दबाएँ।.
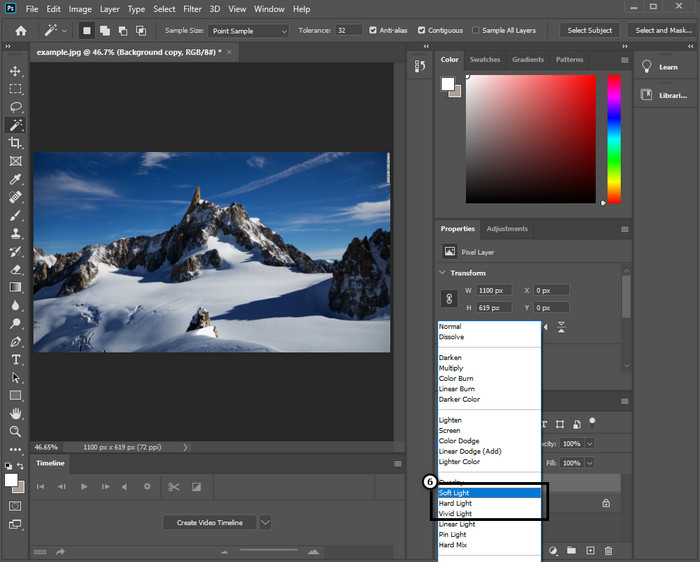
स्टेप 5. लेयर पर वापस जाएँ, drop-down बटन पर क्लिक करें और चुनें कि आप इमेज पर किस तरह की लाइट लगाना चाहते हैं, जैसे soft, hard, vivid light आदि, ताकि इमेज शार्प हो सके। अपनी इमेज को दोबारा शार्प करने के लिए स्टेप 3 से लेकर इस स्टेप तक की प्रक्रिया दोहराएँ।.
दूसरा रास्ता। स्मार्ट शार्पर के साथ फोटोशॉप पर इमेज को शार्प कैसे बनाएं:
Smart Sharpen एक प्रभावी फीचर है जिसे आप Adobe Photoshop में एक्सेस कर सकते हैं ताकि आप अपनी इमेज में मौजूद हर चीज़ को शार्प कर सकें। यह फीचर ऑटोमैटिक समाधान नहीं है, बल्कि आपको कुछ पैरामीटर समायोजित करने होंगे ताकि सब कुछ शार्प दिखे। इसलिए, अगर आप Adobe में इस फीचर का उपयोग करना चाहते हैं, तो आप नीचे दिए गए चरणों का पालन कर सकते हैं।.
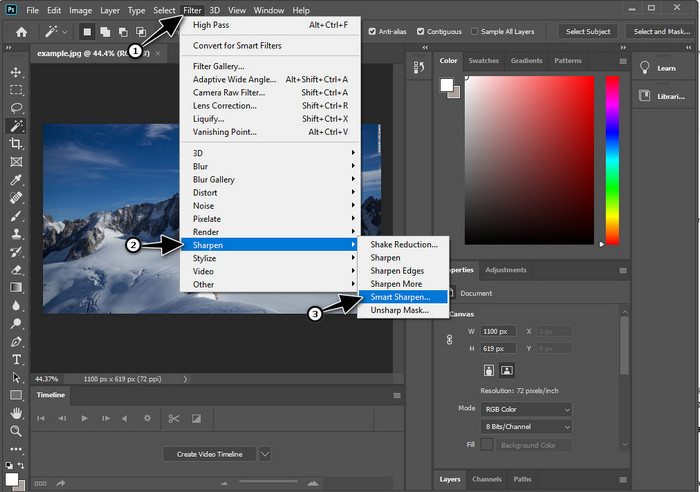
स्टेप 1. इमेज जोड़ने के बाद, जिसे आप शार्प करना चाहते हैं, Filter मेनू पर क्लिक करें।.
स्टेप 2. दिखने वाले विकल्पों में से Sharpen पर क्लिक करें, फिर Smart Sharpen दबाएँ।.
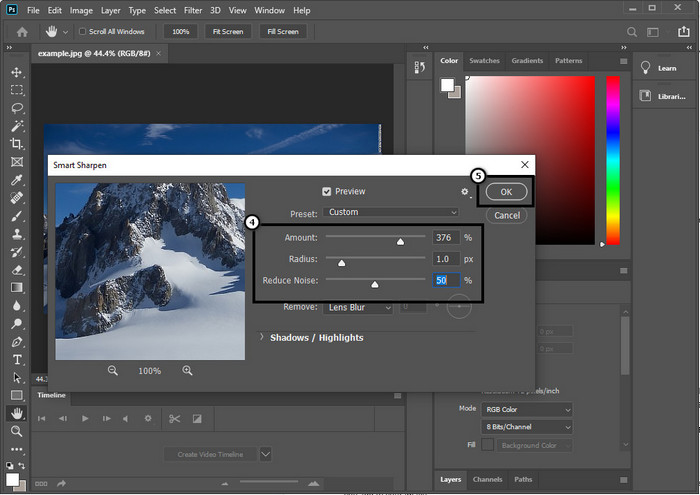
स्टेप 3. अपनी पसंद के अनुसार शार्पनेस की amount और radius की संख्या समायोजित करें और बदलावों को सेव करने के लिए OK पर क्लिक करें। इतना आसान है—आपने इस सॉफ़्टवेयर के शार्पनिंग टूल से फोटो को शार्प कर लिया है।.
तीसरा रास्ता। चमक और कंट्रास्ट को समायोजित करके फोटो पर छवि को कैसे तेज करें:
हमारे द्वारा पेश किए गए दो तरीकों के विपरीत, चमक और कंट्रास्ट आपके द्वारा अपलोड की गई छवि को अधिक विस्तृत दिखाने के लिए हाइलाइट करने पर ध्यान केंद्रित करते हैं, जैसे कि शार्पनिंग टूल क्या करते हैं। कुछ उपयोगकर्ता इस विकल्प को जानते हैं, इसलिए यदि आप इस विकल्प का उपयोग करना चाहते हैं और अपनी छवि को तेज करना शुरू करना चाहते हैं, तो नीचे दिए गए चरणों का पालन करें।
स्टेप 1. अपनी इमेज को Photoshop में अपलोड करने के बाद, आगे बढ़ते हुए Image मेनू पर क्लिक करें।.
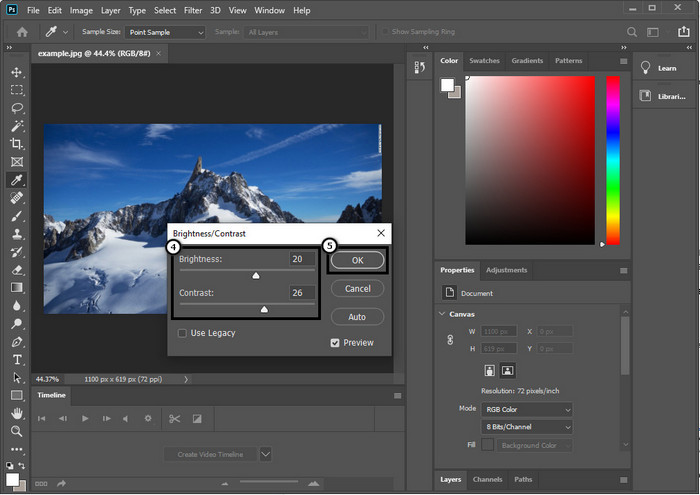
स्टेप 2. कई विकल्प दिखाई देंगे; Adjustment पर क्लिक करें, फिर Brightness and Contrast चुनें।.

स्टेप 3. ब्राइटनेस और कॉन्ट्रास्ट को slider ड्रैग करके समायोजित करें और अपनी इमेज में किए गए बदलावों को सेव करने के लिए OK दबाएँ।.
संबंधित:
Photoshop में जल्दी से वीडियो पर वॉटरमार्क जोड़ने की सरल गाइड
भाग 2. ऑनलाइन छवि को तेज करने के लिए फोटोशॉप का सबसे अच्छा विकल्प [मुफ्त सेवा]
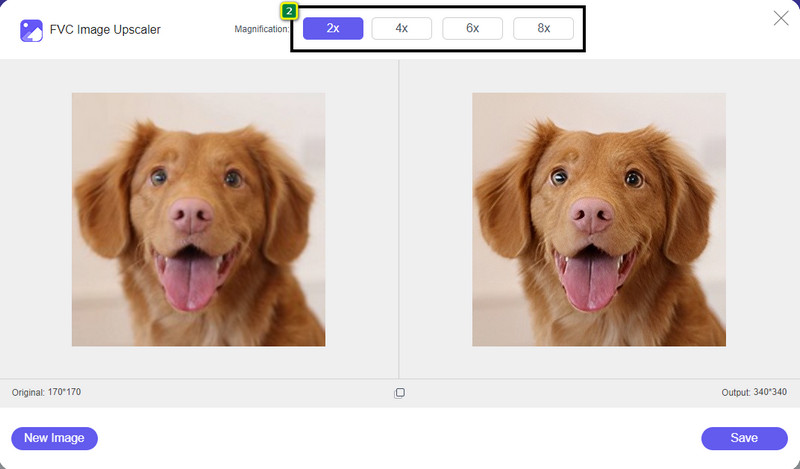
Photoshop में बिना ऐप के धुंधली इमेज को कैसे शार्प करें? आप FVC Free Image Upscaler का उपयोग कर सकते हैं। यह ऑनलाइन टूल आपको यहाँ बताई गई जटिल प्रक्रियाओं से बचा सकता है। इमेज अपलोड करें और इस सॉफ़्टवेयर की AI तकनीक को आपका काम करने दें। साथ ही, आपको सॉफ़्टवेयर का लाइसेंस की या प्रीमियम वर्जन खरीदने की ज़रूरत नहीं होगी क्योंकि यह उन सभी यूज़र्स के लिए मुफ्त है जिन्हें तुरंत अपनी तस्वीरें एडिट करनी हैं। भले ही आप एडिटिंग एक्सपर्ट न हों, तब भी आप नीचे बताए गए स्टेप्स का पालन करके अपनी इमेज को शार्प कर सकते हैं।.
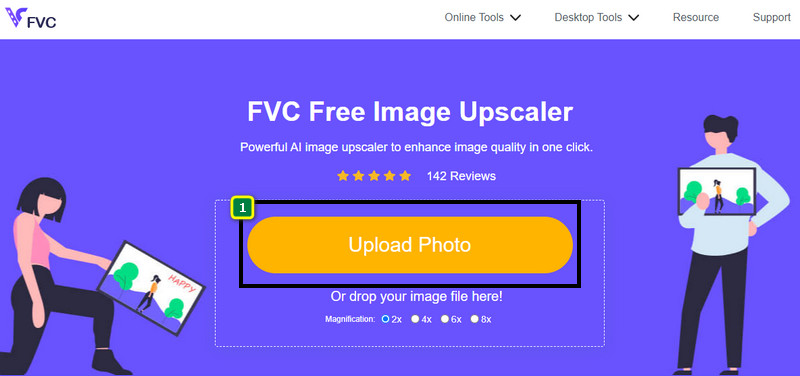
स्टेप 1. आपको यह वेब टूल खोलने और अपनी फोटो को शार्प करने के लिए इस लिंक पर क्लिक करना होगा।.
स्टेप 2. वेबसाइट पर, आपको वह तस्वीर जोड़ने के लिए Upload Image दबाना होगा जिसे आप शार्प करना चाहते हैं। आपकी स्क्रीन पर एक फ़ोल्डर दिखाई देगा, इमेज चुनें और फिर उसे अपलोड करने के लिए Open पर क्लिक करें।.
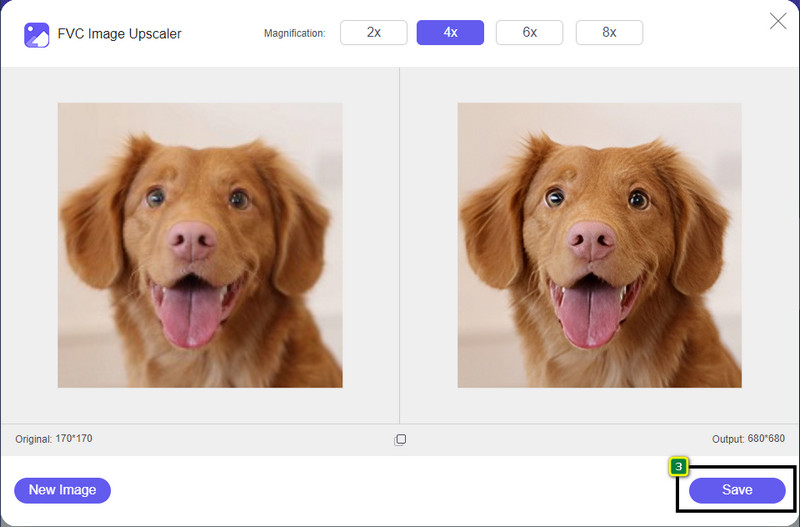
स्टेप 3. आपकी इमेज के लिए कई तरह के magnification विकल्प होंगे, जिनकी मदद से AI तकनीक के ज़रिए आप इमेज को आसानी से शार्प कर सकते हैं।.
स्टेप 4. नीचे वाले हिस्से में, Save बटन पर क्लिक करें ताकि शार्प की गई इमेज को अपने लोकल ड्राइव पर डाउनलोड कर सकें।.
भाग 3. फोटोशॉप पर छवियों को कैसे तेज करें पर अक्सर पूछे जाने वाले प्रश्न
अगर फोटोशॉप का फ्री ट्रायल खत्म हो जाए तो मुझे क्या करना चाहिए?
मान लीजिए आप Adobe द्वारा विकसित इस प्रोफ़ेशनल इमेज एडिटर का उपयोग जारी रखना चाहते हैं। ऐसे में, आपको इसे आगे इस्तेमाल करने के लिए कोई प्लान खरीदना होगा। लेकिन अगर आप Photoshop जैसे ही एडिटिंग फीचर्स का अनुभव चाहते हैं, तो FVC Free Image Upscaler का उपयोग शुरू करें।
मैं फोटोशॉप के साथ क्या कर सकता हूं?
आप यहाँ बहुत सारी छवि और वीडियो संपादन कर सकते हैं, जो अन्य संपादक प्रदान नहीं करता है। यह एक पूर्ण छवि संपादक है जिसे आपको 2D छवि को 3D में बदलने जैसी अद्भुत चीजें बनाने की आवश्यकता होगी और बहुत कुछ। हालाँकि, यह सॉफ़्टवेयर थोड़ा जटिल है, और आपको इसे समग्र रूप से उपयोग करने में महारत हासिल करने के लिए अपना समय निकालने की आवश्यकता होगी।
मैं फोटोशॉप कहां से डाउनलोड कर सकता हूं?
Adobe Photoshop 64-बिट या बाद के संस्करण और Mac 10.15 Catalina या बाद के संस्करण के साथ Windows 10 का समर्थन करता है। इसके अलावा, यह एक मोबाइल संस्करण, फोटोशॉप एक्सप्रेस फोटो एडिटर का समर्थन करता है।
निष्कर्ष
हमने Photoshop में इमेज को शार्प कैसे करें पर जो ट्यूटोरियल जोड़ा है, उसकी मदद से आप अब इस बेहतरीन एडिटर का उपयोग करके अलग‑अलग तरीकों से आसानी से इमेज को शार्प कर सकते हैं। अगर आपका फ्री ट्रायल खत्म हो जाए और आप इमेज को शार्प करना चाहें, तो क्या करें? आपको चिंता करने की ज़रूरत नहीं है क्योंकि हमने इमेज को और भी आसान और मुफ्त में शार्प करने के लिए एक ऑनलाइन विकल्प जोड़ा है, बस आपके पास इंटरनेट होना चाहिए, और वह है FVC Free Image Upscaler।.
-
 बाजार में उपलब्ध सर्वोत्तम तरीकों से फोटो एचडी बनाएं
 क्या आप सोच रहे हैं या फोटो एचडी बनाना चाहते हैं? आप हमारे द्वारा उपयोग किए जा सकने वाले विभिन्न समाधानों के साथ नीचे दिए गए ट्यूटोरियल का अनुसरण कर सकते हैं।
-
 शीर्ष 4 छवि गुणवत्ता रेड्यूसर जिनका आप ऑनलाइन और ऑफलाइन उपयोग कर सकते हैं
 ये छवि गुणवत्ता रिड्यूसर कुछ कारणों से आपकी छवि की गुणवत्ता को कम करने में आपकी सहायता कर सकते हैं। यदि आपको इसकी आवश्यकता है, तो आप इस लेख को पढ़ें!
-
 हैंड्स-ऑन ट्यूटोरियल के साथ इमेज को 4k तक अपग्रेड करने के आधिकारिक तरीके
 छवि को 4k तक बढ़ाने के लिए आपको अपने डिवाइस पर एक सॉफ़्टवेयर की आवश्यकता होगी। यदि आपके पास एक नहीं है तो आपको हमारे द्वारा यहां शामिल किए गए टूल का चयन करना होगा।