


कंप्यूटर और मोबाइल पर छवि को तेज करने के लिए AI का उपयोग करने की अंतिम गाइड
क्या आपके पास कभी ऐसी इमेज रही है जो फीकी और बेजान लगती हो? हो सकता है आपकी फोटो में धार (शार्पनेस) और कसावट (क्रिस्पनेस) की कमी हो। लेकिन क्या आप जानते हैं? इंटरनेट पर आपको ढेरों इमेज शार्पनर एप्लिकेशन मिल जाएंगे। आपको अपनी इमेज को शार्प करने के लिए महंगे डेस्कटॉप सॉल्यूशन की ज़रूरत नहीं है। इंटरनेट पर सर्च करके आपको कई ऐसे ऐप मिलेंगे जो आपकी इमेज को शार्प करने में मदद कर सकते हैं। लेकिन अब आपको और खोजने की ज़रूरत नहीं, क्योंकि हम यहाँ सबसे अच्छे इमेज शार्पनिंग टूल्स की सूची दे रहे हैं और आपको उनका इस्तेमाल करना भी सिखा रहे हैं। यह लेख अंत तक पढ़ें और जानें कि ऑनलाइन या ऑफलाइन फ्री में इमेज शार्प कैसे करें।.

भाग 1. बिना साइनअप के ऑनलाइन मुफ़्त में इमेज शार्प कैसे करें
इसके बावजूद, छवि को तेज करने के लिए कई अनुप्रयोग हैं; यह अनुशंसा की जाती है कि आप सुरक्षित और सबसे सरल उपकरण का उपयोग करें। इसलिए हमने सर्वश्रेष्ठ इमेज शार्पनर की खोज की और उन्हें केवल आपके लिए सूचीबद्ध किया। इसके अलावा, हम आपको दिखाएंगे कि इन इमेज शार्पनर टूल्स का उपयोग कैसे करें।
FVC निःशुल्क इमेज अपस्केलर के माध्यम से चित्र को शार्प करें
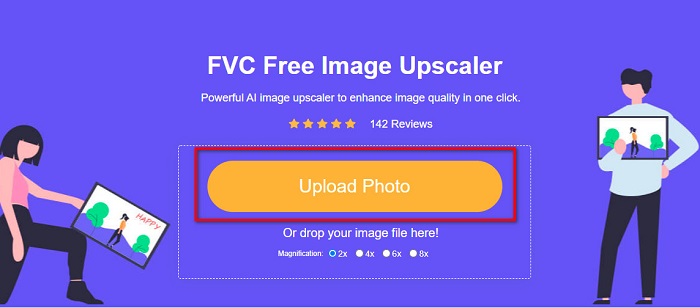
FVC Free Image Upscaler इमेज को शार्प करने के लिए सबसे अच्छा टूल है। अगर आप AI आधारित इमेज शार्पन टूल ढूंढ रहे हैं, तो FVC Free Image Upscaler वही टूल है जिसकी आपको तलाश है। इसके अलावा, यह PNG, JPG, JPEG और BMP जैसे कई इमेज फॉर्मैट को सपोर्ट करता है। और अपनी AI (Artificial Intelligence) टेक्नोलॉजी का इस्तेमाल करके आप अपनी इमेज को 2x, 4x, 6x और 8x तक बड़ा (अपस्केल) और एन्हांस कर सकते हैं। इस ऑनलाइन टूल की एक और शानदार बात यह है कि आप इसे सभी वेब ब्राउज़र, जैसे Google, Firefox और Safari पर एक्सेस कर सकते हैं।.
इसके अलावा, कई शुरुआती इस उपकरण का उपयोग करना पसंद करते हैं क्योंकि इसका एक सीधा यूजर इंटरफेस है। इसके अलावा, हालांकि यह एक ऑनलाइन आवेदन है, इसकी एक तेज शार्पनिंग प्रक्रिया है, जिससे इसका उपयोग करना सुविधाजनक हो जाता है। आप अपनी आउटपुट छवि को अपने डिवाइस पर डाउनलोड करने से पहले उसका पूर्वावलोकन भी कर सकते हैं। इसलिए, यदि आप अपनी छवि को तेज करने के लिए इस टूल का उपयोग करना चाहते हैं, तो नीचे दिए गए आसान निर्देशों का पालन करें।
FVC फ्री इमेज अपस्केलर का उपयोग करके किसी छवि को कैसे तेज करें:
स्टेप 1. अपना ब्राउज़र खोलें और सर्च बॉक्स में FVC Free Image Upscaler सर्च करें। आप सीधे उनकी मुख्य पेज पर जाने के लिए दिए गए लिंक पर भी क्लिक कर सकते हैं।.
स्टेप 2. फिर मुख्य यूज़र इंटरफ़ेस पर Upload Photo बटन पर क्लिक करें और वह इमेज इम्पोर्ट करें जिसे आप शार्प करना चाहते हैं।.
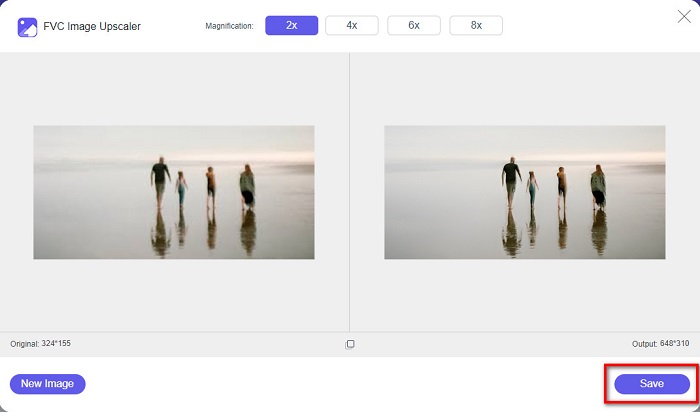
स्टेप 3. इसके बाद, अपनी इमेज के लिए मनचाहा magnification प्रीसेट चुनें। आप 2x, 4x, 6x और 8x मैग्निफिकेशन में से चयन कर सकते हैं। फिर, आप अपने आउटपुट का प्रीव्यू देखेंगे।.

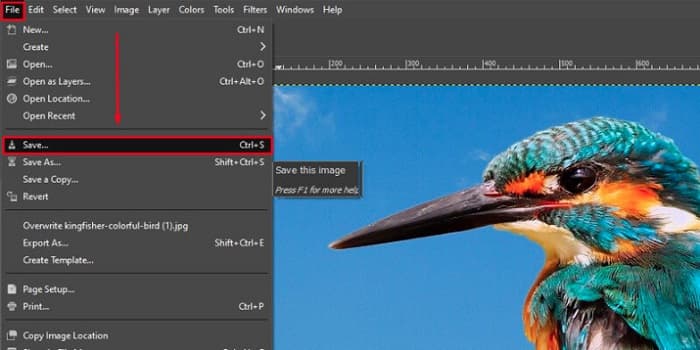
स्टेप 4. अंत में, अपनी इमेज आउटपुट को सेव करने के लिए Save बटन पर क्लिक करें। इसके बाद एप्लिकेशन आपकी इमेज को अपने-आप और तेज़ी से आपके कंप्यूटर के फ़ोल्डर में सेव कर देगा।.
और बस! इतना ही सरल, आप आसानी से अपनी छवि के धुंधले हिस्से को बढ़ा सकते हैं और उसमें तीक्ष्णता जोड़ सकते हैं।
VanceAI के साथ छवि को तेज करें
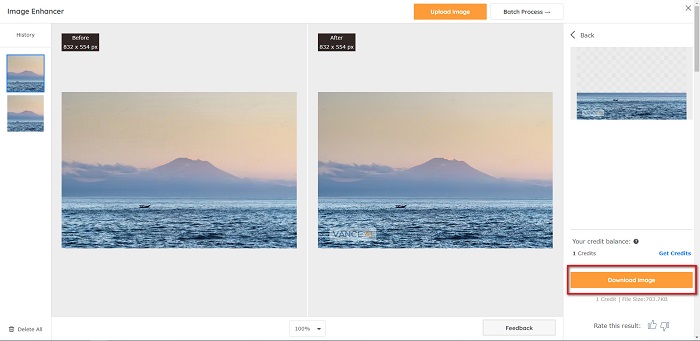
VanceAI एक ऑनलाइन इमेज शार्पनर है जिसे आप अपनी इमेज को शार्प करने या उसमें क्रिस्पनेस जोड़ने के लिए इस्तेमाल कर सकते हैं। सचमुच, जब आप अपनी इमेज में शार्पनेस जोड़ते हैं तो वह बेहतर दिखती है। इसलिए अगर आप अपनी इमेज को जल्दी शार्प करना चाहते हैं, तो VanceAI इस्तेमाल करने लायक टूल है। इसके अलावा, आप इसे लगभग सभी वेब ब्राउज़र, जैसे Google और Safari पर मुफ्त में इस्तेमाल कर सकते हैं। साथ ही, यह केवल कुछ क्लिक में आपकी इमेज के धुंधले हिस्सों को अपने-आप एन्हांस कर देता है। इसके आसान इंटरफ़ेस की वजह से शुरुआती यूज़र भी इस एप्लिकेशन को आसानी से इस्तेमाल कर सकते हैं। और यह JPG, JPEG और PNG जैसे सबसे आम इमेज फॉर्मैट को सपोर्ट करता है। हालांकि, जब आप VanceAI का उपयोग करके अपनी इमेज को शार्प करते हैं, तो यह आपकी इमेज पर वॉटरमार्क छोड़ देता है।.
VanceAI का उपयोग करके धुंधली छवि को कैसे तेज करें:
स्टेप 1. अपने ब्राउज़र पर VanceAI सर्च करें, फिर उसके मुख्य पेज पर जाएँ। उसके बाद मुख्य यूज़र इंटरफ़ेस पर Upload Image बटन पर क्लिक करें और वह इमेज अपलोड करें जिसे आप शार्प करना चाहते हैं।.
स्टेप 2. इमेज अपलोड करने के बाद, इंटरफ़ेस के निचले दाएँ कोने में स्थित Start to Process बटन पर क्लिक करें।.
स्टेप 3. अंत में, आप अपनी इमेज के आउटपुट का प्रीव्यू देखेंगे। फिर, अपनी शार्प की हुई इमेज डाउनलोड करने के लिए Download Image बटन पर क्लिक करें।.
पाइनटूल्स का उपयोग करके धुंधली छवि को तेज करें
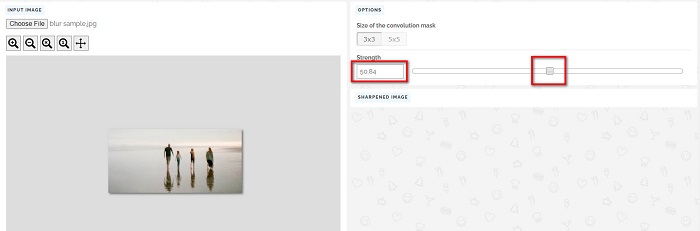
PineTools एक और ऑनलाइन शार्पनिंग ऐप है जिसे आप बहुत आसानी से इस्तेमाल कर सकते हैं। इसके सरल यूज़र इंटरफ़ेस की मदद से शुरुआती यूज़र भी इस टूल का इस्तेमाल करके इमेज की क्वॉलिटी ठीक कर सकते हैं। आप इसके स्लाइडर विकल्प की मदद से अपनी इमेज की स्ट्रेंथ या शार्पनेस को एडजस्ट कर सकते हैं। इसके अलावा, आप अपनी इमेज के कन्वोल्यूशन मास्क का आकार 3x3 और 5x5 में से चुन सकते हैं। इस ऑनलाइन एप्लिकेशन की एक और अच्छी बात यह है कि आप इसे लगभग सभी वेब ब्राउज़र, जैसे Google और Safari पर एक्सेस कर सकते हैं। PineTools की कमी यह है कि इसमें कई विज्ञापन (ऐड) होते हैं, जो इमेज शार्प करते समय आपको परेशान कर सकते हैं। फिर भी, इसे इस्तेमाल करना सुविधाजनक होने की वजह से बहुत से शुरुआती यूज़र इस टूल का उपयोग करते हैं।.
पाइनटूल्स का उपयोग करके धुंधली छवि को कैसे शार्प करें
स्टेप 1. सबसे पहले अपने ब्राउज़र पर PineTools सर्च करें और उसके वेबसाइट वाले पेज पर क्लिक करें। फिर पहले इंटरफ़ेस पर Choose Files बटन पर क्लिक करके वह फोटो अपलोड करें जिसे आप शार्प करना चाहते हैं।.

स्टेप 2. इसके बाद, Sharpen पैनल पर, अपनी इमेज के लिए मनचाही स्ट्रेंथ या शार्पनेस सेट करने के लिए mini box को मूव करें।.
स्टेप 3. फिर, अपनी इमेज को शार्प करने के लिए इंटरफ़ेस के नीचे मौजूद Sharpen बटन पर क्लिक करें। अगर आप आउटपुट इमेज सेव करना चाहते हैं, तो अपना पसंदीदा image format चुनें, और इमेज आपके डिवाइस पर सेव हो जाएगी।.
भाग 2. विंडोज़/मैक पर इमेज को शार्प कैसे करें
फ़ोटोशॉप में इमेज को शार्प कैसे करें
एडोब फोटोशॉप एक शक्तिशाली और व्यापक रूप से इस्तेमाल किया जाने वाला इमेज एडिटिंग सॉफ्टवेयर है जिसका इस्तेमाल दुनिया भर में कई लोग करते हैं। यह शुरुआती और पेशेवरों दोनों के लिए है, और इसमें कई विशेषताएं हैं जो व्यक्तियों को छवियों को सटीक और रचनात्मक रूप से संपादित करने में सक्षम बनाती हैं। सरल समायोजन से लेकर जटिल डिज़ाइन तक, फ़ोटोशॉप आपको अपने विचारों को जीवंत करने की अनुमति देता है। इसके शार्पनिंग फ़िल्टर फ़ोटो के कंट्रास्ट और विवरण को संशोधित करके उन्हें शार्प दिखाने में सहायता करते हैं। फ़ोटोशॉप में फ़ोटो को शार्प करना सरल है और इसकी परिष्कृत परतों और फ़िल्टर के कारण मूल को नुकसान नहीं पहुँचाएगा - सोशल मीडिया छवियों, वाणिज्यिक फ़ोटोग्राफ़ी और ग्राफ़िक डिज़ाइन के लिए आदर्श।
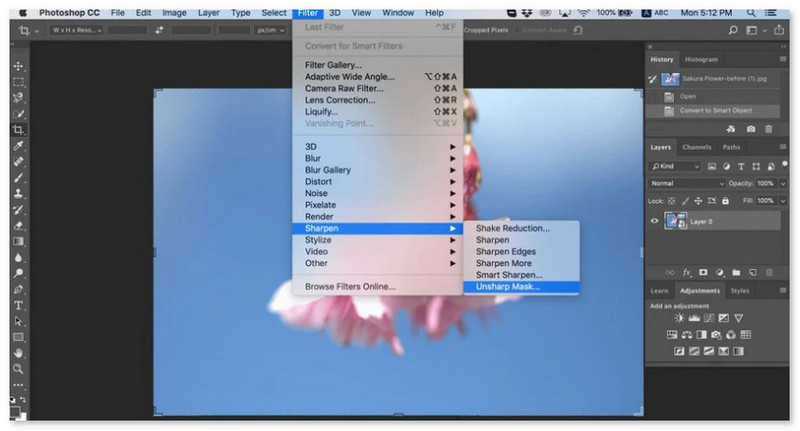
स्टेप 1. Layers panel > Filter menu > Convert for Smart Filters पर क्लिक करें।.

स्टेप 2. Sharpen > Unsharp Mask under Filter चुनें।.
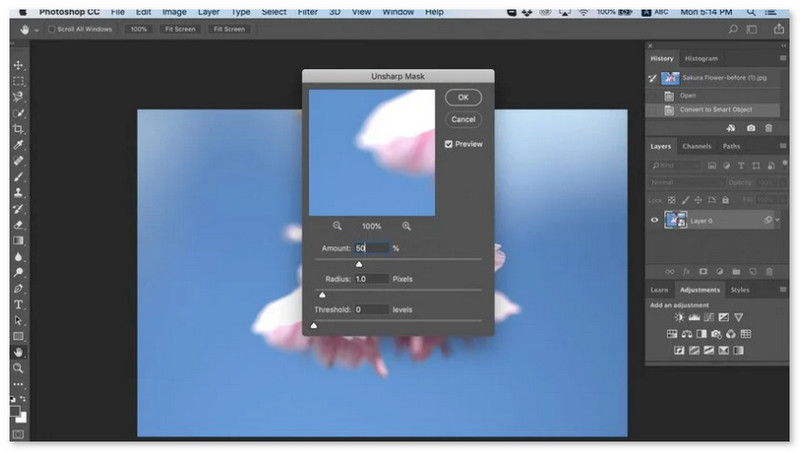
स्टेप 3. सेटिंग्स एडजस्ट करें और OK पर क्लिक करें।.
GIMP में छवि को कैसे शार्प करें
ऊपर प्रस्तुत शार्प इमेज ऐप के विपरीत, GIMP एक ऑफ़लाइन टूल है जिसका उपयोग आप अपनी छवि को तेज करने या इसकी गुणवत्ता को बढ़ाने के लिए कर सकते हैं। इसके अलावा, कई पेशेवर इस उपकरण का उपयोग छवियों को तेज करने और उन्हें बेहतर बनाने के लिए करते हैं। बहुत से लोग इस टूल को Adobe Photoshop के विकल्प के रूप में पहचानते हैं। यह पीएनजी, जेपीजी, जेपीईजी, वेबपी और बीएमपी जैसे लगभग सभी छवि प्रारूपों का समर्थन करता है। इसके अलावा, इसमें कई संपादन सुविधाएँ हैं जिनका आप उपयोग कर सकते हैं, जिसमें फ़ोटो सुधारना, रचनाएँ बदलना आदि शामिल हैं। लेकिन इस ऐप का नकारात्मक पक्ष यह है कि इसमें एक कठिन इंटरफ़ेस है, जिससे शुरुआती लोगों के लिए इसका उपयोग करना मुश्किल हो जाता है।
फिर भी, यदि आप कई फोटो संपादन अनुप्रयोगों में एक समर्थक हैं, तो आप निश्चित रूप से GIMP को एक छवि को तेज करने के लिए एक महान उपकरण पाएंगे।
GIMP में इमेज को कैसे तेज करें:
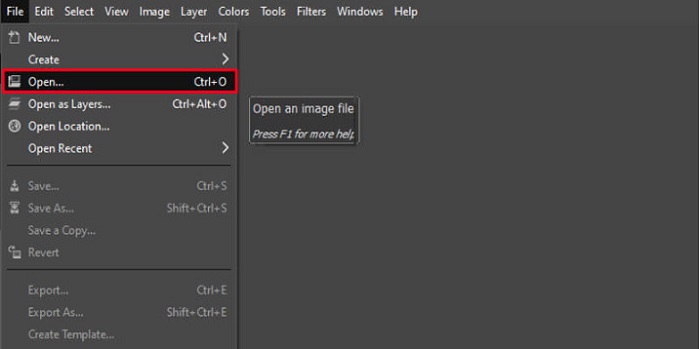
स्टेप 1. अपने डिवाइस पर GIMP इमेज शार्पनर डाउनलोड करें। और सॉफ़्टवेयर के मुख्य इंटरफ़ेस पर जाकर File > Open पर क्लिक करके अपनी इमेज इम्पोर्ट करें।.
स्टेप 2. फिर, Layer > Duplicate बटन पर क्लिक करके एक डुप्लिकेट लेयर बनाएँ। आप लेयर डुप्लिकेट करने के लिए शॉर्टकट कीज़ भी इस्तेमाल कर सकते हैं। Shift + Ctrl + D दबाएँ, और लेयर डुप्लिकेट हो जाएगी।.
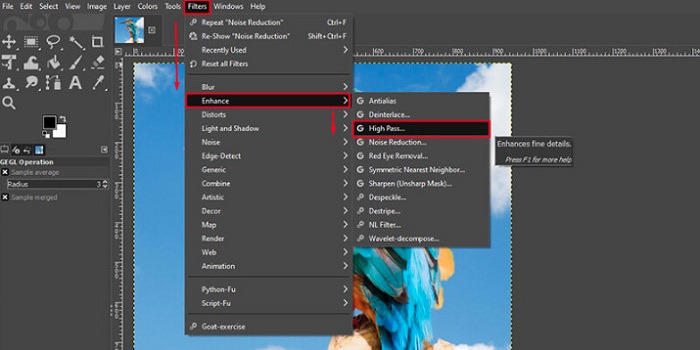
स्टेप 3. इसके बाद, हम नॉइज़ कम करेंगे: Filter > Enhance > Noise Reduction पर जाएँ। फिर, हम मनचाही शार्पनेस लगाने के लिए High Pass विकल्प का उपयोग करेंगे। इसके लिए Filters > Enhance > फिर High Pass विकल्प चुनें।.
स्टेप 4. अब, हम अपनी इमेज को हल्का (ब्राइट) करने और उसमें डिटेल्स जोड़ने के लिए Vivid Light विकल्प का उपयोग करेंगे। मोड सेक्शन में Option पर जाएँ और Normal को बदलकर Vivid Light कर दें।.
स्टेप 5. अंतिम टच के लिए एक बार फिर डुप्लिकेट लेयर बनाएँ, फिर Filters > Enhance > Sharpen (Unsharp Mask) पर जाएँ। इसके बाद, आप अपनी इमेज का Radius, Amount, और Threshold एडजस्ट कर सकते हैं। फिर, आउटपुट सेव करने के लिए कीबोर्ड पर Ctrl + S दबाएँ।.
बस इतना ही! अगर आप भी उन लोगों में से हैं जो GIMP के साथ इमेज को कैसे शार्प करें, यह सर्च कर रहे हैं, तो यह गाइड आपके लिए है। बस इन स्टेप्स को फॉलो करें और GIMP का उपयोग करके अपनी इमेज क्वॉलिटी बढ़ाएँ।.
भाग 3. iPhone/Android पर तस्वीर को कैसे शार्प करें
Picwand AI फोटो एडिटर एक शक्तिशाली एडिटर है जो AI के साथ आपकी तस्वीरों को संपादित करने में आपकी सहायता करता है। आप सीधे Picwand की वेबसाइट पर संपादन कर सकते हैं या इसे अपने iPhone या Android डिवाइस पर डाउनलोड कर सकते हैं। इसमें कई बुद्धिमान विशेषताएं हैं जैसे कि चित्रों को बड़ा करना, पृष्ठभूमि को काटना, वस्तुओं को निकालना और चित्रों को स्पष्ट करना, ये सभी उन्नत AI के कारण हैं। धुंधली छवियों को ठीक करें, पुरानी तस्वीरों को फिर से बनाएँ, या Picwand के साथ अवांछित चीजों को हटाएँ और इसे जल्दी और सटीक रूप से करें। इसका सरल इंटरफ़ेस इसे किसी के लिए भी उपयुक्त बनाता है, चाहे उनका अनुभव कुछ भी हो।
स्टेप 1. ऐप खोलें और AI Image Upscaler चुनें।.
स्टेप 2. एक इमेज अपलोड करें और मनचाहा मैग्निफिकेशन फैक्टर चुनें।.
स्टेप 3. एक्सपोर्ट करने के लिए डाउनलोड आइकन पर टैप करें।.

भाग 4. धुंधली छवि को कैसे शार्प करें, इस बारे में अक्सर पूछे जाने वाले प्रश्न
क्या पिक्सलेटेड तस्वीरों को ठीक करने के लिए कोई एप्लिकेशन है?
हाँ। आप अपनी इमेज के पिक्सेल एडजस्ट करने के लिए इमेज अपस्केलर का उपयोग कर सकते हैं। पिक्सेलेटेड तस्वीरों को ठीक करने के लिए सबसे अच्छे टूल्स में से एक PIXLR है। यह आपकी इमेज का ब्लर हटाने के लिए भी अच्छा है।.
क्या जीआईएमपी मुफ्त है?
GIMP विंडोज, मैक और लिनक्स पर उपलब्ध एक इमेज एडिटिंग ऐप है। यह एक फ्री-टू-यूज़ ऐप है, जिसमें आप इसके सोर्स कोड को बदल सकते हैं। हालाँकि, आपको इसकी अन्य संपादन सुविधाओं तक पहुँचने के लिए ऐप को खरीदना होगा।
क्या मैं कैनवा का उपयोग करके एक छवि को तेज कर सकता हूं?
सौभाग्य से, कैनवा में एक विशेषता है जहाँ आप अपनी छवि में तीक्ष्णता जोड़ सकते हैं। इसलिए, यदि आपकी छवि धुंधली है, तो कैनवा आपके लिए एक उपयुक्त उपकरण हो सकता है।
निष्कर्ष
हमें उम्मीद है कि हमने आपकी इमेज शार्प करने से जुड़ी शंकाओं का जवाब दे दिया है। इसे अच्छी और तेज़ी से करने के 7 तरीके हैं, जैसे कि Video Converter Ultimate, PhotoShop, VanceAI वगैरह का उपयोग करना। अगर आप एक बिल्कुल फ्री टूल ढूंढ रहे हैं, तो आप FVC Free Image Upscaler पर नज़र डाल सकते हैं। यह 100% फ्री ऑनलाइन टूल है।.
-
 शीर्ष 4 छवि गुणवत्ता रेड्यूसर जिनका आप ऑनलाइन और ऑफलाइन उपयोग कर सकते हैं
 ये छवि गुणवत्ता रिड्यूसर कुछ कारणों से आपकी छवि की गुणवत्ता को कम करने में आपकी सहायता कर सकते हैं। यदि आपको इसकी आवश्यकता है, तो आप इस लेख को पढ़ें!
-
 हैंड्स-ऑन ट्यूटोरियल के साथ इमेज को 4k तक अपग्रेड करने के आधिकारिक तरीके
 छवि को 4k तक बढ़ाने के लिए आपको अपने डिवाइस पर एक सॉफ़्टवेयर की आवश्यकता होगी। यदि आपके पास एक नहीं है तो आपको हमारे द्वारा यहां शामिल किए गए टूल का चयन करना होगा।
-
 मुफ़्त और सशुल्क ऐप्स का उपयोग करके फ़ोटो की स्पष्टता को कैसे संपादित करें
 फोटो की स्पष्टता को कैसे संपादित करें? जब आप इस लेख को पढ़ेंगे तो इस प्रश्न का उत्तर मिल जाएगा और हम ऐसी युक्तियां जोड़ेंगे जिन्हें आपको जानना आवश्यक है!