


あなたが知っておくべき最善の方法を使用してiPhoneの写真の解像度を改善する[最新]
高解像度の画像を撮影できるモバイル端末が必要なら、革新的で高性能な前面・背面カメラを搭載した iPhone を選ぶのは賢い選択です。Android ユーザーには申し訳ありませんが、最新の iPhone のカメラのほうがはるかに優れているという事実は受け入れなければなりません。たいていの人は iPhone で写真を撮りますが、撮った写真がすべて完璧というわけではなく、調整や編集、改善、アップスケーリングが必要な場合もあります。もしあなたがiPhone の写真解像度を上げたいなら、本記事で必要な情報を順に解説していくので、ぜひ読み進めてください。

パート 1. 推奨される方法: 最高のイメージ アップスケーラーを使用してオンラインで写真の解像度を上げる方法
「iPhone 13 で写真の解像度を変更する方法は?」これがあなたの悩みなら、FVC Free Image Upscaler を使う必要があります。ここにアップロードした画像はすべて、このツールの誇る AI 技術によってすぐにアップスケールされます。画像をアップロードしたあとは、ツールが自動的に解像度を上げてくれるので、あなたは待っているだけで構いません。他のソフトウェアと違って、利用するためにインストーラーをダウンロードする必要もありません。また、FVC ではアカウントにログインする必要もないため、情報漏えいの心配が少なく、クッキーも付与されません。このツールに興味を持ったなら、以下の手順にそのまま従って問題を解決しましょう。
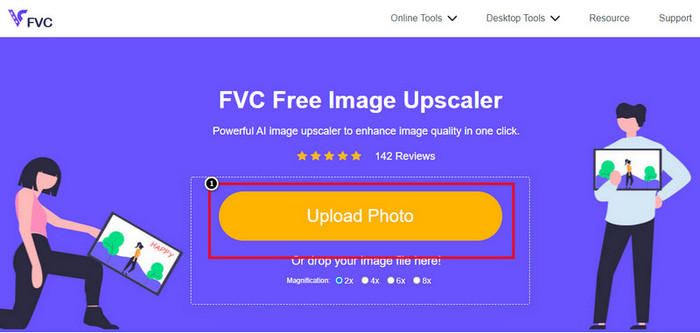
ステップ1. 上記のツール名をクリックしてオンラインツールを開きます。自動的に新しいタブが開き、公式サイトへ移動します。
ステップ2. Upload Photo をクリックして、このツールでアップスケールしたい画像を挿入します。クリックするとフォルダが画面に表示されるので、画像を選択して Open を押します。
ステップ3. 強化後の画像に適用したい倍率(Magnification)の種類を選択します。どのオプションがより見栄えを良くしてくれるか、すべて試してみても構いません。
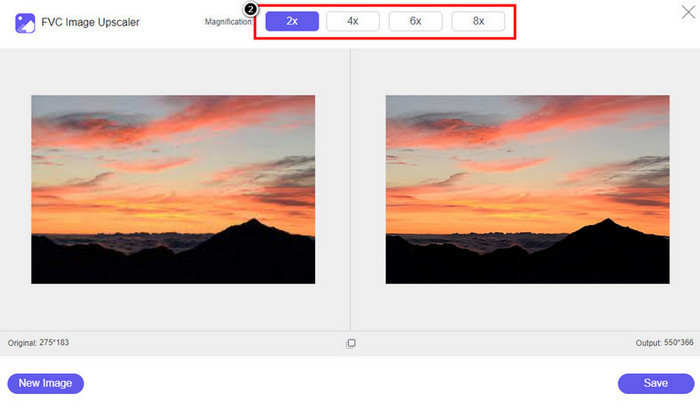
ステップ4. Save ボタンをクリックして、ここで強化した画像をダウンロードします。ツールは画像を直接ローカルフォルダに保存します。編集した画像のアップスケール版を確認してみましょう。

パート2。 iPhoneで写真の解像度を変更する方法[画像の保存を簡単に改善する]
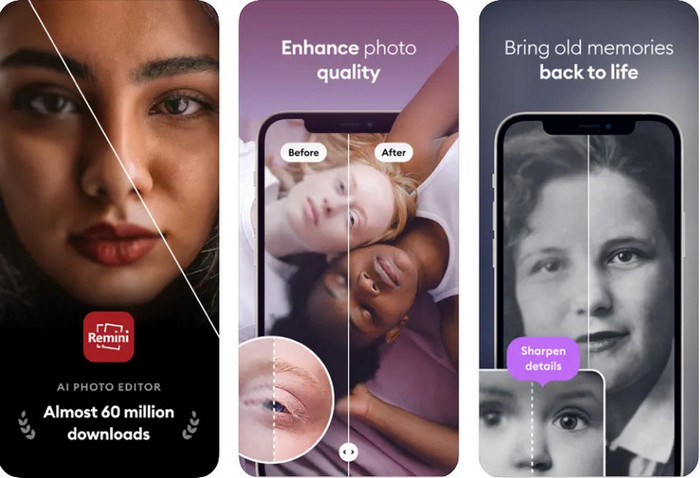
Remini アプリを使えば、iPhone の写真の解像度を変更して、さらに見栄えを良くすることができます。このアプリは App Store からダウンロード可能です。1 つで何役もこなす画像編集アプリで、ワンタッチで白黒写真をカラー化したり、画像を強化したりできます。このアプリでは、AI 技術の助けを借りて、任意の画像を最大 4 倍までアップスケールできます。このアプリを使ってみたい場合は、次に紹介するステップバイステップの手順をそのまま真似してください。
ステップ1. iPhone にアプリをダウンロードして、使用できる状態にします。
ステップ2. アプリを開き、Enhance をタップします。写真フォルダの中から、画質を向上させたい画像を選択します。
ステップ3. アップロードした画像の強化処理が完了するまで待ちます。スライダーをドラッグすると、処理前と処理後の画像を見比べることができます。
ステップ4. 処理が完了したら、Save ボタンをクリックして強化した画像を保存します。
パート3. Androidで写真の解像度を変更する方法[画像を効果的に強化する]
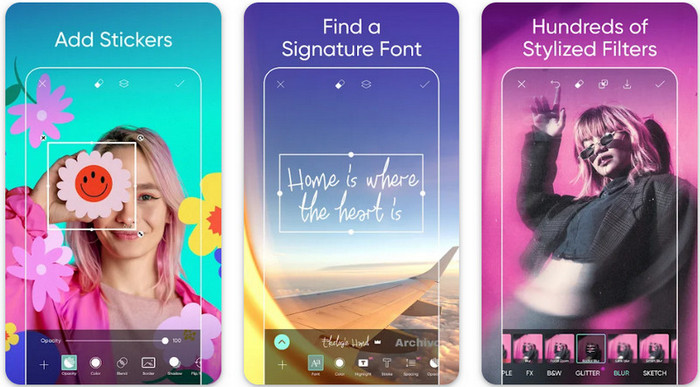
Android で写真の解像度を変更するには?Android で撮影した画像の解像度を上げたいなら、Picsart を試してみてください。これは Android にダウンロードできる有名な画像編集アプリで、手持ちの写真をより良く見せることができます。機能が非常に豊富で、さまざまな機能を活用できます。ここで紹介する「画質アップ」は、一般的に想像する方法とは少し違いますが、画像の見え方を改善することができます。詳しく知りたい方は、以下の情報を順に確認してください。
ステップ1. Play ストアからアプリをダウンロードして起動します。画質を向上させたい画像を選び、アップロードします。
ステップ2. Effects に進み、Blur をクリックします。ブラー(ぼかし)のスライダーをドラッグして 5〜10 に設定し、チェック アイコンを押して反映させます。
ステップ3. Tools を開き、Curve に進みます。
ステップ4. カーブを上下にドラッグして調整し、画像の見た目の解像感が良くなるようにします。
ステップ5. カーブ調整で加えた変更を保存するために、チェック アイコンをタップし、その後 Export して画像を書き出します。
パート 4. カメラの設定を調整して、より良い画像をキャプチャする方法! [ヒントとコツ]
iPhone で写真の解像度を上げて、より良いポートレート画像をキャプチャする方法は?すべての機能が iPhone のカメラ アプリに表示されるわけではありません。画質を向上させるためのいくつかの設定があります。この問題に対処する方法に興味がありますか?次に、以下に追加する情報を読みます。
ステップ1. 設定(Settings)を開き、カメラアプリを選択します。
ステップ2. 「フォーマット(Formats)」をタップします。
ステップ3. 最終出力形式を Most Compatible(もっとも互換性の高い形式)に設定します。これは JPEG 形式で、よく知られているように、非可逆圧縮でありながら高画質な画像出力を実現します。
関連記事:
画像の肌をなめらかにするために使うべきシミ消し・肌補正ツール
パート 5. iPhone で写真の解像度を変更する方法に関する FAQ
iPhoneの画質が悪くなる原因とは?
何が問題なのかを検討する必要がある多くの要因があります。画像をキャプチャする前に、iPhone のレンズをきれいにし、安定した手があることを確認してください。または、カメラ スタンドを使用して、移動するオブジェクトに高い ISO を使用することができます。それを行っても品質が悪い場合は、この記事に記載されているツールを使用できます.
画質を変えるとファイルサイズは大きくなりますか?
確かに、エンハンスすると画質が大きくなります。画像にピクセルを追加すると、それを強調した後に、改善されたバージョンのファイル サイズも大きくなります。
iPhoneで写真の解像度を変更するのは簡単ですか?
はい、iPhone の写真解像度を向上させるために何年もの経験を積む必要はありません。そのため、その方法を知りたい場合は、上記に追加した手順と使用できるツールをコピーできます。
結論
以上のように、専用アプリを活用すれば、iPhone の写真解像度をこれまで以上に良くする方法がはっきりと分かりました。この記事が、iPhone と Android それぞれに対する異なる解決策で、あなたの悩みを解決する手助けになれば幸いです。誰だって画質の悪い写真は好きではありません。だからこそ、私たちはその問題を解決するためにこの記事を用意しました。上で紹介した手順に従えば、短時間で仕上げることができます。
-
 低解像度の画像をオンラインで高解像度に変換する方法
 低解像度の画像をオンラインで高解像度の画像に変換する方法を学びたい場合は、この記事が最適です。方法を学ぶために完全に読んでください。
-
 あなたが今持っている必要があるトップ6の傷の写真除去剤[2022]
 滑らかな肌にするために写真の傷の除去剤が必要ですか?もう心配しないでください!ここでは、デバイスに役立つさまざまなツールを紹介します。
-
 使用できる無料および有料バージョンを使用してStarUML透かしを削除します
 最終出力のStarUML透かしを削除したいですか?それを行うには2つの方法があります。ここでそれらについて説明しましょう。