


Windows Media Player でスクリーン キャプチャする 4 つの方法
Windows Media Player は、あらゆる種類のメディアを再生できる人気のプレーヤーです。写真の表示、音楽プレーヤー、動画視聴、音楽コレクションの管理など、さまざまな機能が搭載されています。Windows Media Player を利用することで、メディアに関する作業を効率よく行うことができます。本記事では、その中でもWindows Media Player で画面キャプチャする方法に焦点を当てて解説します。映画の印象的なシーンやチュートリアルの一部、面白い瞬間などを再生しながら、好きなタイミングでスクリーンショットを撮って保存しておけると便利です。しかし、多くのユーザーは、この多機能なプレーヤー内でスクリーンショットを撮るための内蔵ツールやテクニックについて、あまりよく知らないかもしれません。この記事の最後まで読み進めることで、ソフトウェア、ショートカットキー、Snipping Tool(切り取りツール)、およびプレーヤーの内蔵機能を利用した、Windows Media Player での画面キャプチャの簡単かつ効果的な 4 つの方法を学ぶことができ、印象的な瞬間を手軽にキャプチャできるようになります。

パート 1. Windows Media Player でスクリーンショットを撮る方法
Windows Media Player でスクリーンショットを撮るのは簡単で、操作や習得に時間を取られることはありません。方法も多数ありますが、Windows 11 以前のメディアプレーヤー画面をスクリーンショットする推奨方法は、FVC が厳選したScreen Recorder のようなソフトウェアツールを使うことです。このソフトは、特に Windows Media Player 上のあらゆる種類のメディア画面をキャプチャするニーズに応える、汎用性の高いツールです。このソフトを使えば、画面上の操作や動画・音声・ゲームを 1 つの場所でまとめて録画でき、特定の機能だけに特化した他のツールとは異なります。さらに、このソフトには使いやすく時間の節約につながる機能が備わっています。編集ツールにより、スクリーンショットを撮った直後から簡単に編集することができます。
ステップ 1. まず、このスクリーンショット用ツールをパソコンにダウンロードしてインストールします。インストールが完了したら、ソフトを起動します。
無料ダウンロードWindows 7以降に対応安全なダウンロード
無料ダウンロードMacOS 10.7以降に対応安全なダウンロード
ステップ 2. ソフトを開くと、右側にスナップショットの下向き矢印アイコンが表示されます。このボタンをクリックして進みます。
ステップ 3. ドロップダウンメニューからスクロールウィンドウオプションを選択します。あるいは、キーボードのショートカット Alt+L を使用することもできます。
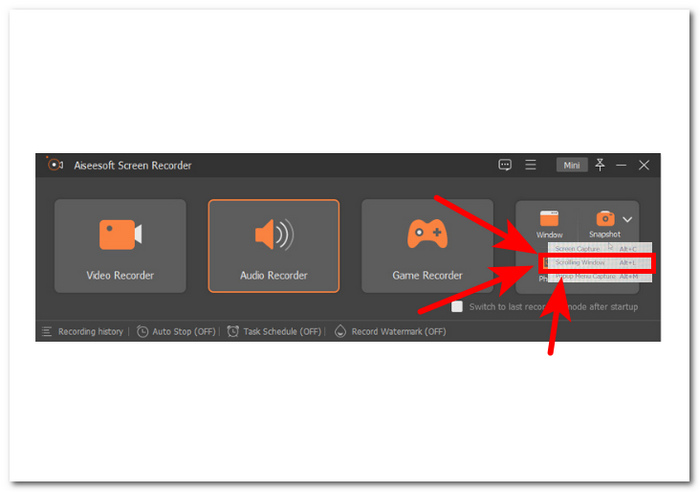
ステップ 4. スクロールウィンドウオプションを選択すると、ソフトが自動的にスクリーンショットを撮ります。必要な情報をすべて収められるよう、画面をスクロールしてください。ソフトがページまたはドキュメント全体の長さをキャプチャするので、そのまま保存したり共有したりできます。
FVC が推奨する Screen Recorder は、Windows Media Player でビデオのスクリーンショットを撮るのに使用できる信頼性の高いツールです。このソフトウェアは Mac と Windows の両方のデバイスで無料で利用できるため、幅広いユーザー層が確保されています。さまざまな画面録画機能とキャプチャ機能を備えたこのスクリーンショット ツールは、コンピューター画面をキャプチャするための信頼性の高い多目的ツールを必要とするすべての人にとって最適です。
パート 2. Windows ショートカットを使用した Windows Media Player のスクリーンショット
Windows Media Player を使用していてスクリーンショットを撮る必要がある場合、サードパーティのツールをダウンロードする必要はありません。Windows Media Player のビデオから画像をキャプチャするには、ショートカット キーを使用して、視聴中のビデオのスクリーンショットをすばやく簡単にキャプチャできます。これは、ビデオから静止画像を取得して参照したり、他の人と共有したりするのに最適な方法です。適切なショートカット キーを使用するだけで、スクリーンショットが保存され、ドキュメントや画像編集ソフトウェアに簡単に転送できます。
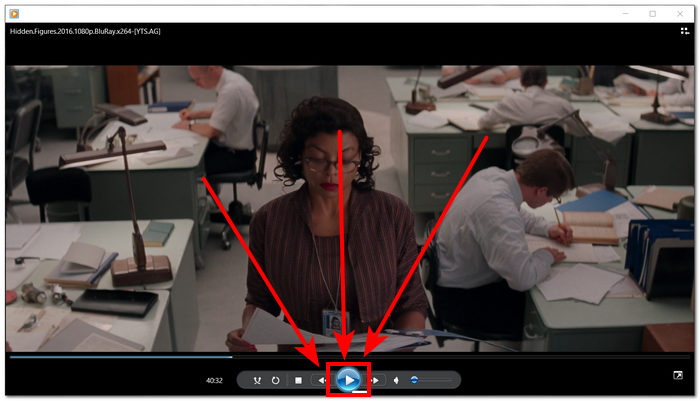
ステップ 1. まずパソコンでWindows Media Playerを起動します。スクリーンショットを撮りたい動画を選択します。

ステップ 2. スクリーンショットとして保存したいちょうどそのフレームに達したら、一時停止ボタンをクリックして動画を一時停止します。
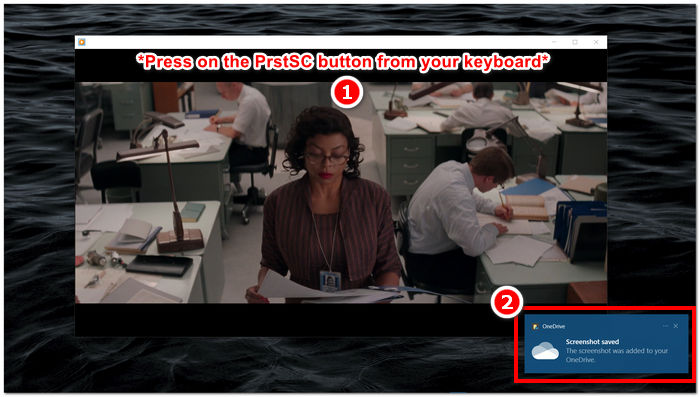
ステップ 3. キーボード上のPrtScnボタンを探して押します。これで画面全体がスクリーンショットとして撮影され、画像ファイルとして保存されます。(PrtSc キーなしでスクリーンショットを撮る方法は?)
ステップ 4. スクリーンショットは自動的にパソコンの既定の保存場所に保存されます。スクリーンショットを保存しましたというポップアップウィンドウを探して確認してください。
Windows Media Player でスクリーンショットを撮る場合、ショートカット キーを使用すると、時間を節約でき、ツールを使用する必要がなくなります。この方法は、急いでいる人にとって効率的で便利ですが、スクリーンショットを編集することはできないことに注意することが重要です。
パート3. Snipping Toolを使用してWindows Media Playerでスクリーンショットを撮る方法
Windows Media Player でビデオを再生中にスクリーンショットをキャプチャしたい場合は、追加のソフトウェアをインストールしなくても簡単にできます。すべての Windows デバイスに既に組み込まれている Windows Snipping ツールを使用すると、メディア プレーヤーのビデオ再生ウィンドウを含む画面の任意の部分のスクリーンショットを撮ることができます。この機能は、参照または共有の目的でビデオから静止画像をすばやくキャプチャする必要がある場合に便利です。
ステップ 1. スクリーンショットを撮りたい動画をWindows Media Playerで開きます。
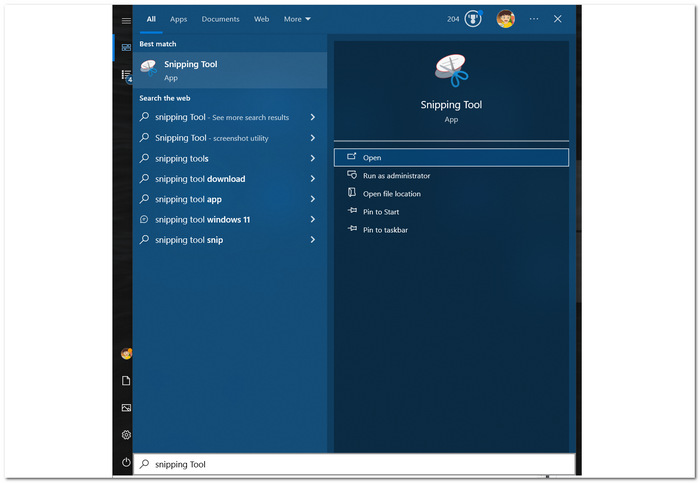
ステップ 2. Windows デバイスのスタートメニューでSnipping Tool(切り取りツール)を検索して開きます。
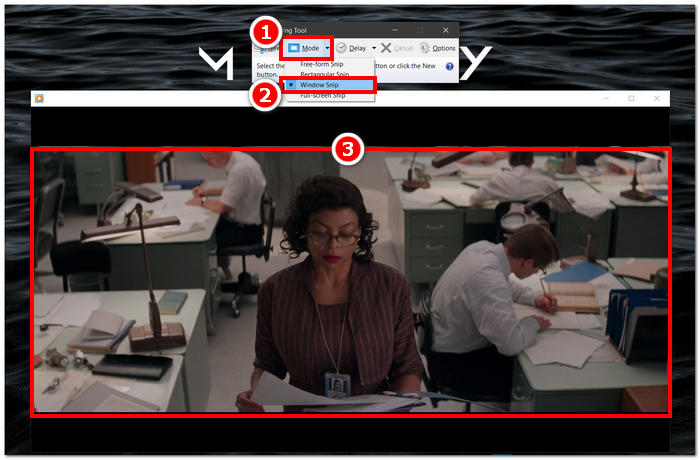
ステップ 3. インターフェイス上で、[モード]欄からウィンドウの領域切り取りをクリックし、スクリーンショットを撮りたい領域を手動で選択します。
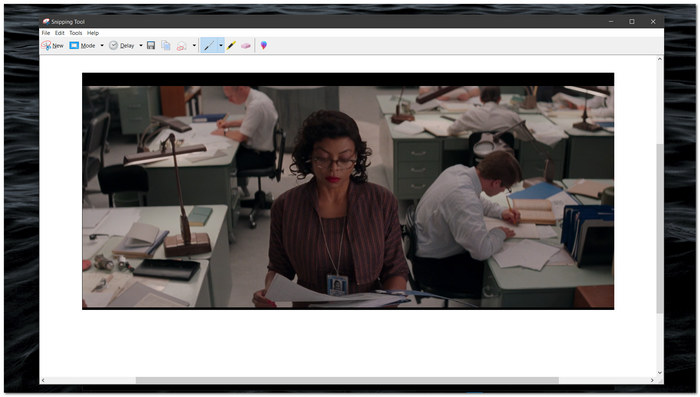
ステップ 4. 領域をクリックすると新しいウィンドウが開き、注釈を追加したり、パソコンに保存したりできるようになります。
Windows Snipping Tool のネイティブ機能により、Windows Media Player でビデオを視聴しながらスクリーンショットをキャプチャすることが簡単になりました。Windows Snipping Tool を活用することで、ユーザーはメディア エクスペリエンスを強化し、コンテンツをシームレスにキャプチャして共有するプロセスを合理化できます。
パート4. Windows Media Playerの組み込みツールでスクリーンショットを撮る方法
Windows Media Player には組み込み機能がないため、ユーザーはプレーヤー内でスクリーンショットを撮ることができません。ただし、上記のショートカット キーに加えて、Windows Media Player でスクリーンショットを撮るために使用できるショートカット キーが 1 つあります。
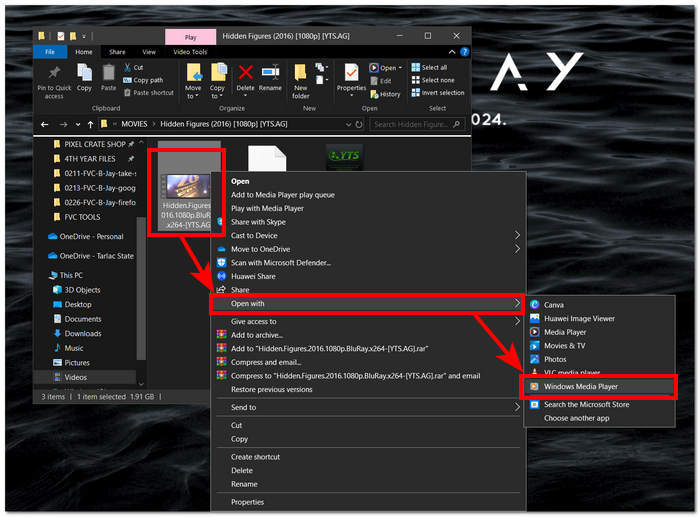
ステップ 1. Windows Media Playerで再生中の動画をスクリーンショットするには、まずプレーヤーでその動画を開きます。

ステップ 2. キャプチャしたいちょうどその瞬間で、プレーヤーをいったん一時停止します。

ステップ 3. 一時停止した動画のスクリーンショットを撮るには、キーボードでWindows ロゴ キー + Shift + Sの組み合わせキーを押します。
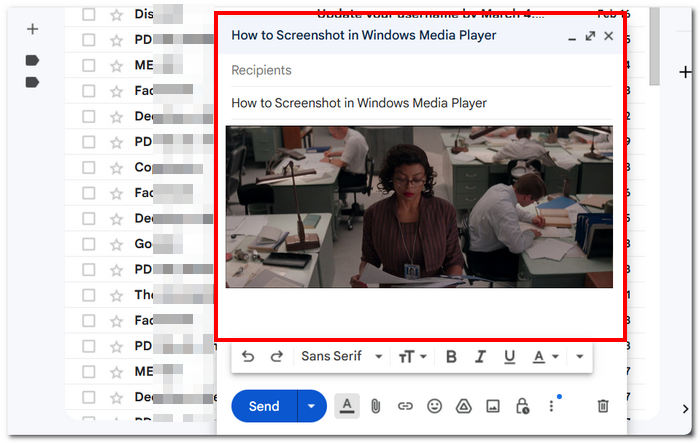
ステップ 4. スクリーンショットしたい部分を手動で選択すると、その画像は自動的にクリップボードに保存されます。あとは、メール、メッセージアプリ、メモアプリなど、使いたい場所に貼り付けるだけで簡単に利用できます。
Windows Media Player にはスクリーンショットを撮る機能が組み込まれていない場合があります。ただし、VLC スクリーンショットとは異なり、無料でデバイスにプリインストールされていることを考慮すると、信頼性が高く強力なメディア プレーヤーです。
パート 5. Windows Media Player でスクリーンショットを撮る方法に関する FAQ
追加のソフトウェアを使用せずに Windows Media Player でスクリーンショットを撮ることはできますか?
Windows Media Player では、追加のソフトウェアを使用せずにスクリーンショットをキャプチャできます。Windows には、Snipping Tool と呼ばれる組み込みツールがあり、これを使用すると、Windows Media Player のビデオ再生ウィンドウを含む、画面の任意の部分のスクリーンショットを撮ることができます。
スクリーンショットをより良く撮るために、Snipping Tool の設定をカスタマイズできますか?
Snipping Tool では、デフォルト モード (長方形の切り取り、自由形式の切り取りなど)、キャプチャ前の遅延、スクリーンショットを保存する形式 (PNG、JPEG など) などのカスタマイズ可能な設定が提供されます。
Windows Media Player でスクリーンショットを撮るより速い方法はありますか?
より高度な機能とより高速なスクリーンショット撮影方法を提供するサードパーティのスクリーンショット ツールがあります。Windows Media Player の使用中に頻繁にスクリーンショットを撮る必要がある場合は、これらのオプションを検討してください。
全画面モードで再生されているビデオのスクリーンショットをキャプチャできますか?
はい、ビデオが全画面モードで再生されているときでも、Snipping Tool を使用してスクリーンショットを撮ることができます。Snipping Tool に切り替えて、ビデオを含む画面の目的の領域をキャプチャするだけです。
Windows Media Player で高品質のスクリーンショットを撮るための推奨方法は何ですか?
Windows Media Player で高品質のスクリーンショットを撮るには、ソフトウェアを使用する方法が推奨されます。このツールを使用すると、ビデオ再生ウィンドウを含む画面の特定の領域を選択してキャプチャできるため、スクリーンショットの鮮明さと正確さが確保されます。ソフトウェア ツールの機能を活用することで、サードパーティ ソフトウェアを必要とせずに、鮮明で詳細なスクリーンショットを簡単に撮ることができます。
結論
本記事では、ソフトウェアベースのソリューションから Snipping Tool(切り取りツール)やショートカットキーといった内蔵ツールまで、Windows Media Player でスクリーンショットを撮る方法を幅広く紹介しました。これらの手法は手軽に使うことができ、メディア体験の中で大切な瞬間を簡単に保存・共有する力をユーザーに与えてくれます。ここで紹介した機能を活用すれば、Windows Media Player の利用にスムーズに画面キャプチャを取り入れ、メディアとの関わりをさらに充実させることができます。
-
 Firefox でスクロールスクリーンショットを簡単に撮る方法
 Firefox でスクロール スクリーンショットを撮って、Web ページ全体を瞬時にキャプチャする方法を学びます。この機能の利用方法については、簡単なステップ バイ ステップのチュートリアルに従ってください。
-
 手のひらでSamsung S23のスクリーンショットを撮る方法
 Samsung S23 でスクリーンショットを撮る方法について知っておくべきすべてのこと。シームレスなスクリーン キャプチャ エクスペリエンスを実現するために、フラッグシップ デバイスの機能を最大限に活用します。
-
 Windows Media Player で効率的にスクリーンショットを撮る方法
 Windows Media Player でスクリーンショットを簡単にキャプチャする最も簡単な方法をご紹介します。当社の包括的なガイドで、スクリーン キャプチャ体験を向上させましょう。