

Photoshopで透かしを追加する方法の簡易ガイド
昨今、透かしを追加することはますます重要になっています。多くの人がオンラインでデジタルコンテンツを共有したり入手したりしているため、あなたの作品がクレジット表記なしに転載される可能性は高くなっています。透かしは、コンテンツがオリジナルであり、あなたが所有していることを示すことで、コンテンツを保護するのに役立ちます。
Photoshopを使っている方で、動画に透かしを追加できるかどうか疑問に思っている方もいるかもしれません。もちろん、可能です!Photoshopでは、タイムラインパネルを使って動画に透かしを追加できます。Photoshopは主に画像編集ツールですが、基本的な動画レイヤーもサポートしており、動画クリップ全体に透かしを重ねることができます。ただし、短時間の簡単な編集には最適です。より長い動画や複雑な動画を扱う場合は、専用の動画編集ソフトを使用する方が効率的です。
このガイドでは、Photoshopでウォーターマークを追加する方法を解説します。さっそく始めましょう!

パート 1. Photoshop で透かしを作成する方法
Photoshopを使えば、どんな透かしでも簡単に作成できます。デジタルコンテンツにいつでも簡単に透かしを適用できる、素晴らしいツールです。以下は、Photoshopで透かしを作成する手順です。
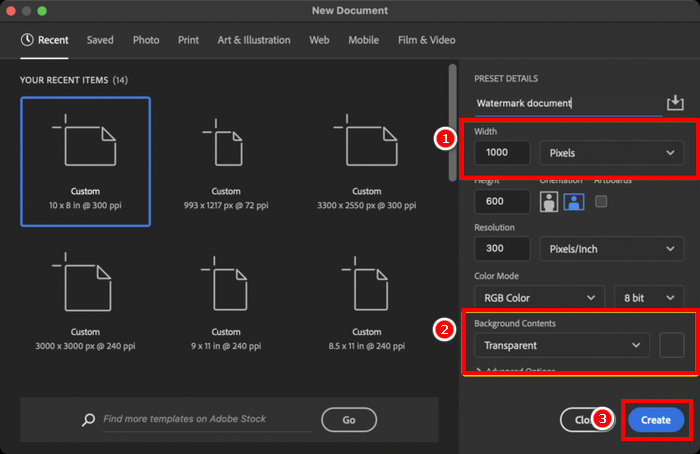
ステップ1.Photoshopを開き、背景を透明にした新規ドキュメントを作成します。ドキュメントサイズは幅1000 pxにするのがおすすめです。設定が完了したら、下部の作成ボタンをクリックします。
ステップ2.文字ツール(Type Tool)を使ってテキストのウォーターマーク用に自分の名前やブランド名を入力するか、ブラシツール(Brush Tool)で署名を描きます。カラーは白に設定してください。
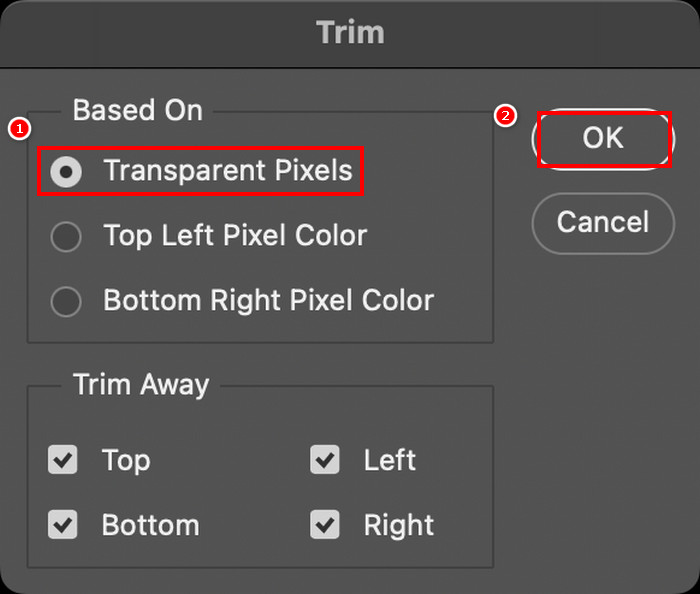
ステップ3.メニューのイメージ(Image)タブに移動し、トリミング(Trim)を選択します。そこで透明ピクセル(Transparent Pixels)を選び、余白を削除するためにOKをクリックします。
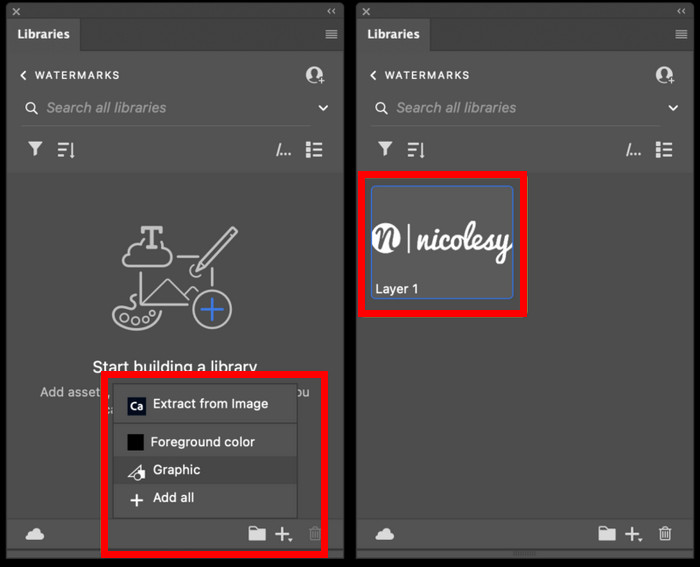
ステップ4.続いて、ライブラリ(Libraries)パネルを開き、新規ライブラリを作成(Create New Library)をクリックして名前を付け、作成(Create)をクリックします。
ステップ5.ライブラリ(Libraries)パネル内の+アイコンをクリックし、グラフィック(Graphic)を選択してウォーターマークを保存しておくと、いつでも簡単に呼び出せます。
これはPhotoshopで透かしを作成する方法の一つに過ぎませんが、大胆なロゴ、控えめな署名、シンプルな名前など、お好きなように自由にデザインできます。重要なのは、コンテンツを保護する必要があるときにいつでも使えるように、自分だけの透かしを作成することです。
パート 2. Photoshop でビデオに透かしを追加する方法
Photoshopで透かしを作成する方法がわかったので、いよいよ実際に使ってみましょう。このパートでは、Photoshopの基本的な動画編集ツールを使って動画に透かしを追加する方法をご紹介します。Photoshopは完全な動画編集ソフトではありませんが、透かしを重ねるなどの簡単な作業は可能です。ただし、Photoshopはインターフェースが複雑で、慣れていないユーザーは戸惑う可能性があるため、初心者には適していません。正しく操作するには、以下の手順に従ってください。
ステップ1.パソコンにPhotoshopがインストールされていない場合は、まずダウンロードしてインストールします。このソフトはWindowsとmacOSの両方に対応しています。
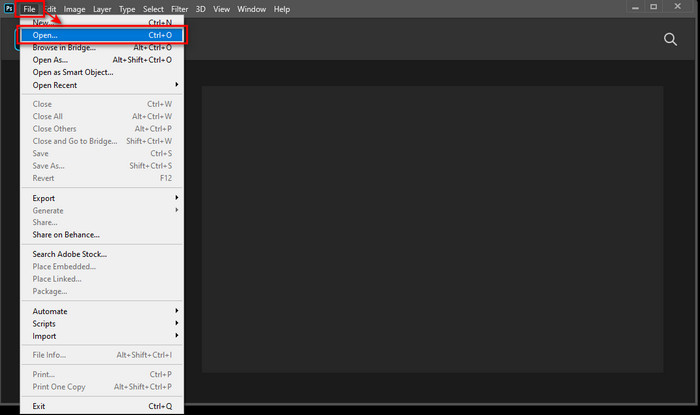
ステップ2.再びPhotoshopで、メニューのファイル(File)タブから開く(Open)をクリックします。その後、ウォーターマークを追加したい動画を探して選択します。ファイルを追加すると、タイムラインが表示されます。
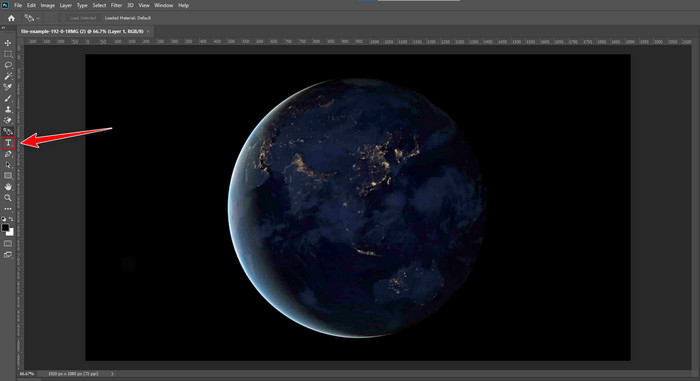
ステップ3.続いて、画面左側のパネルでテキストツール用のTアイコンを見つけます。動画上の任意の場所をクリックして、ウォーターマークとして使用したいテキストを入力します。先へ進む前に、フォントスタイル、サイズ、色、その他の設定を調整して、ウォーターマークの見た目を好みにカスタマイズしてください。
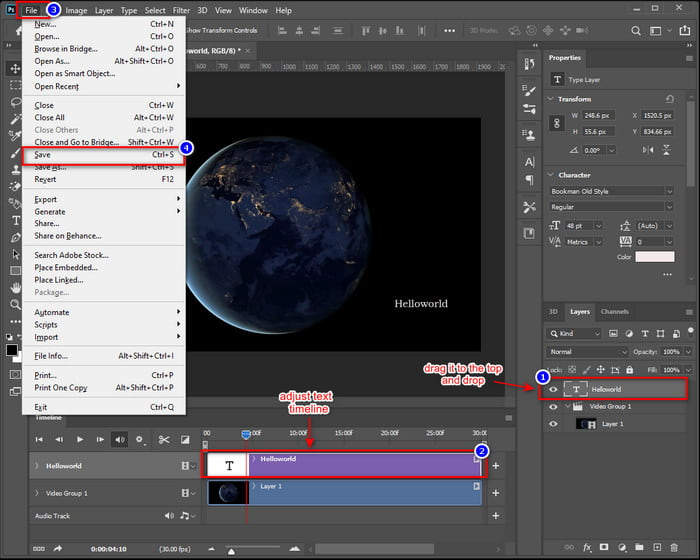
ステップ4.レイヤーパネルで、動画グループの上にくるようにテキストレイヤー(Text layer)をドラッグし、テキストが動画の最前面に表示されるようにします。次に、タイムラインパネルに戻り、テキストの開始点または終了点をドラッグして表示される長さを調整します。完了したら、ファイル(File)メニューから保存(Save)をクリックして変更内容を保存します。
Photoshopを使えば、確かに動画にウォーターマークを追加することができます。ただし、誰にとっても扱いやすいわけではありません。習得には時間がかかり、初心者にとってはインターフェースが複雑で戸惑うこともあります。レイヤーやタイムライン、テキストツールなどの扱いに慣れていない場合、使いこなせるようになるまで少し時間が必要になるでしょう。
パート3. Photoshopで動画に画像の透かしを追加する方法[究極の方法]
Photoshopは動画へのウォーターマーク追加に関して初心者向きとは言えないため、代わりに試せるツールもあります。FVC Video Converter Ultimateは特におすすめです。このコンバーターソフトは、動画や音声を変換できるだけでなく、動画に画像ウォーターマークを追加することも可能です。
FVCにはツールボックスがあり、様々な便利な機能が用意されています。ビデオウォーターマークもその一つです。このツールを使えば、動画を簡単にアップロードし、画像ウォーターマークを追加して、画面上の好きな場所に配置できます。複雑なレイヤーやタイムラインは不要で、シンプルで使いやすいインターフェースですぐに作業を完了できます。Photoshopの習得に時間をかけずに、すぐに成果を出したい方に最適です。以下は、FVCを使ってPhotoshopで動画に画像ウォーターマークを追加する手順です。
ステップ1.まずはお使いのコンピューターにFVC Video Converter Ultimateをダウンロードしてインストールします。WindowsとmacOSの両方に対応している点に注意してください。
無料ダウンロードWindows 7 以降に対応安全なダウンロード
無料ダウンロードMacOS 10.7 以降に対応安全なダウンロード
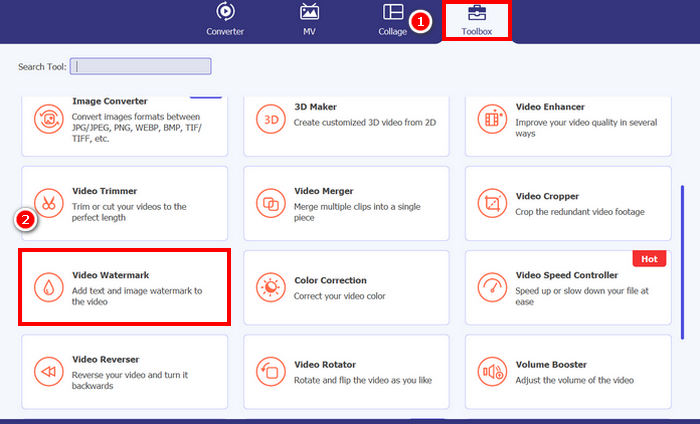
ステップ2:ツールを起動し、ツールボックスタブをクリックして、そこからVideo Watermark(動画ウォーターマーク)を選択します。
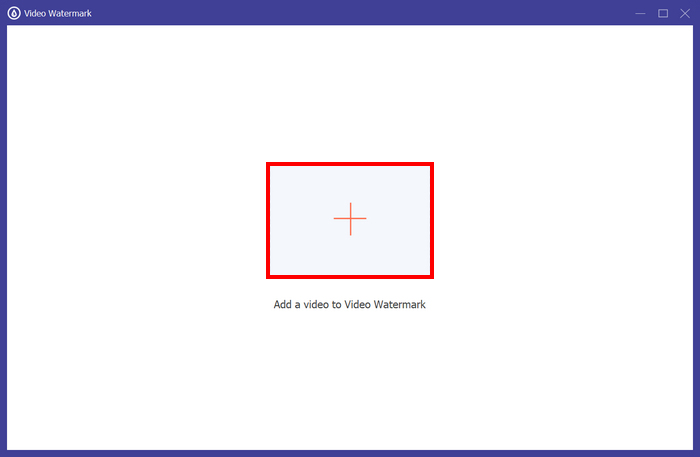
ステップ3.その後、動画ウォーターマークに動画を追加(Add a Video to Video Watermark)をクリックし、画像ウォーターマークを追加したい動画を選択します。
ステップ4:次に、+ Image Watermark(画像ウォーターマークを追加)を選択し、動画のウォーターマークとして使用したい画像を追加します。そこから位置やサイズなどを調整できます。設定が終わったら、Export(エクスポート)ボタンをクリックします。
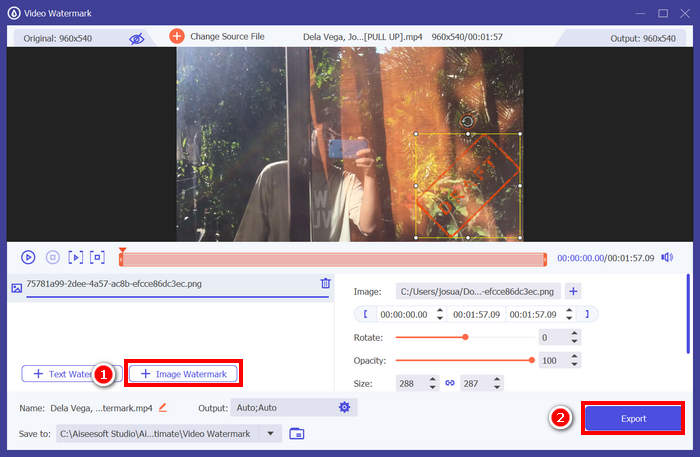
FVC Video Converter Ultimateのビデオウォーターマークツールを使えば、動画に画像ウォーターマークを簡単に追加できます。初心者でも誰でも簡単に使えます。手順は至ってシンプル。動画をアップロードし、ウォーターマークを挿入し、サイズと位置を調整するだけで完了です。
必要であれば、動画のウォーターマークを削除する方法についてはこちらをクリックしてご確認ください。
パート4. Photoshopで透かしを追加する方法に関するよくある質問
透かしを入れても大丈夫ですか?
はい、透かしを追加することは、コンテンツを保護する一般的で許容される方法です。コンテンツの盗用が横行するデジタルコンテンツにアイデンティティを与えるという点で役立ちます。
Photoshop はビデオに透かしを追加するのに初心者に優しいですか?
必ずしもそうではありません。Photoshopは動画に透かしを追加できますが、インターフェースと動画編集のワークフローは初心者には複雑です。レイヤーやタイムラインに慣れているユーザーに適しています。
Photoshop で透かしの外観をカスタマイズできますか?
はい、もちろんです。Photoshop では、テキストベースでも画像ベースでも、透かしのフォント、サイズ、色、不透明度、配置を完全に制御できます。
結論
これで、Photoshopでウォーターマークを追加する方法がわかったと思いますが、その重要性を理解しておくことも大切です。Photoshopでウォーターマークを追加することは、動画コンテンツを保護し、所有権を明確にするのに役立ちます。とくに初心者にとっては、最初は少し複雑に感じられるかもしれませんが、Photoshopならカスタムウォーターマークを高い精度で作成・適用できる柔軟性があります。もし、より簡単な方法を探しているなら、FVC Video Converter Ultimate のようなツールを使えば、より直感的な手順でウォーターマークを追加できます。さあ、始めてみましょう!
-
 プロの方法でビデオから透かしを削除する 5 つの方法
 ビデオから透かしを削除して、プロフェッショナルに見せる必要がありますか?それを行う方法についてのチュートリアルを追加するので、この記事を読んでください!
-
 MP4ビデオから透かしを削除するために使用できる2つの優れたアプリ
 この記事では、Windows や Mac などのデバイスを使用して MP4 ビデオから透かしを削除する方法について、シンプルで最も簡単な方法を紹介します。
-
 3つの実証済みの方法でエクスポートされたビデオのAnimotica透かしを削除します
 エクスポートしたビデオのAnimotica透かしを削除できるかどうか疑問に思ったことはありますか?この記事では、その方法を説明します。