


동영상에서 Picsart 필터 워터마크를 효과적으로 제거하는 완벽한 방법
요즘에는 Picsart처럼 데스크톱에서 믿고 쓸 수 있는 시각 미디어 편집 소프트웨어가 꼭 필요한 도구가 되었습니다. 이 프로그램만 있으면 몇 가지 옵션만 조정해도 평범한 이미지를 누구도 보지 못했던 멋진 사진처럼 바꿀 수 있습니다! 당신이 만든 시선을 끄는 이미지를 통해 더 많은 고객이나 관객을 얻을 수도 있죠. 하지만 Picsart를 사용할 때 한 가지 문제가 있는데, 바로 내보내기 후에 추가되는 워터마크입니다. 이 워터마크는 꽤 성가실 뿐 아니라 제거하지 않으면 화면에서 눈에 거슬릴 수 있습니다. 따라서 이 소프트웨어와 함께 Picsart 필터 워터마크를 제거하는 방법 튜토리얼이 필요하다면, 이 글을 계속 읽어 보며 자세한 내용을 익혀 보세요!

파트 1. 데스크톱에서 무료 소프트웨어를 사용하여 Picsart 필터 워터마크를 제거하는 방법
FVC Video Converter Ultimate - Windows 및 Mac용 최고의 워터마크 제거 도구
먼저 워터마크 Picsart를 제거하는 방법을 도와주고 알려 줄, 우리가 첫 번째로 추천하는 소프트웨어부터 소개해 보겠습니다. FVC Video Converter Ultimate는 마치 무기고에 반드시 있어야 할 필수 무기와 같은 프로그램으로, 전문가급 결과물을 유지하면서도 영상의 워터마크를 손쉽게 제거할 수 있습니다. 성능과 뛰어난 기능 덕분에 이미 많은 사용자가 이 도구를 사용해 보았고, 결과에 실망하지 않았습니다. 영상에서 워터마크를 제거하는 데 도움이 필요하다면, 아래에 정리한 단계를 그대로 따라 해 보세요.
1단계. 아래에 있는 알맞은 다운로드 버튼을 클릭해 기기에 이 최종 버전을 설치하십시오. 그다음, 컴퓨터에 프로그램을 설치한 뒤 Start Now를 클릭해 소프트웨어를 실행합니다.
Free DownloadFor Windows 7 or laterSecure Download
Free DownloadFor MacOS 10.7 or laterSecure Download
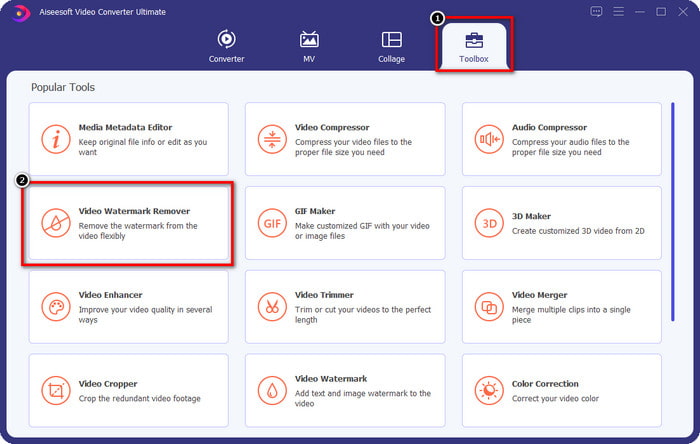
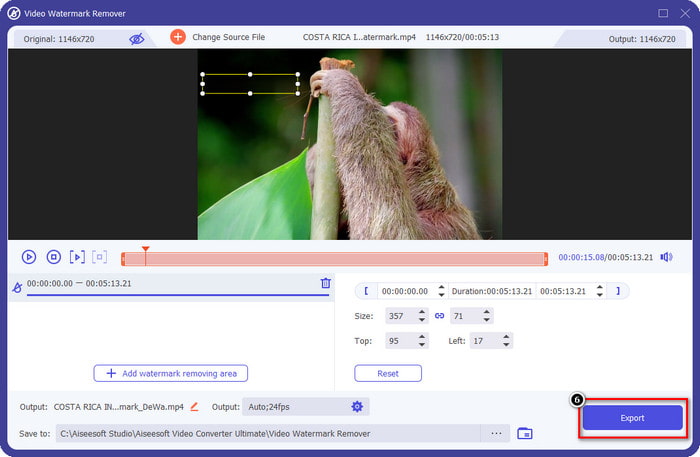
2단계. Toolbox 섹션에서 동영상에 더욱 풍부한 효과를 줄 수 있는 다양한 기능을 확인할 수 있습니다. 하지만 오늘은 그중에서 Video Watermark Remover를 클릭하세요.
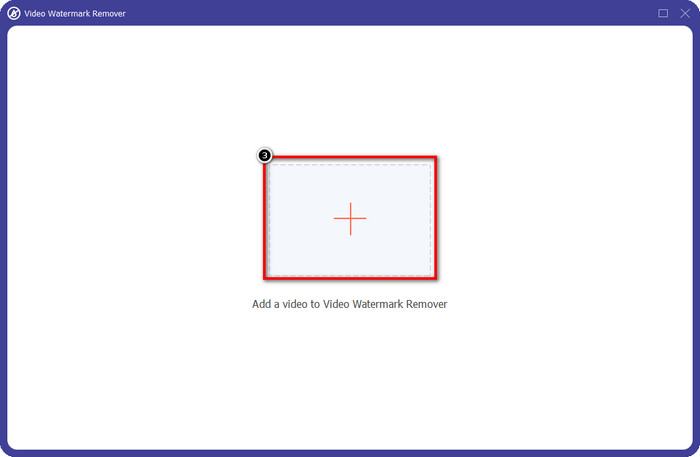
3단계. + 아이콘을 클릭해 Picsart에서 편집한 동영상을 업로드합니다. 화면에 표시되는 폴더에서 파일을 찾아 선택한 뒤 Open을 클릭합니다.
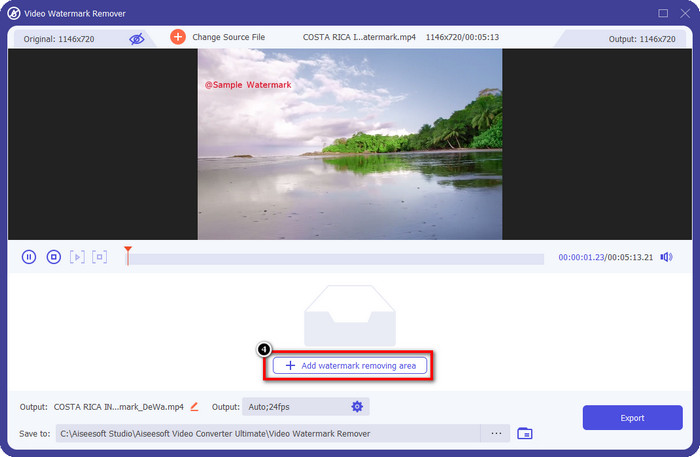
4단계. 업로드한 영상에 삽입된 워터마크를 제거하려면 Add Watermark Removing Area를 누르세요.
5단계. 선택 상자를 드래그해 워터마크 부분으로 옮겨 완전히 덮습니다. 필요에 따라 상자의 크기를 늘리거나 줄일 수 있습니다.
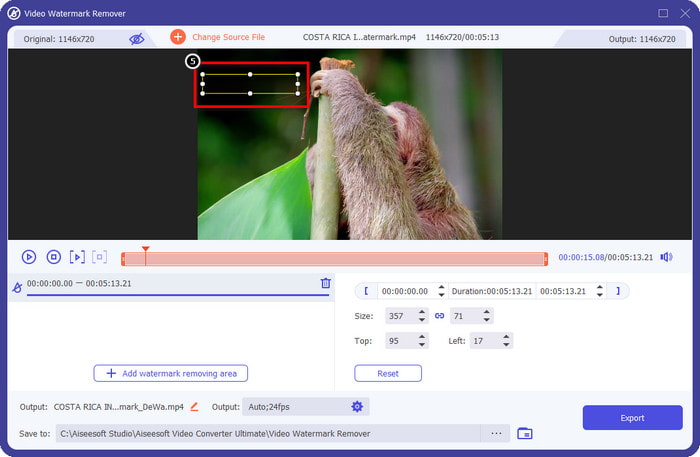
6단계. 선택 상자로 워터마크를 모두 가렸다면 Export를 클릭해 최종 결과물을 로컬 드라이브에 저장합니다.
Windows의 사진 - 3D 디자인으로 워터마크 커버
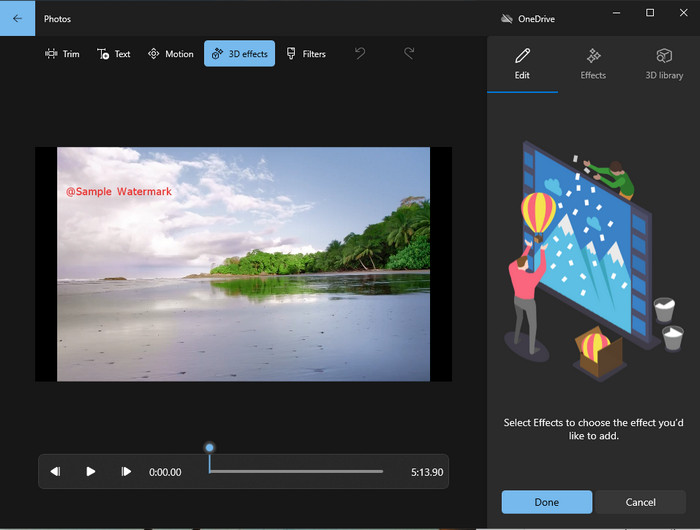
소프트웨어를 따로 내려받는 것이 내키지 않고 Windows 사용자라면, 동영상의 워터마크를 편집하기 위해 사진(Photos) 앱을 사용해 볼 만합니다. 이 도구를 사용하면 Picsart 워터마크 제거 방법을 더 빠르게 익힐 수 있는데, 그 이유는 앱을 새로 다운로드하는 과정이 필요 없기 때문입니다. 이 도구가 실제로 동영상에서 워터마크를 삭제하는 것은 아니지만, 3D 디자인을 이용해 워터마크를 가릴 수 있습니다. 그럼에도 불구하고 이 기본 이미지·영상 뷰어 및 편집기의 성능은 꽤 괜찮은 편입니다. 잘 모르겠다면 아래 단계를 읽어 보고, 따라 해 보세요.
1단계. 작업 표시줄에서 Windows 버튼을 클릭하고 Photos(사진) 앱을 검색해 실행합니다.
2단계. 기본 편집기를 열었다면, + 기호를 눌러 여기에서 편집하려는 동영상을 업로드합니다.
3단계. 3D Effects로 이동해 3D Library를 클릭한 뒤, 워터마크를 가리는 데 사용할 디자인을 검색합니다. 선택한 디자인을 워터마크가 있는 위치에 배치하세요.
4단계. Finish Video를 눌러 완성된 동영상을 Windows 로컬 드라이브에 저장합니다.
PickFrom 블러 비디오 온라인
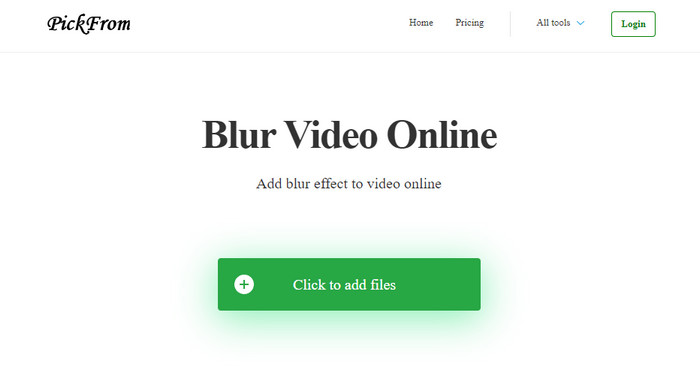
PickFrom Blur Video Online은 웹에 있는 동영상의 PicsArt 워터마크를 제거하는 데 도움을 줄 수 있는 온라인 도구입니다. 아직 많은 사람에게 알려진 서비스는 아니지만, 여기서 새롭게 소개해 보겠습니다. 이 소프트웨어를 포함한 이유는 업로드한 동영상에서 워터마크를 제거하는 효율성이 뛰어나기 때문입니다. 인터페이스가 단순하고 직관적이어서 처음 사용하는 사람도 헤매지 않고 쉽게 쓸 수 있습니다. 워터마크를 없애고 싶다면, 이제 아래 과정을 따라가 봅시다.
1단계. 웹 브라우저를 열어 도구 이름을 검색한 뒤, 첫 번째 결과를 클릭해 온라인 워터마크 제거 페이지를 엽니다.
2단계. 동영상을 업로드하려면 Click to Add File을 클릭합니다.
3단계. Blur Part of the Video에 체크한 뒤, 선택 상자를 워터마크 부분에 배치합니다.
4단계. Start를 눌러 워터마크가 제거(블러 처리)된 동영상을 다운로드합니다.
Part 2. 프리미엄 버전을 구매하여 Picsart 워터마크를 제거하는 방법
Picsart 금색 워터마크를 제거하는 데 문제가 발생하지 않으려면 소프트웨어를 구입해야 합니다. 사용하려면 비용을 지불해야 하고 워터마크가 삽입되지 않은 상태로 비디오를 내보낼 수 있기 때문에 일정 금액의 비용이 듭니다. 따라서 Picsart 구매에 대한 단계별 튜토리얼을 원하신다면 저희가 추가하는 다음 튜토리얼을 따라야 합니다.
1단계. Picsart 공식 웹사이트에 접속해 계정을 로그인합니다. 계정이 없다면 여기에서 가입(Sign up)해 새로 만들어야 합니다.
2단계. 메인 페이지에서 Pricing을 클릭해 각 상품의 가격을 확인합니다.
3단계. 월간 또는 연간 등 원하는 요금제를 선택한 뒤 Go to Payment을 클릭합니다.
4단계. 결제에 필요한 정보를 입력해 청구 내역을 작성한 후 Purchase Now를 클릭합니다.
관련 항목:
파트 3. Picsart 워터마크 제거 방법에 대한 FAQ
Picsart Gold를 영구적으로 구매할 수 있나요?
일회성 지불 기준이나 계획을 지원하지 않으므로 Picsart Gold를 사용하려면 월간 또는 연간 계획을 이용해야 합니다. 공식 웹 사이트로 이동하여 각 계획의 가격을 확인하십시오.
Picsart에서 맞춤 구독을 만들 수 있나요?
예, Picsart에서 팀을 위한 구독을 만들 수 있습니다. 앱을 사용할 사람들의 수를 설정할 수 있습니다.
Picsart는 어디에서 액세스할 수 있습니까?
Windows, Android 및 iOS에서 Picsart를 다운로드할 수 있습니다. 안타깝게도 이 앱에는 현재 Mac 버전이 없지만 시스템에서 사용 가능한 다른 미디어 편집 소프트웨어를 사용할 수 있으므로 슬퍼하지 마십시오.
결론
이전에 가르친 자습서는 PicsArt를 사용하여 워터마크를 제거하는 아이디어와 사용할 수 있는 최고의 워터마크 제거기를 제공합니다. 이제 최종 출력에 추가되는 제품 워터마크에 신경 쓰지 않고 Picsart에서 편집한 비디오를 즐길 수 있습니다. 따라서 우리가 제공하는 도구에 대해 여전히 확신이 서지 않는다면 먼저 이러한 도구, 특히 FVC Video Converter Ultimate를 사용해 보아야 합니다. 다운로드 버튼을 클릭하고 Windows 및 Mac에서 무료로 다운로드한 다음, 제공되는 기능을 마음껏 활용하십시오.
-
 궁극적인 도구를 사용하여 Pond5 워터마크를 제거하는 방법
 아래의 간단한 단계에 따라 Pond5 워터마크를 제거하는 방법을 배우십시오. 이 인상적인 도구를 사용하여 이미지에서 Pond5 워터마크를 쉽게 제거할 수 있습니다.
-
 Dxtory 워터마크를 제거하는 방법에 대한 2가지 강력한 방법
 두 가지 가장 좋은 방법에 따라 Dxtory 워터마크를 제거하는 방법을 배우십시오. Dxtory 워터마크 제거에 가장 적합한 도구를 찾고 있다면 여기를 읽어보세요.
-
 놓치지 말아야 할 뛰어난 Arnold Maya 워터마크 제거제
 많은 워터마크 제거제가 Arnold Maya 워터마크를 제거할 수 있습니다. 그러나 최고의 Arnold Maya 워터마크 제거제가 무엇인지 알고 싶다면 이 페이지를 읽으십시오.