


그래프에서 원점 그래프의 워터마크를 효과적으로 제거하는 방법
수학 또는 과학 데이터가 너무 복잡해서 글로 표현하기 어렵다면 Origin Graph를 사용해 템플릿을 만들어야 할 수도 있습니다. 이 소프트웨어는 이미 학생, 연구원, 교수, 비즈니스 종사자 등 자체 그래프를 만들어야 하는 많은 사람들에게 도움을 주고 있습니다. 제공되는 다양한 템플릿 중에서 선택해 시각적으로 보기 좋고 보는 이의 관심을 끌 수 있는 그래프를 만들 수 있습니다. 다만 무료 버전을 사용할 경우 최종 결과물에 텍스트 워터마크가 추가된다는 문제가 있습니다. 워터마크 처리 때문에 곤란하신가요? 더 이상 걱정하지 마세요! 저희가 해결 방법을 준비했습니다. 여기에서 Origin Graph에서 워터마크를 제거하는 방법을 소개한 뒤, 워터마크를 제거한 그래프를 Word나 PowerPoint 프레젠테이션에 사용하는 방법까지 안내하겠습니다.

1부. 온라인 이미지 워터마크 제거기를 사용하여 원본 그래프에서 워터마크를 제거하는 방법
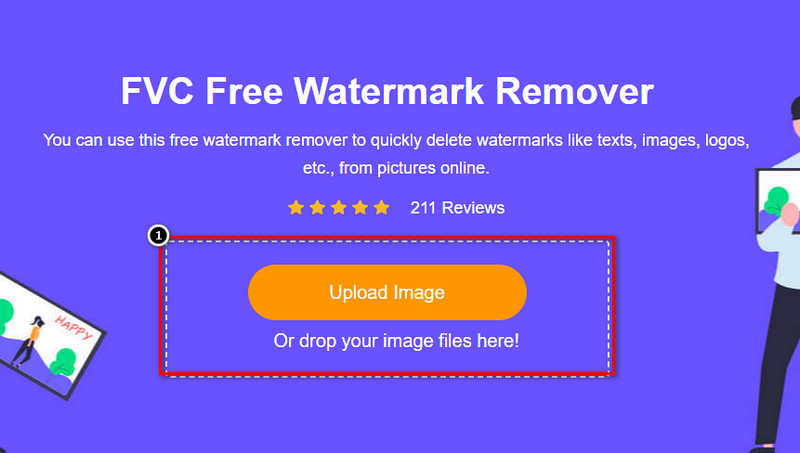
FVC Free Watermark Remover Online은 Origin Graph의 워터마크를 제거하는 데 사용할 수 있는 최고급 텍스트 워터마크 제거 도구입니다. 이 도구는 이미지에서 워터마크를 제거해 더욱 전문적인 이미지를 만들 수 있도록, 이미지 위의 어떤 객체든 효율적으로 제거해 줍니다. 이를 통해 여러분이 언제든 믿고 사용할 수 있는 전용 워터마크 제거 도구임을 확신할 수 있습니다. 사용법이 쉬운지 궁금하신가요? 걱정하지 마세요! 아래에 소개하는 단계만 따르면 Origin Graph가 추가한 이미지 속 텍스트 워터마크를 쉽게 제거할 수 있습니다.
1단계. 이 링크를 클릭해 온라인 이미지 워터마크 제거기를 엽니다. 새 탭이 열리며 도구에 바로 접근할 수 있습니다.
2단계. Upload Image를 눌러 워터마크가 있는 사진을 추가합니다. 폴더에서 이미지 파일을 찾은 뒤 선택하고, Open을 클릭해 업로드를 완료합니다.
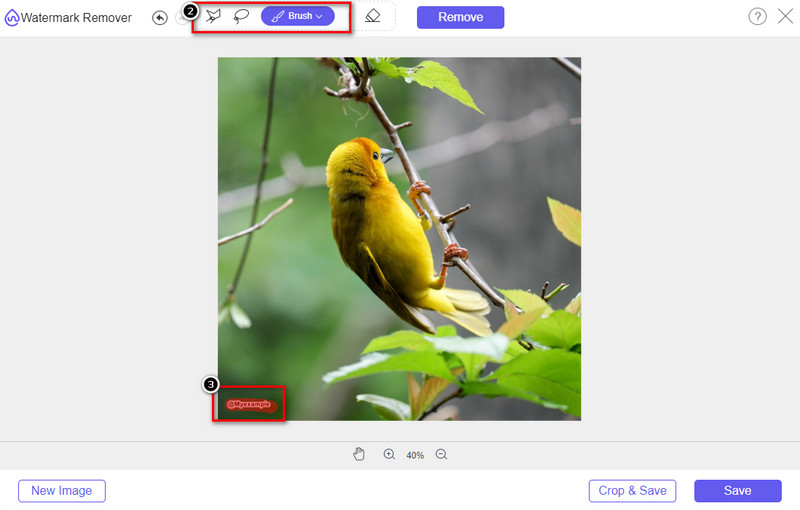
3단계. 워터마크를 표시하는 데 사용할 수 있는 세 가지 도구가 있습니다. 기능은 서로 다르지만 효과는 동일합니다. 도구 중 하나를 선택한 뒤, 워터마크가 있는 이미지 영역을 드래그해 표시합니다.
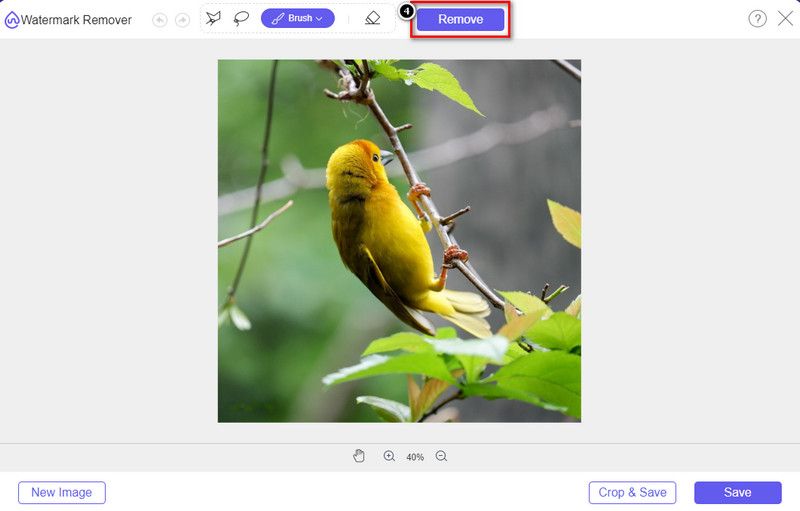
4단계. 워터마크 영역을 표시한 후 반드시 Remove 아이콘을 클릭합니다. 이 단계는 이미지를 내보낼 때 워터마크가 없는 상태로 저장되도록 하기 위해 매우 중요합니다.
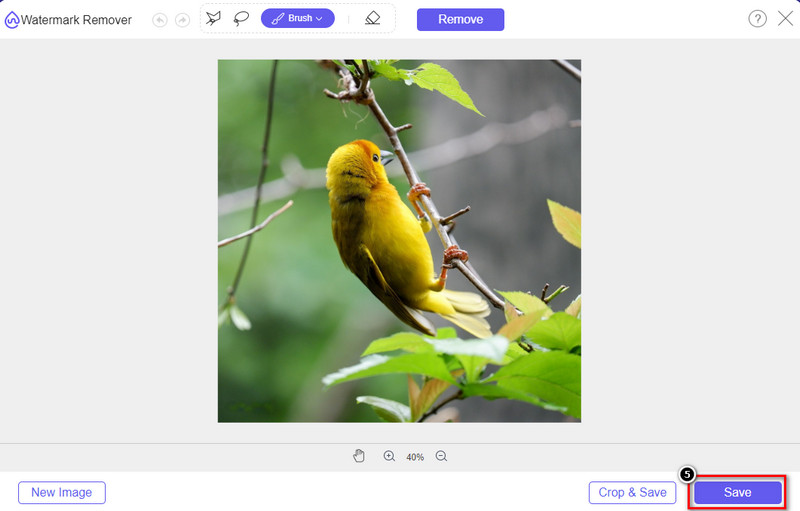
5단계. 내보내기를 시작하려면 이제 Save 버튼을 클릭합니다. 처리 과정이 끝날 때까지 기다린 다음, Origin Graph의 워터마크가 보이지 않는 이미지를 확인할 수 있습니다.
장점
- 액세스할 수 있는 무료 웹 기반 이미지 워터마크 제거기입니다.
- AI-Technology 지원으로 워터마크 제거에 효율적으로 작동합니다.
- 로컬 드라이브에 있는 다양한 이미지 형식을 지원합니다.
- 내보낸 이미지에는 워터마크가 추가되지 않습니다.
단점
- 작동하려면 인터넷 연결이 필요합니다.
- 그 초점은 워터마크를 제거하는 것뿐입니다.
2부. 워터마크 없이 Origin에서 Word 또는 PowerPoint로 그래프를 복사하는 방법
이 기사에서는 생성한 그래프를 Origin Graph에 워터마크 없이 추가하기 위해 알아야 할 절차에 대해 설명합니다. 그에 따라 워터마크 없이 Microsoft Word 및 PowerPoint에서 성공적으로 만든 그래프를 추가하십시오.
엄청난 파일 크기 때문에 최소 1.9GB를 확보해야 합니다. 1.9GB 파일에서 필요한 도움을 받을 수 있지만 도움이 필요하지 않은 경우 .zip 또는 .exe를 통해 652MB 버전을 다운로드할 수 있습니다.
워터마크 없이 Origin Graph에 그래프를 생성하는 방법:
1단계. 먼저 Origin Graph 공식 웹사이트에 접속해 운영체제에 맞는 프로그램을 다운로드합니다. 설치 후 도구를 열어 만들고자 하는 그래프 작업을 시작하세요.
2단계. 소프트웨어를 실행한 후 필요한 표의 값을 입력합니다. 이곳에서 더 많은 변수와 그에 따른 그래프를 추가할 수 있습니다.
추가: Plot을 클릭하면 Basic 2D, Bar, Statistical 등 사용할 수 있는 다양한 그래프 유형을 확인할 수 있습니다.
3단계. File을 클릭한 다음 Save를 눌러 만든 그래프를 내보냅니다.
4단계. 1부에서 소개한 단계들을 따라가며 FVC Free Watermark Remover Online을 이용해 Origin Graph의 워터마크를 제거합니다.
워터마크 없이 Word에서 그래프를 사용하는 방법:
1단계. 데스크톱에서 Word 앱을 열고 새 문서를 위해 빈 페이지를 클릭합니다. 이미 작성한 문서가 있다면 해당 파일을 열어도 됩니다.
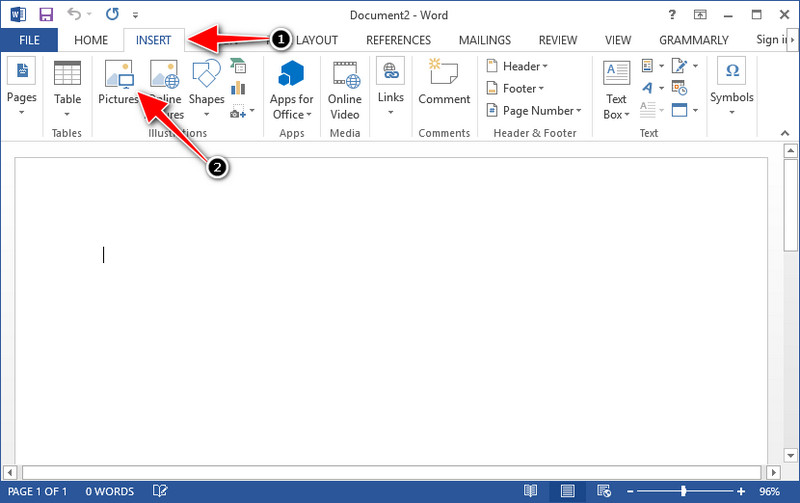
2단계. 상단 메뉴에서 삽입(Insert) 탭으로 이동한 뒤 그림(Pictures)을 클릭합니다. 로컬 드라이브에서 그래프 파일을 찾아 한 번 클릭한 후, 열기(Open)를 눌러 Word에 삽입합니다.
3단계. 그래프가 열려 있거나 새로 만든 Word 문서에 자동으로 로드됩니다. 이제 이미지를 클릭해 드래그하면서 원하는 위치에 배치할 수 있습니다.
워터마크 없이 파워포인트에서 그래프를 사용하는 방법:
1단계. 컴퓨터에서 PowerPoint를 실행한 뒤 새 작업을 위해 빈 프레젠테이션을 선택합니다. 왼쪽에 표시되는 최근 프레젠테이션 목록에서 그래프를 추가해야 하는 파일이 있다면 해당 파일을 클릭해 열어도 됩니다.
2단계. 상단 메뉴에서 삽입(Insert)을 누르고 그림(Picture)을 클릭해 Origin Graph에서 만든 그래프 이미지를 삽입합니다.

3단계. 슬라이드 위에서 그래프 이미지의 크기와 위치를 조절해 적절한 곳에 배치합니다.
추가 읽을거리:
3부. Origin 그래프에서 워터마크를 제거하는 방법에 대한 FAQ
오리진 프로는 얼마인가요?
개인 사용자는 $435부터 Origin Graph 프리미엄 버전을 받을 수 있습니다. Origin Lab에서 공식 스토어를 방문할 수 있습니다.
Origin Graph는 어디에서 공식적으로 다운로드할 수 있습니까?
Origin 그래프를 다운로드하려면 Origin Lab을 방문하세요. 데스크탑에서 소프트웨어를 다운로드하기 전에 질문이 표시됩니다. 그 후, .exe 또는 zip 형식으로 파일을 다운로드할 수 있는 두 가지 옵션이 있습니다.
엑셀과 오리진은 같은건가요?
Excel 및 Origin에는 데이터 정렬, 계산 및 레이블 정의를 위한 스프레드시트와 같은 GUI가 있습니다. 그러나 Excel은 사용할 수 있는 많은 열과 행을 포함하는 데 중점을 둡니다. 그러나 Origin에서는 Excel이 지원하는 것과 같은 셀 수식 대신 열 수식을 사용하는 속성을 정렬하기 위한 것입니다.
결론
Origin Graph에서 워터마크를 제거하는 방법을 배웠으니 이제 생성한 그래프를 사용하여 전문적으로 제시할 차례입니다. Word 또는 Powerpoint에서 사용하는 것이 목적이라면 Part 2를 읽고 사용 방법을 배울 수 있습니다. 이 도구를 사용하여 워터마크를 제거하는 것은 이미지에서 워터마크를 제거하려는 모든 사람이 가장 원하는 것입니다. 이 도구를 사용하면 문제가 해결됩니다. 이 기사가 도움이 되었다면 아래에 별 5개를 남겨주세요.
-
 자세한 단계에서 Pixlr로 워터마크를 제거하는 방법 [유효]
 Pixlr로 워터마크를 제거하는 방법을 알고 싶으십니까? 그렇다면 아래를 계속 읽고 수행 방법과 사용할 수 있는 대안을 알아보십시오.
-
 3가지 입증된 방법으로 내보낸 비디오에서 Animotica 워터마크 제거
 내보낸 비디오에서 Animotica 워터마크를 제거할 수 있는지 궁금해 한 적이 있습니까? 이 문서에서는 방법을 제공합니다.
-
 비디오에서 VideoShop 워터마크를 제거하는 무료 방법 [손쉬운]
 VideoShop 워터마크를 제거하려면 장치에 워터마크 제거제가 필요합니다. 이것이 무엇인지 알아보려면 이 기사를 읽으십시오.