


Hoe u audio professioneel kunt vervagen in Premiere Pro [2024]
Perfect audio timing is essential for a video. It’s thrilling whenever the audio rightfully fades in and fades out in the video. That's why many users, from professional editors to enthusiasts, meticulously work to ensure that their audio fits perfectly with the timing of each scene. In this guide, we'll show you how to fade audio in Premiere Pro, helping you create professional-quality videos with flawless sound. Let’s get started.

Deel 1: Wat zijn de Fade Out- en Fade In-effecten in Premiere Pro?
Er zijn verschillende fade-in en fade-out effecten in Premiere Pro, en het begrijpen van elk is essentieel om elk uniek doel te onderscheiden. Hier verkennen we drie primaire fade-effecten: Constant Gain, Constant Power en Exponential Fade.
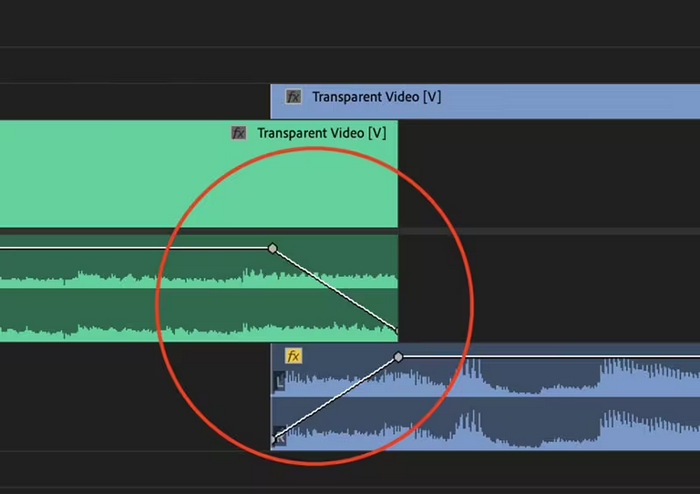
Constante winst
De Constant Gain verandert de audio met een constante snelheid terwijl deze in- en uitfadet tijdens de overgang tussen clips. Deze methode kan soms resulteren in een abrupte verandering, omdat het geen vloeiende overgang creëert. Normaal gesproken worden deze overgangen handmatig aangepast met behulp van keyframes om het fade-in- en fade-outproces beter te kunnen regelen.
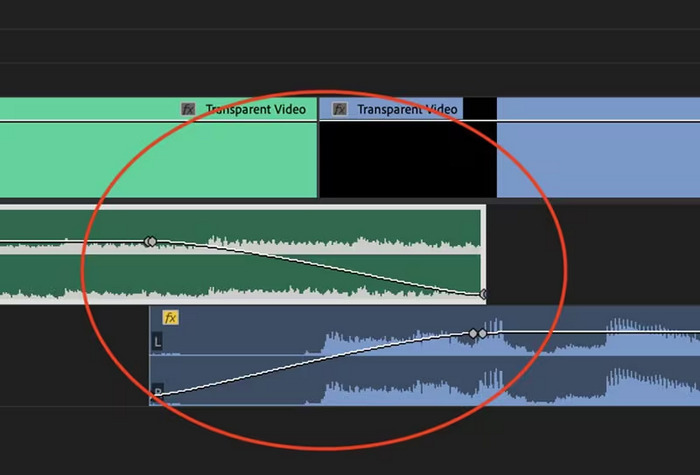
Constante kracht
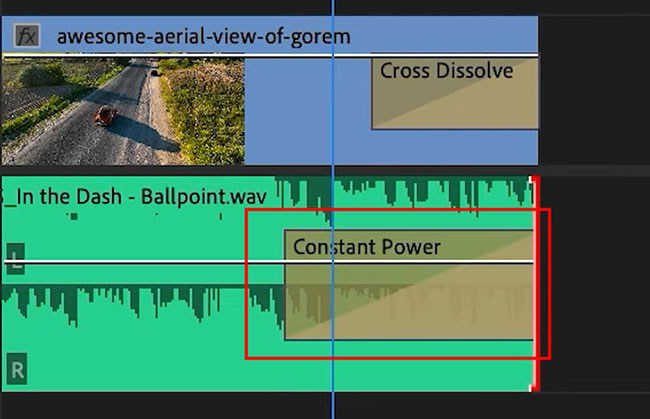
De Constant Power crossfade creëert een vloeiend, geleidelijk overgangseffect, vergelijkbaar met een visuele overvloeiing tussen clips. Deze methode fadet audio eerst uit en fadet het vervolgens uit aan het einde van de clip. Zoals geïllustreerd, nemen keyframes geleidelijk af in de eerste clip en nemen ze gestaag toe in de tweede clip. Vergeleken met andere crossfades wordt Constant Power vaak beschouwd als de beste voor audio-overgangen vanwege het vermogen om een vloeiender effect en een geleidelijkere verschuiving in gain tussen clips te bieden, zonder merkbare veranderingen tijdens de overgang.
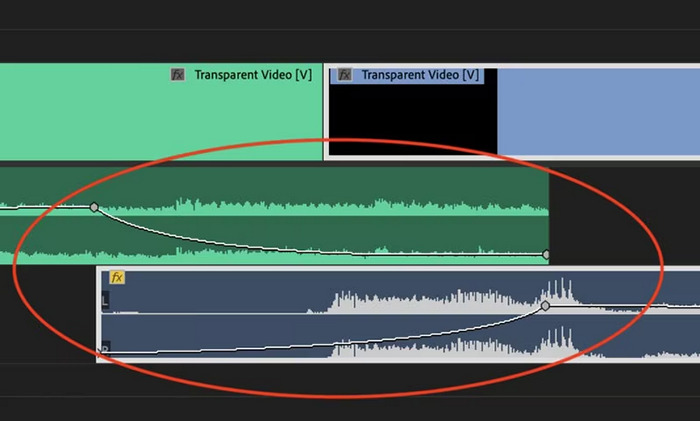
Exponentiële vervaging
De Exponential Fade crossfade is het tegenovergestelde van Constant Power. Het fade-out in de eerste clip en fade-out in de tweede clip, waardoor een vloeiende, logaritmische curve ontstaat. Dit type fade biedt een andere auditieve ervaring, waardoor het bruikbaar is voor verschillende audio-overgangen. Het biedt een naadloze en natuurlijk klinkende fade, wat met name effectief is voor complexere audiotracks.
Deel 2: Hoe u audio in- of uitfadet in Premiere Pro
Nu we de verschillende fade-in- en fade-outeffecten in Premiere Pro kennen, gaan we kijken hoe je ze kunt gebruiken.
Zo fade je audio in Premiere Pro:
Step 1. To import the audio clip you want to fade out in the timeline, go to the Import tab in the File Tab or simply drag the file to the tool's main interface.
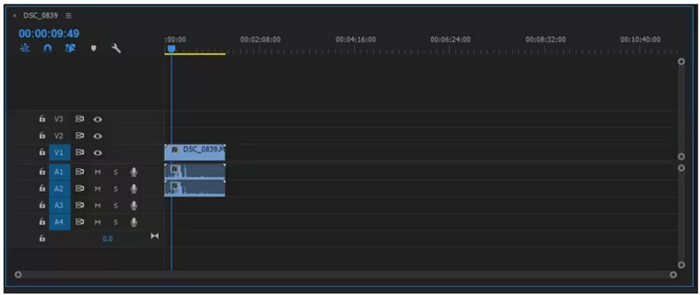
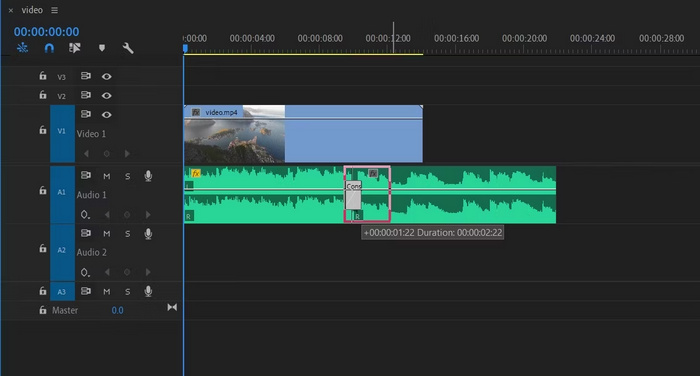
Step 2. Move to the Effect panel and expand the audio transition folder to choose one crossfade effect. You can choose Constant Gain, Constant Power, or Exponential Fade.

Step 3. To apply your desired fade type, click or drag the type you chose into the timeline.
Step 4. Type a duration for the fade into the pop-up window that appears and click OK.
De verschillende opties van Premiere Pro voor het in- en uitfaden van audio maken het een go-to tool voor degenen die op zoek zijn naar een professionele manier om plotselinge starts en stops in hun audio te voorkomen. Deze functies zorgen voor vloeiende overgangen, wat de algehele auditieve ervaring van elk project verbetert. Bovendien biedt deze tool flexibiliteit en precisie, waardoor het geschikt is voor nieuwe en gevorderde gebruikers. Het gebruik van deze specifieke tool kan echter tijdrovende handmatige aanpassingen vereisen, waarbij beginners bepaalde effecten misschien complex vinden om te gebruiken. Niettemin is dit nog steeds een van de beste tools om professioneel fade-out en fade-in toe te voegen.
Deel 3: Eenvoudiger Premiere Pro-alternatief voor het in- of uitfaden van audio
If you’re looking for an alternative tool because of Premiere Pro’s complex interface, the FVC-picked Video Converter Ultimate is the best choice. This all-in video and audio converter has a very user-friendly and intuitive interface, making it easy and efficient for users to fade in or fade out audio. Also, this tool supports a wide range of audio formats, making it less stressful in terms of compatibility issues.
Zo kunt u audio vervagen met Video Converter Ultimate:
Step 1. On your computer device, install the Video Converter Ultimate.
Gratis downloadVoor Windows 7 of nieuwerVeilige download
Gratis downloadVoor MacOS 10.7 of nieuwerVeilige download
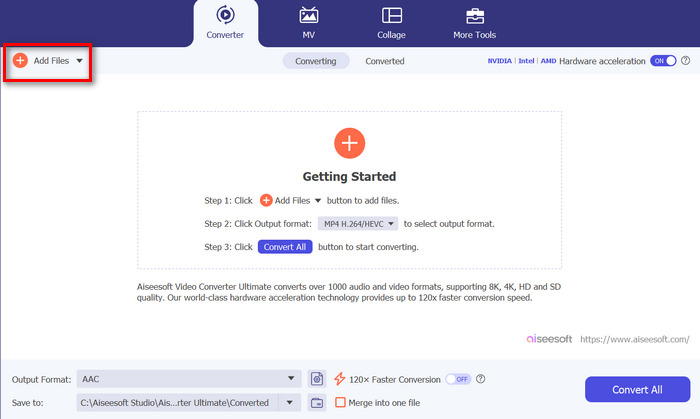
Step 2. Next, to import the audio file that you want to modify, click on the Add Files button.
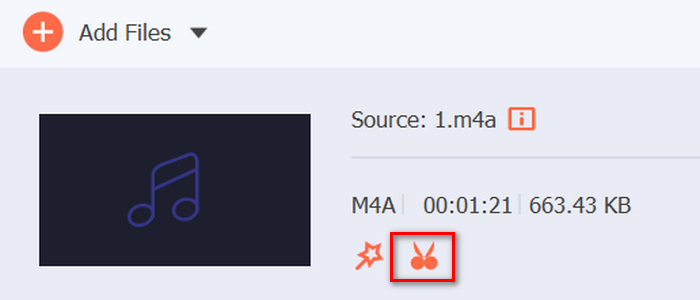
Step 3. Now click on the Cut button and this will head you to another window where you can set the fade in and fade out of your audio file.
Step 4. Click the boxes for Fade In and Fade Out options and set the duration for each effect according to your preference.
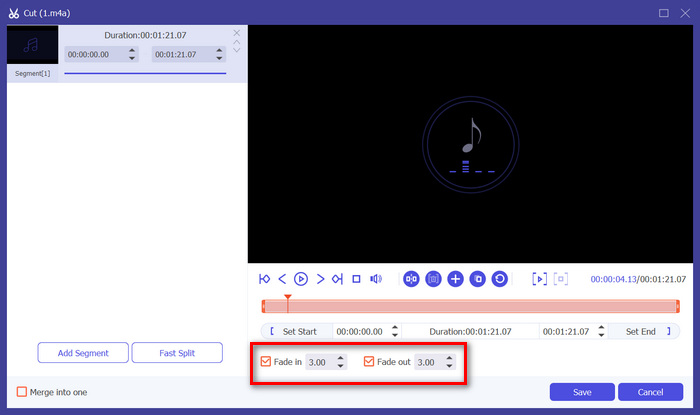
Step 5. Once done, you can preview your audio by playing it to check if the changes you’ve made are accurate and precise.
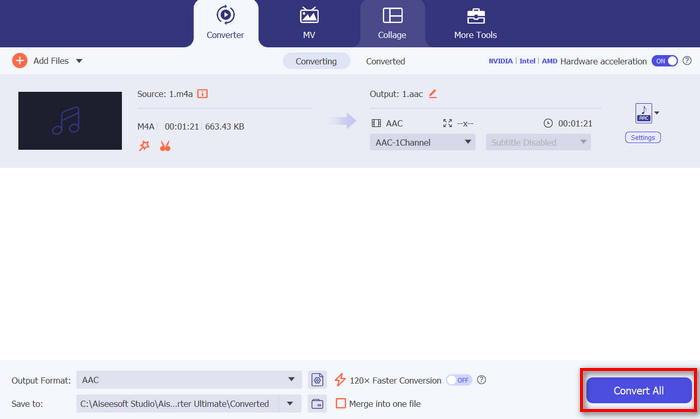
Step 6. Lastly, click the Save button. This will lead you back to the main interface, where you will click the Convert All button to export the audio file.
What makes Video Converter Ultimate the best alternative tool to fade out or fade in audio is its ease of use and efficiency. It allows users to achieve smooth, professional audio transitions quickly, without the complexity of more advanced software. This makes it a reliable and user-friendly choice for anyone looking to enhance their audio editing process. Besides, it also offers other audio editing features like compress audio, cut audio, speed up/down audio, and more before you export an audio file you want.
Deel 4: Veelgestelde vragen over het vervagen van audio in Premiere Pro
Wat zijn fade-in en fade-out in audio?
Fade in en out zijn beide audiobewerkingstechnieken die worden gebruikt om het volume van een audiotrack te verhogen of te verlagen voor een vloeiende overgang. Een fade-in-effect begint met stilte en neemt geleidelijk toe tot het volledige volume, terwijl een fade-out-effect begint met het volledige volume en geleidelijk afneemt tot stilte.
Wat is de sneltoets voor fade-out in Premiere Pro?
Voor Mac is de sneltoets voor Premiere Pro Shift+Command+D, en voor Windows Shift+Ctrl+D.
Hoe kan ik audio op de iPhone laten vervagen?
To fade out audio on an iPhone, you can use the iMovie app.
Here’s how to do it:
Step 1. Open iMovie and load your project.
Step 2. Right-click the audio in the timeline.
Step 3. Tap the Audio button.
Step 4. Tap Fade to reveal the fade handles at the beginning and end of your clip.
Step 5. Drag the fade handle at the end of the clip to set the duration of the fade-out.
Gevolgtrekking
Premiere Pro is indeed a versatile tool, making it easy for users to modify their audio files. Now that you know how to fade audio in Premiere, there’s no reason for you to stop creating seamless and professional transitions for your projects. Also, you can try the Video Converter Ultimate as an alternative if you find this tool challenging to use for a more user-friendly experience. Here’s to smooth audio transitions!
-
 Beste 10 GIF-compressoren voor desktop- en onlinegebruikers
 In dit bericht leer je over de beste GIF-compressoren waarmee je je probleem met grote GIF-bestanden kunt oplossen. Bekijk ze en krijg de beste inzichten.
-
 5 Meest gekozen audiorecorder-apps op Android en iOS [2023 bijgewerkt]
 Weet u niet welke audiorecorder-app u moet gebruiken? Als dit het geval is, helpt dit artikel u bij het kiezen van de app die u zal helpen bij uw audio-opnametaak.
-
 Geweldige MP4 naar MP3 Converter Tools die u zou moeten overwegen te gebruiken
 Ontgrendel de kracht van audioveelzijdigheid met onze best beoordeelde MP4 naar MP3-converters. Ervaar naadloze conversie, uitzonderlijke geluidskwaliteit en razendsnelle verwerking.