


Jak profesjonalnie wyciszyć dźwięk w programie Premiere Pro [2024]
Idealne dopasowanie dźwięku w czasie jest kluczowe dla jakości wideo. To ekscytujące, gdy dźwięk we właściwym momencie płynnie się pojawia i wycisza w filmie. Dlatego wielu użytkowników, od profesjonalnych montażystów po entuzjastów, z ogromną starannością pracuje nad tym, by ich ścieżka dźwiękowa idealnie pasowała do czasu trwania każdej sceny. W tym przewodniku pokażemy Ci, jak wykonać efekt zanikania dźwięku w Premiere Pro, aby pomóc Ci tworzyć profesjonalne wideo z nienaganną ścieżką dźwiękową. Zaczynajmy.

Część 1: Czym są efekty zanikania i pojawiania się w programie Premiere Pro
W Premiere Pro jest kilka efektów fade-in i fade-out, a zrozumienie każdego z nich jest niezbędne do rozróżnienia każdego unikalnego celu. Tutaj przyjrzymy się trzem podstawowym efektom fade: Constant Gain, Constant Power i Exponential Fade.
Stały zysk
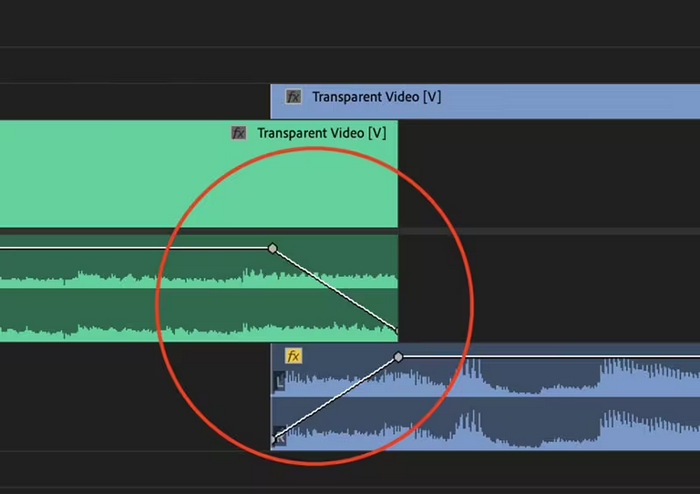
Constant Gain zmienia dźwięk ze stałą szybkością, gdy zanika i pojawia się podczas przejścia między klipami. Ta metoda może czasami powodować nagłą zmianę, ponieważ nie tworzy płynnego przejścia. Zazwyczaj te przejścia są ręcznie regulowane za pomocą klatek kluczowych, aby lepiej kontrolować proces zanikania i pojawiania się.
Stała moc
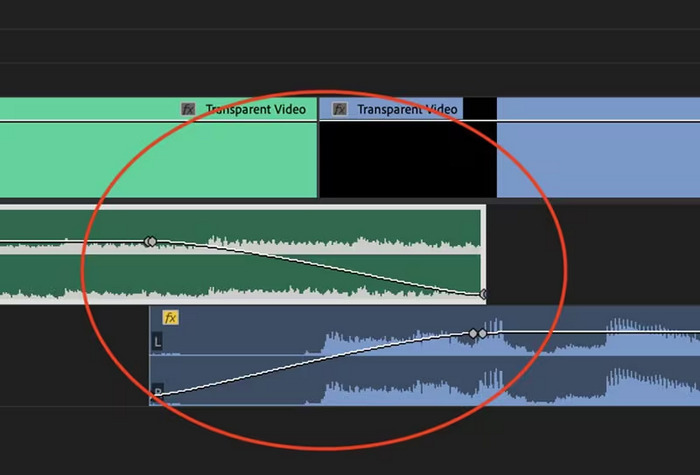
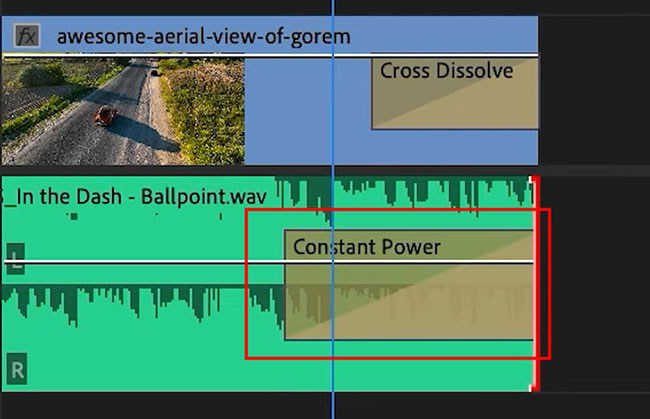
Przejście Constant Power tworzy płynny, stopniowy efekt przejścia, podobny do wizualnego rozpuszczenia między klipami. Ta metoda początkowo wycisza dźwięk, a następnie wycisza go na końcu klipu. Jak pokazano, klatki kluczowe stopniowo zmniejszają się w pierwszym klipie i stale zwiększają się w drugim klipie. W porównaniu z innymi przejściami Constant Power jest często uważany za najlepszy do przejść audio ze względu na jego zdolność do zapewnienia płynniejszego efektu i bardziej stopniowego przesunięcia wzmocnienia między klipami, bez zauważalnych zmian podczas przejścia.
Wykładniczy zanik
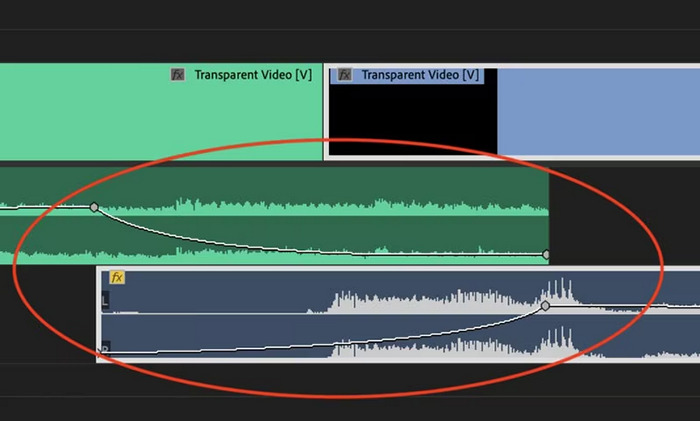
Exponential Fade crossfade jest przeciwieństwem Constant Power. Wygasa w pierwszym klipie i zanika w drugim klipie, tworząc płynną, logarytmiczną krzywą. Ten typ fade oferuje inne wrażenia słuchowe, co czyni go przydatnym w przypadku różnych przejść audio. Zapewnia płynne i naturalnie brzmiące fade, co jest szczególnie skuteczne w przypadku bardziej złożonych ścieżek audio.
Część 2: Jak wyciszyć lub zwiększyć głośność dźwięku w programie Premiere Pro
Teraz, gdy znamy już różne efekty stopniowego pojawiania się i znikania obrazu w programie Premiere Pro, możemy przejść do tego, jak z nich korzystać.
Oto jak wyciszyć dźwięk w programie Premiere Pro:
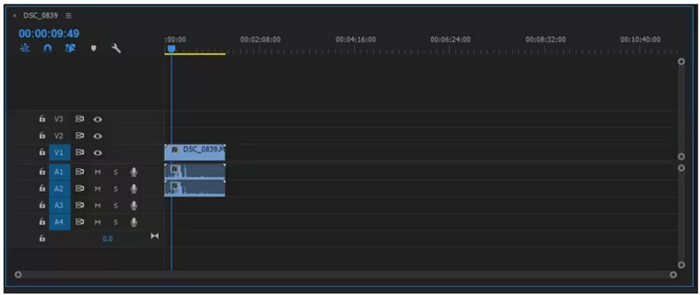
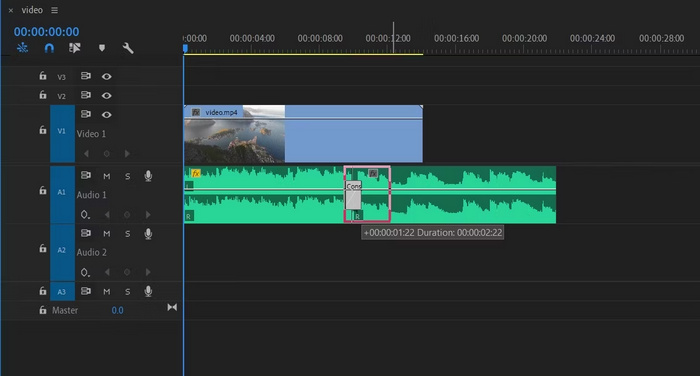
Krok 1. Aby zaimportować klip audio, który chcesz wyciszyć (fade out) na osi czasu, przejdź do zakładki Import w menu Plik lub po prostu przeciągnij plik do głównego interfejsu narzędzia.
Krok 2. Przejdź do panelu Effect (Efekty) i rozwiń folder przejść dźwiękowych (audio transition), aby wybrać jeden z efektów typu crossfade. Możesz wybrać Constant Gain, Constant Power lub Exponential Fade.

Krok 3. Aby zastosować wybrany typ zanikania, kliknij lub przeciągnij wybrany efekt na oś czasu.
Krok 4. W wyświetlonym oknie dialogowym wpisz czas trwania zanikania i kliknij OK.
Różne opcje wyciszania i zanikania dźwięku w Premiere Pro sprawiają, że jest to narzędzie dla tych, którzy szukają profesjonalnego sposobu na uniknięcie nagłych startów i zatrzymań dźwięku. Funkcje te umożliwiają płynne przejścia, poprawiając ogólne wrażenia słuchowe każdego projektu. Ponadto narzędzie to oferuje elastyczność i precyzję, dzięki czemu nadaje się dla nowych i zaawansowanych użytkowników. Jednak korzystanie z tego konkretnego narzędzia może wymagać czasochłonnych ręcznych regulacji, w których początkujący mogą uznać niektóre efekty za skomplikowane w użyciu. Niemniej jednak jest to nadal jedno z najlepszych narzędzi do profesjonalnego dodawania wyciszania i zanikania.
Część 3: Łatwiejsza alternatywa dla Premiere Pro do wyciszania i wzmacniania dźwięku
Jeśli szukasz alternatywnego narzędzia z powodu złożonego interfejsu Premiere Pro, wybrany przez FVC Video Converter Ultimate będzie najlepszym wyborem. Ten kompleksowy konwerter wideo i audio ma bardzo przyjazny i intuicyjny interfejs, dzięki czemu użytkownicy mogą łatwo i skutecznie tworzyć efekty fade in i fade out w dźwięku. Ponadto narzędzie to obsługuje szeroką gamę formatów audio, co znacząco ogranicza problemy z kompatybilnością.
Oto jak wyciszyć dźwięk za pomocą programu Video Converter Ultimate:
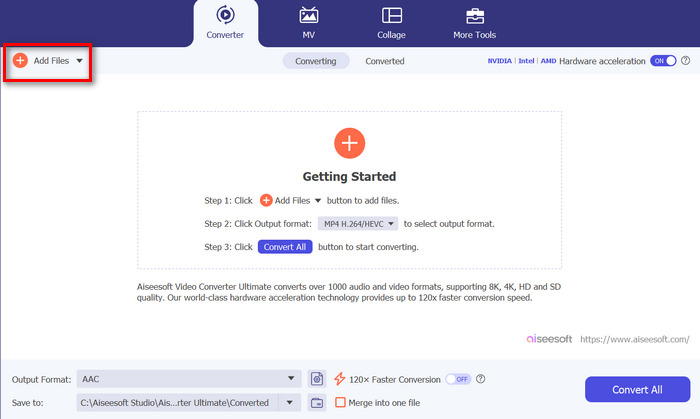
Krok 1. Zainstaluj program Video Converter Ultimate na swoim komputerze.
Bezpłatne pobieranieDla Windows 7 lub nowszegoBezpieczne pobieranie
Bezpłatne pobieranieDla MacOS 10.7 lub nowszegoBezpieczne pobieranie
Krok 2. Następnie, aby zaimportować plik audio, który chcesz zmodyfikować, kliknij przycisk Add Files (Dodaj pliki).
Krok 3. Teraz kliknij przycisk Cut (Przytnij), a zostaniesz przeniesiony do innego okna, w którym możesz ustawić fade in i fade out dla swojego pliku audio.
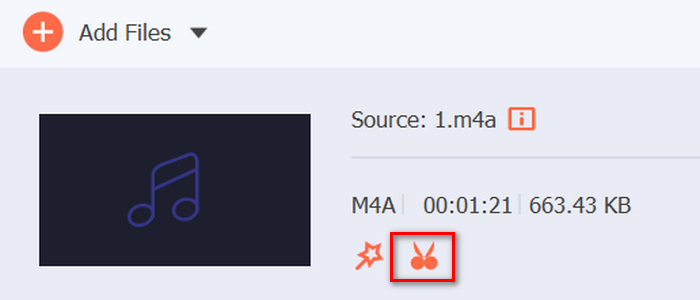
Krok 4. Zaznacz pola Fade In i Fade Out, a następnie ustaw czas trwania każdego efektu zgodnie ze swoimi preferencjami.
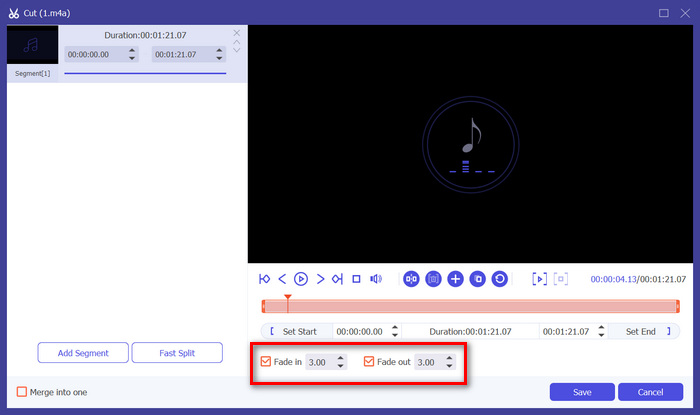
Krok 5. Po zakończeniu możesz odsłuchać swój plik audio, odtwarzając go, aby sprawdzić, czy wprowadzone zmiany są dokładne i precyzyjne.
Krok 6. Na koniec kliknij przycisk Save (Zapisz). Następnie wrócisz do głównego interfejsu, gdzie klikniesz przycisk Convert All (Konwertuj wszystko), aby wyeksportować plik audio.
To, co sprawia, że Video Converter Ultimate jest najlepszym alternatywnym narzędziem do tworzenia efektów fade out i fade in dźwięku, to jego łatwość obsługi i wydajność. Umożliwia użytkownikom szybkie uzyskanie płynnych, profesjonalnych przejść dźwiękowych, bez złożoności bardziej zaawansowanego oprogramowania. Dzięki temu jest to niezawodny i przyjazny wybór dla każdego, kto chce usprawnić proces edycji audio. Ponadto oferuje inne funkcje edycji dźwięku, takie jak kompresja plików audio, przycinanie, przyspieszanie/zwalnianie dźwięku i wiele więcej, zanim wyeksportujesz wybrany plik audio.
Część 4: Często zadawane pytania dotyczące zanikania dźwięku w programie Premiere Pro
Czym jest wyciszanie i narastanie dźwięku?
Fade in i out to techniki edycji dźwięku stosowane w celu zwiększenia lub zmniejszenia głośności ścieżki audio, aby uzyskać płynne przejście. Efekt fade-in zaczyna się od ciszy i stopniowo zwiększa do pełnej głośności, podczas gdy efekt fade-out zaczyna się od pełnej głośności i stopniowo zmniejsza do ciszy.
Jaki jest skrót do wyciszania w programie Premiere Pro?
Na komputerach Mac skrót klawiaturowy Premiere Pro to Shift+Command+D, a na komputerach z systemem Windows: Shift+Ctrl+D.
Jak wyciszyć dźwięk na iPhonie?
Aby wyciszyć (fade out) dźwięk na iPhonie, możesz użyć aplikacji iMovie.
Oto jak to zrobić:
Krok 1. Otwórz iMovie i wczytaj swój projekt.
Krok 2. Kliknij prawym przyciskiem myszy ścieżkę audio na osi czasu.
Krok 3. Stuknij przycisk Audio.
Krok 4. Stuknij Fade, aby wyświetlić uchwyty zanikania na początku i na końcu klipu.
Krok 5. Przeciągnij uchwyt zanikania na końcu klipu, aby ustawić czas trwania efektu fade out.
Wniosek
Premiere Pro to rzeczywiście wszechstronne narzędzie, które ułatwia użytkownikom modyfikowanie plików audio. Teraz, gdy wiesz, jak wykonać efekt zanikania dźwięku w Premiere, nie ma powodu, abyś przestawał tworzyć płynne i profesjonalne przejścia w swoich projektach. Możesz też wypróbować Video Converter Ultimate jako alternatywę, jeśli uznasz Premiere Pro za zbyt wymagający i wolisz bardziej przyjazne w użyciu rozwiązanie. Powodzenia w tworzeniu idealnie gładkich przejść dźwiękowych!
-
 Najlepsze 10 kompresorów GIF dla użytkowników komputerów stacjonarnych i online
 W tym poście dowiesz się o najlepszych kompresorach GIF, które pomogą Ci rozwiązać problem z dużymi plikami GIF. Sprawdź je i uzyskaj najlepsze informacje.
-
 5 najczęściej wybieranych aplikacji do nagrywania dźwięku na Androida i iOS [aktualizacja 2023]
 Nie wiesz, jakiej aplikacji do nagrywania dźwięku powinieneś użyć? Jeśli tak, ten artykuł pomoże Ci wybrać aplikację, która pomoże Ci w zadaniu nagrywania dźwięku.
-
 Świetne narzędzia konwertujące MP4 na MP3, których powinieneś rozważyć
 Odblokuj moc wszechstronności audio dzięki naszym najwyżej ocenianym konwerterom MP4 na MP3. Doświadcz bezproblemowej konwersji, wyjątkowej jakości dźwięku i błyskawicznego przetwarzania.