


วิธีที่ง่ายกว่าในการบันทึก Blu-ray บน OBS Studio และเครื่องมืออื่นๆ ที่เป็นไปได้
แผ่นบลูเรย์จัดเก็บข้อมูลวิดีโอได้คุณภาพสูงที่สุดเท่าที่แผ่นดิสก์จะทำได้ สามารถบันทึกวิดีโอได้สูงสุดถึงความละเอียด 1080 พิกเซล ในด้านเสียงก็เช่นเดียวกัน แผ่นบลูเรย์ให้เสียงที่ใสคมชัดยิ่งกว่าแผ่นซีดี และไม่ต้องกังวลเรื่องพื้นที่จัดเก็บไฟล์ขนาดใหญ่บนแผ่นบลูเรย์เพราะมีความจุสูง นอกจากนี้ OBS Studio ยังเป็นโปรแกรมโอเพนซอร์สที่ดาวน์โหลดได้ฟรี รองรับแพลตฟอร์มอย่าง Windows, macOS และ Linux อีกทั้งยังเหมาะมากสำหรับการอัดวิดีโอและเสียงจากหน้าจอคอมพิวเตอร์ของคุณ ผู้ใช้บางรายอาจพบว่าการอัดวิดีโอบลูเรย์ด้วย OBS นั้นยุ่งยาก ดังนั้นให้อ่านบทความนี้ต่อไปเพื่อเรียนรู้วิธีอัดหนังบลูเรย์ด้วย OBS และรู้ว่าโปรแกรมอัดหน้าจอระดับมืออาชีพตัวไหนที่ควรใช้เพื่อให้ได้วิดีโอคุณภาพสูงที่สุด.

ส่วนที่ 1. วิธีการบันทึกภาพยนตร์ Blu-ray ด้วย OBS Studio
OBS Studio เป็นที่รู้จักในฐานะเครื่องมือฟรีสตรีมมิ่งที่ทรงพลัง ได้รับการอัปเดตเป็นประจำเนื่องจากผู้สนับสนุนที่ทรงอิทธิพลของพวกเขา Youtube, Twitch, Facebook, API.video, own3d.pro และแพลตฟอร์มอื่น ๆ อีกมากมาย ไม่ต้องกังวลกับการสตรีมเพราะแพลตฟอร์มหลักเหล่านี้ ในทางกลับกัน มันสร้างชื่อให้เป็นเครื่องมือที่ซับซ้อนที่สุดสำหรับการบันทึกและให้คำแนะนำน้อยลง แต่ถ้าคุณต้องการสตรีมมิงแบบง่ายๆ ไม่ต้องดำดิ่งสู่การตั้งค่าที่ซับซ้อน ยิ่งกว่านั้น เปลี่ยนเรื่องยากให้จัดการได้ด้วยการอ่านบทความนี้เพื่อดูขั้นตอนและรายละเอียดเกี่ยวกับ OBS Studio
ต่อไปนี้คือขั้นตอนบางประการเกี่ยวกับวิธีใช้ OBS Studio:
ขั้นตอนที่ 1. เปิดเบราว์เซอร์ของคุณ จากนั้นเลือกระบบปฏิบัติการ (OS) ที่คุณใช้งานอยู่ แล้วดาวน์โหลด ตั้งค่า ติดตั้งโปรแกรม และคลิก Finish เพื่อเปิดใช้งานเครื่องมือ.
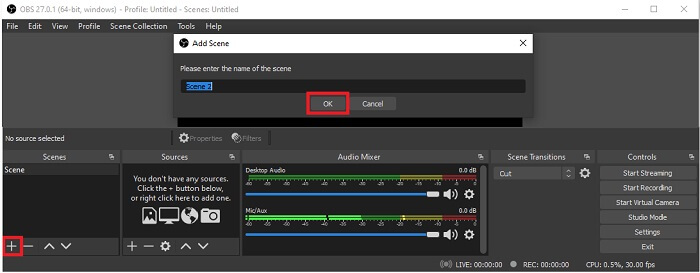
ขั้นตอนที่ 2. ไปที่แผง Scenes คลิกไอคอน Add เพื่อเพิ่มซีน แล้วตั้งชื่อ จากนั้นคลิก OK เพื่อดำเนินการต่อ.
ขั้นตอนที่ 3. ไปยังแผง Source คลิกไอคอน Plus จากนั้นจะมีตัวเลือกต่าง ๆ แสดงขึ้นมา นี่คือตัวเลือกพื้นฐานบางส่วนที่มีให้ ได้แก่ Audio Input Capture สำหรับบันทึกเสียงพูดจากไมโครโฟน ถัดมาคือ Audio Output Capture สำหรับบันทึกเสียงที่ออกจากระบบของคุณ และ Display Capture สำหรับบันทึกภาพทั้งหน้าจอ สุดท้ายคือ Game Capture เพื่อบันทึกเกมหรือคลิปการเล่นของคุณ คลิก OK เพื่อบันทึก เมื่อเพิ่มแหล่งสัญญาณที่ต้องการครบแล้ว ให้ปรับระดับเสียงในแท็บ Audio Mixer.

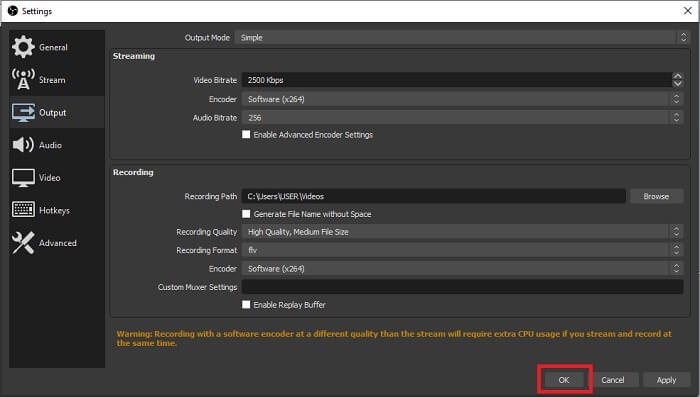
ขั้นตอนที่ 4. คลิกปุ่ม Settings ใต้ Control Panel ที่มุมล่างขวาของหน้าจอโปรแกรม ไปที่แท็บ Output ตั้งค่าฟอร์แมตและปรับตัวเลือกต่าง ๆ ตามความต้องการ ตั้งค่าตัวเลือกอื่น ๆ ให้เรียบร้อย แล้วคลิก OK เพื่อบันทึก.
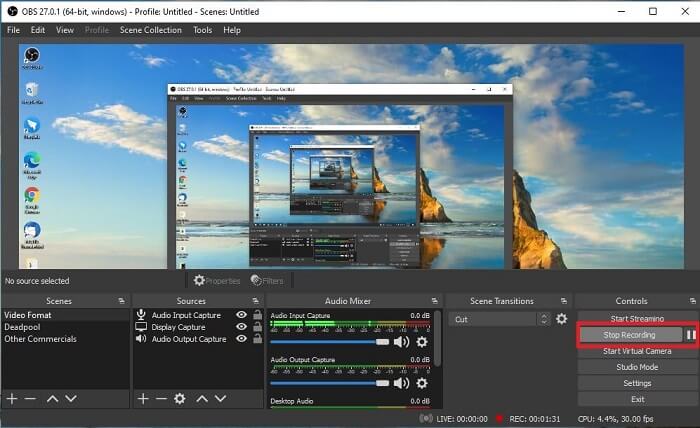
ขั้นตอนที่ 5. คลิกปุ่ม Start Recording เพื่อเริ่มบันทึกวิดีโอ เมื่อบันทึกเสร็จให้คลิกปุ่มที่มุมขวาล่างตำแหน่งเดียวกับที่ใช้เริ่มอัดเพื่อหยุดการบันทึก จากนั้นคุณสามารถเข้าไปตรวจสอบไฟล์บันทึกได้ใน File Explorer.
ข้อดี
- เหมาะสำหรับบันทึกวิดีโอและสตรีมมิงแบบสด
- มันไม่ได้ให้คุณทดลองใช้ฟรี เพราะมันฟรี
- ให้ตัวเลือกมากมายให้เลือก
จุดด้อย
- ไม่ใช่ตัวเลือกที่ดีที่สุดสำหรับมือใหม่ เพราะมีหลายอย่างให้ตั้งค่า
- ไม่รองรับการตัดต่อวิดีโอ ดังนั้นคุณจะต้องติดตั้งเครื่องมืออื่นเพื่อแก้ไข และตัวเครื่องมือเองก็มีขนาด 85.6MB ซึ่งเป็นพื้นที่เก็บข้อมูลที่ใหญ่ที่สุดที่เครื่องบันทึกหน้าจอมี
ส่วนที่ 2 วิธีการออนไลน์ในการจับภาพ Blu-ray ด้วย OBS Alternative
OBS studio เป็นตัวเลือกที่ดีสำหรับการบันทึกและการสตรีม แต่เครื่องมือนี้มีอินเทอร์เฟซมากมาย ดังนั้นจึงเป็นเรื่องยุ่งยากสำหรับผู้ใช้ใหม่ที่จะบันทึก นี่คือเครื่องมือออนไลน์ทางเลือกที่คุณอาจใช้
FVC โปรแกรมบันทึกหน้าจอฟรี (เครื่องมือออนไลน์)
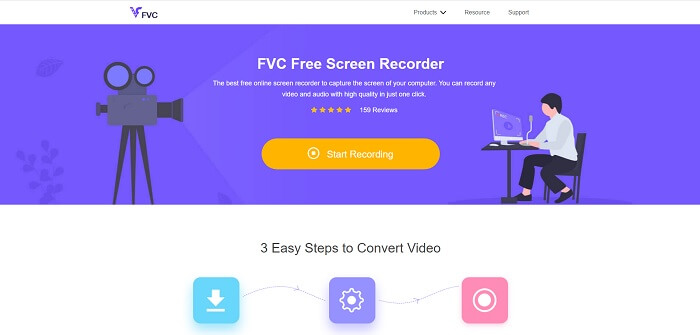
เครื่องมือออนไลน์ฟรีที่ใช้งานไม่ยุ่งยากสำหรับผู้ใช้คือ FVC Free Screen Recorder ฟังก์ชันการทำงานคล้ายกับการอัดวิดีโอบลูเรย์ด้วย OBS Studio แต่ใช้งานง่ายกว่าเพราะมีแถบเครื่องมือลอยที่จัดการได้สะดวก เครื่องมือที่ละเอียดและตรงจุดนี้ช่วยให้คุณบันทึกวิดีโอและเสียงจากแพลตฟอร์มต่าง ๆ ได้แทบทุกแบบ พร้อมให้เสียงคมชัดและวิดีโอความละเอียดสูงที่คุณสามารถบันทึกเก็บไว้ลงแผ่นบลูเรย์ได้ แทนที่จะต้องดาวน์โหลดไฟล์โปรแกรมขนาดใหญ่เพื่อใช้ครั้งเดียว ลองใช้เครื่องมือออนไลน์ตัวนี้ดูก่อน ตอนนี้มาดูวิธีการทำงานของเครื่องมือนี้กันต่อ นี่คือขั้นตอนการใช้งานเครื่องมือออนไลน์นี้.
ขั้นตอนที่ 1. เปิดเบราว์เซอร์ของคุณและไปที่ https://www.free-videoconverter.net/free-screen-recorder/ จากนั้นคลิกปุ่ม Start Recording เพื่อเปิดใช้งานเครื่องมือออนไลน์ จะมีแถบลอยปรากฏขึ้นบนหน้าจอหลังจากเรียกใช้เครื่องมือ.
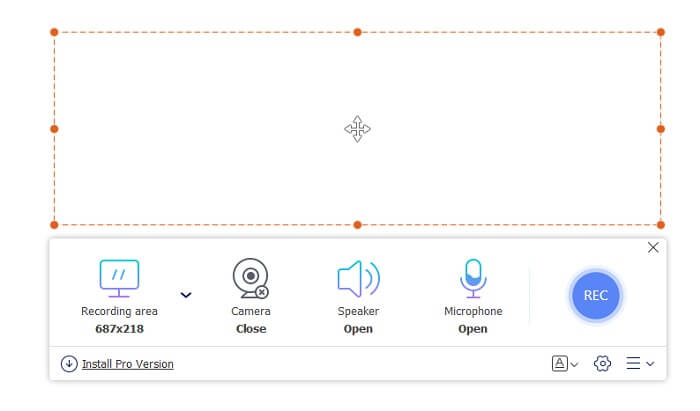
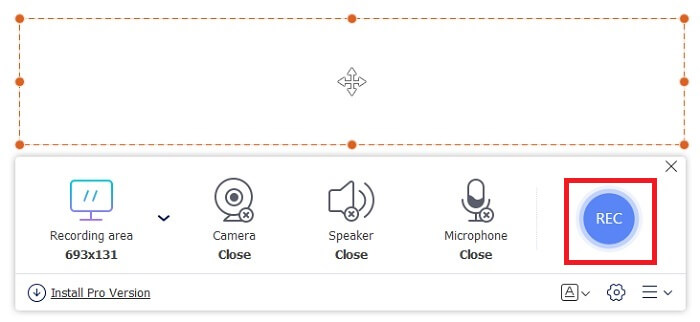
ขั้นตอนที่ 2. บนแถบเครื่องมือลอยจะมีแผงให้เลือก 4 ส่วน คุณสามารถปรับขนาดกรอบบันทึกหรือเลือกเต็มหน้าจอได้ ต่อมาให้คลิกไอคอน Speaker เพื่อจัดการระดับเสียงระบบ นอกจากนี้คุณยังสามารถเพิ่มเสียงพูดและใบหน้าของคุณได้โดยคลิกเปิด Microphone และ Webcam แต่หากไม่ต้องการให้บันทึกก็ให้คลิกปิด จากนั้นคลิกปุ่มกลม REC เพื่อเริ่มบันทึก.
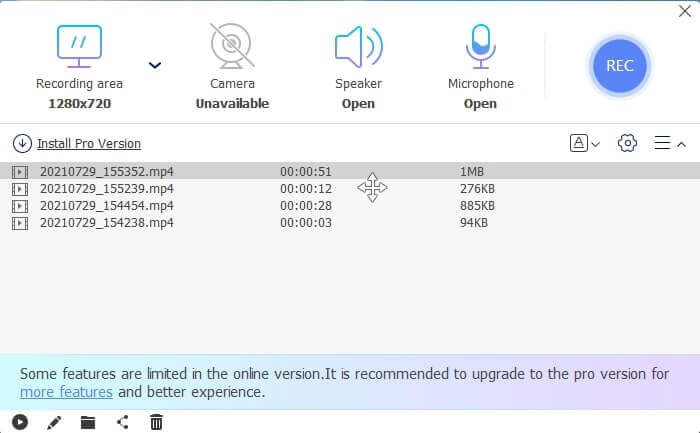
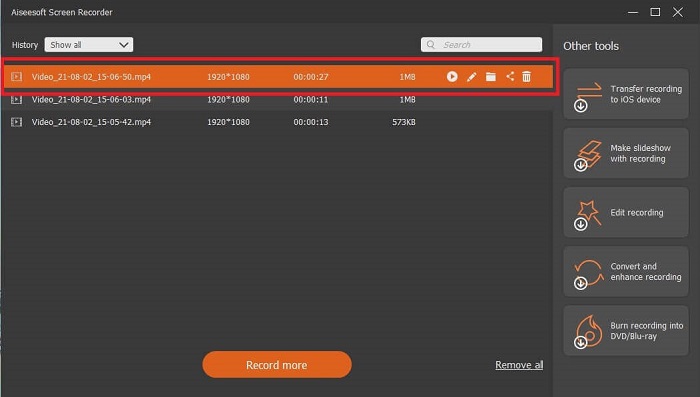
ขั้นตอนที่ 3. เมื่อบันทึกเสร็จแล้วให้คลิกปุ่ม สี่เหลี่ยม เพื่อหยุดการบันทึก ไฟล์บันทึกทั้งหมดที่คุณอัดไว้จะแสดงอยู่ในเมนูประวัติ (history dropdown) ให้คลิกไฟล์วิดีโอลำดับแรกซึ่งเป็นไฟล์ล่าสุด.
ข้อดี
- เปิดแหล่งที่มาออนไลน์ฟรี ไม่มีการดาวน์โหลดจึงไม่ยุ่งยาก
- เครื่องบันทึกหน้าจอที่ดีที่สุดสำหรับบริการออนไลน์ที่รองรับทุกแพลตฟอร์ม
- ใช้งานง่ายเพราะมีคำแนะนำเครื่องมือตรงจุด
จุดด้อย
- ต้องมีการเชื่อมต่ออินเทอร์เน็ตเพื่อให้เครื่องมือทำงานได้
- ไม่รองรับฟีเจอร์แบบพรีเมียมฟรี
ส่วนที่ 3 แทนที่ OBS ที่ดีที่สุดในการบันทึกภาพยนตร์ Blu-ray
อีกหนึ่งบันทึก Blu-ray ที่ดีที่สุดใน OBS Studio คือ FVC Screen Recorder หากคุณต้องการบันทึกออนไลน์และออฟไลน์และใช้ได้กับทุกแพลตฟอร์ม ช่องทางนี้เหมาะสำหรับคุณ
เครื่องบันทึกหน้าจอ FVC
ต่างจาก OBS Studio เครื่องมือนี้ใช้งานง่ายด้วยแถบเครื่องมือที่จัดการได้ FVC Screen Recorder เป็นหนึ่งในทางเลือกที่ดีที่สุดสำหรับการบันทึก มันมีฟีเจอร์อย่าง OBS ที่ตรงประเด็นมากกว่าและเข้าใจง่าย ตัวอย่างเช่น บันทึกหน้าจอ เว็บแคม เสียง และระบบเสียง และอื่นๆ อีกมากมาย เครื่องมือนี้ยังมีคุณสมบัติล็อคอินที่อ็อบส์ไม่มี ยกเว้นว่าเครื่องมือนี้เป็นแบบจ่ายต่อการใช้งาน นอกจากนี้ หากคุณใช้เครื่องบันทึกหน้าจอนี้ แสดงว่าคุณตัดสินใจถูกแล้ว
ทำตามขั้นตอนด้านล่างเกี่ยวกับวิธีการใช้เครื่องมือนี้อย่างเต็มที่
ขั้นตอนที่ 1. คลิกปุ่มดาวน์โหลดเพื่อติดตั้งซอฟต์แวร์ จากนั้นตั้งค่าตามต้องการแล้วคลิก Finish เพื่อดำเนินการต่อ โปรแกรมจะเปิดขึ้นมาโดยอัตโนมัติ.
ดาวน์โหลดฟรีสำหรับ Windows 7 ขึ้นไปดาวน์โหลดอย่างปลอดภัย
ดาวน์โหลดฟรีสำหรับ MacOS 10.7 ขึ้นไปดาวน์โหลดอย่างปลอดภัย
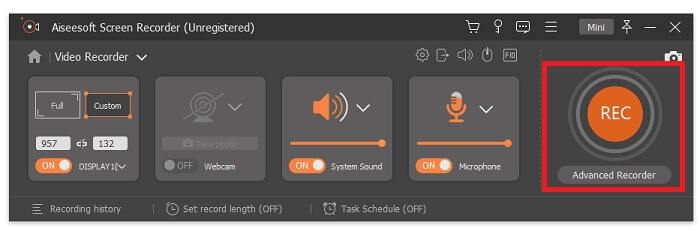
ขั้นตอนที่ 2. คลิก Video Recorder จากนั้นจะมีแผงให้เลือก 4 ส่วน แผงแรกคุณสามารถปรับขนาดกรอบบันทึกเพื่อเปลี่ยนอัตราส่วนภาพ หรือคลิก Full เพื่อบันทึกทั้งหน้าจอ แผงที่สองคือ Webcam สำหรับบันทึกใบหน้าคุณระหว่างอัดหน้าจอ แผงถัดมาคือ System Sound สำหรับบันทึกเสียงจากระบบ สุดท้ายคือ Microphone สำหรับใส่เสียงพูดของคุณลงในวิดีโอ คลิกปุ่มรูปดิสก์เพื่อเริ่มบันทึก.
ขั้นตอนที่ 3. หากบันทึกวิดีโอเสร็จแล้วให้คลิกปุ่ม สี่เหลี่ยม เพื่อหยุดการบันทึก จากนั้นคลิกปุ่ม Play เพื่อเล่นวิดีโอที่บันทึกไว้.
ข้อดี
- มีคุณลักษณะเฉพาะของสิ่งที่เราเรียกว่าหน้าจอล็อคอินเพื่อหลีกเลี่ยงการรบกวนขณะบันทึก
- สามารถบันทึกได้นาน 24 ชั่วโมงโดยไม่มีความผิดปกติของภาพและเสียง
- การจัดเก็บและเป็นมิตรกับผู้ใช้เนื่องจากรูปแบบข้อมูลที่บีบอัดและข้อมูลที่ใช้งานได้ง่าย
จุดด้อย
- การได้มานั้นจะต้องชำระเป็นเดือน หนึ่งปี หรือตลอดชีวิต
- จำเป็นต้องดาวน์โหลดจากเว็บไซต์เพื่อใช้งาน
อ่านเพิ่มเติม
1. บันทึกวิดีโอหน้าจอด้วย VLC Media Player
2. อัดหน้าจอพร้อมเสียงบน Mac ด้วย QuickTime
ส่วนที่ 4. คำถามที่พบบ่อยเกี่ยวกับการบันทึก Blu-ray บน OBS Studio
ความแตกต่างระหว่าง Blu-ray, DVD และ CD คืออะไร?
ความแตกต่างหลักระหว่างรูปแบบดิสก์ออปติคัลแต่ละรูปแบบคือเอาต์พุตและที่เก็บข้อมูลที่สามารถจัดเก็บได้เอง โดยระบุว่าซีดีสามารถจัดเก็บไฟล์ได้มากถึง 700 MB ดีวีดีสามารถจัดเก็บข้อมูลได้มากถึง 4.7GB ในขณะที่ Blu-ray สามารถจัดเก็บได้มากถึง 25GB ในบางกรณี Blu-ray แบบ Dual-layer สามารถเก็บข้อมูลได้ 50GB นอกจากนี้ยังมีชั้นดิสก์สามชั้นและชั้นสี่เท่า
OBS เป็นเครื่องมือฟรีหรือไม่? การดาวน์โหลดนั้นปลอดภัยหรือไม่?
ใช่ OBS Studio เป็นเครื่องมือที่ไม่มีค่าใช้จ่ายและไม่มีค่าใช้จ่ายแอบแฝง นอกจากนี้ คุณสามารถดาวน์โหลดได้จากทุกแพลตฟอร์ม อีกอย่าง ใช่ มันปลอดภัยจากมัลแวร์ ไวรัส เวิร์ม ไฮแจ็คเกอร์เบราว์เซอร์ และอื่นๆ
ตัวแปลงสัญญาณวิดีโอใดบ้างที่รองรับ Blu-ray
สำหรับวิดีโอ: MPEG-2, MPEG-4 AVC และ SMPTE VC-1
สำหรับเสียง: Linear PCM (LPCM), Dolby Digital® (DD), Dolby Digital® Plus (DD+), Dolby® TrueHD, DTS Digital Surround® และ DTS-HD®.
สรุป
ท้ายที่สุดแล้ว เครื่องบันทึกหน้าจอมีประโยชน์เนื่องจากความสามารถของพวกเขา OBS เป็นตัวเลือกที่ดีสำหรับการบันทึก แต่เนื่องจากตัวเลือกที่หลากหลาย ทำให้ผู้ใช้เดาและถามว่าพวกเขากำลังทำถูกต้องหรือไม่ แต่เนื่องจากรายการออนไลน์และออฟไลน์ที่รองรับทุกแพลตฟอร์ม ตอนนี้คุณมีอำนาจในการเลือก เพื่อเลือกสิ่งที่ดีที่สุดสำหรับคุณ
เช่นเดียวกับเครื่องบันทึกหน้าจอ FVC เป็นเครื่องมือที่ใช้งานง่ายและตรงจุดที่ช่วยให้ผู้ใช้สามารถบันทึกได้ทุกที่ทุกเวลา แม้ว่าจะเป็นเครื่องมือจ่ายต่อการใช้งาน ยังคงคุ้มค่าทุกเพนนีที่ใช้ไป อย่าลืมว่าอย่ากดดันตัวเองกับการใช้งานที่ยากหากการใช้งานที่ง่ายสามารถทำได้ดีกว่า
-
 หนังบู๊! รีวิวเครื่องบันทึกหน้าจอ - จุดด้อยข้อดีและทางเลือกที่ดีที่สุด
 Action Screen Recorder เป็นซอฟต์แวร์บันทึกเกมที่ต้องการเพื่อจับภาพวิดีโอการเล่นเกมหรือไม่? เพียงเรียนรู้รายละเอียดเพิ่มเติมจากบทวิจารณ์และทางเลือกอื่น ๆ จากบทความ
-
 3 เครื่องบันทึกการโทรบน Facebook ที่ดีที่สุดสำหรับคอมพิวเตอร์ iOS และ Android
 เมื่อคุณต้องการบันทึกการโทรบน Facebook เพื่อบันทึกสิ่งที่มีค่า มีเครื่องบันทึกการโทรบน Facebook ให้เลือกมากมาย ที่นี่คุณสามารถเรียนรู้ 3 เครื่องมือที่ดีที่สุดในการบันทึกการสนทนาทางวิดีโอบน Facebook สำหรับพีซี iOS และ Android
-
 เครื่องบันทึก WAV ฟรี 6 อันดับแรกสำหรับ Windows และ Mac
 ซอฟต์แวร์บันทึก WAV ที่ดีที่สุดที่เราแชร์ในบทความนี้มีฟีเจอร์ที่มีประโยชน์มากมาย ซึ่งช่วยให้คุณบันทึกเสียงและเสียงได้เหมือนมืออาชีพ