


如何在 Photoshop 中快速銳化圖像 - 您必須知道的完整指南
使用最專業、最受專家青睞的影像編輯器,你可以將手上每一張圖片處理到更高層次。Adobe Photoshop 是歷史最悠久、最可靠的軟體之一,你可以在 Windows、Mac、iOS 和 Android 上下載使用。多虧開發商 Adobe,它早已把影像編輯發揮到極致並帶來革命性的改變。由於功能強大,許多新手編輯一看到它的介面與整體操作就會感到害怕。它看起來也許很難上手,但其實並不會,尤其是在銳化圖片方面。下面我們將為你完整教學,說明如何快速在 Photoshop 中銳化圖片。

第 1 部分。有關如何在 Photoshop 中銳化圖像的完整教程 [3 種有效的銳化方式]
銳化 Photoshop 圖像可能會讓那些沒有使用過這個程序的人不知所措。但在我們繼續教程之前,您需要在 Adobe 下載官方軟件。請選擇正確的下載按鈕以將其放在桌面上。如果您還沒有在桌面上下載這個程序,您可以使用它的免費試用版,但如果您完成了試用版,您將需要購買月度或年度計劃。完成以下所有操作後,請繼續執行我們在下麵包含的選擇方式的步驟。
第一種方式。如何使用高反差在 Photoshop 上使圖像清晰:
Highpass 允許您突出顯示圖像並對圖像應用濾鏡,這可以幫助您銳化上傳到 Photoshop 的照片的邊緣。您可以按照我們在下面添加的教程學習如何在您擁有的圖像上應用和使用高通。
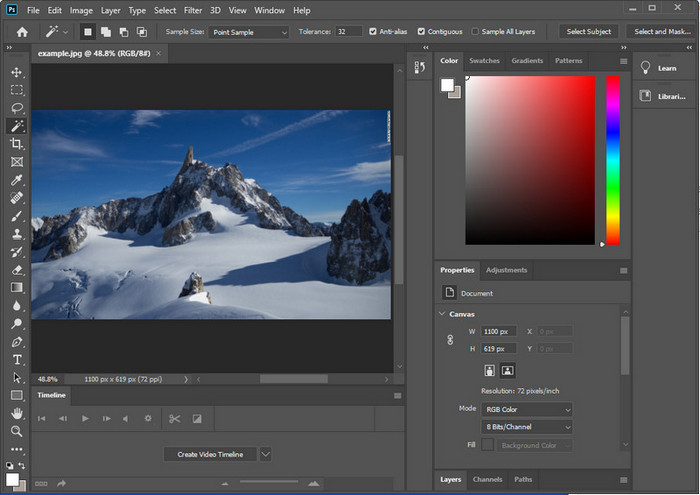
步驟 1. 啟動軟體後,點擊 File(檔案),再按 Open(開啟) 以上傳圖片並開始進行銳化。
步驟 2. 將你在 Photoshop 中上傳的圖片圖層複製一份。
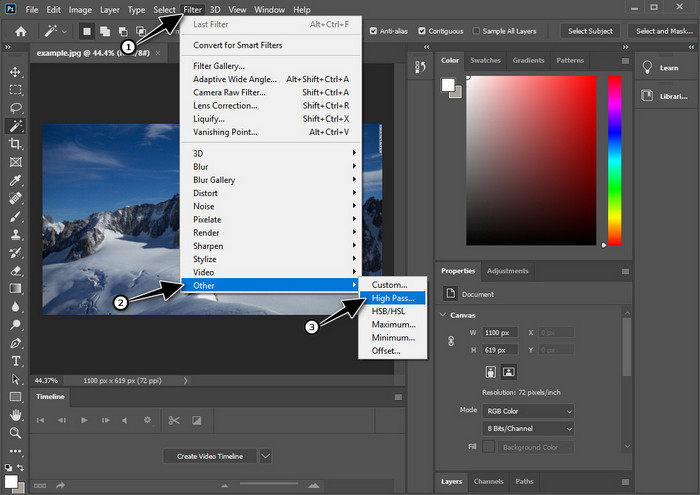
步驟 3. 在上方選單中點擊 Filter(濾鏡),按下 Other(其他),再選擇 High Pass(高反差保留)。若圖片變成灰色不用擔心,因為套用高反差保留時本來就會出現這種效果。
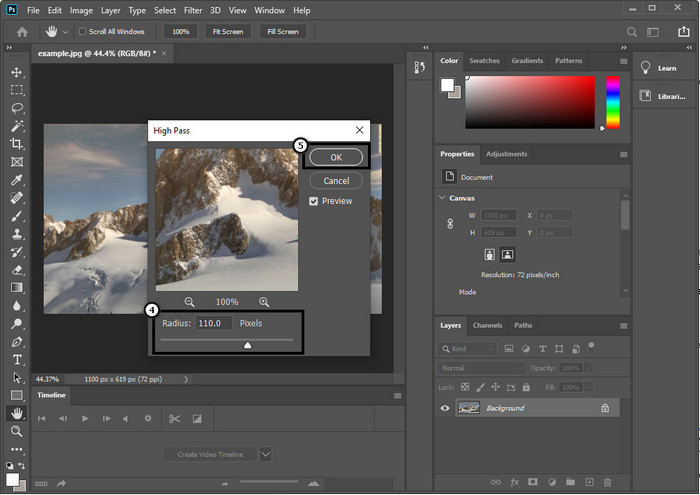
步驟 4. 螢幕上會跳出一個視窗,你可以開始拖曳滑桿來提高半徑數值,讓圖片細節更清晰。設定完成後按 OK 儲存。
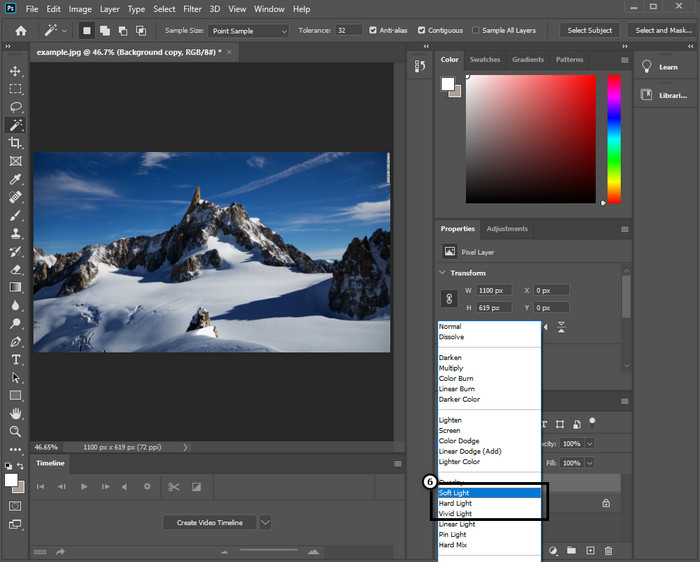
步驟 5. 回到圖層面板,點擊下拉式選單,選擇你要套用在圖片上的光源模式,例如由柔光、強光到鮮明光等,來達到銳化效果。若想再次加強銳利度,可以重複步驟 3 到這個步驟,進行多次銳化。
第二種方式。如何使用 Smart Sharper 在 Photoshop 上使圖像更清晰:
「Smart Sharpen(智慧型銳利化)」是你在 Adobe Photoshop 裡可以使用的強大功能,用來銳化畫面中的所有元素。這個功能並不是一鍵自動解決方案,你仍需要微調一些參數,才能讓整體看起來足夠清晰。若你想在 Adobe 中使用此功能,可以依照我們整理的以下步驟操作。
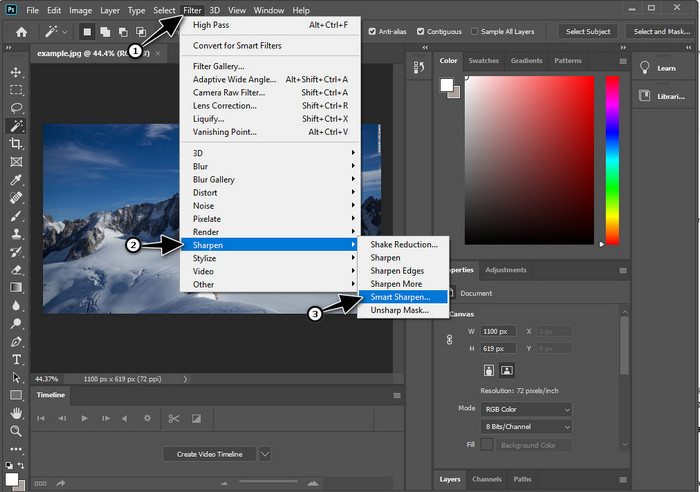
步驟 1. 匯入你想要銳化的圖片後,點擊上方的 Filter(濾鏡) 選單。
步驟 2. 在出現的選項中點選 Sharpen(銳利化),接著按 Smart Sharpen(智慧型銳利化)。
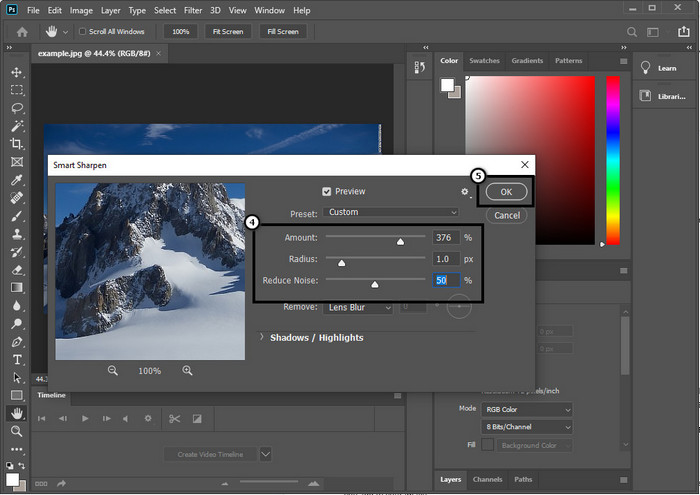
步驟 3. 依照個人喜好調整銳利化的 Amount(數量)與 Radius(半徑),然後點擊 OK 儲存變更。就這麼簡單,你就能利用這款軟體內建的銳化工具完成照片銳化。
第三種方式。如何通過調整亮度和對比度來銳化照片上的圖像:
與我們介紹的兩種方式不同,亮度和對比度側重於突出顯示您上傳的圖像,使其看起來更細緻,就像銳化工具所做的那樣。很少有用戶知道此選項,因此如果您想使用此選項並開始銳化您擁有的圖像,請按照以下步驟操作。
步驟 1. 將圖片匯入 Photoshop 後,先點擊上方的 Image(影像) 功能表。
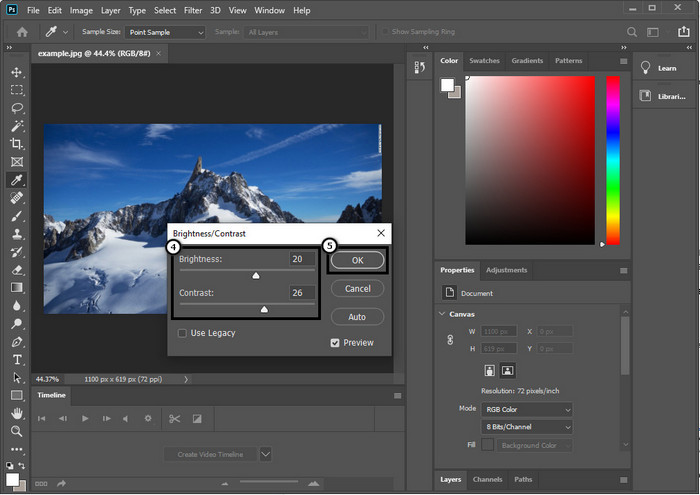
步驟 2. 會出現多個選項;點選 Adjustment(調整),接著按 Brightness and Contrast(亮度/對比)。

步驟 3. 拖曳滑桿來微調亮度與對比,完成後按 OK 儲存你對圖片所做的變更。
相關閱讀:
簡單指南:如何在 Photoshop 中快速為影片加入浮水印
第 2 部分。 Photoshop 在線銳化圖像的最佳替代品 [免費服務]
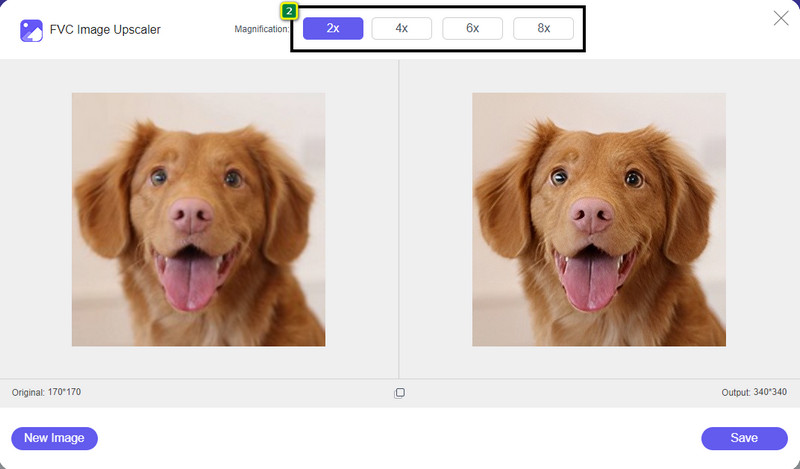
想在沒有 Photoshop 應用程式的情況下,在 Photoshop 風格下銳化模糊圖片該怎麼做?你可以使用 FVC 免費圖片放大銳化工具(Free Image Upscaler)。這款線上工具能讓你免去繁複操作。只要上傳圖片,交由此軟體的 AI 技術自動處理即可。而且你無須購買軟體序號或付費版本,所有需要立即編輯照片的使用者都能免費使用。即使你不是專業修圖師,只要依照下方的步驟說明,也一樣可以完成圖片銳化。
步驟 1. 先點擊這個連結,開啟這款網頁工具並開始銳化你的照片。
步驟 2. 進入網站後,按下 Upload Image(上傳圖片),匯入你想銳化的照片。螢幕會跳出資料夾視窗,選取圖片後再按 Open(開啟) 進行上傳。
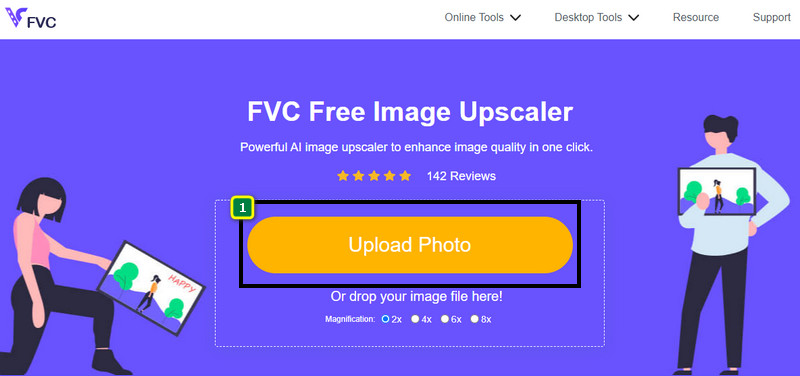
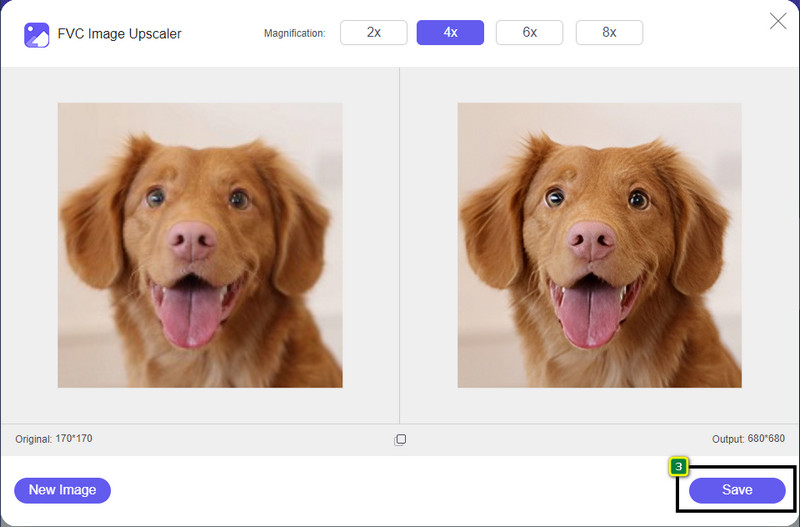
步驟 3. 之後會提供多種放大倍率選項,你可以搭配 AI 技術,輕鬆對圖片進行放大與銳化。
步驟 4. 在畫面下方點擊 Save(儲存) 按鈕,即可將銳化後的圖片下載到本機裝置。
第 3 部分。有關如何在 Photoshop 上銳化圖像的常見問題解答
如果 Photoshop 的免費試用期結束了,我該怎麼辦?
如果你想持續使用由 Adobe 開發的這款專業圖片編輯器,就必須購買方案才能繼續使用。不過,若你想體驗與 Photoshop 類似的編輯功能,也可以開始使用 FVC 免費圖片放大銳化工具(Free Image Upscaler)。
我可以用 Photoshop 做什麼?
您可以在這裡進行大量的圖像和視頻編輯,這是其他編輯器不提供的。它是一個完整的圖像編輯器,您將需要它來創建令人驚嘆的東西,例如將 2D 圖像轉換為 3D 等等。但是,這個軟件有點複雜,你需要花時間去掌握它的整體使用方法。
我在哪裡可以下載 Photoshop?
Adobe Photoshop 不支持 64 位或更高版本的 Windows 10 以及 Mac 10.15 Catalina 或更高版本。此外,它還支持移動版本,即 Photoshop Express 照片編輯器。
結論
透過我們提供的如何在 Photoshop 中銳化圖片教學,你現在已能用多種方式,利用這款頂尖編輯器來輕鬆完成銳化。如果免費試用已到期,卻還想繼續銳化圖片,該怎麼辦?不用擔心,因為我們也介紹了一款線上替代方案,只要有網路,就能更簡單、完全免費地銳化圖片,那就是 FVC 免費圖片放大銳化工具(Free Image Upscaler)。
-
 用市場上最好的方法製作高清照片
 您想知道或想要製作照片高清嗎?您可以按照我們在下面添加的教程使用不同的解決方案。
-
 您可以在線和離線使用的前 4 種圖像質量降低器
 由於某些原因,這些圖像質量降低器可以幫助您降低圖像質量。如果您需要,請閱讀本文!
-
 通過動手教程將圖像升級到 4k 的官方方法
 要將圖像升級到 4k,您需要在設備上安裝軟件。如果您還沒有,那麼您需要選擇我們在此處包含的工具。