


如何使用提示和技巧在不到一分鐘的時間內編輯照片的清晰度
每一位攝影愛好者都希望自己拍攝的照片,在眾多攝影師的作品中顯得最出色。透過不同的技巧,你可以輕鬆做到這一點:讓畫面更銳利、色彩更飽和,讓影像變得更細緻。如果你想讓照片看起來更「酥脆銳利」,或是想讓一切變得更柔順平滑,那就是「清晰度」要發揮作用的時候了。藉由調整清晰度,你可以控制照片中的中間調與對比,為畫面增加你想要的衝擊力,讓呈現效果更驚豔。想知道怎麼做嗎?那就閱讀以下我們整理的資訊,學習如何編輯照片的清晰度。

第 1 部分。如何通過升級圖像免費在線提高照片清晰度
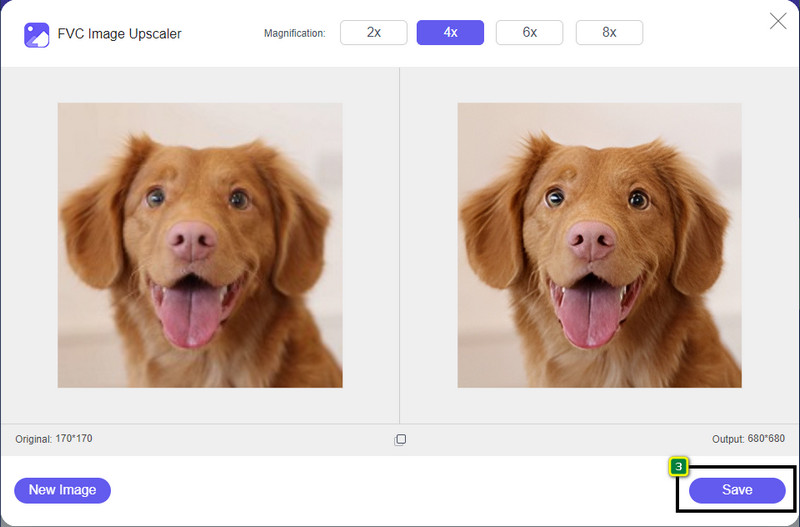
FVC Free Image Upscaler 是一款你可以直接在瀏覽器中使用、無需在桌面下載任何檔案的最佳照片清晰度工具。這個應用程式可以修復照片品質,並以你前所未見的方式大幅提昇圖像效果。即使你不是科技高手,也能在不到一分鐘的時間內迅速上手這款軟體的操作。因此,如果你想試用這款工具,可以依照下方我們提供的教學步驟進行。
步驟一: 點擊此連結前往這款放大工具的官方網站。
步驟二: 點擊Upload Image匯入你想調整清晰度的圖片。接著會開啟資料夾視窗,在其中找到圖片檔案並按下Open。

步驟三: 圖片上傳完成後,選擇你想使用的選項,來提昇影像的清晰度。

步驟四: 調整好清晰度之後,點擊Save按鈕,將你在此強化過的圖像下載到裝置中。
第 2 部分。如何在 Photoshop 中快速提高照片的清晰度
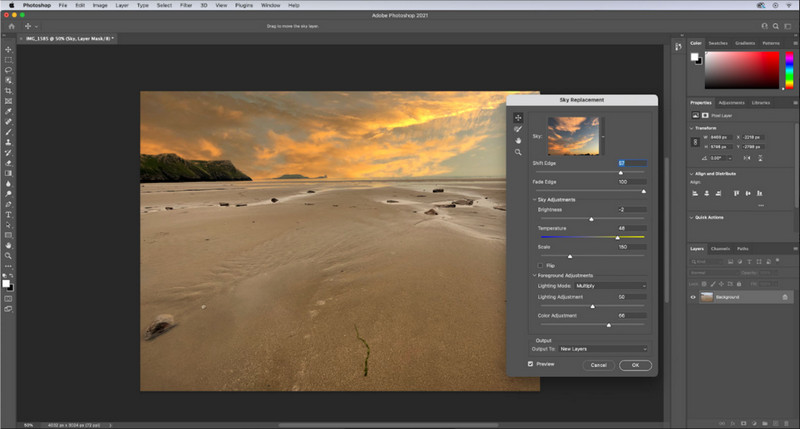
如果你想在裝置上使用專業級工具,那麼Adobe Photoshop就是你應該下載的照片清晰度軟體。它提供完整的影像編輯功能,讓你透過調整各項參數,讓照片看起來更出色,足以讓觀賞者眼前一亮。市面上很少有軟體能達到它這樣的效能。若要提昇圖片的清晰度,你需要調整對比與中間調。想知道如何操作嗎?請依照以下提供的教學步驟進行。
步驟一: 下載並開啟 Adobe Photoshop。點擊File,再選擇Open,上傳你要編輯的圖片。
步驟二: 在上方選單中點擊Image,在其下方選擇Adjustment,再點選Brightness/Contrast。
步驟三: 螢幕上會跳出一個對話框;拖曳滑桿來改變影像的對比度。你可以自由地增加或減少對比,而這也會影響到照片的清晰度。
步驟四: 按下OK,即可儲存你對照片所做的更動,效果會自動套用在影像上。
第 3 部分。如何在不到一分鐘的時間內提高 Adobe Lightroom 上照片的清晰度
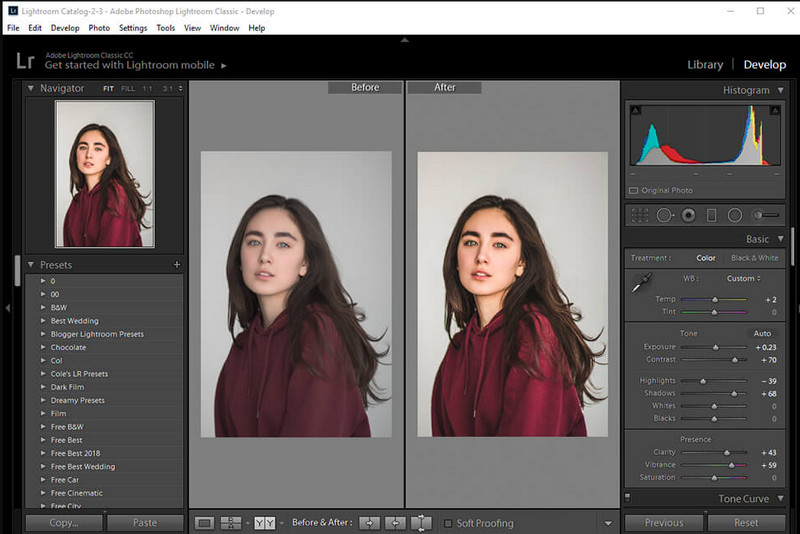
與 Photoshop 不同,Adobe Lightroom 內建了非常實用的「清晰度」選項,可以用來提升圖片品質:將清晰度往上調,可以讓畫面細節與色彩更突出;往下降,則能讓整體顯得更加柔和順滑。由於 Photoshop 與 Lightroom 都是由 Adobe 開發,因此在輸出品質上的專業程度絕對有保證。你可以依照下列步驟,為照片加入清晰度,並改善原始圖片的色彩表現。
步驟一: 從 Adobe 官方下載並安裝 Lightroom,啟動程式後,上傳你想編輯的照片。
步驟二: 開啟Develop(修改)模組,以顯示可用來開始調整清晰度的相關選項。
步驟三: 在「Presence」相關選項下,將清晰度的slider(滑桿)拖曳到你想套用的百分比。你也可以一併調整其他選項,讓照片看起來比原始影像更細膩、更出色。
第 4 部分。您必須知道的有關編輯照片清晰度的提示
現在您已經有了可以在網絡上和離線使用的最佳照片清晰度應用程序,以下信息將為您提供有關調整圖像清晰度的提示。
提示 1. 不要過分追求清晰度!
這是什麼意思?這些方法不會為您的圖像增加太多清晰度,因為它會變成顆粒狀的。每個人都不喜歡有顆粒感的圖像,所以不要增加太多。此外,請勿將清晰度降低到最大潛力,以免使圖像看起來模糊。
技巧 2. 對比度和清晰度不一樣
對比度和清晰度通常被認為是相同的,但事實並非如此。如果你調整圖像的清晰度,你就是在調整它的中間色調,然後是某個區域。而如果你使用對比度,你正在改變、突出顯示和陰影整個圖像。
提示 3. 在添加圖像之前了解圖像清晰度的目的
許多圖像編輯研究了這些選項,他們可以調整這些選項以改善圖像,例如清晰度、曝光度、伽瑪等等。因此,如果您是新用戶,最好在將清晰度應用於圖像之前先了解清晰度的用途。此外,如果您閱讀了有關清晰度的信息,您就會知道通過調整使圖像看起來更好是否是正確的選擇。如果不是,則不要增加清晰度。
技巧 4. 大規模使用 Clarity
如果您處理的是小尺寸圖像,最好銳化它們而不是改變其清晰度。它將幫助您輕鬆更好地銳化照片的邊緣。但是如果你認為你的圖像是大尺寸的,那麼你最好使用清晰度。
第 5 部分。 關於如何編輯照片清晰度的常見問題解答
為什麼我的圖像在增加清晰度後變得有顆粒感?
如果您將清晰度設置為100%,那麼毫無疑問,圖像出現顆粒感的可能性肯定會發生。我們建議您將百分比設置為 40% 到 70%;您可以根據自己的喜好提高。
我需要編輯器來增加照片的清晰度嗎?
實際上,您需要下載或使用軟件來增加圖像的清晰度。很多軟件都說可以調節清晰度,大家不要被他們騙了。您可以使用我們在本文中添加的軟件,因為我們證明它們可以改變圖像的清晰度,使其比以前更詳細。
我可以在圖像中添加對比度以使其清晰嗎?
是的,您可以為圖像添加對比度,使其更清晰、更美觀。但如果你想更精確而不是影響整個畫面,最好調整它的清晰度。
結論
我們希望本文教會您如何使用不同的工具和添加的步驟來編輯照片的清晰度。如果您認為我們做得很好,請在下方給我們 5 星,我們會很高興。感謝您閱讀本文!
-
 如何提高圖像的分辨率【5種提高方法】
 因圖像分辨率低而煩惱?不用擔心了!在這裡,我們將教您如何提高圖像的分辨率。
-
 使用頂級增強器使 iPhone 照片分辨率更好
 你想提高 iPhone 照片的分辨率嗎?好吧,在本文中,我們將介紹您可以使用的最佳工具以及您必須知道的其他技巧!
-
 線上線下老照片修復【簡單步驟】
 想要恢復舊照片?使用這些工具,您將了解舊照片恢復過程。閱讀這篇文章以了解最直接的方法。