


Entfernen Sie das Objekt aus Fotos mit der 6 effektiven Software [kostenlos]
Millionen von Fotografen, selbst Einsteiger, haben mehrfach Landschaften bei Sonnenuntergang, Strände, Touristenattraktionen, den Mond und vieles mehr fotografiert. Mit Bildern können wir ausdrücken, wer wir wirklich sind. Mit einem einfachen Schnappschuss kannst du die Kreativität aller und ihren künstlerischen Geist in ihnen wecken. Nicht jedes Mal, wenn wir ein Foto aufnehmen, entsteht ein perfektes Bild; manchmal müssen wir ein bestimmtes Objekt entfernen, das nicht auf dem Foto erscheinen soll. Benötigst du ein Werkzeug, um ein Objekt aus Fotos zu entfernen? Hier stellen wir verschiedene Methoden und Tools vor, mit denen du störende Objekte auf deinem Foto in Sekundenschnelle entfernen kannst.

Teil 1. Entfernen Sie Objekte aus dem Foto mit dem besten Objektentferner [Webdienst]
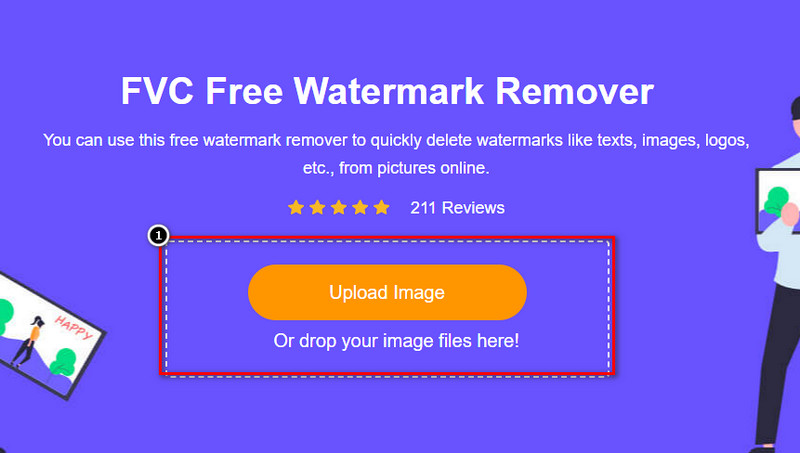
FVC Free Watermark Remover ist unsere erste Wahl, um kostenlos online Objekte aus Fotos zu entfernen. Damit kannst du alles, was dein perfektes Bild stört, sofort löschen, ohne Software auf deinen Desktop herunterzuladen – selbst wenn du keinerlei Erfahrung mit dieser Art von Bildbearbeitung hast. Du kannst dich auf dieses Tool verlassen, denn du musst das Objekt nur markieren, und es entfernt es aus dem Bild, ohne Rückstände zu hinterlassen. Wir finden dieses Tool unterhaltsam und effektiv beim Entfernen unnötiger Elemente im Bild. Wenn du es benutzen möchtest, kopiere einfach die folgenden Schritte.
Schritt 1. Um das Objekt zu öffnen und die FVC-Entwicklung zu entfernen, kannst du auf diesen Link zur offiziellen Website klicken.
Schritt 2. Klicke auf Upload Image, um das Foto zu importieren, das ein störendes Objekt enthält.
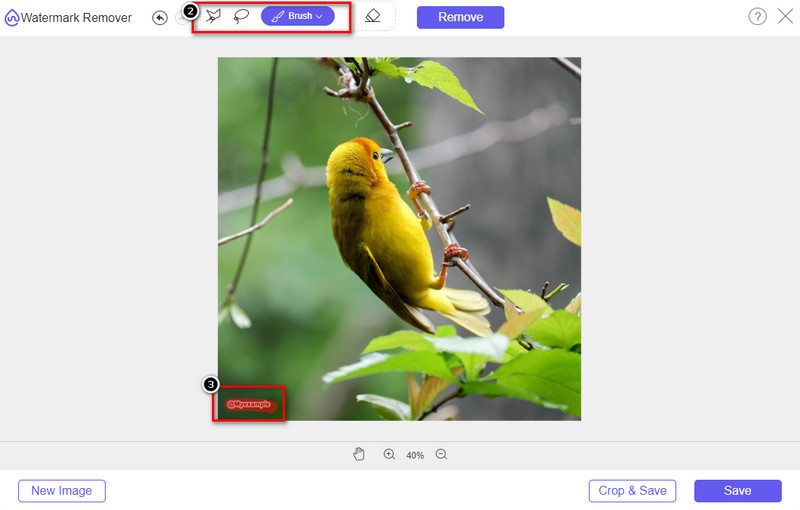
Schritt 3. Mit den hier verfügbaren Werkzeugen musst du das Objekt markieren.
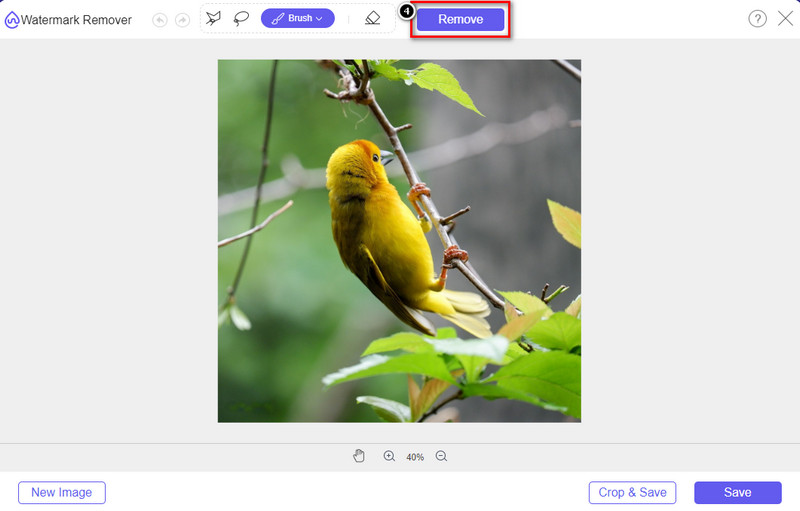
Schritt 4. Drücke die Schaltfläche Remove, um das Objekt mithilfe der von diesem Tool unterstützten KI-Technologie zu entfernen.
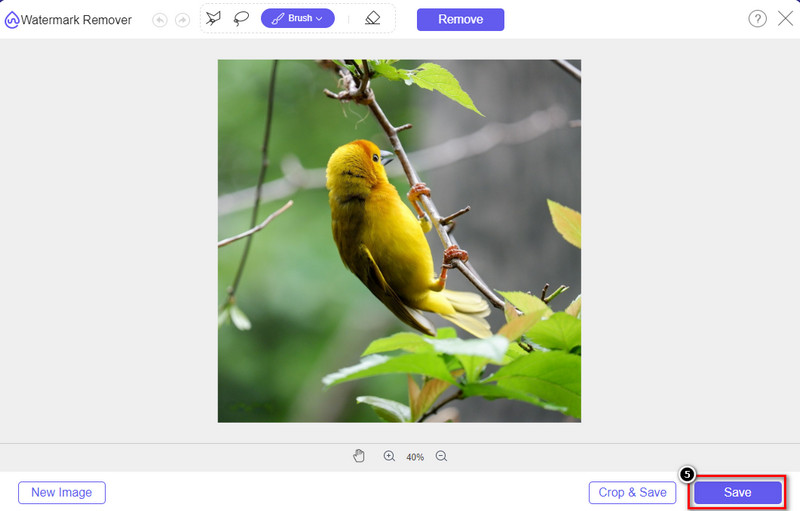
Schritt 5. Um das perfekte Bild herunterzuladen, das du hier bearbeitet hast, klicke auf Save.
Teil 2. Professionelles Entfernen von Objekten aus Fotos mit Desktop-Programmen [Windows & Mac]
Photoshop
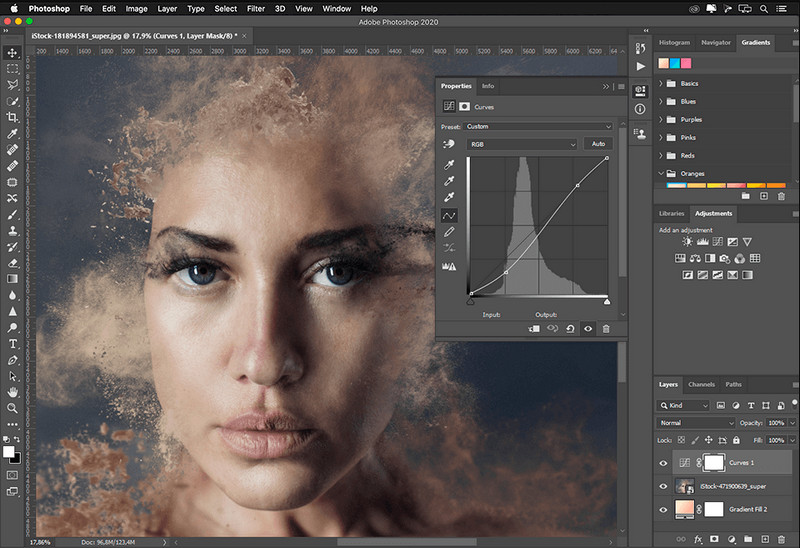
Wenn Sie ein professionelles Tool zum Entfernen von Objekten aus Fotos benötigen, ist Photoshop die Antwort! Dieses Tool ist ein vollständiger Bildeditor, den Adobe uns stolz präsentiert. Nichts hindert Sie daran, das Bild mit seiner Funktion und Funktion unglaublich aussehen zu lassen. Aufgrund seiner Beliebtheit bei Profis versuchen viele Anfänger, diese Software zu verwenden, um ihre Bilder zu bearbeiten und zu erstellen. Wenn Sie also wissen möchten, wie Sie dieses professionelle Tool verwenden, können Sie dem unten hinzugefügten Tutorial folgen.
Schritt 1. Öffne die offizielle Website von Adobe und lade Photoshop auf deinen Desktop herunter.
Schritt 2. Klicke auf File und dann auf Open, um das Bild hochzuladen, das du hier bearbeiten möchtest.
Schritt 3. Wähle im linken Bereich das Magic Wand Tool, um das Objekt auf dem Bild automatisch nachzuzeichnen.
Schritt 4. Gehe zum Bereich Edit und wähle dort Content-Aware Fill aus.
Schritt 5. Nachdem du es geöffnet hast, wird das Wasserzeichen automatisch entfernt. Klicke anschließend auf OK.
GIMP
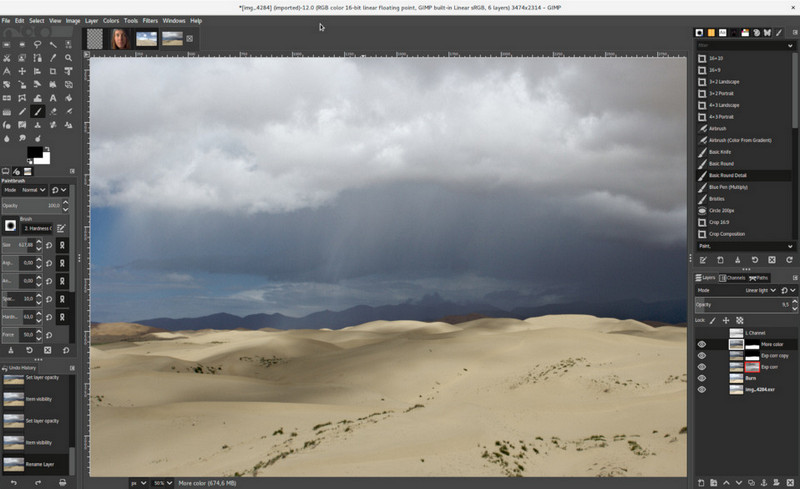
GIMP ist ein umfassender Bildeditor, mit dem du kostenlos Objekte aus Fotos auf Mac, Linux und Windows entfernen kannst. Es ist ein zuverlässiges Tool wie Photoshop. Obwohl das Programm als Top-Alternative zu Adobe Photoshop gilt, wird es noch aktiv weiterentwickelt. Mit diesem Tool kannst du deine Bilder aufwendig bearbeiten, um sie für dein Publikum besonders ansprechend zu gestalten. Außerdem kannst du die Oberfläche anpassen, um deine Arbeit zu erleichtern. Wenn du darüber nachdenkst, dieses Tool für professionelle Bildbearbeitung herunterzuladen, können wir dir versichern, dass du dieses Ziel erreichen kannst. Obwohl es sich um einen Open-Source-Editor handelt, muss das Tool noch finalisiert werden, da seine GUI noch in Entwicklung ist. Wenn du es verwenden möchtest, helfen dir die folgenden Schritte dabei, ein Objekt in GIMP aus einem Foto zu entfernen. Die nachstehenden Anweisungen führen dich durch den Vorgang.
Schritt 1. Lade die Software herunter und starte sie, damit du das Bild hochladen kannst, das du bearbeiten möchtest. Lade außerdem das Resythesizer-Plug-in herunter.
Schritt 2. Wähle im Werkzeugbereich auf der linken Seite Free Select aus und ändere den Modus auf Add Current Selection.
Schritt 3. Zeichne nun um das Objekt, das du entfernen möchtest; nachdem du das Objekt erfolgreich nachgezeichnet hast, drücke Enter auf deiner Tastatur.
Schritt 4. Um das heruntergeladene Plug-in zu verwenden, gehe zu Filter, dann zu Enhance und klicke auf Heal Selection.
Schritt 5. Danach erscheint ein Dialogfeld. Ändere bei Bedarf die Sampling-Breite, stelle das Sampling auf all-around und die Filling Order auf random. Drücke OK, um mit dem Synthesieren des Bereichs im Bild zu beginnen.
Foto-App auf dem Mac
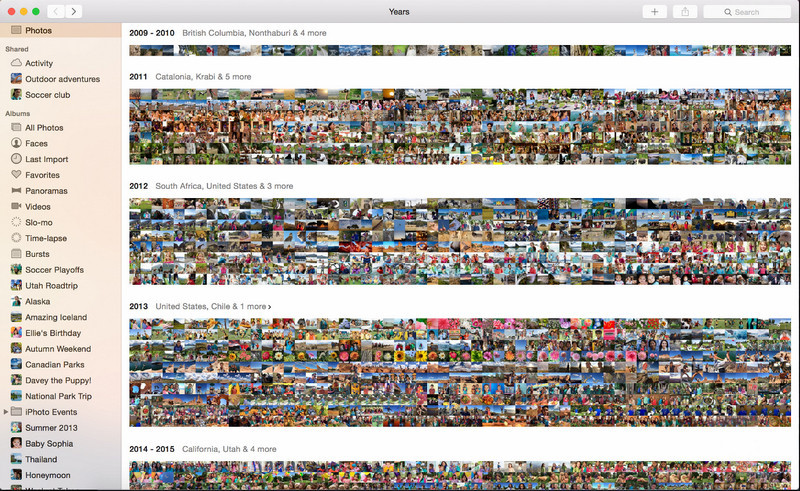
Die Fotos-App ist eine integrierte Funktion auf aktualisierten Apple-Produkten wie dem Mac. Diese Anwendung ist vorinstalliert, sodass du den Download überspringen und das Tool sofort nutzen kannst. Die Software ist kein Bildeditor im klassischen Sinn, da sie in erster Linie als Bibliothek und Betrachter für Fotos auf Mac- oder iOS-Geräten dient. Auch wenn du keinen professionellen Bildeditor auf dem Mac hast, kannst du diese Funktionen nutzen, um mit einem einzigen Klick ein professionell wirkendes Ergebnis zu erzielen. Wenn du also ein Objekt mit der Fotos-App entfernen möchtest, kannst du die folgenden Schritte befolgen.
Schritt 1. Öffne die Fotos-App auf deinem Mac und wähle das Bild aus, das ein störendes Objekt enthält.
Schritt 2. Klicke oben rechts auf die Schaltfläche Edit, um mit der Bildbearbeitung zu beginnen.
Schritt 3. Auf der rechten Seite siehst du die Option Retouch; klicke darauf, um die Funktion zu nutzen.
Schritt 4. Klicke und ziehe mit der Maus über den Bereich, den du entfernen möchtest.
Schritt 5. Drücke die Schaltfläche Done, um die an dem Bild vorgenommenen Änderungen zu speichern.
Teil 3. Entfernen Sie Objekte aus dem Foto mit der Anwendung auf Android und iOS
Photoshop-FIX
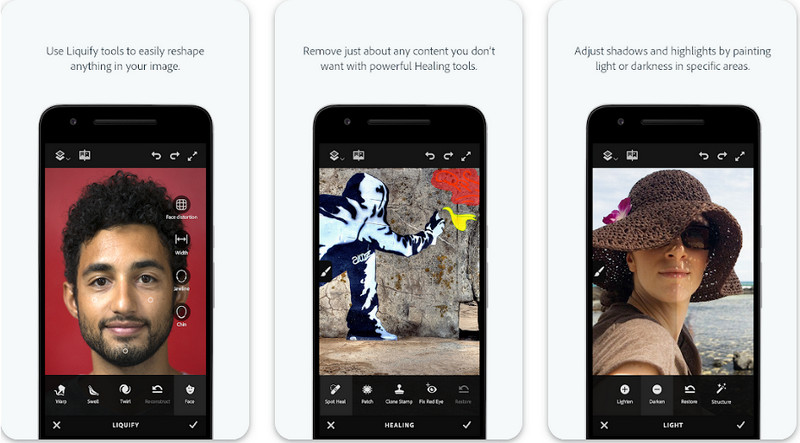
Photoshop FIX ist eine leistungsfähige Android-App zum Entfernen von Objekten aus Fotos, die professionell arbeitet und dennoch leicht zu bedienen ist. Es ist eine Open-Source-App, die du über den Play Store auf dein Gerät herunterladen kannst. Obwohl das Tool Open Source ist, sind seine Funktionen zur Objektentfernung ohne Zweifel hervorragend. Es gehört zu den am häufigsten heruntergeladenen Apps auf Android-Geräten für diese Aufgabe. Wenn du wissen möchtest, wie du die App benutzt, lies einfach weiter unten.
Schritt 1. Lade die App auf dein Android-Gerät herunter.
Schritt 2. Drücke auf On My Phone, um dir alle Bilder in deiner Mediathek anzeigen zu lassen. Wähle das Bild aus, das du bearbeiten möchtest.
Schritt 3. Um die Objektentfernung dieser App zu nutzen, klicke auf Healing.
Schritt 4. Hier stehen dir zwei Optionen zur Verfügung. Um das Objekt wegzupinseln, wähle Spot Heal. Wenn du hingegen Pixel klonen möchtest, musst du Clone Stamp wählen. Markiere das Wasserzeichen mit der von dir gewählten Option.
Schritt 5. Speichere das Bild in deiner Kamerarolle – das war’s!
Fotoretusche
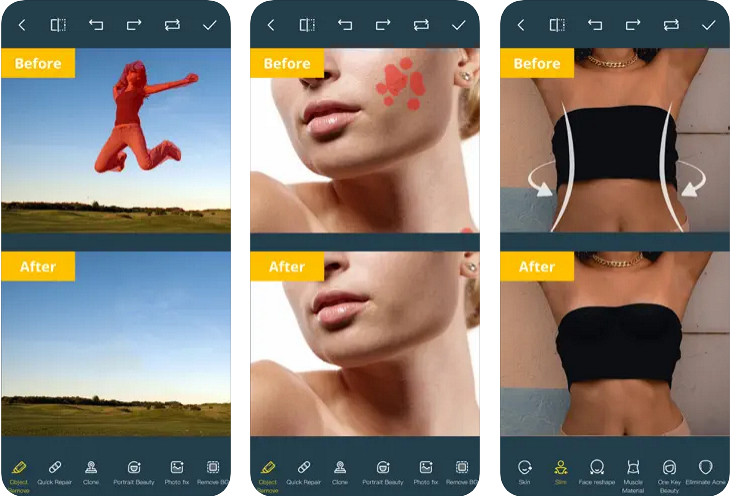
Photo Retouch ist eine zuverlässige App, um Objekte auf dem iPhone mühelos aus Fotos zu entfernen. Selbst wenn du kein Profi im Entfernen von Objekten auf deinen Bildern bist, kannst du sie damit effektiv beseitigen. Du kannst diese App kostenlos im App Store herunterladen, wenn du sie ausprobieren möchtest. Außerdem kannst du damit den Hintergrund und Wasserzeichen auf deinen Fotos entfernen, falls du so etwas benötigst. Wenn du bereit bist, diese App zu nutzen, um ein Objekt auf deinem Bild zu entfernen, folge den von uns aufgeführten Schritten.
Schritt 1. Lade die offizielle App herunter und starte sie.
Schritt 2. Klicke auf Photo Eraser und dann auf Photo. Wähle das Bild mit dem störenden Hintergrund aus, den du entfernen möchtest, und stelle sicher, dass sich das Bild in der Fotos-Mediathek deines iPhones befindet.
Schritt 3. Wähle im unteren Bereich die Option Object Removal aus.
Schritt 4. Verwende den Pinsel, den diese App bietet, um das Objekt nachzuzeichnen, das du entfernen möchtest, und klicke auf GO, um das Objekt zu löschen.
Verwandt:
Dreamstime-Wasserzeichen entfernen
Picsart-Filter-Wasserzeichen entfernen
Teil 4. Häufig gestellte Fragen zum Entfernen von Objekten aus Fotos
Warum muss ich Objekte aus Fotos entfernen?
Es gibt viele Male, in denen wir etwas aufnehmen, und es gibt Photobomber. Dieses Objekt ist für die meisten Fachleute ein Problem, da es das aufgenommene Bild nicht hervorhebt. Anstatt also das Bild erneut aufzunehmen, können Sie die folgenden idealen Möglichkeiten zum Entfernen des Objekts auf Ihrem Foto lesen.
Kann ich das Bild zuschneiden, um Objekte zu entfernen?
Ja, du kannst. Wenn sich das Objekt, das Sie entfernen möchten, an der Seite des Fotos befindet, können Sie versuchen, das Bild mit Ihrem integrierten Editor zuzuschneiden. Diese Auswahl ist jedoch keine Option, insbesondere wenn sich das Objekt im mittleren Teil oder in der Nähe des von Ihnen aufgenommenen Bildes befindet. Durch das Zuschneiden des Bildes wird das Foto ausgeschnitten, daher ist es besser, zweimal darüber nachzudenken, ob Sie diese Option ausprobieren möchten.
Warum kann ich kein Bild hochladen, um das Objekt zu entfernen?
Sie können das Bild nicht hochladen; Entweder ist das Bild beschädigt oder die Bilderweiterung wird nicht unterstützt. Wenn Ihr Bild beschädigt ist, gibt es Möglichkeiten, es zu reparieren. Sie können sie im Internet finden, wenn Sie es durchsuchen. Normalerweise könnte es die Dateierweiterung des Bildes sein; Um dieses Problem zu lösen, müssen Sie es konvertieren.
Fazit
Das Entfernen von Objekten aus dem Foto ist dank des Tools und der App, die wir in diesem Artikel vorstellen, einfach. Also, welches Tool bevorzugst du am meisten? Wir hoffen, dass dieser von uns hinzugefügte Leitfaden Ihnen hilft, das Problem einfach zu lösen.
-
 So konvertieren Sie ein Bild mit niedriger Auflösung online in ein Bild mit hoher Auflösung
 Wenn Sie lernen möchten, wie Sie Bilder mit niedriger Auflösung online in Bilder mit hoher Auflösung konvertieren, dann ist dieser Artikel genau das Richtige für Sie. Lesen Sie vollständig, um zu erfahren, wie.
-
 Einfache Methoden zum Entfernen von schussfesten Wasserzeichen
 Entfernen Sie das Shootproof-Wasserzeichen, indem Sie diesen einfachen Methoden folgen. Verwenden Sie diese erstaunlichen Wasserzeichen-Entferner, um das Shootproof-Wasserzeichen einfach von Ihrem Bild zu entfernen.
-
 So entfernen Sie mühelos das Bandicam-Wasserzeichen [3 effektive Möglichkeiten]
 Wie entferne ich das Bandicam-Wasserzeichen? Mit den Tools, die wir hier hinzufügen, werden Sie wissen, wie Sie damit effektiv umgehen können!