


So schärfen Sie das Bild in Photoshop schnell – eine vollständige Anleitung, die Sie kennen müssen
Mit dem besten von Experten empfohlenen Bildeditor können Sie jedes Ihrer Bilder auf ein neues Niveau bringen. Adobe Photoshop ist seit Langem die zuverlässigste Software, die Sie auf Windows, Mac, iOS und Android herunterladen können. Dank seines Entwicklers Adobe hat sie die Bildbearbeitung bereits eingeführt und bis zu ihrem maximalen Potenzial revolutioniert. Aufgrund der fortschrittlichen Funktionen haben neue Nutzer jedoch oft Respekt davor, insbesondere wegen der Benutzeroberfläche und der gesamten Funktionalität. Es mag schwierig erscheinen, ist es aber nicht – vor allem nicht beim Schärfen eines Bildes. Hier zeigen wir Ihnen ein vollständiges Tutorial, wie Sie ein Bild in Photoshop schnell schärfen.

Teil 1. Ein vollständiges Tutorial zum Schärfen des Bildes in Photoshop [3 effektive Möglichkeiten zum Schärfen]
Das Schärfen von Photoshop-Bildern könnte diejenigen überfordern, die dieses Programm nicht verwendet haben. Aber bevor wir mit dem Tutorial fortfahren, müssen Sie die offizielle Software von Adobe herunterladen. Bitte wählen Sie die richtige Download-Schaltfläche, um sie auf Ihrem Desktop zu haben. Wenn Sie dieses Programm nicht auf Ihren Desktop heruntergeladen haben, können Sie seine kostenlose Testversion verwenden, aber wenn Sie die Testversion beendet haben, müssen Sie einen Monats- oder Jahresplan erwerben. Nachdem Sie alles befolgt haben, fahren Sie mit den Schritten Ihrer Wahl fort, die wir unten einschließen.
1. Weg. So machen Sie Bilder in Photoshop mit High Pass scharf:
Mit Highpass können Sie das Bild hervorheben und einen Filter auf das Bild anwenden, mit dem Sie die Kanten des Fotos, das Sie in Photoshop hochladen, schärfen können. Sie können dem unten hinzugefügten Tutorial folgen, um zu erfahren, wie Sie Hochpass auf Bilder anwenden und verwenden, die Sie haben.
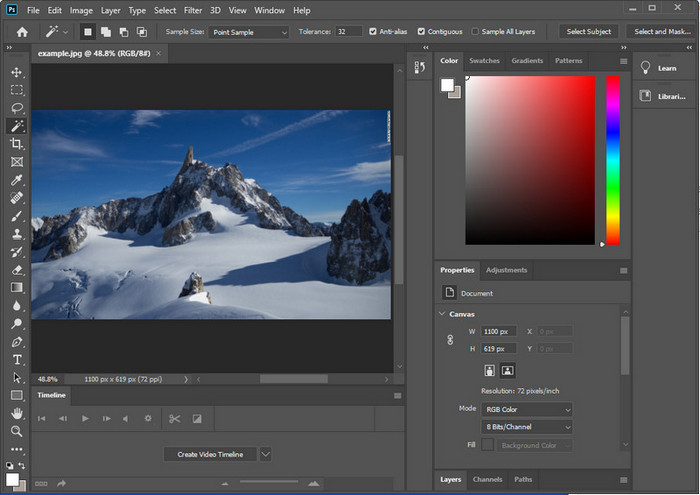
Schritt 1. Starten Sie die Software, klicken Sie auf Datei und dann auf Öffnen, um das Bild hochzuladen und mit dem Schärfen zu beginnen.
Schritt 2. Duplizieren Sie die Ebene des Bildes, das Sie in Photoshop hochgeladen haben.
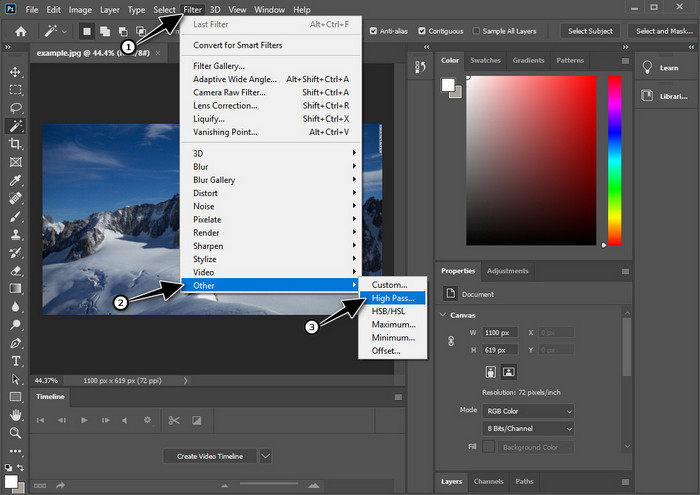
Schritt 3. Klicken Sie im oberen Bereich auf das Menü Filter, wählen Sie anschließend Sonstige Filter und dann Hochpass. Machen Sie sich keine Sorgen, wenn Ihr Bild grau wird, denn das ist normal, sobald Sie einen Hochpass hinzufügen.
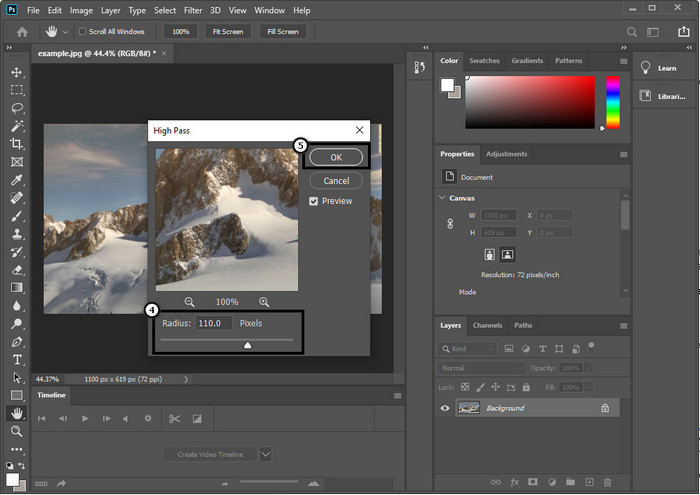
Schritt 4. Es erscheint ein Pop-up-Fenster auf Ihrem Bildschirm, in dem Sie den Schieberegler ziehen können, um den Radius zu erhöhen und mehr Details in Ihrem Bild zu erhalten. Klicken Sie anschließend auf OK, um zu speichern.
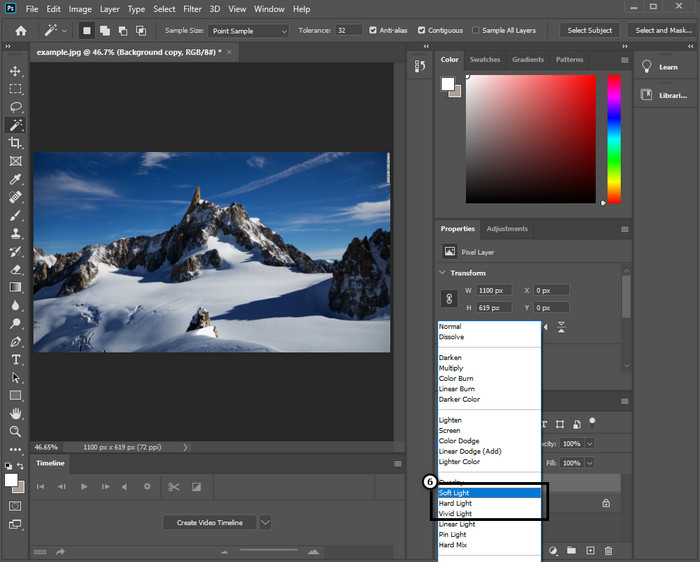
Schritt 5. Gehen Sie zurück zur Ebene, klicken Sie auf die Drop-down-Schaltfläche und wählen Sie die Lichtart, die Sie auf Ihr Bild anwenden möchten – von weichem über hartes bis hin zu lebhaftem Licht – um die Schärfung zu steuern. Wiederholen Sie Schritt 3 bis zu diesem Schritt, um Ihr Bild erneut nachzuschärfen.
2. Weg. So machen Sie Bilder in Photoshop mit Smart Sharper schärfer:
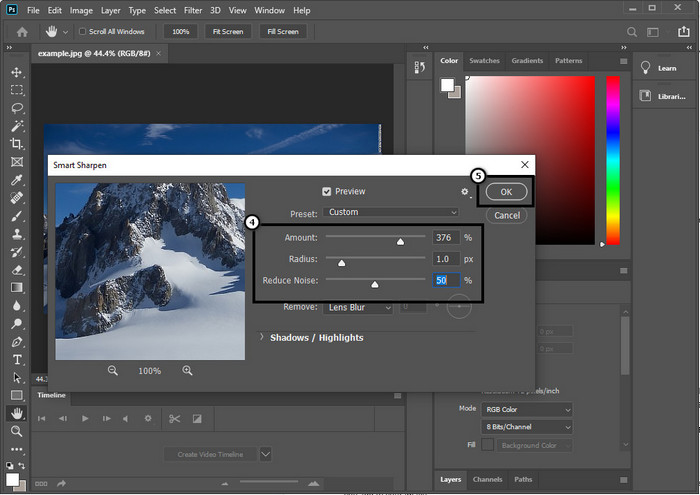
'Smart Sharpen' (Intelligentes Scharfzeichnen) ist eine effektive Funktion in Adobe Photoshop, mit der Sie alles in Ihrem Bild schärfen können. Diese Funktion ist keine automatische Komplettlösung, sondern Sie müssen einige Parameter anpassen, damit alles wirklich scharf wirkt. Wenn Sie diese Funktion in Adobe verwenden möchten, folgen Sie den nachstehenden Schritten.
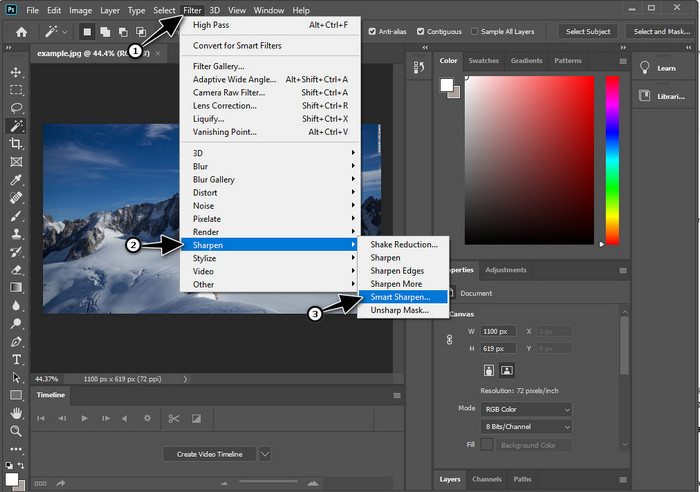
Schritt 1. Nachdem Sie das Bild hinzugefügt haben, das Sie schärfen möchten, klicken Sie auf das Menü Filter.
Schritt 2. In den angezeigten Optionen klicken Sie auf Scharfzeichnen und dann auf Unscharf maskieren bzw. Smart Sharpen (Intelligentes Scharfzeichnen), je nach Ihrer Photoshop-Version.
Schritt 3. Passen Sie die Werte für Stärke (Amount) und Radius der Schärfung nach Ihren Vorlieben an und klicken Sie auf OK, um die Änderungen zu speichern. So einfach können Sie das Foto mit dem Schärfwerkzeug dieser Software schärfen.
3. Weg. So schärfen Sie das Bild auf dem Foto, indem Sie Helligkeit und Kontrast anpassen:
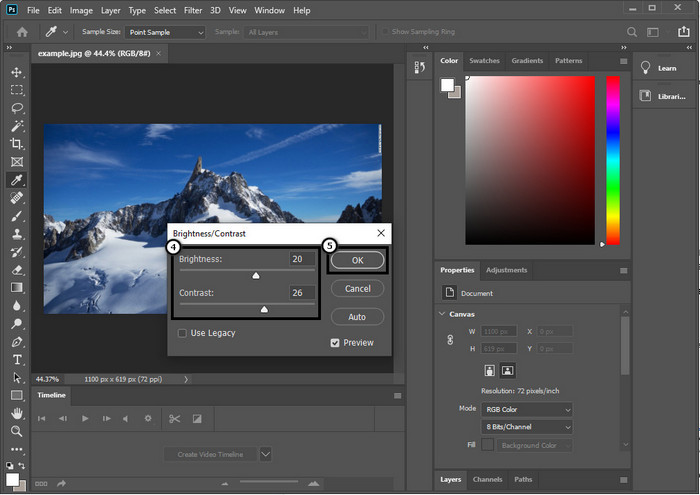
Im Gegensatz zu den beiden Methoden, die wir eingeführt haben, konzentrieren sich Helligkeit und Kontrast darauf, das von Ihnen hochgeladene Bild hervorzuheben, damit es detaillierter aussieht, wie es die Schärfewerkzeuge tun. Nur wenige Benutzer kennen diese Option. Wenn Sie also diese Option verwenden und mit dem Schärfen des vorhandenen Bildes beginnen möchten, befolgen Sie die nachstehenden Schritte.
Schritt 1. Nachdem Sie Ihr Bild in Photoshop hochgeladen haben, klicken Sie auf das Menü Bild.
Schritt 2. Es werden mehrere Optionen angezeigt; wählen Sie Korrekturen und klicken Sie dann auf Helligkeit/Kontrast.

Schritt 3. Passen Sie Helligkeit und Kontrast an, indem Sie den Schieberegler bewegen, und klicken Sie auf OK, um die an Ihrem Bild vorgenommenen Änderungen zu speichern.
Verwandt:
Einfache Anleitung: So fügen Sie in Photoshop schnell ein Wasserzeichen zu einem Video hinzu
Teil 2. Beste Alternative zu Photoshop zum Schärfen des Bildes online [Kostenloser Service]
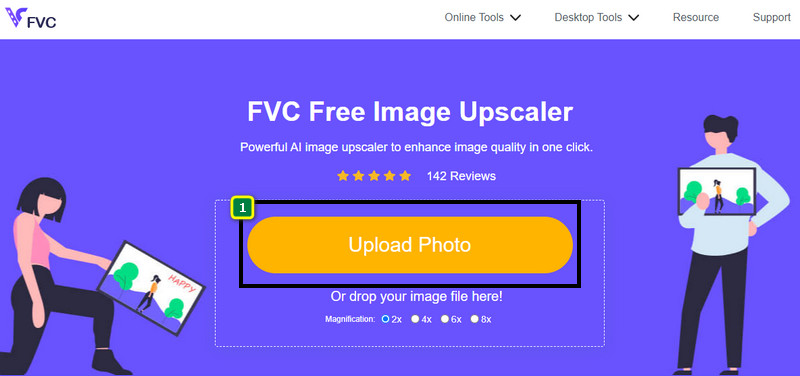
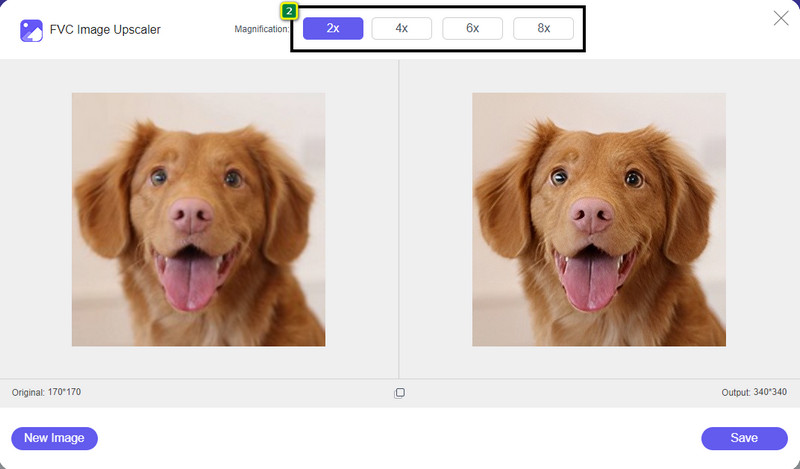
Wie schärft man ein verschwommenes Bild in Photoshop, ohne die App zu verwenden? Sie können den FVC Free Image Upscaler nutzen. Dieses Online-Tool erspart Ihnen komplizierte Arbeitsschritte. Laden Sie das Bild hoch und lassen Sie die KI-Technologie dieser Software die Arbeit für Sie erledigen. Außerdem müssen Sie keinen Lizenzschlüssel oder eine Premiumversion kaufen, denn es ist für alle Nutzer kostenlos, die ihre Bilder schnell bearbeiten müssen. Selbst wenn Sie kein Bearbeitungsprofi sind, können Sie Ihr Bild schärfen, indem Sie die unten angegebenen Schritte befolgen.
Schritt 1. Klicken Sie auf diesen Link, um das Online-Tool zu öffnen und Ihr Foto zu schärfen.
Schritt 2. Auf der Website müssen Sie auf Upload Image klicken, um das Bild einzufügen, das Sie schärfen möchten. Ein Ordnerfenster erscheint auf Ihrem Bildschirm; wählen Sie das Bild aus und klicken Sie dann auf Öffnen, um es hochzuladen.
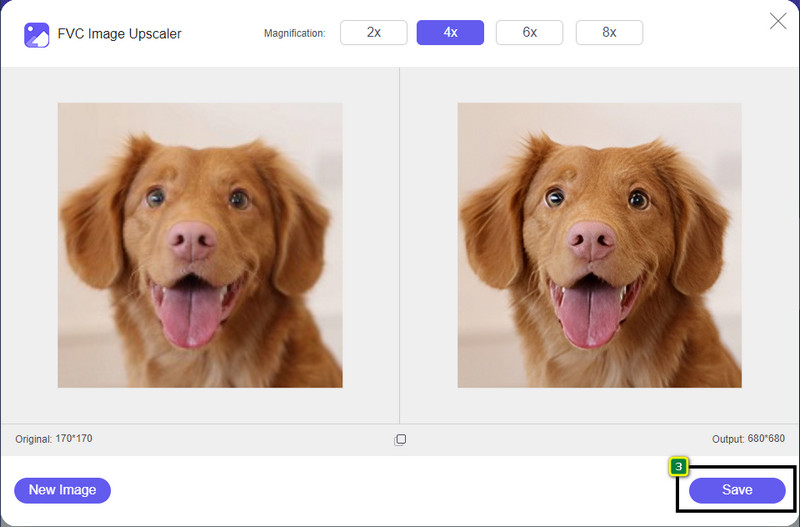
Schritt 3. Es werden verschiedene Vergrößerungsoptionen für Ihr Bild angeboten, sodass Sie es mit Hilfe der KI-Technologie leicht schärfen können.
Schritt 4. Klicken Sie im unteren Bereich auf die Schaltfläche Save, um das geschärfte Bild auf Ihrem lokalen Laufwerk herunterzuladen.
Teil 3. Häufig gestellte Fragen zum Schärfen von Bildern in Photoshop
Was soll ich tun, wenn eine kostenlose Testversion von Photoshop beendet wird?
Wenn Sie diesen professionellen Bildeditor von Adobe weiterverwenden möchten, müssen Sie ein Abo abschließen, um den Editor weiterhin nutzen zu können. Wenn Sie jedoch ähnliche Bearbeitungsfunktionen wie in Photoshop erleben möchten, verwenden Sie den FVC Free Image Upscaler.
Was kann ich mit Photoshop machen?
Sie können hier eine Vielzahl von Bild- und Videobearbeitungen vornehmen, die der andere Editor nicht bietet. Es ist ein vollständiger Bildeditor, den Sie benötigen, um erstaunliche Dinge zu erstellen, wie das 2D-Bild in ein 3D-Bild umzuwandeln und vieles mehr. Diese Software ist jedoch etwas kompliziert, und Sie müssen sich Zeit nehmen, um zu lernen, wie man sie insgesamt verwendet.
Wo kann ich Photoshop herunterladen?
Adobe Photoshop unterstützt Windows 10 mit 64-Bit oder höher und Mac 10.15 Catalina oder höher. Außerdem unterstützt es eine mobile Version, den Photoshop Express Photo Editor.
Fazit
Mit dem Tutorial, das wir zu wie man ein Bild in Photoshop schärft hinzugefügt haben, können Sie Ihre Bilder nun auf unterschiedliche Weise ganz einfach mit dem besten Editor schärfen. Was ist, wenn Ihre kostenlose Testversion abgelaufen ist und Sie weiterhin Bilder schärfen möchten? Was sollten Sie dann tun? Sie müssen sich keine Sorgen machen, denn wir haben eine Online-Alternative hinzugefügt, mit der Sie Bilder einfacher und kostenlos schärfen können, solange Sie eine Internetverbindung haben – den FVC Free Image Upscaler.
-
 Machen Sie Photo HD mit den besten Möglichkeiten, die Sie auf dem Markt finden können
 Fragen Sie sich oder möchten Sie Fotos in HD machen? Sie können dem unten hinzugefügten Tutorial mit verschiedenen Lösungen folgen, die Sie verwenden können.
-
 Die 4 besten Bildqualitätsreduzierer, die Sie online und offline verwenden können
 Diese Bildqualitätsreduzierer können Ihnen aus bestimmten Gründen dabei helfen, die Qualität Ihres Bildes zu reduzieren. Wenn Sie einen brauchten, lesen Sie diesen Artikel!
-
 Offizielle Methoden zum Hochskalieren von Bildern auf 4k mit einem praktischen Tutorial
 Um das Bild auf 4k hochzuskalieren, benötigen Sie eine Software auf Ihrem Gerät. Wenn Sie keins haben, müssen Sie das Tool auswählen, das wir hier enthalten.