


Ultimativer Leitfaden zum Erstellen von FaceTime-Screenshots [2025]
FaceTime ist eine weit verbreitete Video-Chat‑App, die von Apple entwickelt wurde, damit Nutzer in Echtzeit Videoanrufe auf dem iPhone, iPad oder Mac führen können. Screenshots während FaceTime‑Anrufen zu machen, ist eine großartige Möglichkeit, besondere Momente mit der Person festzuhalten, mit der wir sprechen – besonders, wenn man sie lange nicht gesehen hat. Wenn du also wertvolle Augenblicke während dieser Anrufe speichern möchtest, ist dieser Artikel genau das Richtige für dich. Nimm dir etwas Zeit zum Lesen und lerne 3 einfache Methoden kennen, wie du ganz leicht FaceTime‑Screenshots machen kannst. Los geht’s!

Teil 1: Der ultimative Weg, FaceTime-Screenshots auf iPhone/iPad/Mac zu machen
Die effizienteste und einfachste Methode, FaceTime‑Screenshots auf Apple‑Geräten aufzunehmen, ist die Verwendung des FVC Screen Recorders. Dieses Screen‑Recording‑Tool eines Drittanbieters ist perfekt dafür ausgelegt, Screenshots auf iPhone, iPad oder Mac zu machen. Wenn du also eines dieser Geräte verwendest und während deiner FaceTime‑Videoanrufe mit Familie, Freunden oder anderen lieben Menschen Screenshots aufnehmen möchtest, profitierst du sehr von der Snapshot‑ und der Telefonaufnahme‑Funktion. Außerdem kann dieses Tool von jedem Nutzer dank seiner benutzerfreundlichen Oberfläche leicht bedient werden. Und wenn du deine FaceTime‑Screenshots besonders kreativ gestalten möchtest, wirst du die vielfältigen, individuell anpassbaren Bearbeitungsfunktionen zu schätzen wissen.
Methode 1: Für Mac
Schritt 1. Lade zunächst den FVC Screen Recorder auf deinen Mac herunter und installiere ihn. Diese Software unterstützt nahezu alle macOS‑Versionen, einschließlich des neuesten macOS 14 Sonoma.
Kostenloser DownloadFür Windows 7 oder höherSicherer Download
Kostenloser DownloadFür macOS 10.7 oder höherSicherer Download
Schritt 2. Starte anschließend das Tool.
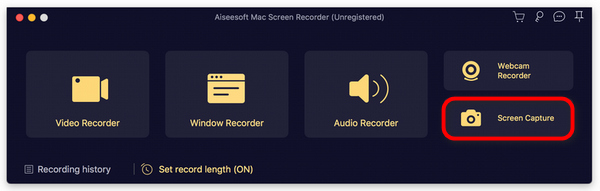
Schritt 3. Während du nun deinen FaceTime‑Videoanruf auf dem Mac führst, klicke auf die Schaltfläche Screen Capture, die du im schwebenden Fenster der Programmoberfläche findest.
Schritt 4. Optional kannst du deine FaceTime‑Screenshot‑Bilder mit Hilfe der unten angezeigten, zahlreichen Bearbeitungstools anpassen.
Schritt 5. Klicke zum Schluss auf Save, um das Bild auf deinem Mac zu speichern.

Methode 2: Für iPhone und iPad
Schritt 1. Lade den FVC Screen Recorder herunter und öffne ihn – diesmal jedoch auf deinem Windows‑Computer.
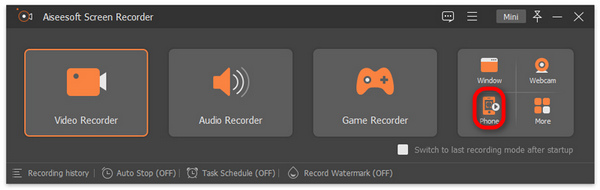
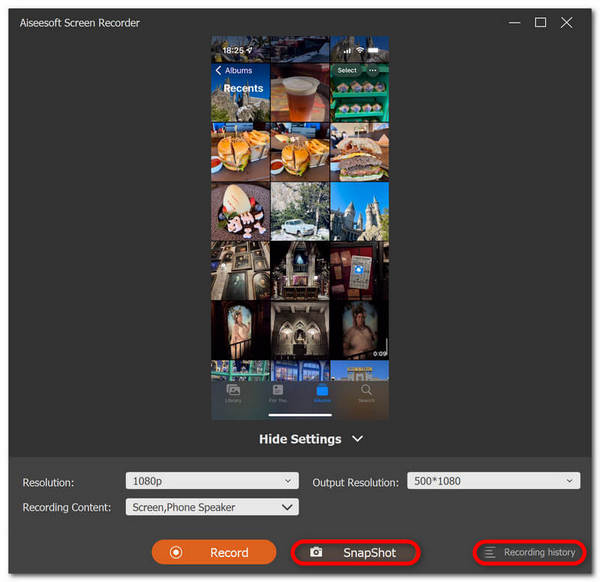
Schritt 2. Öffne das Tool nach der Installation und klicke im rechten Bereich des schwebenden Fensters der Benutzeroberfläche – dort, wo sich auch die drei anderen Optionen befinden – auf die Option Phone.
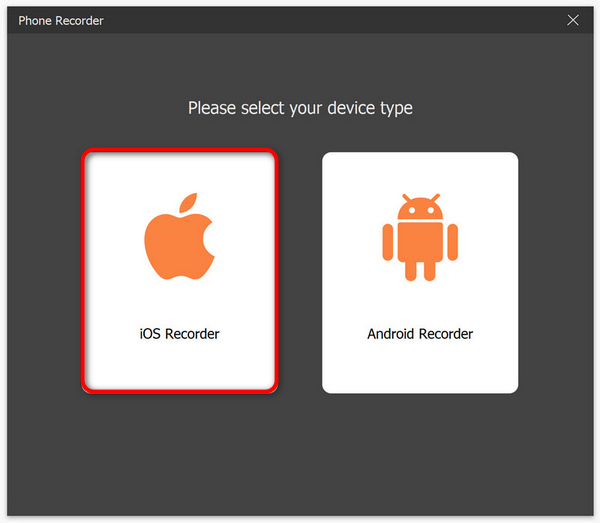
Schritt 3. Klicke anschließend auf die Option iOS Recorder.
Schritt 4. Nun erscheint ein neues Fenster mit einer Bildschirm‑Anleitung, in der du auch aufgefordert wirst, zwischen Screen Mirroring und Audio Mirroring zu wählen. In deinem Fall wählst du Screen Mirroring.
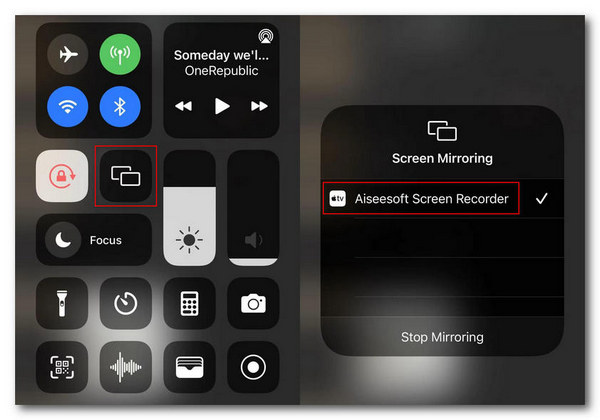
Schritt 5. Öffne nun auf deinem iPhone oder iPad das Kontrollzentrum und tippe auf Screen Mirroring. Tippe anschließend auf „Aiseesoft Screen Recorder“, um dein iPhone oder iPad mit dem Computer zu verbinden.
Schritt 6. Um schließlich einen Screenshot auf deinem iPhone oder iPad aufzunehmen, klicke einfach auf das Snapshot‑Symbol.
FVC Screen Recorder ist in der Tat ein vielseitiges Tool, wenn es um das Aufnehmen von Screenshots geht. Stellen Sie sich ein Tool vor, das mehrere iOS-Geräte unterstützt. Zu schön, um wahr zu sein, aber es ist so. Unabhängig davon, welches iOS-Gerät Sie verwenden, ist es mit diesem Bildschirmaufzeichnungstool möglich, während Videoanrufen FaceTime-Screenshots zu erstellen.
Teil 2: So erstellen Sie einen FaceTime-Screenshot auf dem iPhone/iPad
Mit den integrierten Screenshot-Funktionen können Sie auf einem iPhone oder iPad problemlos FaceTime-Screenshots erstellen.
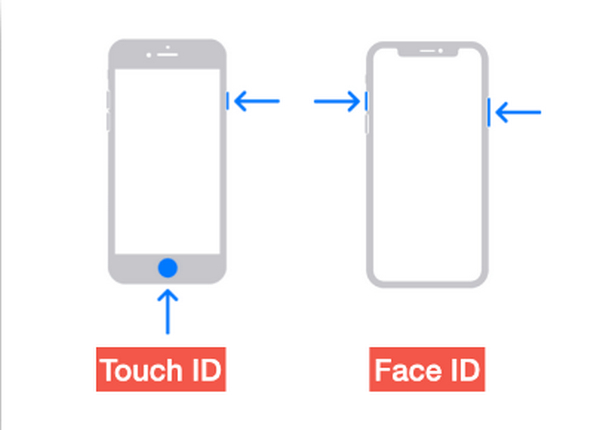
Schritt 1. Überprüfe zunächst, welches iOS‑ oder iPadOS‑Gerät du während eines FaceTime‑Videoanrufs verwendest.
Schritt 2. Verfügt dein Gerät über Touch ID, musst du gleichzeitig die Tasten Home und Power drücken, um einen Screenshot deines FaceTime‑Videoanrufs aufzunehmen. Hat dein iPhone oder iPad hingegen Face ID, kannst du einen Screenshot des FaceTime‑Anrufs erstellen, indem du gleichzeitig die Tasten Lauter (Volume Up) und Power drückst.
Schritt 3. Greife über die App Fotos im Ordner Bildschirmfotos auf deinen Screenshot zu.,
Dank der integrierten Screenshot-Funktionen ist das Aufnehmen von FaceTime-Screenshots auf einem iPhone oder iPad ein Kinderspiel. Allerdings muss man beim Drücken der erforderlichen Tasten während eines aktiven FaceTime-Anrufs vorsichtig sein, da dies zu einer versehentlichen Unterbrechung führen kann, z. B. wenn man den Anruf beendet oder die Lautstärke unabsichtlich ausschaltet.
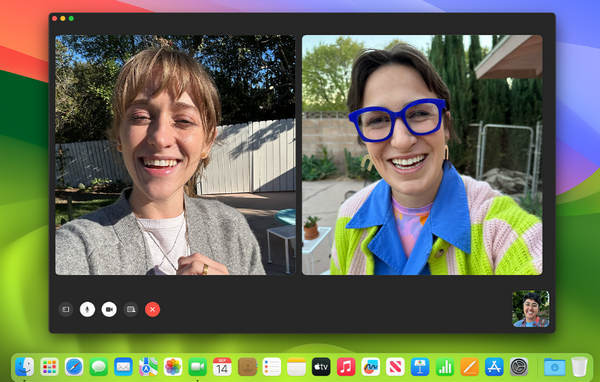
Teil 3: So erstellen Sie einen FaceTime-Screenshot auf dem Mac
Wenn Sie auf Ihrem Mac einen FaceTime-Videoanruf führen, können Sie dies am einfachsten tun, indem Sie mithilfe der Hotkeys FaceTime-Screenshots erstellen.
Schritt 1. Öffne zunächst deinen FaceTime‑Videoanruf auf dem Mac.
Schritt 2. Mache nun während des Videoanrufs einen FaceTime‑Screenshot mit Hilfe der Tastenkombinationen.
Hinweis: Um einen Screenshot des gesamten Bildschirms deines FaceTime‑Videoanrufs aufzunehmen, drücke und halte gleichzeitig die Tasten Command, Shift und 3. Möchtest du hingegen nur einen bestimmten Bereich des Bildschirms aufnehmen, drücke und halte die Tasten Command, Shift und 4 gleichzeitig. Wenn du schließlich nur das FaceTime‑Fenster erfassen möchtest, drücke gleichzeitig die Tasten Command, Shift, 4 und die Leertaste.
Schritt 3. Der Screenshot wird direkt auf deinem Schreibtisch (Desktop) gespeichert.
Das einzige Problem bei der Verwendung von Hotkeys während eines FaceTime-Screenshots auf dem Mac ist, dass Sie diese nicht bearbeiten können, wenn Sie Ihre Screenshot-Bilder anpassen möchten. Wenn Sie jedoch nur einen Screenshot davon machen möchten, ist das in Ordnung, aber wenn Sie kreativ sein möchten, können Sie Tools von Drittanbietern wie FVC Screen Recorder verwenden.
Teil 4: Häufig gestellte Fragen zum Erstellen von FaceTime-Screenshots
Wohin gehen FaceTime-Screenshots?
Sie können über die Fotos-App Ihres Geräts auf Ihre FaceTime-Screenshots zugreifen. Normalerweise wird ein Screenshot, den Sie während eines FaceTime-Anrufs erstellt haben, direkt dort gespeichert, und zwar im Screenshot-Ordner dieser App.
Benachrichtigt Sie FaceTime, wenn jemand Screenshots macht?
Nein. FaceTime verfügt nicht über eine Funktion, die jemanden benachrichtigt, der während eines FaceTime-Videoanrufs einen Screenshot macht. Wenn also jemand während Ihres FaceTime-Anrufs einen Screenshot macht, erhalten Sie keine Benachrichtigung.
FaceTime-Screenshots werden nicht gespeichert?
Wenn Sie Probleme damit haben, dass FaceTime-Screenshots nicht auf Ihrem iOS-Gerät gespeichert werden, kann dies mehrere Gründe haben. Zunächst müssen Sie sicherstellen, dass der Speicher Ihres Geräts nicht voll ist, da dies ein Hauptgrund dafür sein kann, dass FaceTime-Screenshots nicht gespeichert werden. Im Grunde verhindert dies, dass neue Screenshots gespeichert werden. Überprüfen Sie außerdem die Datenschutzeinstellungen Ihres Geräts, vielleicht weil die Fotos-App keine Berechtigung zum Speichern von Screenshots hat. Wenn das Problem weiterhin besteht, kann ein Neustart Ihres Geräts oder ein Update Ihrer Software helfen, das Problem zu beheben.
Fazit
Zusammenfassend lässt sich sagen, dass FaceTime‑Screenshots während Videoanrufen die einfachste Möglichkeit sind, unvergessliche Momente mit geliebten Menschen festzuhalten. Ob du nun die integrierten Funktionen auf iOS‑Geräten nutzt oder Drittanbieter‑Tools wie den FVC Screen Recorder verwendest – es stehen dir verschiedene Methoden zur Verfügung, mit denen du diese Augenblicke mühelos aufnehmen kannst. Zögere also nicht, diese Tools und Funktionen zu nutzen, um das Beste aus deinen FaceTime‑Erlebnissen herauszuholen. Rufe deine Liebsten per FaceTime an und bewahre diesen Moment, indem du einen Screenshot davon machst.
-
 So beheben Sie, dass Screenshots auf dem iPhone nicht funktionieren [2025]
 Sie haben Probleme beim Erstellen von Screenshots auf Ihrem iPhone? Wir sind für Sie da! Lesen Sie unsere umfassende Anleitung, um schnell und einfach Screenshots zu reparieren, die auf iPhones nicht funktionieren.
-
 Screenshot unter Windows ohne Druckbildschirm [2025-Anleitung]
 Suchen Sie nach Möglichkeiten, unter Windows einen Screenshot ohne Bildschirmausdruck zu machen? Dieser Artikel hat es Ihnen leicht gemacht. Lesen Sie ihn jetzt und erfassen Sie Ihren Bildschirm mühelos!
-
 4 Möglichkeiten, auf Snapchat einen Screenshot zu machen, ohne dass Ihr Gegenüber es merkt
 Möchten Sie auf Snapchat einen Screenshot machen, ohne dass die anderen es merken? In diesem Artikel finden Sie 4 effektive Methoden, die genau auf Sie zugeschnitten sind. Lesen Sie ihn jetzt und probieren Sie es selbst aus!