

Einfachste und schnellste Möglichkeit, DVDs auf das MacBook zu kopieren [Aktualisiert]
DVDs neigen zu Kratzern, die ihre Abspielbarkeit beeinträchtigen können. Um dies zu verhindern, ist die Digitalisierung die beste Lösung.
Heutzutage verwenden immer weniger Menschen Discs, um DVD-Inhalte anzusehen, da inzwischen alles digital ist und dies deutlich bequemer ist. In diesem Artikel stellen wir dir deshalb vier Methoden vor, mit denen du schnell DVDs auf ein MacBook kopieren kannst. Diese Methoden umfassen sowohl die in macOS integrierten Werkzeuge als auch Drittanbieter-Software, sodass du verschiedene Möglichkeiten hast, deine DVDs zu rippen und schließlich eine Kopie auf deinem MacBook zu speichern. Legen wir los!

Teil 1. So kopieren Sie DVDs mit dem integrierten Tool auf das MacBook
Das MacBook bietet zahlreiche nützliche Funktionen, die selbst seine Nutzer gerne nutzen. Wenn Mac-Benutzer DVDs auf ein MacBook kopieren möchten, können sie die integrierten Tools nutzen. Damit erhalten Benutzer eine unkomplizierte Lösung zum Kopieren von DVDs, ohne dass sie Software von Drittanbietern benötigen.
Es gibt zwei integrierte Tools, mit denen Mac-Benutzer ihre DVDs einfach kopieren können:
Methode 1: Verwenden des Festplatten-Dienstprogramms
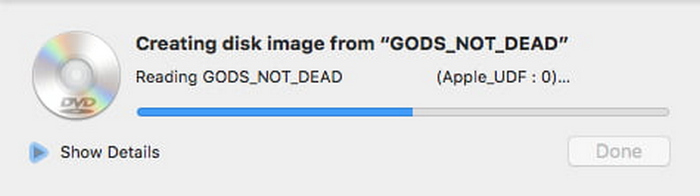
Dies ist eines der bekanntesten integrierten Tools, mit dem Mac-Benutzer ihre DVDs kopieren. Dieses Tool verwandelt Ihre DVD in ein Disk-Image, das sich einfacher auf einem MacBook speichern lässt.
So kopierst du eine DVD mit dem Festplattendienstprogramm auf ein MacBook:
Schritt 1. Legen Sie zunächst auf Ihrem MacBook die DVD in das Laufwerk ein.
Schritt 2. Öffne als Nächstes das Festplattendienstprogramm und rufe es über Dienstprogramme im Ordner Programme auf.
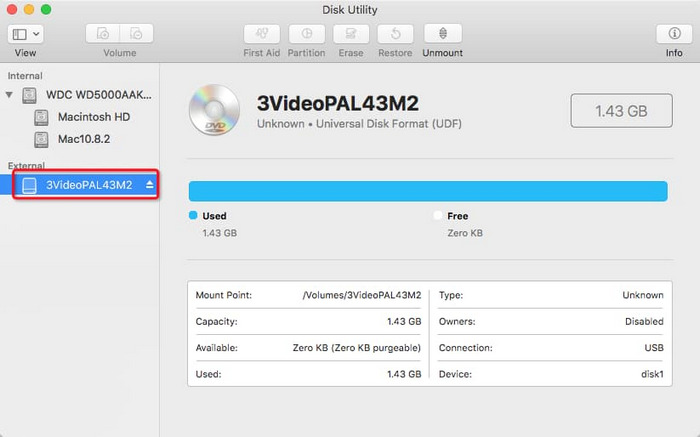
Schritt 3. In der linken Seitenleiste siehst du deine DVD unter dem Bereich „Extern“. Klicke darauf.
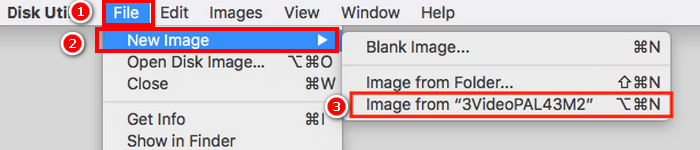
Schritt 4. Gehe nun zum Tab Ablage, klicke auf Neues Image und wähle im Drop-down-Menü „Image von …“ mit dem Namen deiner DVD aus.
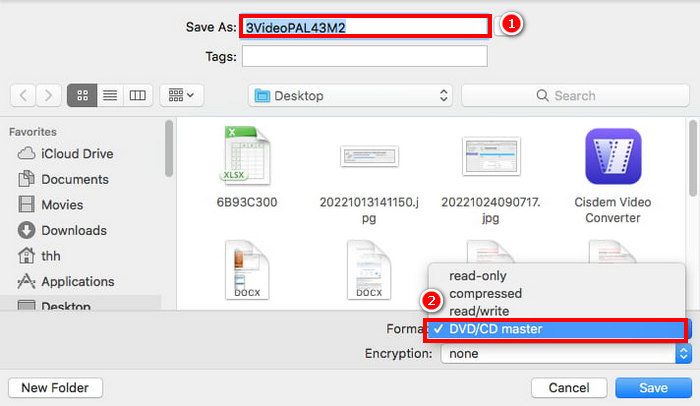
Schritt 5. Benenne anschließend deine DVD um und wähle als Format DVD/CD-Master.
Schritt 6. Klicke zum Schluss auf die Schaltfläche Sichern. Dadurch wird deine DVD auf dein MacBook kopiert.
Das integrierte Festplattendienstprogramm bietet einen wirklich einfachen Vorgang, um DVDs auf ein MacBook zu kopieren. Es erstellt jedoch nur ein Image der Disc und konvertiert den Inhalt nicht in abspielbare Videoformate wie MP4, MOV oder MKV. Dafür wird empfohlen, Drittanbieter-Software zu verwenden.
Methode 2: Verwenden der QuickTime-Aufnahme
Im Gegensatz zur ersten Methode wird bei dieser zweiten Methode das DVD-Video auf einem Mac aufgezeichnet. Auf diese Weise können Benutzer den Videoinhalt direkt während der Wiedergabe aufnehmen und die digitale Kopie einfach auf einem MacBook speichern.
So kopierst du eine DVD mit einer QuickTime-Aufnahme auf ein MacBook:
Schritt 1. Öffne zuerst deine DVD mit einem DVD-Player-Programm auf deinem Mac.
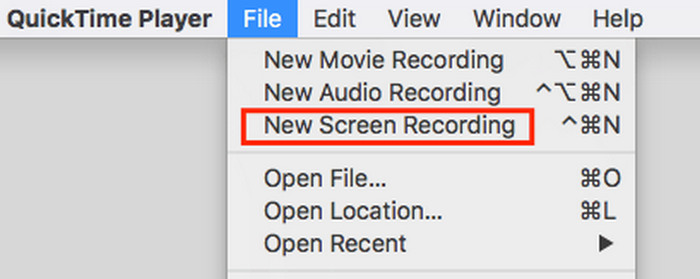
Schritt 2. Gehe danach in QuickTime zu „Ablage“ und klicke auf Neue Bildschirmaufnahme.
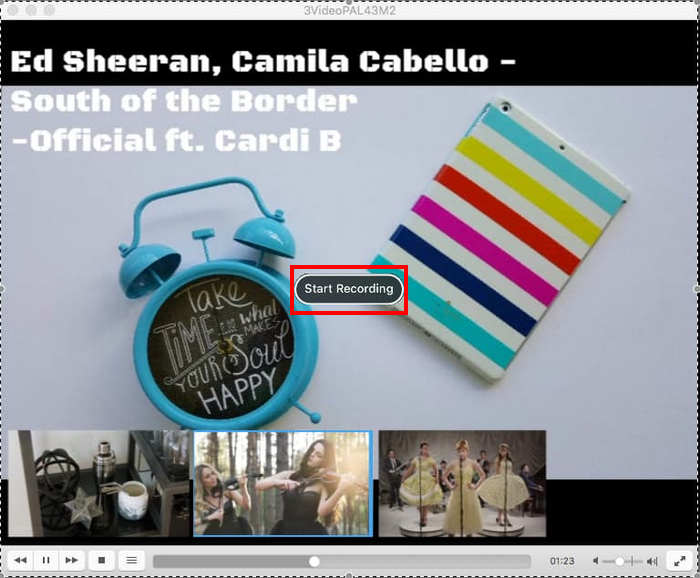
Schritt 3. Sobald das Video abgespielt wird, kannst du auf die Schaltfläche Aufnehmen klicken.

Schritt 4. Gehe nun zu dem Bereich, den du auf deinem Bildschirm aufzeichnen möchtest, und klicke auf Aufnahme starten, um den Vorgang zu beginnen.
Schritt 5. Wenn du fertig bist, klicke einfach auf das Stopp-Symbol in der oberen Menüleiste.
Schritt 6. Gehe zum Schluss zu Ablage und scrolle nach unten, um die Option Sichern im Menü anzuklicken. Die aufgezeichnete DVD wird dann direkt auf deinem MacBook gespeichert.
Das einzige Problem bei dieser Methode ist, dass sie sehr zeitaufwändig ist und Sie mit Ihrem MacBook kein Multitasking durchführen können. Wenn Sie jedoch keine andere Möglichkeit haben, kann diese Methode dennoch als Alternative funktionieren, wenn Sie eine DVD auf ein MacBook kopieren möchten.
Teil 2. DVD mit Drittanbietersoftware auf das MacBook kopieren
Die integrierten Tools des MacBooks bieten zwar eine Möglichkeit zum Kopieren von DVDs, haben aber ihre Grenzen. So erstellt das Festplatten-Dienstprogramm beispielsweise nur ein Disk-Image und rippt es nicht in ein digitalisiertes Format. Auch die Verwendung von QuickTime Recording kann sehr aufwändig und zeitintensiv sein. Wenn Sie also nach effizienteren Möglichkeiten zum Kopieren von DVDs auf ein MacBook suchen, kann Software von Drittanbietern eine gute Lösung sein.
Methode 1: Verwendung des AnyMP4 DVD Rippers
Das beste Drittanbieter-Tool zum Kopieren von DVDs auf ein MacBook ist AnyMP4 DVD Ripper. Mit diesem Tool können Sie Ihre DVDs ganz einfach rippen und direkt eine Kopie auf Ihrem MacBook speichern. Dank der intuitiven und benutzerfreundlichen Oberfläche ist es zudem eine der einfachsten Methoden, die derzeit verfügbar sind. Auch die Qualität ist dank fortschrittlicher Kodierung und Blu-Hyper-Technologie erstklassig. Darüber hinaus unterstützt es eine Vielzahl von Medienformaten, was ein Pluspunkt für alle ist, die Wert auf Flexibilität und Kompatibilität mit anderen Plattformen und Geräten legen.
So kopierst du den Inhalt einer DVD auf ein MacBook:
Schritt 1. Lade das Programm zunächst herunter und installiere es auf deinem Gerät.
Kostenloser DownloadFür Windows 7 oder höherSicherer Download
Kostenloser DownloadFür macOS 10.7 oder höherSicherer Download
Hinweis: Bevor Sie mit dem nächsten Schritt fortfahren, müssen Sie die DVD in das DVD-Laufwerk Ihres Computers einlegen und ein paar Minuten warten, bis sie erkannt wird.
Schritt 2. Starten Sie nun das Tool und klicken Sie auf die Schaltfläche “Load DVD”, um die Disc zu laden.
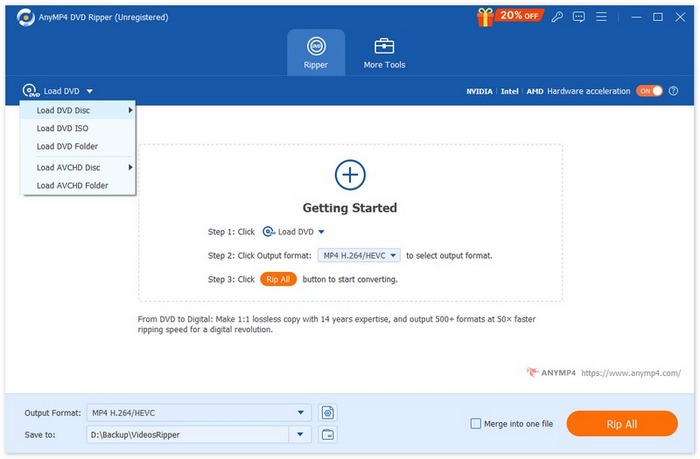
Schritt 3. Klicke anschließend unten auf die Schaltfläche "Output Format" und wähle im Tab "Video" das Format deiner Wahl. Wenn du fertig bist, klicke einfach auf die Schaltfläche „Alle rippen“, um deine DVD in ein digitales Video zu konvertieren, das breiter und kompatibler einsetzbar ist.

Hinweis: Nach dem Ripping-Vorgang wird die Kopie des Inhalts deiner DVD direkt auf deinem MacBook gespeichert.
Sehen Sie, es ist einfacher, oder? Außerdem lässt sich die DVD-Kopie auf Ihrem MacBook problemlos abspielen, da sie digitalisiert wurde. AnyMP4 DVD Ripper ist zudem sehr benutzerfreundlich, und die Qualität bleibt nach der Digitalisierung erhalten oder wird sogar verbessert.
Methode 2: Verwenden eines kostenlosen Online-Bildschirmrekorders
Wenn du eine DVD auf deinem Gerät mit einem DVD-Player abspielst und sie auf deine Festplatte kopieren möchtest, kannst du den FVC Free Screen Recorder Online verwenden. Mit diesem leistungsstarken Bildschirmaufnahme-Tool kannst du die DVD, die du abspielst, aufnehmen und die aufgezeichnete DVD anschließend auf deiner Festplatte speichern.
So nimmst du eine DVD auf eine Festplatte auf:
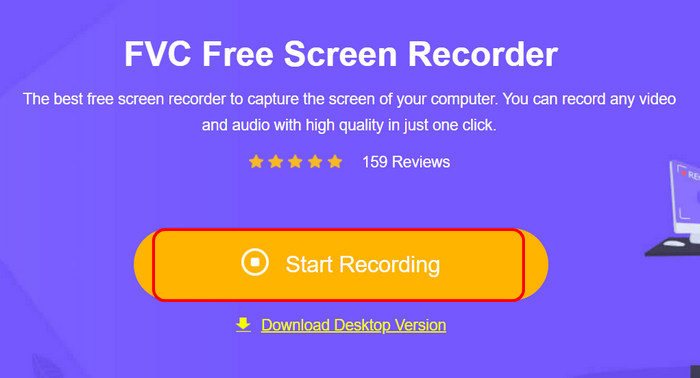
Schritt 1. Öffne zuerst in Safari die offizielle Website von FVC Screen Recorder Online.
Schritt 2. Klicke danach auf die Schaltfläche Start Recording. Klicke anschließend auf die Schaltfläche Rec, um die Aufnahme deines Bildschirms zu starten.
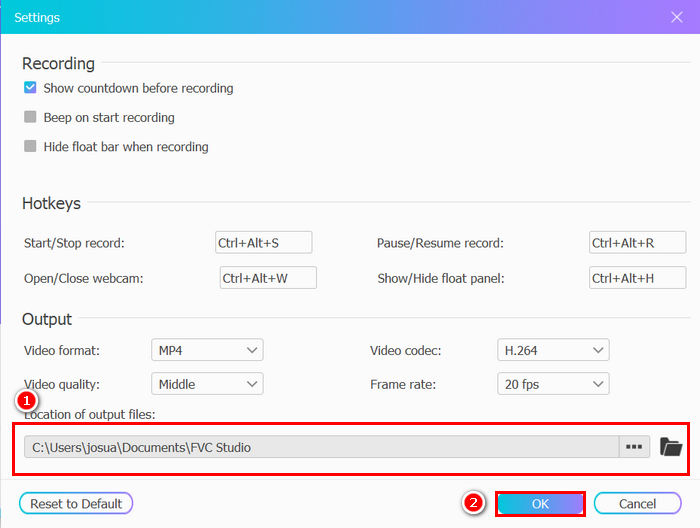
Schritt 3. Sobald du die Aufnahme deiner DVD beendet hast, wähle den Ordner aus, in dem du die Kopie deiner DVD auf deinem MacBook speichern möchtest. Klicke danach auf Ok.
Dies ist die alternative Methode, wenn QuickTime auf Ihrem Mac nicht funktioniert. Sie bietet den gleichen Vorgang und die gleiche Methode zum Kopieren einer DVD auf ein MacBook, indem Sie einfach den DVD-Inhalt aufzeichnen.
Teil 3. FAQs zum Kopieren von DVDs auf das MacBook
Teil 3. Häufig gestellte Fragen zum Kopieren einer DVD auf ein MacBook. Kann ich eine DVD auf mein MacBook kopieren, ohne zusätzliche Software zu installieren?
Ja. Dank der integrierten Tools des Mac können Sie eine DVD auf ein MacBook kopieren, ohne Drittanbieter-Tools installieren zu müssen. Sie können das Festplatten-Dienstprogramm und QuickTime auf Ihrem Mac verwenden. Diese Methoden können jedoch viele Einschränkungen mit sich bringen, z. B. können Sie den Inhalt nicht in abspielbare Videoformate wie MP4 konvertieren.
Ist es möglich, eine DVD auf mein MacBook zu kopieren, ohne dass die Videoqualität darunter leidet?
Ja. Die Verwendung von Drittanbieter-Tools wie AnyMP4 DVD Ripper stellt sicher, dass die Qualität der DVD während des Rippvorgangs erhalten bleibt oder sogar verbessert wird.
Kann ich eine DVD kostenlos auf mein MacBook kopieren?
Ja. Sie können kostenlose Tools wie das Festplatten-Dienstprogramm oder QuickTime Recording auf Ihrem MacBook verwenden, um DVDs ohne zusätzliche Kosten zu kopieren.
Fazit
Digitale Medien setzen sich immer mehr durch, und DVDs werden zunehmend seltener verwendet. Wenn du also Mac-Nutzer bist, kann es einen großen Unterschied machen, wenn du weißt, wie man DVDs auf ein MacBook kopiert. Worauf wartest du also noch? Probiere jetzt eine dieser Methoden aus!
-
 DVD9 VS DVD5 – Was ist der Unterschied zwischen ihnen
 Wenn Sie den Unterschied zwischen DVD9 und DVD5 und die richtige Wahl erfahren möchten, lesen Sie diesen Beitrag. Wir erläutern ihre Funktionen und Einsatzszenarien.
-
 So konvertieren Sie DVDs in ISO unter macOS/Windows/Linux
 Suchen Sie nach Möglichkeiten zum Erstellen einer ISO-Datei? Lesen Sie diesen Artikel und finden Sie basierend auf Ihrem Betriebssystem den passenden DVD-zu-ISO-Konverter für Sie.
-
 So rippen Sie eine DVD auf einem Mac-Computer – 5 Methoden zum Ausprobieren
 Sie möchten eine DVD auf Ihrem Mac rippen, wissen aber nicht, welches Tool Sie wählen sollen? In diesem Artikel stellen wir Ihnen fünf praktische Optionen vor. Lesen und entdecken Sie gemeinsam.