


Bildgröße ohne Qualitätsverlust ändern: Verlustfreie Komprimierung
Eine der größten Sorgen beim Verkleinern oder Vergrößern eines Bildes ist der Qualitätsverlust. Die Antwort darauf hängt allerdings davon ab, wie das Foto skaliert wurde, welches Tool verwendet wurde und von weiteren Faktoren. Zum Glück wird oft übersehen, dass man ein Bild ohne Qualitätsverlust skalieren kann, wenn man es richtig macht. Wenn Sie Best Practices befolgen, die Feinheiten der Bildskalierung verstehen und das passende Tool finden, können Sie die Klarheit und Schärfe Ihrer Bilder unabhängig von der Größenanpassung bewahren.
In diesem Handbuch befassen wir uns mit drei effektiven Methoden zur Größenänderung von Bildern, bei denen ihre visuelle Integrität gewahrt und die Qualität nahezu unverändert bleibt.

Teil 1. Schnellste Möglichkeit, die Bildgröße ohne Qualitätsverlust zu ändern [Stapelverarbeitung unterstützt]
Der FVC Free Image Compressor ist ein kostenloses Online-Tool zur Bildkomprimierung und ideal für alle, die Bilder schneller und ohne Qualitätsverlust verkleinern möchten. Mit einem einzigen Klick werden Ihre Fotos automatisch angepasst und ihre Qualität bleibt nahezu vollständig erhalten. Außerdem ist dieses Tool äußerst benutzerfreundlich, sodass Anwender aller Erfahrungsstufen es nutzen können, ohne sich im Prozess zu verlieren. Und wenn Sie eine ganze Reihe von Bilddateien anpassen müssen, können Sie mit diesem Tool bis zu 40 Bilder gleichzeitig komprimieren.
So können Sie mit dem FVC Free Image Compressor ein Bild ohne Qualitätsverlust skalieren
Schritt 1. Öffne deinen Browser und gib „Free Image Compressor“ in die Suchleiste ein.
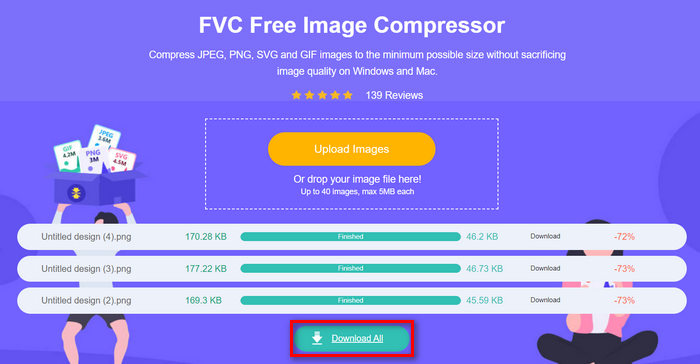
Schritt 2. Sobald du auf der Website bist, klicke auf Upload Images, um die Fotos zu importieren, die du verkleinern möchtest. Das Tool komprimiert automatisch alle von dir hochgeladenen Fotos.

Schritt 3. Warte, bis der Komprimierungsvorgang abgeschlossen ist. Sobald er fertig ist, siehst du eine Statusleiste mit dem Hinweis, dass der Vorgang beendet ist, sowie Informationen zur Größe vor und nach der Komprimierung des Bildes. Klicke danach auf Alle herunterladen, um dein Bild zu speichern.
Mit dem kostenlosen Bildkompressor von FVC müssen Sie sich keine Mühe machen, die Größe eines Bilds zu ändern. Außerdem ist dieses Tool völlig kostenlos und sehr leicht zugänglich, sodass es sich tatsächlich um ein Komprimierungstool für unterwegs für jedermann handelt.
Teil 2. So verkleinern Sie ein Bild in Photoshop ohne Qualitätsverlust
Wenn Sie Photoshop auf Ihrem Gerät installiert haben, können Sie damit Ihre Bilddateien verkleinern. Dieses Tool ist aufgrund seiner hervorragenden Funktionen und Möglichkeiten eine bekannte Fotobearbeitungssoftware. Mit Photoshop können Sie Fotos nicht nur präzise bearbeiten und verbessern, sondern sie auch für verschiedene Zwecke optimieren, einschließlich der Reduzierung der Dateigröße. Hier sind die beiden Methoden, mit denen Sie versuchen können, die Größe eines Bilds ohne Qualitätsverlust zu ändern.
Ändern der Bildgröße in Pixeln
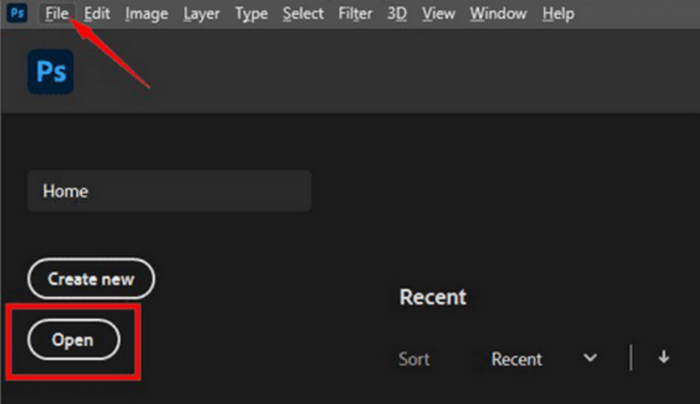
Schritt 1. Öffnen Sie Ihr Bild in Photoshop, indem Sie auf Öffnen klicken oder zu Datei gehen und das Bild auswählen, das Sie skalieren möchten.
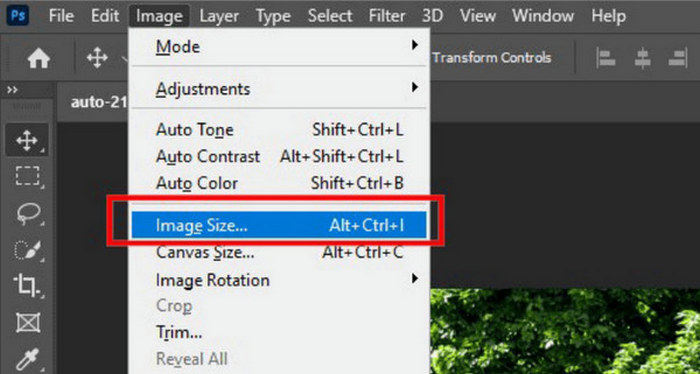
Schritt 2. Gehen Sie nun zum Reiter Bild und wählen Sie im Menü Bildgröße aus.
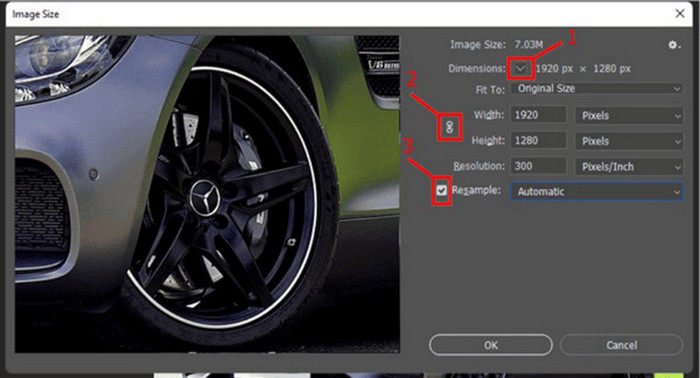
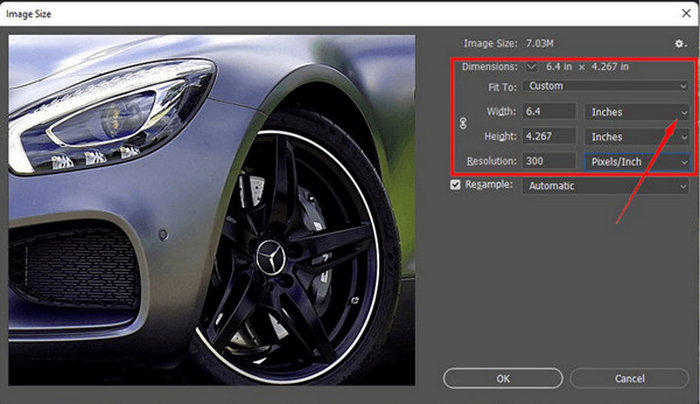
Schritt 3. Wähle im Dialogfeld Image Size aus dem Dropdown-Menü Pixels aus. Um bestimmte Abmessungen festzulegen, gib Werte in die Breiten- und Höhenfelder ein und klicke auf OK, um die Bildgröße zu ändern.
Schritt 4. Speichern Sie abschließend Ihre Bilddatei, indem Sie unter dem Reiter Datei auf die Schaltfläche Speichern unter klicken.
Speichern Sie die PSD-Datei vor dem Speichern im JPEG-Format.
Ändern der Bildgröße in Zoll
Schritt 1. Öffnen Sie Ihr Bild in Photoshop, indem Sie auf Open klicken oder zu File gehen und Ihr Bild auswählen.
Schritt 2. Wechseln Sie nun zum Reiter Image und wählen Sie Image Size.
Schritt 3. Wähle im Dialogfeld Image Size aus dem Dropdown-Menü Inches aus. Um bestimmte Abmessungen festzulegen, gib Werte in die Breiten- und Höhenfelder ein und klicke auf OK, um die Bildgröße zu ändern.
Schritt 4. Klicke abschließend im File-Tab auf die Schaltfläche Save As, um das endgültige Bild zu speichern.
Photoshop ist ein vielseitiges und leistungsstarkes Tool, mit dem Benutzer Fotos bearbeiten und ihre Größe ändern können, ohne dass die Qualität darunter leidet. Darüber hinaus können Benutzer die hochwertigen Algorithmen von Photoshop nutzen, um sicherzustellen, dass ihre Bilder auch nach erheblichen Größenanpassungen scharf und klar bleiben. Ein Nachteil dieses Tools besteht jedoch darin, dass es recht komplex sein kann, was es Anfängern schwer macht, sich in seinen Funktionen zurechtzufinden.
Teil 3. Bildgröße ohne Qualitätsverlust durch AI-Upscaling ändern
Der FVC Free Image Upscaler ist ein KI-gestütztes Tool, das entwickelt wurde, um Bilder ohne Qualitätsverlust zu vergrößern. Er nutzt KI-Super-Resolution-Technologie, die anhand von Millionen von Beispielen trainiert wurde, um unscharfe Bildbereiche automatisch zu erkennen und zu verbessern. Dieses Tool kann verlorene Pixel, Farben, Texturen und andere Details wiederherstellen und sorgt so dafür, dass das Bild ohne Qualitätsverlust vergrößert wird.
Schritt 1. Rufe zunächst die offizielle Website auf.
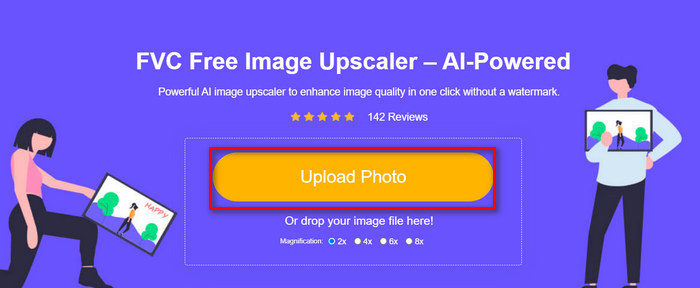
Schritt 2. Sobald Sie darauf zugegriffen haben, importieren Sie die Bilddatei, die Sie skalieren möchten, indem Sie auf die Schaltfläche Foto hochladen klicken.
Schritt 3. Wählen Sie nun aus, wie stark das Bild vergrößert werden soll. Sie können Ihr Bild von 2x bis auf 8x hochskalieren. Auf diese Weise können Sie Ihr Bild ohne Qualitätsverlust vergrößern.
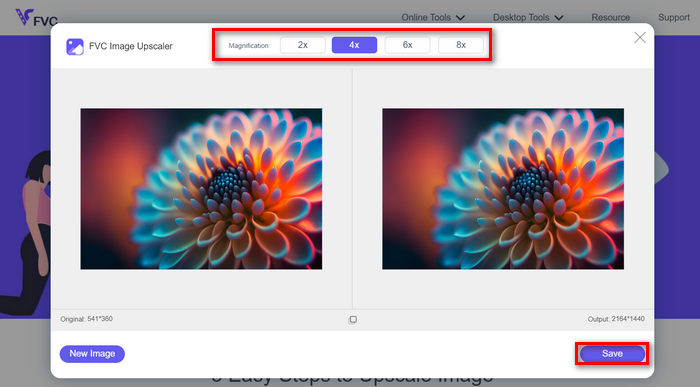
Schritt 4. Wenn du fertig bist, klicke auf die Schaltfläche Save, und die neue, in der Größe angepasste Datei wird automatisch auf deinen Computer heruntergeladen.
Dieser KI-gestützte Image-Upscaler ist ein großartiges Tool, um Bilder ohne Qualitätsverlust zu skalieren. Diese Funktion verkleinert nicht nur das Bild oder passt es an, sondern skaliert und verbessert es zugleich.
Teil 4. Vergleich von 3 Methoden zur Größenänderung von Bildern ohne Qualitätsverlust
| Bildgrößenänderungstool | Stapelkomprimierung | Geschwindigkeit | Einfache Bedienung |
| FVC Free Image Compressor | Ja, bis zu 40 Bilder | Schnell | Äußerst benutzerfreundlich |
| Photoshop | Nein | Durchschnitt | Ziemlich einfach zu bedienen |
| FVC Free Image Upscaler | Nein | Schnell | Äußerst benutzerfreundlich |
Teil 5. Häufig gestellte Fragen zur Größenänderung von Bildern ohne Qualitätsverlust
Verlieren Bilder beim Verkleinern an Qualität?
Teilweise nein. Bilder verlieren beim Verkleinern im Allgemeinen nicht an Qualität. Beim Verkleinern oder Reduzieren der Bildgröße bleiben die ursprünglichen Details und die Schärfe des Bildes erhalten, da keine Pixelinformationen verloren gehen. Die Qualitätswahrnehmung kann jedoch je nach verwendeter Komprimierungsmethode und der Fähigkeit der Software, den Verkleinerungsprozess effizient durchzuführen, variieren.
Wie kann ich die Größe eines Bildes in Paint ohne Qualitätsverlust ändern?
Um die Größe eines Bilds in Paint ohne Qualitätsverlust zu ändern, öffnen Sie Paint und laden Sie Ihr Bild. Klicken Sie anschließend auf der Registerkarte „Start“ auf die Schaltfläche „Größe ändern“. Wählen Sie im Dialogfeld „Größe ändern und verzerren“ entweder die Option „Prozent“ oder „Pixel“. Stellen Sie sicher, dass das Kontrollkästchen „Seitenverhältnis beibehalten“ aktiviert ist, um die Proportionen des Bilds beizubehalten. Geben Sie dort ein, wie Sie die Größe Ihres Bilds ändern möchten, und klicken Sie auf „OK“.
Welches ist das beste Tool, um die Größe von Bildern ohne Qualitätsverlust zu ändern?
Es gibt viele hervorragende Tools, um Bilder zu skalieren, ohne dass die Qualität leidet. Wenn es jedoch um die schnellste Methode mit Stapelkomprimierung geht, ist das Tool FVC Free Image Compressor die beste Option. Damit können Sie bis zu 40 Bilder gleichzeitig skalieren und dabei eine hohe Qualität beibehalten – äußerst effizient und benutzerfreundlich für Anwender aller Erfahrungsstufen.
Fazit
Mit den richtigen Methoden und Tools können Sie Bilder ohne Qualitätsverlust skalieren. Ganz gleich, ob Sie eines dieser Tools verwenden oder nicht – das Hauptziel ist, das für Sie passende Werkzeug zu finden. Bereit, Ihre Bilder mühelos zu verbessern? Probieren Sie diese Tools noch heute aus und überzeugen Sie sich selbst vom Unterschied!
-
 Die besten Bildgrößenreduzierer für Desktop- und Mobilgeräte
 Schauen Sie sich die in diesem Artikel am häufigsten aufgelisteten Apps an, um die beste Fotogrößenreduzierung für Ihr Lieblingsgerät zu finden. Erfahren Sie jetzt, wie Sie die Größe von Bildern am besten optimieren!
-
 Die 5 besten Methoden, um die Bildgröße auf allen Geräten zu reduzieren
 Klicken Sie auf diesen Beitrag, um mehr über effektive Methoden zum Ändern oder Komprimieren der Bildgröße zu erfahren. Entdecken Sie außergewöhnliche Foto-Skalierungstools und ihre Schritt-für-Schritt-Anleitungen.
-
 Personen aus Fotos entfernen: Schnelle und einfache Fotobearbeitung
 Möchten Sie Personen von Ihrem Foto entfernen? Lesen Sie diesen Artikel, während wir Ihnen die besten und einfachsten Methoden zeigen, um Personen mit Apps von Fotos zu entfernen.