

نحوه برش تصویر در فتوشاپ
شما میتوانید کارهای زیادی را در فتوشاپ انجام دهید؛ این نرمافزار مثل یک جعبهابزار کامل برای ویرایش تصاویر است. اگر مدتی است از فتوشاپ استفاده میکنید و هنوز با همه قابلیتهای آن آشنا هستید، یا اگر کسی هستید که میخواهید امکانات برش و جدا کردن سوژه را در آن کشف کنید، ما اینجاییم تا کمکتان کنیم! سریع و راحت بیاموزید و درک کنید که چگونه یک تصویر را در فتوشاپ برش بزنید و سوژه را جدا کنید. همچنین اگر فتوشاپ با امکانات و مهارتهای شما همخوانی ندارد، روشهای دیگرِ آنلاین برای برش و جدا کردن سوژه از تصویر را هم کشف کنید.
قسمت 1. چگونه یک تصویر را در فتوشاپ برش دهیم
یادگیری نحوه برش تصاویر در فتوشاپ بسیار مهم است زیرا به افراد اجازه می دهد عناصر مختلف را در یک تصویر به طور دقیق جدا کرده و دستکاری کنند. این مهارت برای کارهایی مانند حذف پسزمینه، ایجاد کلاژ و ایجاد پیشرفتهای هدفمند در طول ویرایش تصویر اساسی است. چه در طراحی گرافیک، عکاسی محصول یا هنر دیجیتال، توانایی برش تصاویر انعطافپذیری و کنترل خلاقانه را فراهم میکند و حرفهایها و علاقهمندان را به طور یکسان قادر میسازد تا به نتایج بصری مطلوب در پروژههای متنوع دست یابند.
در اینجا نحوه برش تصویر در فتوشاپ آورده شده است:
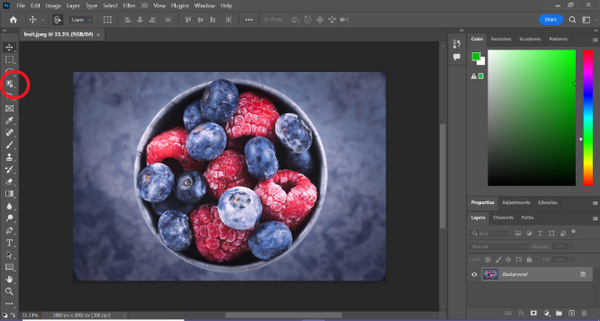
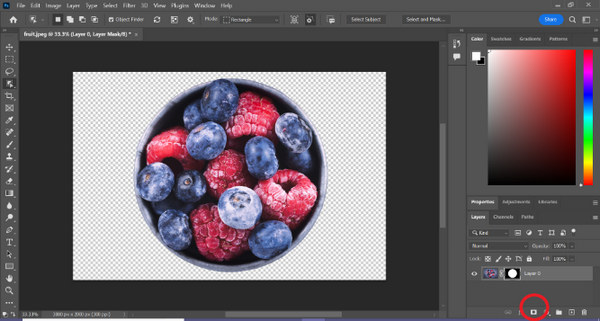
مرحله ۱. با رفتن به زبانه File یک تصویر را در فتوشاپ باز کنید.

مرحله ۲. ابزار Object Selection را انتخاب کنید و ماوس را روی سوژه خود بکشید تا ناحیهای را که میخواهید برش بزنید، انتخاب کنید.
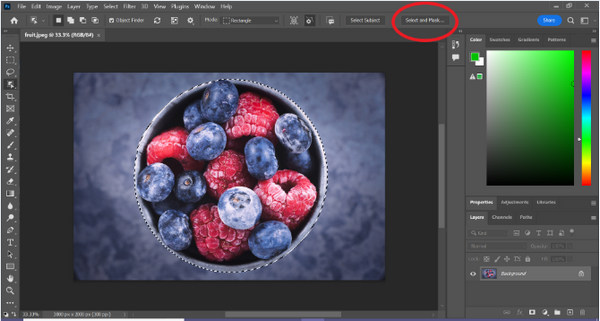
مرحله ۳. روی Select and Mask کلیک کنید.
مرحله ۴. در صورت نیاز تنظیمات انتخاب، مانند Feather (نرمی لبهها)، را تنظیم کنید.
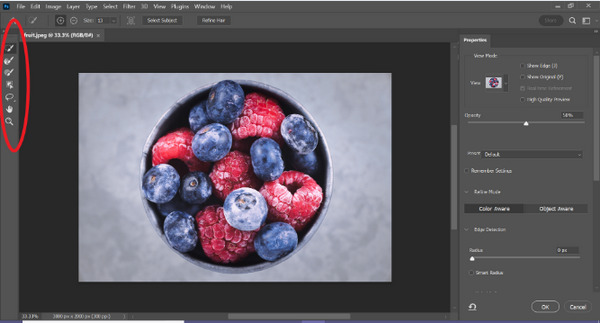
مرحله ۵. روی آیکون Mask کلیک کنید تا سوژه از تصویر جدا شود و تصویر ویرایششده را ذخیره کنید.
با این راهنمای ساده، حالا میتوانید خیلی سریع و آسان یک سوژه را در فتوشاپ از پسزمینه جدا کنید. کافی است مراحل را دنبال کنید و از فرایند دقیق و بید麻烦 ویرایش تصویر لذت ببرید. همچنین میتوانید برای جایگزین کردن قسمت برشخورده، رنگ تصویر را در فتوشاپ تغییر دهید.
قسمت 2. چگونه یک تصویر را بدون فتوشاپ آنلاین برش دهیم؟
اگر فتوشاپ را روی رایانه خود نصب ندارید، راهی وجود دارد که می توانید یک تصویر را به صورت آنلاین برش دهید. در حالی که فتوشاپ یک ابزار با کیفیت برای ویرایش تصاویر، به ویژه برای برش کامل یک تصویر است، برای تسلط بر آن نیاز به مهارت و تمرین است. بنابراین، اگر این ابزار از دست شما خارج است، می توانید از این روش ها برای برش آسان یک تصویر استفاده کنید.
روش 1: حذف پس زمینه آنلاین FVC
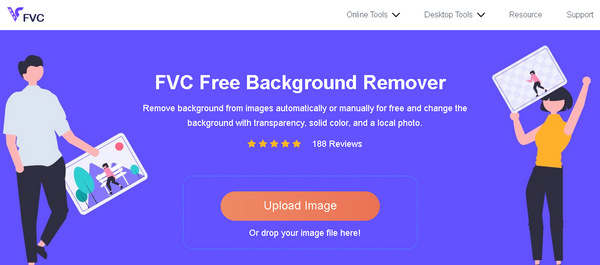
ابزار آنلاین FVC Online Background Remover یک ابزار چندمنظوره و کاربرپسند است که برای حذف خودکار پسزمینه از تصاویر با فرمتهایی مانند PNG، JPG و JPEG طراحی شده است. این ابزار فرایند ایجاد پسزمینه شفاف را ساده میکند و گزینههای شخصیسازی در اختیار شما میگذارد؛ به این صورت که میتوانید با استفاده از قلممو (Brush) بخشهایی را که میخواهید حذف یا حفظ شوند، بهطور دستی انتخاب کنید.
علاوه بر این، FVC Free Background Remover به کاربران این امکان را می دهد که پس زمینه تصویر را به رنگ ثابتی تغییر دهند یا حتی آن را با عکس دیگری جایگزین کنند. این ابزار فراتر از حذف پسزمینه است و ویژگیهای ویرایش سادهای مانند برش، جابجایی، چرخش و چرخش را ارائه میدهد و به کاربران امکان میدهد جذابیت کلی تصاویر خود را افزایش دهند. در زیر مراحل نحوه استفاده از آن آورده شده است.
مرحله ۱. ابتدا به وبسایت رسمی آنها بروید و روی Upload Image کلیک کنید.
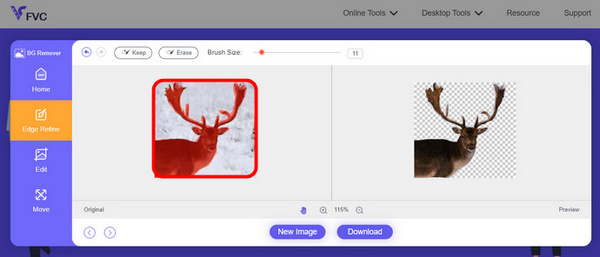
مرحله ۲. منتظر بمانید تا فرایند انجام شود. بعد از آن میتوانید با اصلاح لبهها و جابهجا کردن سوژه، تصویر خود را ویرایش کنید.
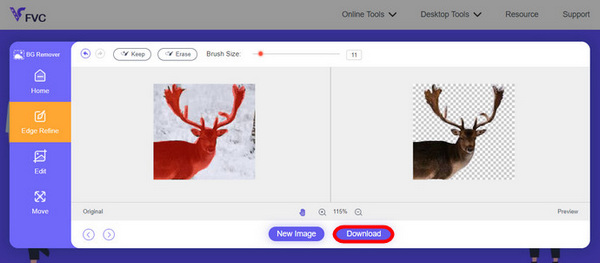
مرحله 3. برای ذخیره نتیجه، روی دکمه Download کلیک کنید.
ابزار FVC Image Background Remover واقعاً یک گزینه عالی برای برش و جدا کردن سوژه از تصویر است. علاوه بر اینکه رایگان است، برای اضافه کردن پسزمینه به تصویر هم بسیار کاربرپسند است. میبینید، فقط کافی است چند مرحله ساده را دنبال کنید تا بتوانید بهراحتی پسزمینه عکسهایتان را حذف کنید.
روش 2: استفاده از ویژگی آیفون iOS 16
iPhone iOS 16 چندین ویژگی و به روز رسانی جدید را به همراه دارد. یکی از آنها برش تصویر است. این ویژگی برش تصویر به کاربران این امکان را می دهد که سوژه عکس را ایزوله کنند و برش عکس را مستقیماً در آیفون خود ایجاد کنند.
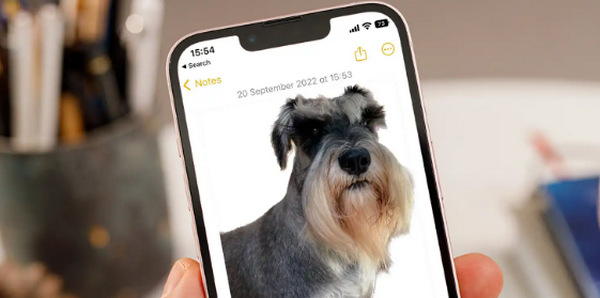
مرحله ۱. یک عکس را در برنامه Photos آیفون خود باز کنید.
مرحله ۲. سوژه عکس را لمس کرده و نگه دارید تا یک خط دور سفید و درخشان دور آن ظاهر شود.
مرحله ۳. حالا تصویر جداشده را کپی کرده و در برنامههایی مثل Notes، پیامرسانها و Messages بچسبانید. همچنین میتوانید آن را مستقیماً با AirDrop به یک دستگاه آیفون دیگر ارسال کنید.
این ویژگی برش عکس فقط در iOS 16 به بعد در iPhone XS، iPhone XR و نسخههای جدیدتر موجود است.
بخش 3. سوالات متداول در مورد برش تصویر در فتوشاپ
چگونه یک نفر را از یک عکس برش دهیم و در عکس دیگری در فتوشاپ قرار دهیم؟
برای اینکه کسی را از یک عکس در فتوشاپ جدا کنید و او را در عکس دیگری قرار دهید، مراحل زیر را دنبال کنید:
۱. با دقت از ابزار Lasso یا Pen برای دورگیری و مشخص کردن خطوط دور شخص استفاده کنید.
۲. کلیک راست کنید و گزینه Layer via Copy را انتخاب کنید تا ناحیه انتخابشده در یک لایه جدید کپی شود.
۳. تصویر مقصد را باز کنید، یک لایه جدید بسازید و لایه کپیشده را روی آن بچسبانید.
۴. اندازه و موقعیت را بهدلخواه تنظیم کنید و لبهها را اصلاح کنید تا ترکیب نهایی طبیعی و یکپارچه به نظر برسد.
چگونه می توان چیزی را در فتوشاپ برش داد و آن را شفاف کرد؟
برای اینکه یک بخش را در فتوشاپ ببرید و آن را شفاف (Transparent) کنید:
۱. از ابزار Pen یا Magic Wand برای انتخاب سوژه استفاده کنید.
۲. کلید Delete را بزنید تا ناحیه انتخابشده حذف شود.
۳. تصویر را با فرمت PNG ذخیره کنید.
۴. مطمئن شوید ناحیه حذفشده بهصورت الگوی شطرنجی (checkerboard) دیده میشود، که نشاندهنده شفاف بودن آن قسمت است.
چگونه می توان یک شکل را در فتوشاپ کم کرد؟
برای کم کردن (تفریق) یک شکل از شکل دیگر در فتوشاپ:
۱. با استفاده از ابزار Shape یا هر ابزار انتخاب دیگری، دو شکل ایجاد کنید.
۲. مطمئن شوید هر دو شکل روی لایههای جداگانه قرار دارند.
۳. لایه بالایی را انتخاب کنید، در نوار ابزار به بخش Path Operations بروید و گزینه Subtract Front Shape را انتخاب کنید.
۴. شکل بالایی از شکل پایینی کم میشود و یک شکل جدید با ناحیه کمشده ایجاد خواهد شد.
آیا می توانم اشیاء پیچیده را با جزئیات دقیق در فتوشاپ برش دهم؟
بله، فتوشاپ ابزارهای پیشرفته ای مانند ابزار Pen را برای انتخاب دقیق اشیاء پیچیده ارائه می دهد. برای دقت بزرگنمایی کنید، نقاط لنگر را در اطراف شی ایجاد کنید و مسیر را برای برش های دقیق اصلاح کنید.
تفاوت Layer via Cut و Layer via Copy هنگام برش تصویر در فتوشاپ چیست؟
Layer via Cut ناحیه انتخاب شده را حذف می کند و آن را روی یک لایه جدید قرار می دهد. در حالی که، Layer via Copy، ناحیه انتخاب شده را روی یک لایه جدید کپی می کند و لایه اصلی را دست نخورده باقی می گذارد. بر اساس اینکه می خواهید در طول فرآیند برش، اصل را حفظ کنید یا خیر، انتخاب کنید.
نتیجه
ساده است، نه؟ حالا که میدانید چگونه یک تصویر را در فتوشاپ برش بزنید و سوژه را جدا کنید، این مهارت را ارتقا دهید و امکانات دیگر فتوشاپ را هم کشف کنید. علاوه بر این، میتوانید روشهای دیگر برش و جداسازی سوژه را بهصورت آنلاین، با استفاده از FVC Online Background Remover یا از طریق دستگاه آیفون خود امتحان کنید. جدا کردن سوژه از تصویر حالا از همیشه آسانتر شده؛ پس این فرصت را از دست ندهید و با دنبال کردن این راهنما، خلاقیت خود را تقویت کنید.
-
 نحوه حذف واترمارک از عکس در فتوشاپ [مراحل]
 فتوشاپ یکی از محبوب ترین ابزارهای ویرایش است. برای حذف واترمارک از عکس ها، آموزش رایگان را در اینجا با استفاده از فتوشاپ دریافت کنید. همچنین، راه های جایگزین را کشف کنید.
-
 نحوه برش در فتوشاپ: راهنمای مبتدیان [2025]
 با این راهنمای ساده، نحوه برش تصاویر در فتوشاپ را بیاموزید. همچنین، نحوه انتخاب مناطق، تنظیم نسبت ابعاد و موارد دیگر برای برش عکس را بیاموزید.
-
 نحوه تغییر رنگ در فتوشاپ | راهنمای جامع 2025
 آیا می خواهید با یادگیری نحوه تغییر رنگ پس زمینه در فتوشاپ، خلاقیت خود را به سطح بعدی ببرید؟ این مقاله همه چیزهایی را که باید بدانید را دارد. اکنون آن را بخوانید!