


چگونه وضوح تصویر را در دسکتاپ به صورت رایگان و پولی افزایش دهیم
آیا به ثبت تصاویر باکیفیت بالا علاقه دارید؟ پس باید بدانید برای داشتن جزئیات ظریف در تصویری که ثبت میکنید، به PPI بالا یا همان پیکسل بر اینچ نیاز دارید. ناامیدکننده است وقتی متوجه میشوید تصویری که گرفتهاید PPI بالایی ندارد و این میتواند هنگام چاپ یا اشتراکگذاری در وب، به کاهش کیفیت تصویر منجر شود. خوشبختانه راههایی وجود دارد که میتوانید با آنها PPI تصویر را افزایش دهید. ابزارهایی که در اینجا معرفی میکنیم ثابت کردهاند که میتوانند تعداد پیکسلهای تصویر شما را افزایش دهند و آن را به خروجیای باکیفیت بالا تبدیل کنند. این مطلب را تا انتها بخوانید، زیرا ما در ادامه به شما آموزش میدهیم و مرحلهبهمرحله نشان میدهیم که چگونه وضوح تصاویر را افزایش دهید تا بهترین خروجی ممکن را به دست آورید.

بخش 1. چگونه می توان وضوح تصویر را به صورت آنلاین رایگان افزایش داد [قابل دسترسی در هر مرورگر وب]
ارتقا دهنده تصویر رایگان FVC
FVC Free Image Upscaler میتواند همان ابزاری باشد که برای یادگیری افزایش وضوح عکس بهصورت آسان و رایگان به آن نیاز دارید. این ابزار آنلاین، تصویر شما را با روش سنتی بازنمونهبرداری (Resampling) بزرگ نمیکند، بلکه از یک تقویتکننده خودکار استفاده میکند تا بخشهای تار تصویر را شناسایی کند. اگر تصویری که بارگذاری میکنید دچار از دست رفتن پیکسلها شده باشد، این ابزار میتواند با تولید پیکسلهای جدید برای تصویر، مشکل را برطرف کرده و کیفیت آن را بالا ببرد. بعد از بزرگنمایی تصویر، میتوانید تفاوت نسخه قبل و بعد را بهوضوح ببینید. بنابراین اگر میخواهید بدانید چگونه با کمک این ابزار مشکل را برطرف کنید، میتوانید مراحل سادهای را که برای بزرگنمایی تصویر آوردهایم، گامبهگام کپی و اجرا کنید.
چگونه با FVC Free Image Upscaler یک تصویر را بزرگنمایی کنیم:
مرحله 1. روی این لینک کلیک کنید تا وارد وبسایت اصلی FVC شوید؛ از آنجا میتوانید فرایند بزرگنمایی تصویر را شروع کنید.
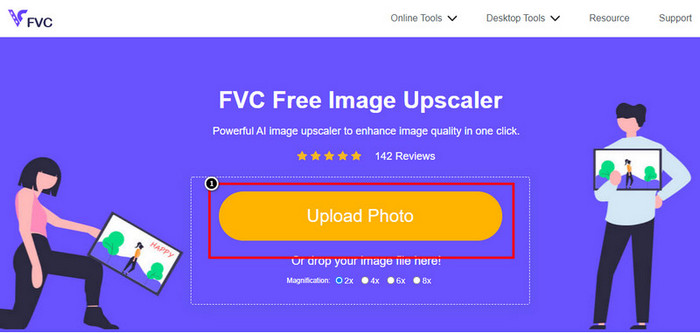
مرحله 2. در صفحه اصلی وبسایت، روی Upload Image کلیک کنید تا تصویری را که میخواهید وضوحش را افزایش دهید، وارد کنید.
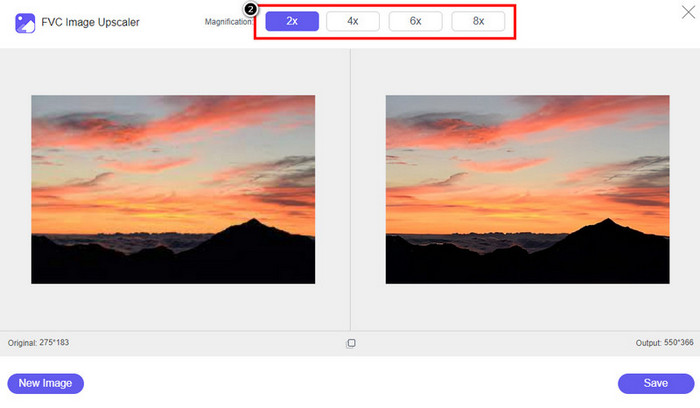
مرحله 3. بعد از بارگذاری، دو ستون روی صفحه نمایش داده میشود: تصویر اصلی و نسخه بزرگنماییشده. میزان Magnification (بزرگنمایی) دلخواه را انتخاب کنید تا روی تصویر اعمال شود.
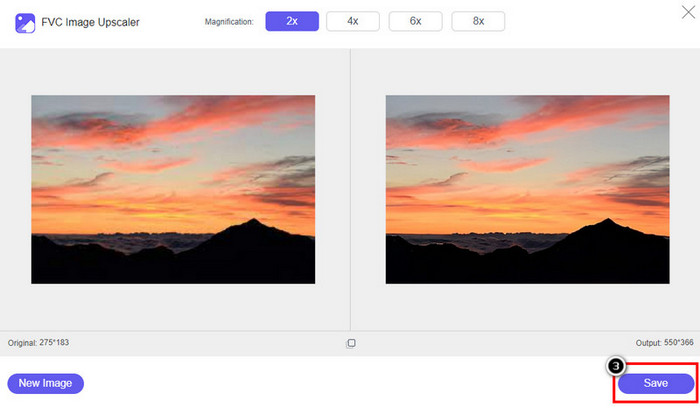
مرحله 4. روی Save فشار دهید تا خروجی نهایی را در حافظه محلی دستگاه خود دانلود کنید؛ به همین سادگی کار بزرگنمایی تصویر به پایان میرسد.
بزرگ کننده تصویر
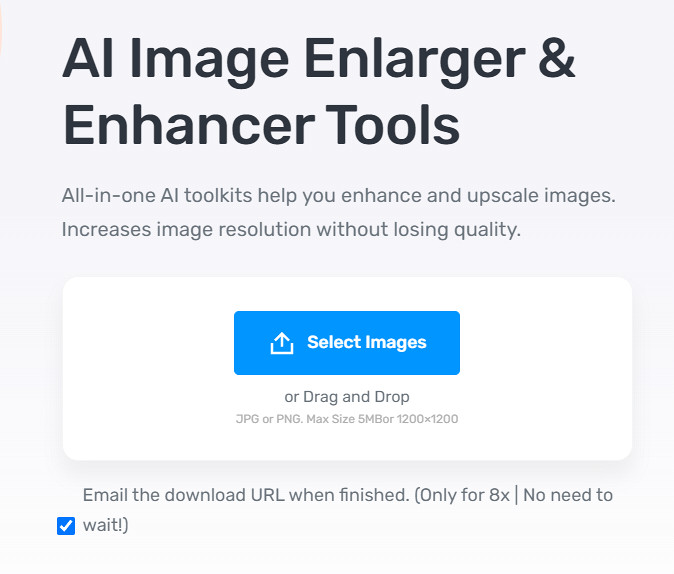
ابزار Image Enlarger میتواند شما را در افزایش وضوح تصویر روی وب راهنمایی کند. این ابزار همچنان از روش سنتی بازنمونهبرداری استفاده میکند که برای تعداد زیادی تصویر هم بهخوبی عمل میکند. در اینجا میتوانید تصاویری با فرمتهای JPG، PNG، GIF و BMP با حداکثر ابعاد 4100 در 4100 و حداکثر حجم 5 مگابایت یا کمتر بارگذاری کنید. با این حال، در این ابزار پیشنمایشی برای دیدن ظاهر تصویر پس از افزایش وضوح وجود ندارد؛ موضوعی که ممکن است برای بسیاری مشکلساز باشد، چون معمولاً کنجکاویم ببینیم تصویر نهایی چگونه خواهد شد. با وجود این، این ابزار آنلاین قبلاً توانایی خود را برای کاربران دیگر ثابت کرده است. اکنون زمان مناسبی است تا با دنبال کردن مراحل زیر، خودتان امتحان کنید و ببینید چگونه میتواند گزینه خوبی برای بزرگنمایی باشد.
چگونه با Image Enlarger یک عکس را بهبود دهیم:
مرحله 1. وبسایت رسمی این تقویتکننده تصویر را در مرورگر خود باز کنید.
مرحله 2. روی Choose File کلیک کنید تا تصویری را که میخواهید بزرگنمایی کنید، بارگذاری کنید؛ در صورت تمایل میتوانید با وارد کردن آدرس URL تصویر نیز آن را اضافه کنید.
مرحله 3. عدد مربوط به عرض و ارتفاع هدف را مطابق سلیقه خود تغییر دهید تا تصویر را بزرگنمایی کنید. اندازه دقیقی را که میخواهید به آن برسید وارد کنید تا ابعاد تصویر، ایدهآل شما شود.
مرحله 4. روی دکمه Start فشار دهید تا تصویرِ پیشتر بارگذاریشده بزرگنمایی شود.
پیکورس
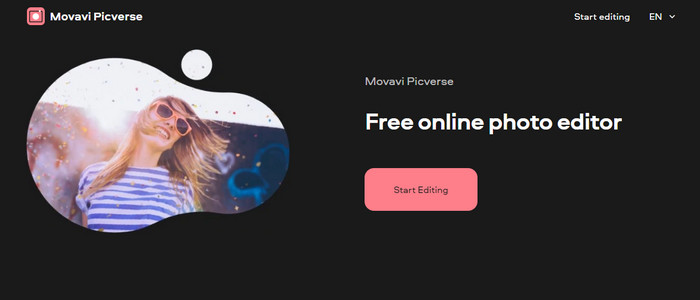
Picverse ابزاری تحتحمایت Movavi است که میتوانید از آن برای افزایش وضوح عکسها بهصورت آنلاین و رایگان استفاده کنید. این ابزار از امکانات پایه ویرایش تصویر بهره میبرد که میتواند رنگ تصاویر را اصلاح کند تا بهتر به نظر برسند. با این حال، این ابزار پیکسل جدیدی تولید نمیکند تا وضوح تصویر بارگذاریشده را افزایش دهد. ولی تأثیری که میتوانید با ویرایش تصویر در اینجا ایجاد کنید نسبت به بسیاری از ویرایشگرهای آنلاین دیگر چشمگیرتر است. در مجموع، با استفاده از این نرمافزار تجربهای شبیه یک ویرایشگر نیمهحرفهای خواهید داشت. میخواهید بدانید چطور؟ میتوانید مراحل آوردهشده برای این ابزار را دنبال کنید.
چگونه با Picverse تصاویر با وضوح بالا بسازیم:
مرحله 1. به وبسایت رسمی مراجعه کنید و روی Upload Image کلیک کنید تا تصویری را که میخواهید کیفیتش را بهبود دهید، بارگذاری کنید.
مرحله 2. حالا که تصویر موردنظر برای بهبود در صفحه است، میتوانید با تنظیم گزینههای مختلف، شروع به بهتر کردن آن کنید.
افزودنی: اگر میخواهید افکتی روی تصویر خود اعمال کنید، میتوانید گزینه Effects را انتخاب کرده و از میان افکتهای موجود، افکت دلخواه را برگزینید. همچنین میتوانید شدت هر افکت را طبق سلیقه خود تنظیم کنید.
مرحله 3. برای اعمال همه تغییرات روی تصویر، روی دکمه Save کلیک کنید.
قسمت 2. نحوه ایجاد تصاویر با وضوح بالا در ویندوز و macOS آفلاین [نسخه پولی و رایگان]
فتوشاپ
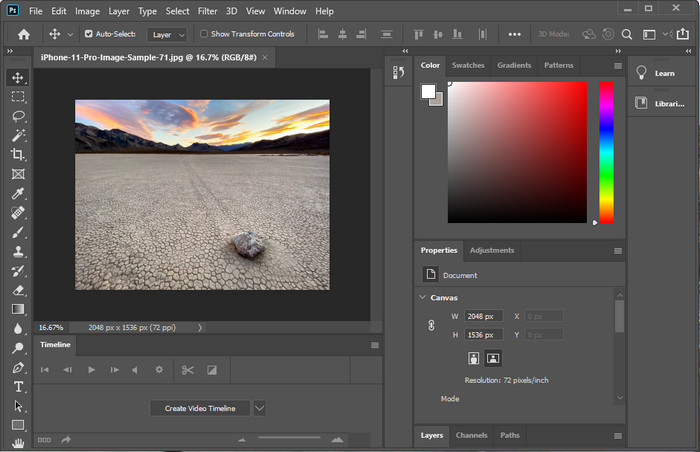
ما نباید Adobe Photo را فراموش کنیم زیرا یک ابزار حرفه ای است. شما باید بدانید که چگونه یک عکس با وضوح بالاتر بسازید. برای ما جدید نیست که این نرم افزار می تواند پیکسل ها را به تصویر اضافه کند تا وضوح آن بهترین باشد. با ویژگی های خودکار آن، می توانید پیکسل های بیشتری را پس از بهبود تصویر خود به آن اضافه کنید. حتی اگر اندازه تصویر را در اینجا تغییر میدهید، ویژگیای دارد که میتواند به شما کمک کند تصاویر را بدون بزرگ کردن آنها بزرگ کنید. اما قبل از استفاده از این ابزار حرفه ای، باید آن را در وب سایت رسمی Adobe خریداری کنید. فرض کنید پولی برای خرید آن ندارید. در این صورت، می توانید از نسخه آزمایشی رایگان استفاده کنید تا تجربه کنید که این ابزار چقدر حرفه ای است. اگر این نرمافزار را روی دسکتاپ خود دانلود کردهاید، میتوانید مراحلی را که در زیر اضافه میکنیم دنبال کنید تا تصویر را در اینجا ارتقا دهید.
چگونه با Adobe Photoshop وضوح یک تصویر را بالاتر ببریم:
مرحله 1. تصویری را که میخواهید وضوحش را افزایش دهید، با کلیک روی File بارگذاری کنید.
مرحله 2. در نوار ابزار بالا روی Image کلیک کرده و Image Size را بزنید تا بتوانید وضوح تصویر خود را افزایش دهید.
مرحله 3. در کادر محاورهای بازشده، اندازه مدنظر خود را وارد کنید و برای اعمال آن روی OK کلیک کنید.
مرحله 4. منوی File را باز کرده و روی Save کلیک کنید. کادر محاورهای دیگری ظاهر میشود که در آن میتوانید کیفیت تصویر را تنظیم و سپس آن را ذخیره کنید.
GIMP
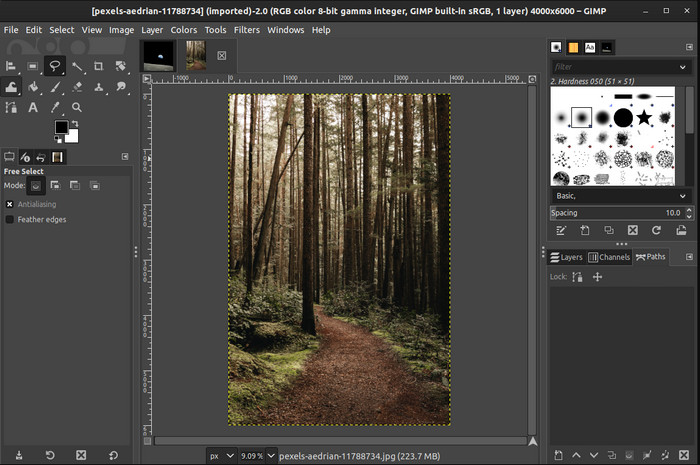
GIMP جایگزینی برای Photoshop است که میتوانید آن را دانلود کرده و از آن برای تبدیل عکسهای کموضوح به وضوح بالا کمک بگیرید. این برنامه بهدلیل کیفیت بالایی که در ویرایش تصاویر ارائه میدهد، بهعنوان جایگزینی شناختهشده برای Photoshop مطرح شده، هرچند Photoshop ابزارهای بیشتری در اختیار شما میگذارد. با نصب آن روی ویندوز یا مک، میتوانید بهسادگی وضوح تصاویر خود را افزایش دهید. همانطور که گفتیم، این ابزار شباهت زیادی به ویرایشگر تصویر Adobe دارد و پیچیدگی آن ممکن است برای یک مبتدی کمی زیاد باشد؛ اما اگر راهنمای مرحلهبهمرحلهای را که در ادامه آوردهایم دنبال کنید، میتوانید از نرمافزار استفاده کرده و تصویر خود را در GIMP تنظیم کنید.
چگونه با GIMP وضوح یک عکس را افزایش دهیم:
مرحله 1. نرمافزار را روی دستگاه خود دانلود کنید، مراحل نصب را انجام دهید و پس از پایان، آن را اجرا کنید.
مرحله 2. به منوی File بروید و روی Open کلیک کنید تا تصویری را که میخواهید وضوح آن را افزایش دهید، بارگذاری کنید.
مرحله 3. منوی Image را باز کرده و Scale Image را انتخاب کنید تا فرایند تغییر اندازه تصویر در GIMP آغاز شود.
مرحله 4. بعد از کلیک روی Scale Image، مجموعهای از گزینهها نمایش داده میشود که در آنها میتوانید وضوح تصویر را تغییر دهید. مقدار هر بخش را تنظیم کنید تا وضوح تصویر افزایش یابد.
مرحله 5. روی دکمه Scale کلیک کنید تا مقادیری را که وارد کردهاید ذخیره کنید.
بخش 3. سوالات متداول در مورد چگونگی افزایش وضوح تصویر
کدام بهتر است، GIMP یا Photoshop، برای افزایش وضوح تصویر؟
GIMP و Adobe Photoshop نرم افزارهای درجه یک هستند و ویرایشگرهای تصویر تقریباً سطحی دارند که می توانید در دستگاه خود بارگیری کنید. با این حال، فتوشاپ از نظر افزایش وضوح تصویر بسیار برتر است.
آیا دانلود نرم افزار برای بهبود وضوح تصویر ضروری است؟
دانلود نرم افزار زمانی که اینترنت ندارید و می خواهید وضوح را بهبود ببخشید می تواند مفید باشد، اما اگر اینترنت مناسبی دارید، ما به شدت توصیه می کنیم از یک ابزار وب استفاده کنید. مانند FVC Free Image Upscaler، این ابزار یک ارتقاء دهنده تصویر قابل اعتماد است که می توانید بدون دانلود هیچ فایلی در وب به آن دسترسی داشته باشید.
آیا ارتقاء یک تصویر چالش برانگیز است؟
برخی از افراد این چالش را به دلیل ابزارشان دردسرساز می دانند، اما در اینجا ما همه چیز را برای شما راحت تر می کنیم. پس از خواندن این مقاله، اکنون دانش گسترده ای در مورد نحوه برخورد ساده تر با این مشکل دارید.
نتیجه
بنابراین، فکر می کنید از کدام نرم افزار به دلیل مزایای آن استفاده خواهید کرد؟ برای افزایش وضوح عکس به صورت آنلاین یا آفلاین، به نرم افزار و آموزش نحوه استفاده از آنها نیاز دارید. این چیزی است که ما به این مقاله اضافه می کنیم. شما می توانید انتخاب کنید که فکر می کنید برای شما مناسب تر است و مراحلی را که ما اضافه می کنیم را دنبال کنید تا به راحتی این مشکل را مدیریت کنید.
-
 نحوه حذف واترمارک Animaker بدون هزینه [راههای اثبات شده]
 چگونه واترمارک Animaker را حذف کنیم؟ با بهترین ابزارهایی که در این وبلاگ ثبت نام کرده ایم، می توانید از آنها برای خلاص شدن از شر واترمارک استفاده کنید.
-
 آموزش حذف واترمارک از Origin Graph [100% Working]
 برای حذف واترمارک از Origin Graph به کمک نیاز دارید. کمکی که نیاز دارید در این مقاله گنجانده شده است، برای دانستن آن می توانید آن را بخوانید.
-
 نحوه حذف واترمارک در SmartDraw به راحتی [2 راه اثبات شده]
 چگونه واترمارک را در Smart Draw حذف کنیم؟ اگر شما هم همین سوال را دارید، می توانید به این مقاله اعتماد کنید که ما شما را تحت پوشش قرار دادیم!