

Adobe Premiere : explorez le concept du ralenti
Le concept du ralenti devient naturel dans chaque vidéo, non pas à cause de la vitesse réduite en elle‑même, mais parce qu’il permet de mettre en valeur les détails essentiels. Il est plus satisfaisant et rassurant de connaître tous les détails sur la façon dont une action va se dérouler ou comment elle est réalisée. Avec l’aide d’Adobe Premiere, vous allez pouvoir vous faire une idée du montage et de la création d’effets au ralenti, mais cela reste assez difficile pour tout débutant. Continuez votre lecture pour connaître tous les détails concernant Adobe Premiere.

Partie 1. Comment produire des vidéos au ralenti dans Adobe Premiere
Un logiciel de montage vidéo comme Adobe Premiere Pro est largement utilisé aussi bien sur Mac OS que sur les ordinateurs Windows. Le montage de vidéos, de publicités, de films, d’émissions de télévision et de projets vidéo en ligne est possible avec Premiere Pro CS6 ou une version ultérieure. Il s’agit d’un logiciel de montage vidéo riche en fonctionnalités, également disponible dans la suite d’applications Adobe Creative Cloud. Premiere Pro est fréquemment utilisé conjointement avec d’autres logiciels comme After Effects et Photoshop dans des projets créatifs. Adobe Premiere est également réputé pour ses améliorations spectaculaires dans le montage des scènes, notamment pour l’ajustement de la vitesse de lecture d’une vidéo. Il peut produire d’excellentes vidéos au ralenti de différentes manières et offrir un rendu de très grande qualité. Mais, comme mentionné dans l’introduction, les produits Adobe comme Adobe Premiere peuvent être complexes à utiliser pour créer des vidéos en ralenti, surtout pour les monteurs débutants. Voici donc des tutoriels d’exemple expliquant la procédure pour réaliser des vidéos au ralenti avec ce logiciel.
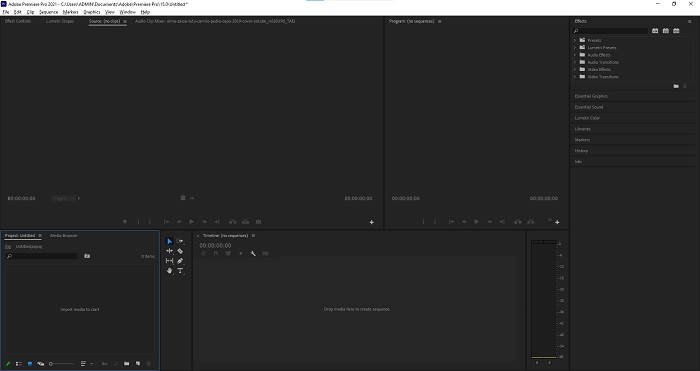
Étape 1 : Ouvrez Adobe Premiere, puis cliquez sur Importer des médias pour commencer dans le coin inférieur gauche de l’interface pour transférer les fichiers vidéo de votre ordinateur vers le logiciel, ou faites‑les simplement glisser. Autre option : allez dans l’onglet menu Fichier en haut à gauche et sélectionnez Importer.
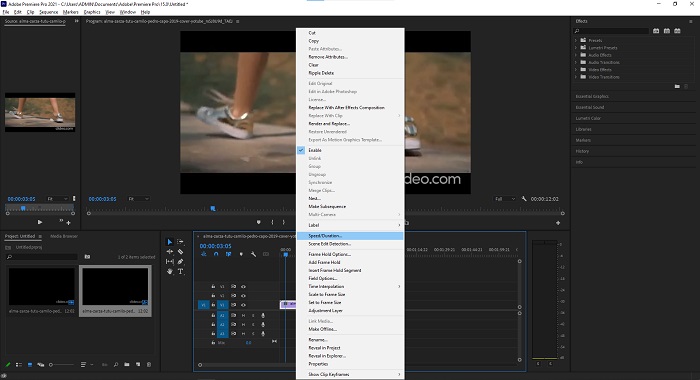
Étape 2 : Double‑cliquez sur les fichiers importés ou faites‑les simplement glisser vers la piste vidéo. Pour ajuster la vitesse du fichier vidéo, faites un clic droit sur le fichier vidéo dans la piste. Repérez Vitesse/Durée et cliquez dessus. Ensuite, créez l’effet de ralenti en diminuant le pourcentage de la vitesse normale, qui est de 100 %.
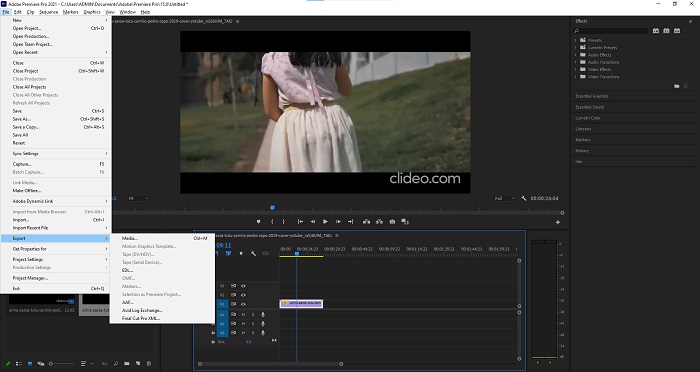
Étape 3 : Enregistrez la vidéo convertie en allant dans l’onglet menu Fichier en haut à gauche. Puis cliquez sur Exporter et choisissez le type de fichier de sortie dans lequel vous souhaitez convertir votre vidéo.
Partie 2. Comment créer des vidéos au ralenti hors ligne à l'aide de Video Converter Ultimate
Contrairement à Adobe Premiere Pro, qui est très compliqué à utiliser en raison de ses nombreux outils souvent inconnus des débutants, Video Converter Ultimate est le meilleur logiciel convivial que tout le monde peut utiliser et qui offre des outils impressionnants pour monter des vidéos. L’un de ses outils phares, le Contrôleur de vitesse vidéo, a la capacité de créer une vidéo au ralenti avec une excellente qualité d’image en moins d’une minute de temps de conversion. Pour découvrir ce logiciel très utile qui peut résoudre votre problème, voici les étapes à suivre :
Étape 1 : Vous pouvez télécharger Video Converter Ultimate en cliquant sur le bouton Téléchargement gratuit. Une fois le téléchargement terminé, localisez le fichier sur votre bureau puis lancez‑le.
Téléchargement gratuit pour Windows 7 ou version ultérieure Téléchargement sécurisé
Téléchargement gratuit pour macOS 10.7 ou version ultérieure - Téléchargement sécurisé
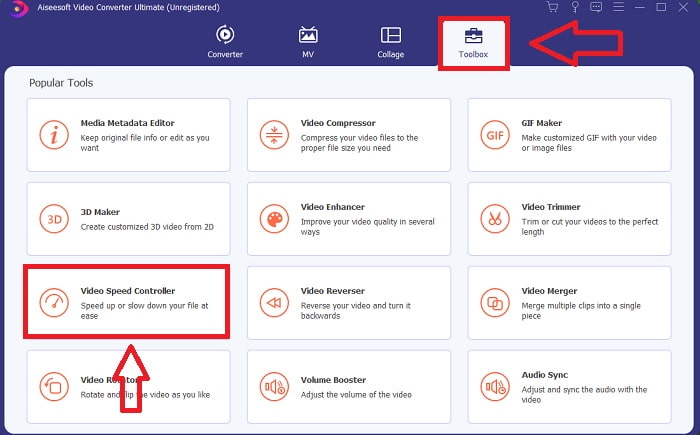
Étape 2 : Vous devez exécuter le logiciel après l’avoir installé sur le bureau de votre ordinateur. L’interface du programme apparaîtra lorsque vous le lancerez pour la première fois. Choisissez Contrôleur de vitesse vidéo dans l’onglet Boîte à outils.
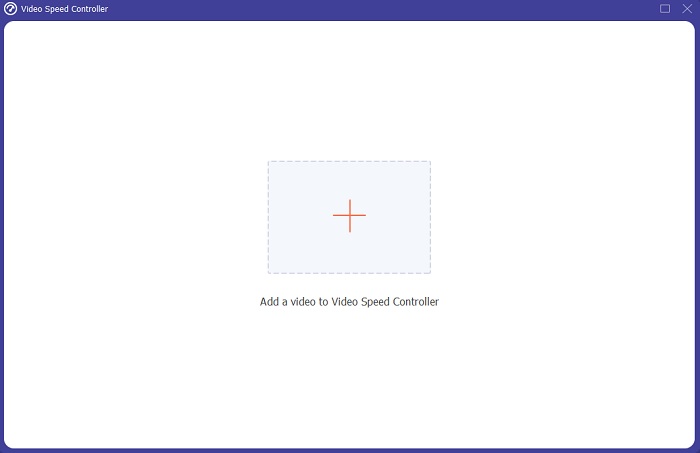
Étape 3 : Pour modifier la vitesse de lecture de votre clip vidéo, faites simplement glisser le fichier ou cliquez sur le bouton + pour ajouter des fichiers depuis votre ordinateur.
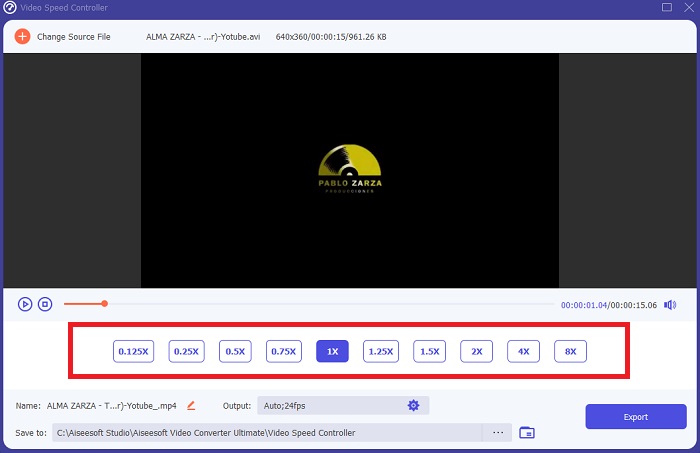
Étape 4 : Sélectionnez le type de vitesse que vous utiliserez pour modifier la vitesse de lecture de votre clip vidéo, ou créez une vidéo au ralenti à partir d’une vidéo en vitesse normale pour commencer à ajuster la vitesse de lecture de votre clip.
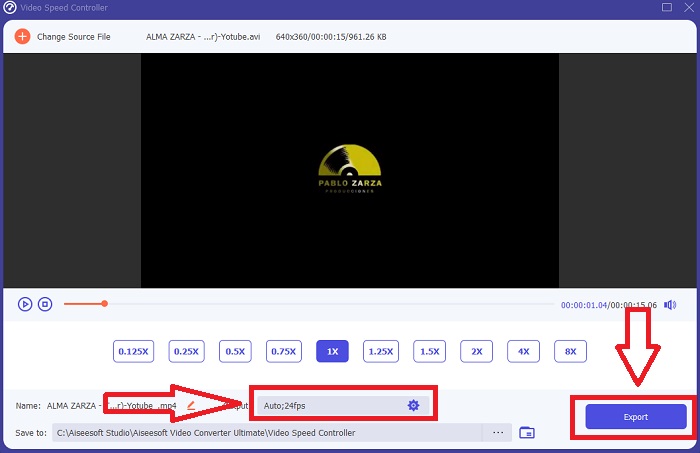
Étape 5 : Lorsque vous avez terminé de régler la vitesse de lecture de la vidéo, le fichier est prêt à être exporté ; avant cela, vous pouvez envisager de modifier la qualité de la sortie en ajustant la résolution, la fréquence d’images, etc. Cliquez sur Exporter lorsque tout est défini.
En rapport:
Comment compresser des fichiers MPEG
Comment compresser des fichiers VOB
Partie 3. Comment créer des vidéos au ralenti en ligne avec Kapwing
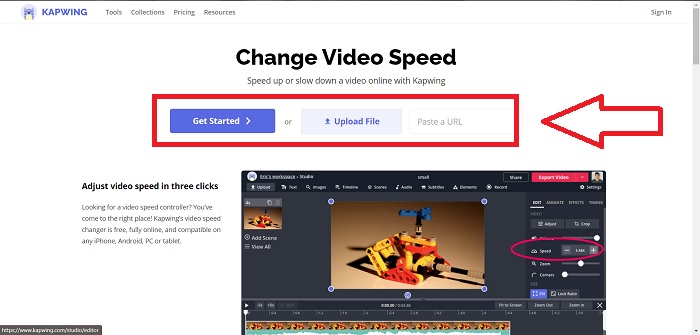
Accélérez ou ralentissez rapidement vos vidéos avec cet accélérateur vidéo en ligne gratuit. Vous n’avez pas besoin de beaucoup d’expérience en montage vidéo pour créer des vidéos au ralenti, en time‑lapse ou en hyper‑accéléré convaincantes que vous pourrez publier sur YouTube ou partager sur les réseaux sociaux. Importez une vidéo ou saisissez une URL pour commencer. En plus des formats AVI et MP4, Kapwing prend également en charge les formats vidéo MP4, MOV et 3PG. Pour les vidéos au ralenti, une vitesse aussi basse que 0,25x est disponible ; la vitesse maximale disponible est de 4x. Installez‑vous confortablement et détendez‑vous pendant que vous lisez les étapes expliquant comment utiliser cet outil en ligne.
Étape 1. Ouvrez un navigateur en ligne et recherchez Kapwing. Sur l’interface, vous pouvez commencer en cliquant sur Get Started. Vous pouvez aussi sélectionner directement votre clip vidéo en cliquant sur Upload File. Il existe également une autre option qui permet de coller des liens vidéo provenant d’autres sites et de passer directement au montage.
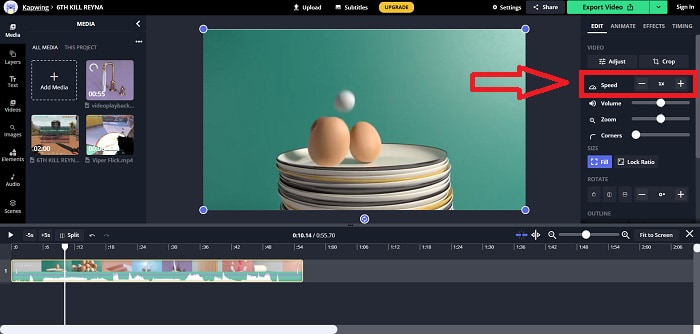
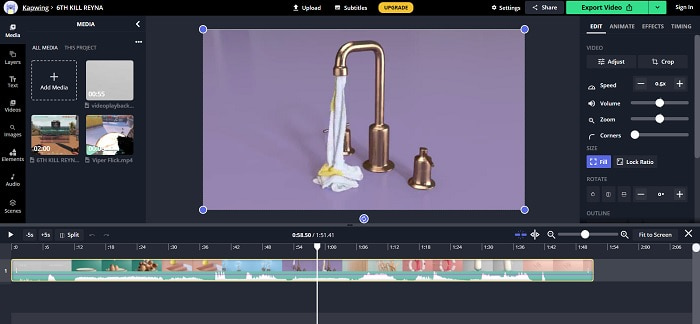
Étape 2. Cliquez sur la vidéo dans la piste vidéo, allez dans l’onglet d’édition Speed, et créez l’effet de ralenti en cliquant sur le signe –. La vitesse de la vidéo sera réduite de 0,25.
Étape 3. Pour exporter votre vidéo convertie, cliquez sur Export Video et enregistrez‑la à l’emplacement souhaité sur votre ordinateur.
Partie 4. FAQ sur la création de vidéos au ralenti dans Adobe Premiere
Quels formats Adobe Premiere Pro prend-il en charge ?
Avec Adobe Premiere Pro, vous pouvez travailler avec une large gamme de formats vidéo tels que MP4, AVCHD/H.264/H.265, MPEG-1 et MPEG-2, MOV, FLV et AVI.
Est-ce que 60 ips est bon pour le ralenti ?
Un facteur important affectant l'apparence générale d'une vidéo est sa fréquence d'images, qui a également un impact sur le réalisme de la vidéo. Cette idée a un lien étroit avec la façon dont nous percevons naturellement l'univers. La création de vidéos au ralenti ou l'enregistrement de séquences de jeux vidéo nécessitent des fréquences d'images supérieures à 30 ips. À mesure que la technologie progresse, de plus en plus de smartphones sont désormais capables d'enregistrer des vidéos à 60 images par seconde.
Que faire si Adobe Premiere Pro ne fonctionne pas ?
Les préférences de Premiere Pro peuvent être réinitialisées à leurs valeurs par défaut pour corriger les plantages, ce qu'Adobe recommande fréquemment. Vos préférences sont « poublies » lorsque vous faites cela. Cela restaurera vos paramètres à leurs paramètres d'usine d'origine. Pour ce faire, maintenez enfoncée la touche Alt tout en lançant Premiere Pro.
Conclusion
Tout bien considéré, nous apprenons que quelle que soit la qualité d'Adobe Premiere Pro, il ne peut pas être le logiciel recommandé à utiliser pour certains utilisateurs qui n'ont aucune expérience en montage. Nous vous recommandons d'utiliser Video Converter Ultimate pour ses outils de fonctionnalités accessibles qui peuvent rogner, couper, mettre des filtres, fusionner, etc. L'un de ses outils utiles disponibles dans le contrôleur de vitesse vidéo est qu'il peut créer des vidéos au ralenti ou ajuster la vitesse de lecture de la vidéo. Les outils en ligne peuvent être une plate-forme plus facile à utiliser qu'Adobe Premiere Pro. Cependant, il ne peut pas produire une sortie de meilleure qualité que le Video Converter Ultimate.
-
 6 meilleures fusions AVI : comment joindre des fichiers vidéo AVI sur Windows et Mac
 Lorsque vous souhaitez joindre des vidéos AVI pour un DVD, vous pouvez en savoir plus sur les fonctionnalités des 6 meilleurs assembleurs AVI, y compris des outils en ligne gratuits, ainsi que sur les programmes de bureau de l'article.
-
 [Guide] 2 méthodes ultimes pour rejoindre des vidéos MXF de Sony X70
 Si vous avez pris des vidéos MXF de Sony X70, quelles sont les meilleures méthodes pour joindre des fichiers MXF ? Voici les 2 méthodes efficaces pour combiner les vidéos de haute qualité.
-
 Comment couper et fusionner des chansons en ligne - 4 meilleures façons de savoir
 Lorsque vous souhaitez couper et fusionner des chansons en ligne pour créer un morceau de musique, vous pouvez en savoir plus sur les 4 meilleurs outils en ligne pour couper les chansons et combiner les fichiers de l'article.