

Adobe Premiere에서 비디오를 트리밍하는 방법 알아보기 [2024]
영상을 편집할 때 불필요한 부분을 삭제해야 할 정도로 긴 영상 클립을 다루는 일은 매우 흔합니다. 또한, 영상의 특정 부분을 보내야 할 때, 결국 일부분을 잘라내야 하는 경우도 있습니다.
좋은 소식은 이 과정을 간단하게 만들어 주는 도구가 있다는 것입니다. Adobe Premiere는 사용자가 동영상의 특정 부분을 정밀하게 선택하고, 다듬고, 잘라낼 수 있도록 해 줍니다. 그래서 시간 제한에 맞추기 위해 길이를 줄이든, 방해가 되는 부분을 잘라 내든, 이 영상 편집 도구로 쉽게 해결할 수 있습니다. 이제 이 간단한 가이드에서 Adobe Premiere에서 동영상을 자르는 방법을 배울 수 있는 기회를 얻게 되었습니다. 무엇을 망설이시나요? 계속 읽어 보세요!

1부. 어도비 프리미어란?
어도비 프리미어는 어도비 시스템즈에서 개발한 유명한 전문 비디오 편집 소프트웨어입니다. 1991년에 처음 출시된 이후 강력한 기능 덕분에 빠르게 인기를 얻었습니다.
오늘날 Adobe Premiere는 Adobe Creative Cloud 제품군에 포함되어 있으며, 다양한 숙련된 영상 편집자들이 업계 전반에서 사용하는 최고의 영상 편집 프로그램 중 하나로 자리매김하고 있습니다. 이 영상 편집 도구를 사용하면 비디오 클립을 자르고, 병합하고, 효과를 추가하고, 정리하는 등 다양한 작업을 수행할 수 있습니다.
왜 영상을 자를 때 Adobe Premiere를 사용해야 할까요?
긴 영상에서 원치 않는 부분을 잘라낼 때 Adobe Premiere를 사용하면 훌륭한 해결책이 됩니다. Razor 기능과 타임라인 마커를 사용하면 정확한 프레임까지 영상을 손쉽게 트리밍하여 매끄러운 편집과 완성도 높은 최종 결과물을 얻을 수 있습니다. 또한, 깔끔하고 전문적인 편집을 빠르게 할 수 있는 제어 기능도 제공합니다.
2부. Adobe Premiere에서 비디오 트리밍하기 [간단하게]
Adobe Premiere에서 비디오를 트리밍하는 것은 매우 간단하고 효율적입니다. 긴 비디오 클립에서 원하지 않는 부분을 쉽게 잘라낼 수 있습니다. Adobe Premiere에서 비디오를 쉽게 트리밍하는 방법에 대한 가이드는 다음과 같습니다.
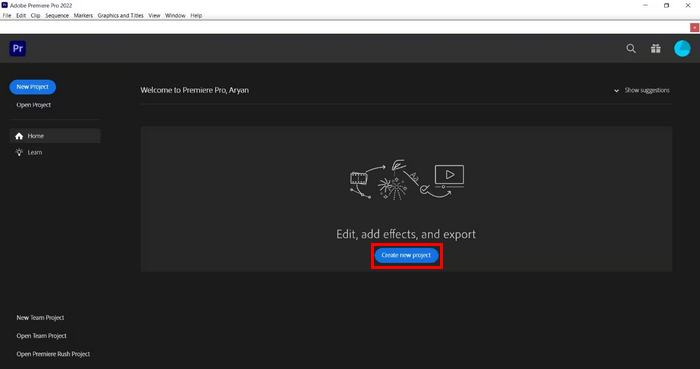
1단계. 먼저, Adobe Premiere에서 새 프로젝트를 생성해야 합니다.
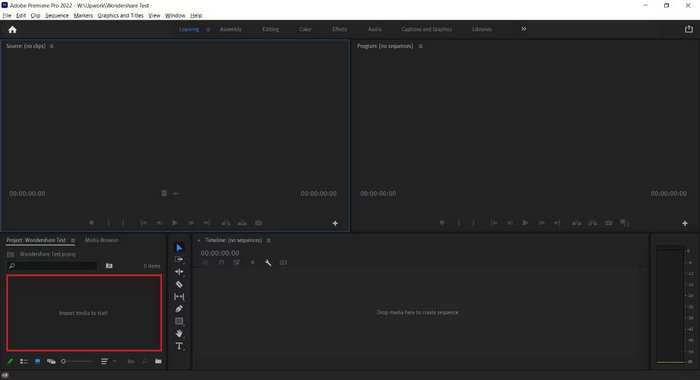
2단계. 다음으로, 아래의 Import Media to Start를 클릭하여 자르고 싶은 비디오 파일을 가져옵니다.
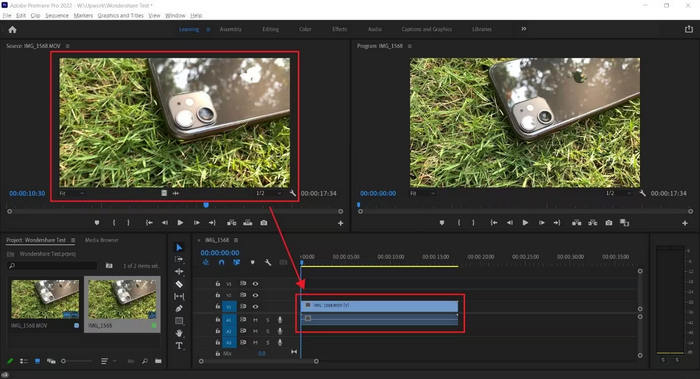
3단계. 그다음, 소스 패널에서 가져온 비디오를 선택한 후, 쉽게 타임라인으로 드래그합니다.
4단계. 이제 타임라인에서 자르고 싶은 비디오를 클릭하고 Razor Tool을 선택합니다. 그런 다음 잘라내기를 시작하고 싶은 지점이나 구간을 선택하고 마우스 왼쪽 버튼으로 확정합니다.
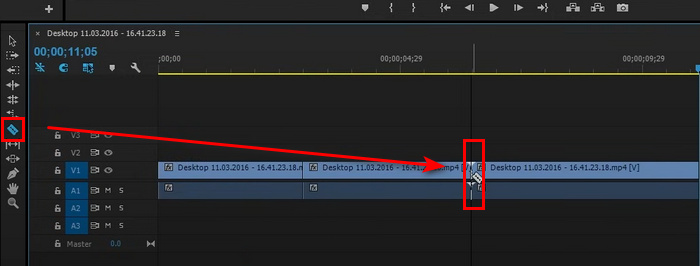
팁: 키보드에서 C 키를 눌러 Razor Tool을 선택할 수도 있습니다.
이제 Adobe Trim Video 기능을 사용하여 비디오를 다듬을 수 있습니다. 이 비디오 편집 도구를 사용하면 비디오를 쉽고 정확하게 자를 수 있습니다. 따라서 길고 큰 비디오 클립을 작업할 때 이제 불필요한 부분을 잘라내는 것이 매우 쉬워졌습니다.
Adobe Premiere Pro에 관심이 있다면, 이 도구로 동영상 재생 속도를 빠르게 만드는 방법을 더 알아보려면 여기를 클릭하세요.
3부. Adobe Premiere Trim Video의 최고 대안
Adobe Premiere를 사용하여 비디오를 트리밍하는 것은 원치 않는 부분을 정밀하게 잘라내는 좋은 방법이지만, 비디오 트리밍 기능만 사용할 경우 구매 비용이 부담스러울 수 있습니다. 비디오 트리머와 동일한 품질을 제공하면서도 가격은 저렴한 제품을 찾고 있다면 Aiseesoft Video Converter Ultimate가 최고의 선택입니다.
이 올인원 비디오 변환 도구는 사용자의 대부분의 비디오 편집 요구를 충족하는 다양한 기능을 제공합니다. 고급 소프트웨어의 복잡한 과정 없이도 비디오를 쉽게 다듬을 수 있는 전용 비디오 트리머 도구가 포함되어 있습니다. 또한, 비디오 클립의 시작 및 종료 지점을 선택하여 더욱 간편하게 다듬을 수 있습니다.
주요 기능:
• 비디오 세그먼트의 시작 및 종료 시간을 잘라내는 수동 입력 옵션.
• 비디오의 다른 부분을 트리밍하기 위해 여러 세그먼트를 추가할 수 있습니다.
• 비디오를 세그먼트로 빠르게 분할하여 편집 속도를 높입니다.
• 재생, 일시 정지, 프레임별 탐색 기능을 통해 트리밍된 비디오를 미리 볼 수 있습니다.
• 여러 개의 잘린 세그먼트를 하나의 파일에 병합합니다.
Aiseesoft Video Converter Ultimate에서 동영상을 자르는 방법은 다음과 같습니다:
1단계. 먼저, 컴퓨터에 Aiseesoft Video Converter Ultimate을 다운로드하여 설치합니다.
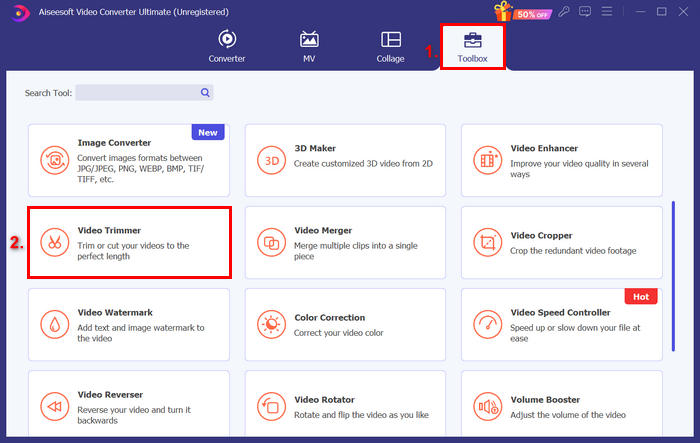
2단계. 프로그램을 실행한 뒤, Toolbox 탭으로 이동하여 Video Trimmer를 선택합니다.
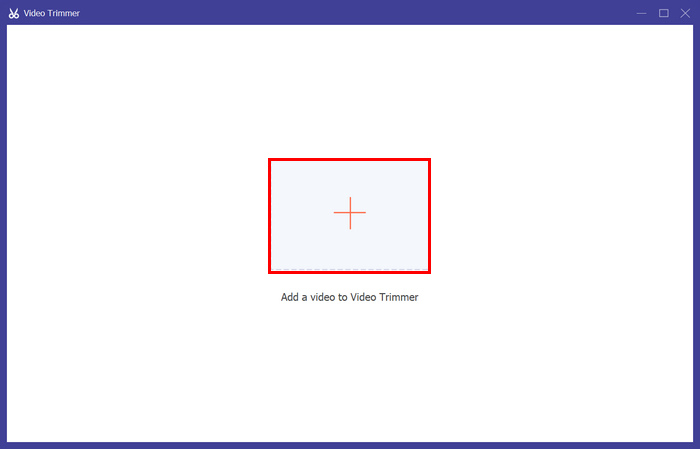
3단계. Add a Video to Video Trimmer를 클릭하여 자르고 싶은 동영상을 추가합니다.
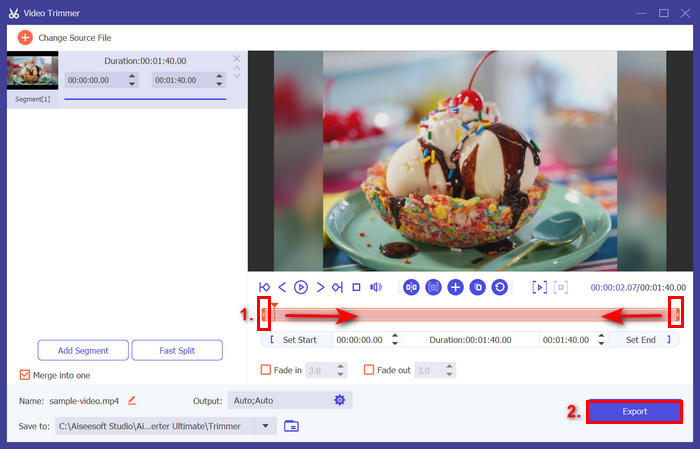
4단계. 그런 다음, 클립의 시작과 끝을 드래그하여 좌우로 이동하거나, 자르고 싶은 부분의 시작 및 종료 시간을 직접 입력하여 조정합니다. 완료되면 아래의 Export 버튼을 클릭합니다.
팁: 영상을 자르고 싶다면 Fast Slip trimmer 기능을 사용해 보세요. Add Segment 버튼 옆에 있는 Fast Slip 버튼을 클릭하기만 하면 됩니다. 이후 구간을 나누고 싶은 방식을 선택합니다. 평균으로 나누기를 선택했다면 개수만 지정하면 되고, 시간으로 나누기를 원한다면 시간을 지정하면 됩니다. 그다음 Split 버튼을 클릭합니다.
Aiseesoft는 MP3와 같은 오디오 파일을 자르는 기능에도 뛰어납니다.
4부. Adobe Premiere에서 비디오 트리밍에 대한 FAQ
Adobe Premiere에서 정확한 트림을 만들려면 어떻게 해야 하나요?
Adobe Premiere는 트림을 정밀하게 조정할 수 있는 여러 도구를 제공합니다. 한 가지 방법은 클립을 타임라인에 추가하기 전에 소스 모니터를 사용하여 시작 지점과 종료 지점을 설정하는 것입니다. 이렇게 하면 클립의 시작과 끝 지점을 더욱 정확하게 제어할 수 있습니다. 더욱 정확하게 조정하려면 확대/축소 슬라이더를 사용하여 타임라인을 확대하여 특정 프레임에 초점을 맞출 수 있습니다.
Adobe Premiere에서 트리밍을 실행 취소하거나 트리밍한 영상을 복원할 수 있나요?
네. Windows에서는 Ctrl+Z, Mac에서는 Cmd+Z를 눌러 트리밍 작업을 쉽게 취소할 수 있습니다. 실수로 너무 많이 트리밍하거나 잘못된 부분을 제거한 경우, 실행 취소 명령을 여러 번 사용하여 변경 사항을 되돌릴 수 있습니다. 또한, 비디오의 일부가 트리밍되었지만 완전히 제거되지 않은 경우, 타임라인에서 클립 가장자리를 다시 드래그하여 트리밍된 영상을 복원할 수 있습니다.
Adobe Premiere에서 여러 클립을 동시에 트리밍할 수 있나요?
네. Adobe Premiere에서는 여러 비디오를 동시에 트리밍할 수 있습니다. 타임라인에서 조정할 클립을 선택한 다음, 잔물결 편집 도구나 타임라인 마커를 사용하여 한꺼번에 트리밍하면 됩니다. 여러 클립에 일관된 트리밍을 적용해야 할 때 유용합니다.
결론
특히 긴 영상 작업을 할 때, Adobe Premiere에서 동영상을 자르는 방법을 익혀 두는 것은 이제 디지털 생활의 필수 요소가 되었습니다. 이미 이 소프트웨어가 컴퓨터에 설치되어 있다면 적극 활용할 수 있고, 없다면 동영상 자르기 작업을 위해 Aiseesoft Video Converter Ultimate을 사용해 볼 수 있습니다.
-
 11가지 놀라운 비디오 트리머 [무료 및 유료]
 다음은 비디오를 다듬는 데 사용할 수 있는 비디오 편집 소프트웨어 목록입니다. 우리는 진정으로 이러한 프로그램을 검토하고 귀하가 찾는 모든 세부 정보를 제공할 것입니다.
-
 Android에서 비디오를 자르는 방법에 대한 3가지 훌륭한 방법
 Android 기기를 사용하여 비디오를 자르고 싶습니까? 그렇다면 이 포스트는 당신을 위한 것입니다. Android에서 동영상을 줄이는 방법에 대한 유용한 방법에 대해 논의합니다.
-
 TikTok으로 비디오를 다듬는 방법 [자세한 지침]
 TikTok으로 비디오를 줄이는 방법을 알고 싶습니까? 그러면 쉬운 방법을 알려드리겠습니다. 또한 오프라인 응용 프로그램/프로그램을 사용하여 다른 방법을 배웁니다.