

Hoe u FLV-videobestanden naar YouTube kunt converteren en uploaden
“Ik heb zojuist een videobestand met de extensie .flv geüpload, maar ik kreeg de waarschuwing dat het bestandsformaat ongeldig is. Hoe kan ik FLV uploaden naar YouTube?” FLV is niet alleen een bestandsextensie, maar ook een videocontainer. Dat betekent dat een FLV‑videobestand verschillende video‑ en audiocodecs kan bevatten, en sommige daarvan worden niet door YouTube ondersteund. In dit artikel lees je alles wat je moet weten om FLV soepel naar YouTube te uploaden.

Deel 1: Welke video- en audiocodecs YouTube ondersteunt
Volgens Google geeft YouTube de voorkeur aan het uitzendformaat en aan dvd-compatibele MPEG-2-streams met de extensie .mpg. De codecs die door YouTube worden ondersteund, zijn onder meer:
- MPEG-2
- Audiocodec: MPEG Layer II of Dolby AC-3
- Audiobitsnelheid: 128 kbps of beter
- MPEG-4
- Video codec: H.264
- Audiocodec: AAC
- Audiobitsnelheid: 128 kbps of beter
Bovendien ondersteunt YouTube alleen WAV-container met MP3- of PCM-audio, MOV met AAC-audio en FLAC-audio. YouTube ondersteunt WMV, AVI, MOV, MP4 en FLV met de juiste codecs.
Als het op FLV aankomt, heeft YouTube toegang tot video's die zijn gecodeerd met Adobe-FLV1-videocodec, samen met MP3- en AAC-audio. Als je FLV-video ongecomprimeerde audio of ADPCM-audio bevat, accepteert YouTube deze niet.
Daarnaast zijn er meer regels voor het uploaden van FLV naar YouTube:
- Framesnelheid aanbevelen: 24 tot 60
- Resolutie aanbevelen: 1080p
- Minimale duur: 33 seconden
Deel 2: Gemakkelijkste manieren om FLV naar YouTube te converteren
Manier 1: FLV converteren naar YouTube op desktop
Als je een foutmelding krijgt bij het uploaden van FLV naar YouTube, is de eerste stap het zoeken van een FLV‑converter, zoals FVC Free FLV Converter. Daarmee kun je video‑ en audiocodecs en andere parameters aanpassen, zodat je FLV‑bestanden voldoen aan de regels van YouTube. Bovendien maakt het gebruik van hardwareversnelling en multithreading om de prestaties te verbeteren.
Belangrijkste kenmerken van de beste FLV-converter voor YouTube
- 1. Pas video- en audiocodecs van FLV eenvoudig aan.
- 2. Batch verwerken onbeperkte FLV-video's in één keer.
- 3. Bescherm de videokwaliteit automatisch tijdens het converteren.
Gratis downloadenVoor Windows 7 of hogerVeilige download
Gratis downloadenVoor macOS 10.7 of hogerVeilige download
Hoe FLV voor YouTube op desktop te converteren
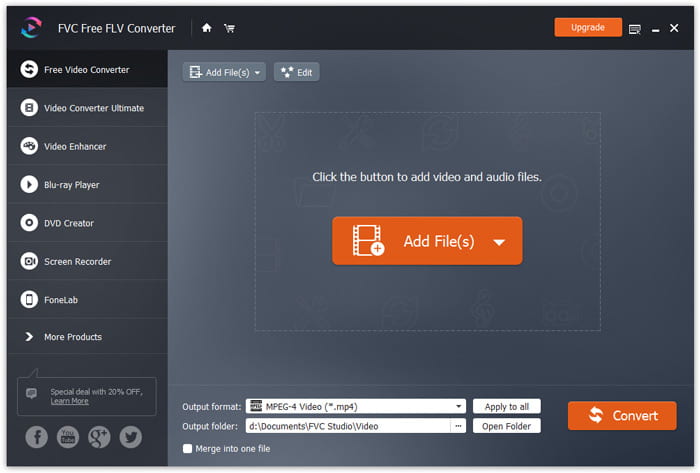
Stap 1: FLV‑bestanden toevoegen
Start de beste FLV-converter zodra u deze op uw computer hebt geïnstalleerd. Klik op het menu Bestand(en) toevoegen in de linkerbovenhoek en voeg de FLV-bestanden toe die je naar YouTube wilt uploaden.
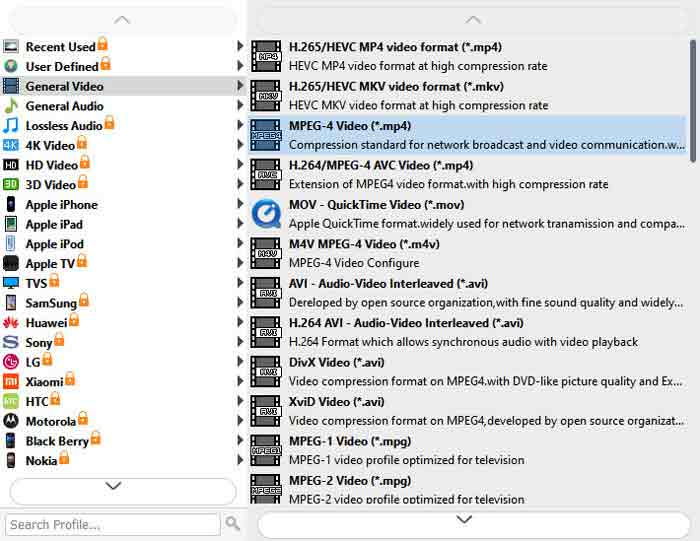
Stap 2: Codecs wijzigen
Klik op het vervolgkeuzemenu naast Uitvoerformaat onderaan om het profieldialoogvenster te openen. Typ FLV in het vak Profiel zoeken en druk op de Enter-toets op je toetsenbord. Selecteer vervolgens het FLV‑formaat met de juiste video‑ en audiocodecs.
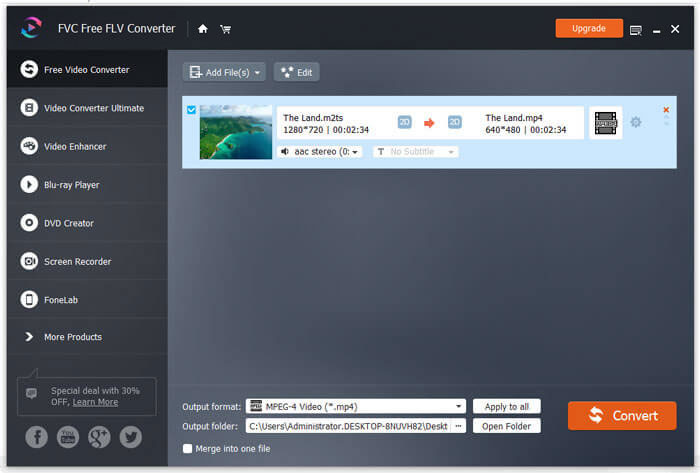
Als je FLV‑video te lang is, kun je die beter in clips opdelen en daarna naar YouTube uploaden. Je kunt op het menu Bewerken klikken om het videobewerkingsvenster te openen.
Stap 3: FLV converteren voor YouTube
Ga vervolgens naar de onderkant en klik op de knop Map openen. Kies een specifieke map om de uitvoervideo's op te slaan. Klik ten slotte op de knop Converteren om direct te beginnen met het converteren van FLV voor YouTube.
Manier 2: Converteer FLV online naar YouTube
Als je geen videoconvertersoftware op je harde schijf wilt installeren, is FVC Free Online Video Converter een goed alternatief. De dienst is gratis en kent geen beperkingen zoals een watermerk. Bovendien zijn er geen beperkingen op de bestandsgrootte. Volg hiervoor de onderstaande stappen:
Stap 1: Ga in een browser naar https://www.free-videoconverter.net/free-online-video-converter/ en klik op de knop Bestanden toevoegen om te converteren om de launcher op te halen.

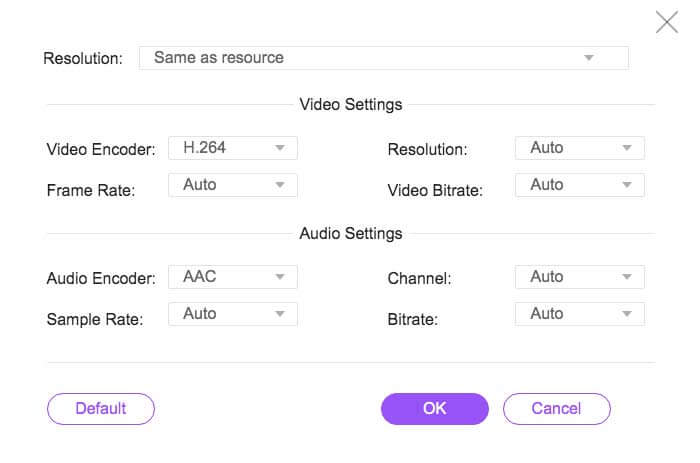
Stap 2: Klik op de knop Bestand toevoegen om meerdere FLV‑bestanden te uploaden. Klik vervolgens op het Tandwiel-pictogram om het profieldialoogvenster te openen. Hier kun je de Video‑encoder en Audio‑encoder aanpassen. Klik op OK om te bevestigen.
Stap 3: Kies onderaan een door YouTube ondersteund formaat en klik op de knop Converteren om te beginnen met het converteren van FLV voor YouTube. Wanneer dit is voltooid, download je de uitvoerbestanden.
Mis het niet:
Deel 3: FLV uploaden naar YouTube
Na het converteren kun je je FLV-bestanden nu op je computer naar YouTube uploaden. We delen de stappen hier, zodat je niet verdwaalt.
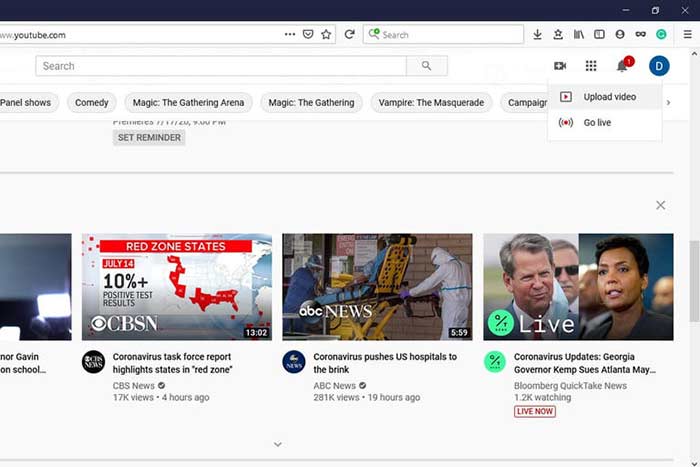
Stap 1: Ga naar de YouTube‑homepage en log in op je account.
Stap 2: Klik op het Camcorder-pictogram en selecteer Video uploaden om naar de uploadpagina te gaan.
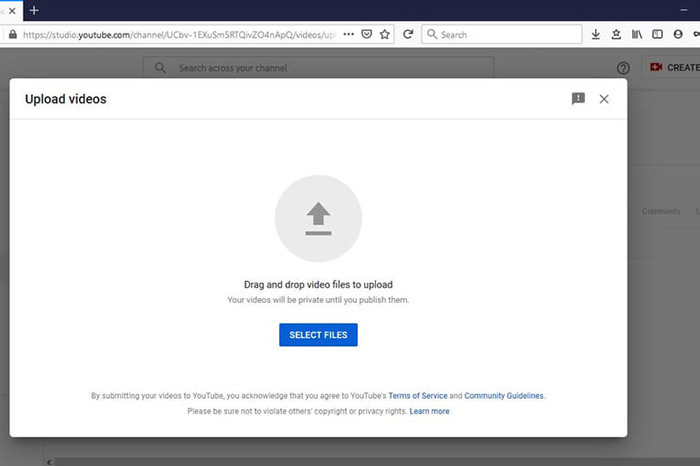
Stap 3: Klik op de grote knop Bestanden selecteren op de pagina en open vervolgens de geconverteerde FLV‑bestanden voor YouTube. Of sleep de FLV‑bestanden naar de pagina om ze te uploaden.
Stap 4: Bepaal vervolgens de privacy-instelling. Standaard staat deze op Openbaar, maar je kunt dit wijzigen in Privé, Gepland of Verborgen.
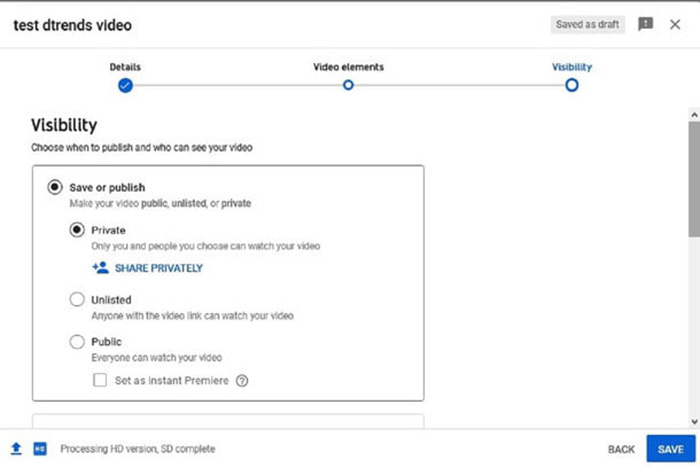
Stap 5: Klik op de knop Opslaan of Publiceren nadat je alles hebt ingesteld. Vervolgens ga je naar de pagina Dashboard. Hier kun je zien dat de FLV‑bestanden naar je YouTube‑account zijn geüpload.

Deel 4: Veelgestelde vragen over FLV naar YouTube
Kun je FLV uploaden naar YouTube?
Ja en nee. YouTube ondersteunt het FLV-videoformaat, maar als videocontainer kun je alleen FLV-bestanden uploaden met ondersteunde video- en audiocodecs; anders wordt het een mislukking.
Kan ik YouTube-video's downloaden in FLV?
Als de YouTube-video de downloadknop biedt, kun je erop klikken en de FLV als uitvoerformaat selecteren.
Welk videoformaat is het beste voor YouTube?
MP4 is het beste videoformaat voor YouTube. Google raadt aan om MP4 te gebruiken met H.256-videocodec en AAC-audiocodec. Dat komt omdat het een hoge kwaliteit produceert met een kleinere bestandsgrootte. Daarnaast worden MOV, WMV, AVI, FLV en 3GPP ook ondersteund op YouTube.
Gevolgtrekking
Deze gids heeft je verteld welke video-indelingen YouTube accepteert en hoe je FLV probleemloos naar YouTube kunt uploaden. FVC Free FLV Converter kan je helpen om FLV voor YouTube te converteren en je in staat te stellen video- en audiocodecs gemakkelijk aan te passen. Het vereist zelfs geen technische vaardigheden, dus beginners kunnen het snel onder de knie krijgen. Als je andere problemen tegenkomt bij het uploaden van video naar YouTube, laat dan een bericht achter onder dit bericht.
-
 Hoe u uw FLV-videobestanden naar MP4 kunt converteren zonder een cent te betalen
 Deze gids deelt vier gratis methoden om uw FLV-videobestanden naar MP4-indeling te converteren op Windows 10/8/7 / XP en Mac OS X, zodat u op elk apparaat van de video's kunt genieten.
-
 Hoe u uw FLV-video's kunt converteren naar MP3-audiobestanden op desktop en online
 Hoe converteer je een FLV naar een MP3-bestand? Het enige dat u hoeft te doen, is dit artikel aandachtig te lezen, uw favoriete methode te vinden en onze stapsgewijze handleiding te volgen om te krijgen wat u zoekt.
-
 3 gratis manieren om FLV naar WAV te converteren
 Hoe converteer ik een FLV-bestand? Kan VLC YouTube FLV naar WAV converteren? Dit bericht vertelt 3 gratis manieren om FLV naar WAV te converteren zonder kwaliteitsverlies.