


Como fazer capturas de tela com rolagem no Windows: 6 ferramentas
Snipping tool is a built-in tool designed for taking screenshots on Windows computer screens. With this tool, users can easily capture any content on their screens within seconds and with a few clicks. Currently, Snipping Tool is available only on Windows 11; however, in older Windows versions like Windows 10, there’s the same tool, but it is called Snip and Sketch. If you’re wondering how to use the Snipping Tool on your Windows computer, we’ve got you covered. This article will teach you the easiest way to capture a screen using this tool. Moreover, don’t miss the chance to discover other alternatives if you want a more advanced snipping tool. Scroll down to read more!

Parte 1. Como usar a Ferramenta de Recorte no Windows 10/11?
Capturar telas no Windows é fácil com a Ferramenta de Recorte, mas os passos podem variar um pouco entre o Windows 10 e o Windows 11. No Windows 10, você pode usar a Ferramenta de Recorte clássica ou o Recorte e Esboço. No Windows 11, ambas as ferramentas foram combinadas em uma versão atualizada com uma aparência mais limpa e novos recursos. Abaixo estão as duas maneiras de capturar uma tela usando a Ferramenta de Recorte do Windows:
Windows 11
Step 1. First, access the Snipping Tool by going to the Windows icon, also known as the Start. After clicking it, in the search bar above, type in Snipping Tool and look for it.

Step 2. Once it appears, access it and click on the Snipping Mode icon. You have 3 options you choose from: Rectangle, Freeform, Window, and Full Screen.
Step 3. Now, to start taking screenshots, click on Ctrl + Windows + S to easily access the snipping tool, and choose how you want to take your screenshot.

Step 4. If you want to take a part of your screen, you can choose the Rectangle from the options. If you want to screenshot the whole Window, choose Window. Meanwhile, if you want to snip the whole screen of your computer, choose Full Screen. Lastly, if you want to be creative, you can choose the Free Form to take a creative screenshot.
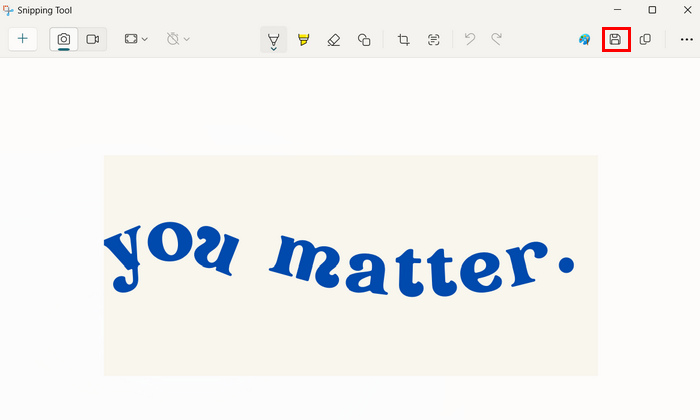
Step 5. Once you’ve taken a screenshot, you can save the file by clicking the Save button above.
Windows 10
Step 1. First, on your computer, you need to access Snip and Sketch by simply pressing Ctrl + Window + S.
Step 2. After that, you’ll notice the screen will gray out slightly. From that, select the area you want to take a screenshot of by clicking and holding the left mouse button down and then dragging the window around the area.
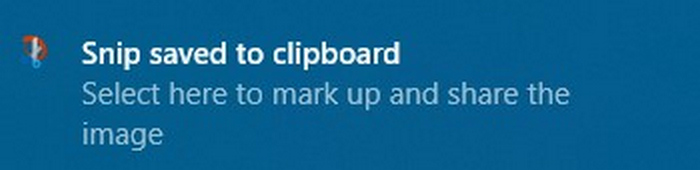
Step 3. Now, you’ll be notified that your screen has been screenshot, and it will appear at the lower right corner of the screen, saying that the screenshot has been saved to the clipboard.
Step 4. Right after that, paste the screenshot into the document by pressing the Ctrl + V keys at the same time or by right-clicking in the document and selecting Paste in the context menu.
Step 5. You can also save the screenshot as a file by clicking the notification at the lower right corner. A Snip & Sketch window will appear, and just click the Save icon to save your screenshot image.

Os métodos para tirar uma captura de tela com a Ferramenta de Captura do Windows são praticamente os mesmos, tanto no Windows 10 quanto no 11.
Parte 2. Onde a Ferramenta de Recorte salva os arquivos?
Por padrão, a Ferramenta de Recorte do Windows não salva automaticamente as capturas de tela como arquivos de imagem. Em vez disso, quando você faz um recorte, ele é copiado para a área de transferência, permitindo que você o cole diretamente em um documento, e-mail ou editor de imagens usando Ctrl + V.
However, if you want to save the screenshot as a file, you need to click the notification that appears after taking the snip. This opens the image in the Snipping Tool, where you can click the Save icon to choose a location, file name, and format such as PNG, JPG, or GIF files.
Parte 3. A Ferramenta de Recorte pode gravar a tela?
Sim, você pode gravar a tela usando a Ferramenta de Recorte do Windows no seu computador. No entanto, observe que ela só está disponível se você estiver usando o Windows 11 com as atualizações mais recentes. A nova versão da Ferramenta de Recorte inclui um recurso integrado de gravação de tela, que permite capturar vídeos da sua tela sem a necessidade de nenhum software adicional.
Para usar, abra a Ferramenta de Recorte e clique no ícone Gravar. Em seguida, selecione a parte da tela que deseja gravar e clique em Iniciar. Quando terminar, clique em Parar e a gravação estará disponível para visualização e salvamento.
Parte 4. A melhor alternativa à ferramenta de recorte
If you’re looking for an alternative tool for Windows Snipping Tool, you can try the FVC Screen Recorder. This screen recorder tool allows you to easily take screenshots on your computer. Just like the Snipping Tool, you can capture any part of your screen, whether it’s the full screen, a specific window, or a custom area. Unlike some free tools, it doesn’t add watermarks to your screenshots or recordings, which means your images and videos look clean and professional.
Um dos seus recursos mais notáveis são as ferramentas de edição em tempo real. Você pode adicionar texto, desenhar formas ou destacar partes da sua captura de tela enquanto a faz. Além disso, o programa oferece suporte à gravação de tela de alta qualidade com áudio do sistema ou do microfone. Por fim, ele suporta diversos formatos de saída e de imagem.
Para usar isso, siga as etapas abaixo:
Step 1. First, download and install the FVC Screen recorder on your Windows.
Free DownloadFor Windows 7 or laterSecure Download
Free DownloadFor MacOS 10.7 or laterSecure Download
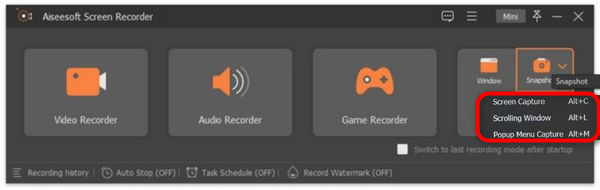
Step 2. Now, click on the Snapshot icon in the right corner after you’ve launched the tool. After clicking the Snapshot icon, you have three options on how you will take a screenshot. You can choose either Screen Capture, Scrolling Window, or Pop-up Menu Capture.
Step 3. Now, drag the cursor to the area of the screen on your Windows device to select the part that you want to screenshot.
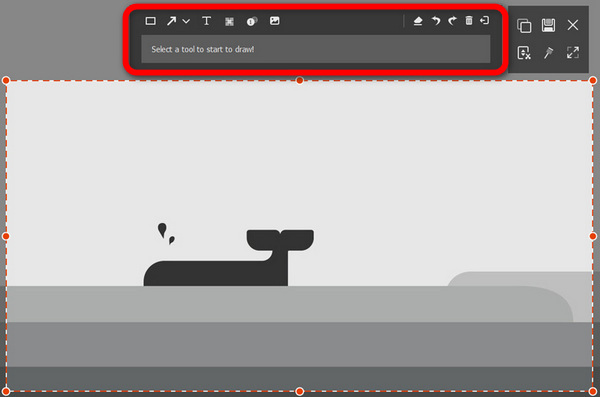
Step 4. After that, if you want to edit your image, access the menu above. Customize your screenshot image depending on your needs. Finally, click the Save button.
O FVC Screen Recorder é realmente uma das melhores alternativas à Ferramenta de Recorte do Windows. É muito fácil de usar, a interface é intuitiva e a navegação é simples. Possui outros recursos avançados que a Ferramenta de Recorte não tem.
Parte 5. Perguntas frequentes sobre a Ferramenta de Recorte no Windows
Posso adicionar anotações às capturas de tela diretamente na Ferramenta de Recorte?
Sim. Depois de capturar uma imagem, você pode usar o recurso integrado da Ferramenta de Recorte do Windows para destacar, desenhar ou escrever diretamente na imagem antes de salvá-la ou copiá-la. Isso é especialmente útil para adicionar anotações rápidas ou ênfase visual.
Posso alterar o formato de arquivo padrão ao salvar com a Ferramenta de Recorte?
No, the Windows Snipping Tool doesn’t allow you to set a default file format. You have to manually choose the format, either PNG, JPG, JPEG, or GIF, every time you save your photo. By default, it suggests PNG.
É possível capturar uma janela com rolagem usando a Ferramenta de Recorte?
Não, a Ferramenta de Recorte do Windows não suporta a captura de janelas com rolagem. Se você precisar capturar uma página da web inteira ou um documento longo, precisará usar uma ferramenta de terceiros, como o FVC Screen Recorder, para capturas de tela com rolagem.
Now that you know how to use Snipping Tool on Windows 10 and 11, you can start taking screenshots on your computer’s screen. However, this tool doesn’t offer more advanced features that you might need when taking a screenshot. In case you need one, you can use the FVC Screen Recorder to enjoy some advanced screenshot features to satisfy and cater to your needs.
-
 Como obter qualidade 4K no OBS: descrição mais detalhada
 Se você joga um jogo de alta resolução e quer gravar suas ações com a maior nitidez possível, leia este guia. Ensinaremos como obter qualidade 4K no OBS.
-
 Análise do gravador de tela Tella Online: recursos, prós e contras
 Análise do Tella Online Screen Recorder com principais recursos, prós e contras. Descubra se esta ferramenta para navegador é ideal para suas necessidades de gravação e edição.
-
 Análise do Loom: Vale a pena experimentar o gravador de tela?
 Descubra os principais recursos, preços, prós e contras do Loom nesta análise detalhada para ver se ele é a opção certa para suas necessidades de gravação e compartilhamento de vídeo.