


 Video Converter Ultimate
 Gravador de ecrã
 Reparo de vídeo
 Secure Download
How to Take a Screenshot in Sims 4 Without Losing Image Quality
One of the most fun parts about gameplaying with The Sims 4 is the creation of moments that you'll want to look back at someday. Maybe because of how your dream home turned out, the most hilarious glitch you've come across, or your Sims' little ones who are all growing up. I have experienced the fulfillment of capturing these moments and sharing them with friends, or just looking at them when memories fade over the years. This is what you need to know about how to take a screenshot in Sims 4. The game has already incorporated its own screenshot utilities, and if you are looking for something a little more advanced, then you should know that such options are also available. This article will focus on the simplest ways to get your favorite Sims saved so you will see the moments in the highest quality possible.

Method 1: Use the Built-in 'C' Key Shortcut
One time, when I just wanted to show the players what was happening in the game, I used the 'C' key as the fastest way. It is the built-in screenshot shortcut in The Sims 4, which takes a high-quality image automatically, so no need for me to turn on another application. If you're trying to screenshot in Sims 4, this is actually a very easy first method you can use since it is quick, no hassle, and it works instantly from the game menu.
Best For
- Capturing moments of regular gameplay.
- Capturing excellent screenshots without the need for additional software.
- Players who desire the quickest built-in screenshot feature.
- Sims, builds, and memorable in-game moments can be swiftly saved.
Step 1. Open the Sims game from the desktop to play it. Choose a household or location where you will take a capture.
Step 2. Move the camera in different positions until a composition you are happy with frames the subject. Camera is the default option. If you prefer a cleaner, more cinematic look, just press the Tab key and switch to that mode.
Step 3. Hide or manipulate the game interface to get the best possible image. Hit the C key on the keyboard.
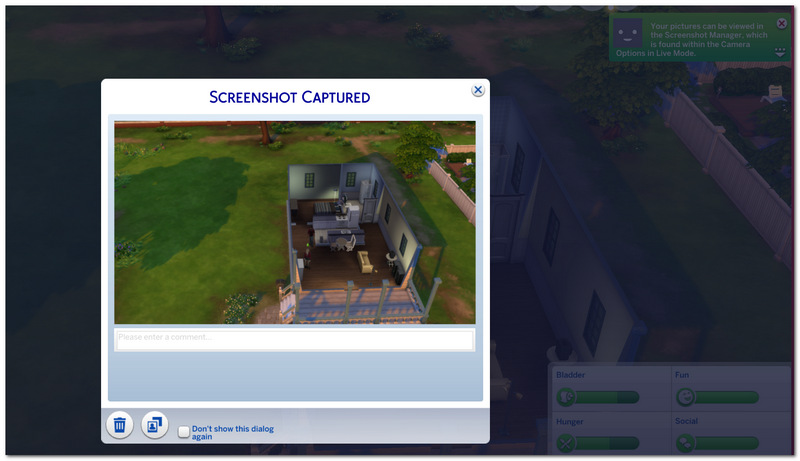
Step 4. A screenshot notification appears with a message indicating that saving has taken place. If you want to capture more moments, you can use your screenshot key (C) multiple times to do so.
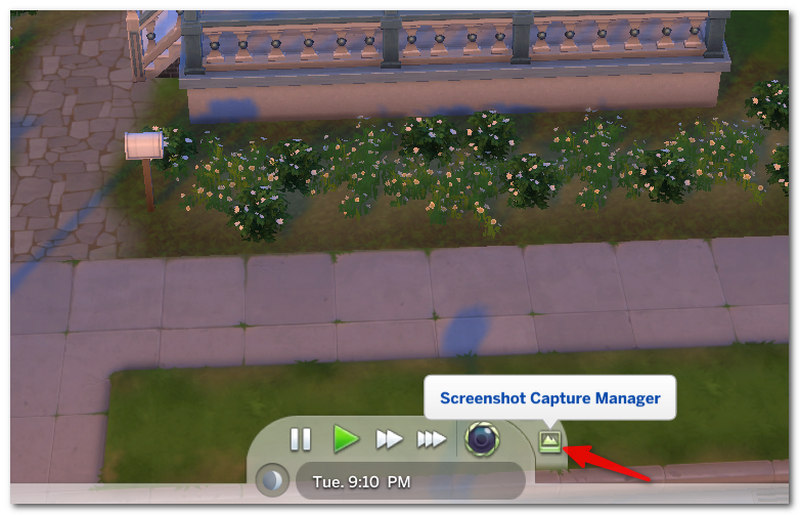
Step 5. Later, go to your Screenshot Capture Manager and do with those images anything you want, like showing them to friends or saving them.
Method 2: Click the In-Game Camera UI Button
If you decide to stick with on-screen buttons instead of keyboard combinations, the game's Camera button serves perfectly as well. Using this button allows one to take screenshots while still in the game without having a keyboard and shortcuts on their mind. For players wondering how to take a screenshot in The Sims 4, this option might be the best one for starters, as the entire process can be completed in just a couple of taps.
Best For
- Some players opt to use the mouse rather than memorize keyboard shortcuts, which can make a big difference in speed and ease of use.
- These tips are great for novice players of The Sims 4.
- Sometimes it is necessary to quickly capture the gameplay while still in the game, but there are ways to do it more seamlessly.
- If you want to take some snapshots of the screen while you are playing through the regular way of using the game, then you need to be able to do that.
Step 1. Play The Sims 4 game and get to your house or neighborhood where you want a photo taken. Find a nice spot for the photo and point the camera from there.
Step 2. The Camera tool is a small icon with your face on it. To take a snapshot, just hit the Take Screenshot button.
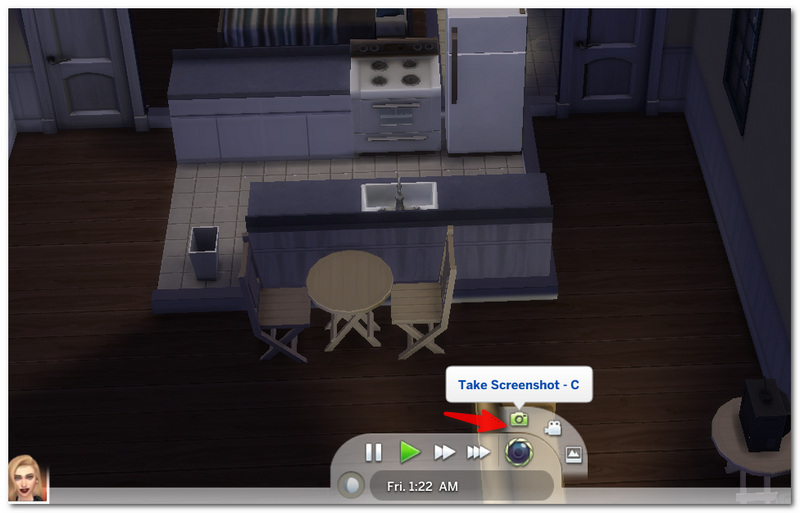
Step 3. Let the game do the checking that the screen capture has been done. Don't stop, carry on with the game until you reach another image-saving checkpoint.
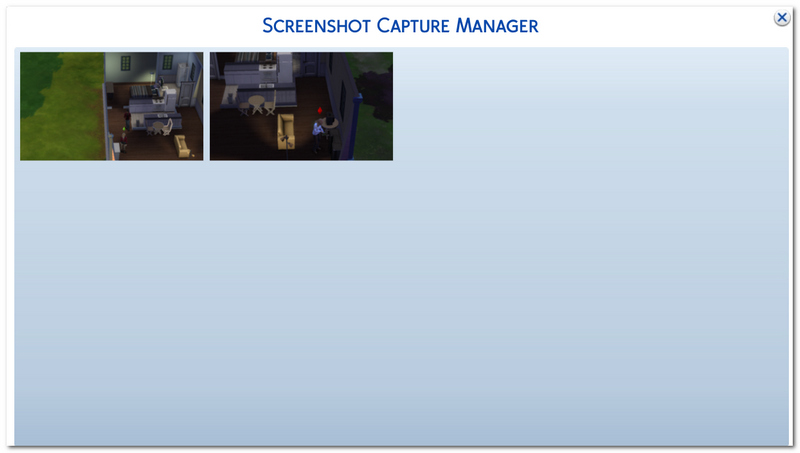
Step 4. Once you are done with a game session, go to the game's default Screenshot Capture Manager to find all your photos taken in a game session.
Method 3: Use FVC Screen Recorder to Capture Menus/UI (Windows / Mac)
Sometimes my goal is to capture more elements, not just the gameplay, but to take screenshots of the game's menu settings, the Build/Buy interface, even the Create-a-Sim screen (or CAS!). In such circumstances, FVC Screen Recorder is much superior to standard tools for taking screenshots because it enables me to record not only my entire screen, but also selective areas. When asking how to take Sims 4 screenshots, the use of this software helps you take screenshots of any portion of the screen with exactness, and it also offers you several useful editing features right before saving the image.
Best For
- Snagging different screens of Build Mode, Buy Mode, Create-a-Sim, and the game menus.
- Photographing scenes to make annotated guides or tutorials.
- You may also use it to save screenshots of a custom size and not the whole screen of the entire game.
- Game players who look for more control over the screenshot’s quality and further editing of the picture.
- PC and MAC users seeking a universal screenshot program.
Main Features
- Take a snapshot of the whole screen, a particular application window, or taking a scrolling screenshot.
- Create game screenshots, menu shots, Build/Buy Mode, and Create-a-Sim screenshots.
- Output of images can be done in PNG, JPG, and BMP formats.
- Edit hotkeys for screenshots to suit a faster mode of capturing.
- Producing high-resolution snapshots while keeping the original image unaltered.
Free DownloadFor Windows 7 or laterSecure Download
Free DownloadFor MacOS 10.7 or laterSecure Download
Steps to Capture Sims 4 Screenshots with FVC Screen Recorder
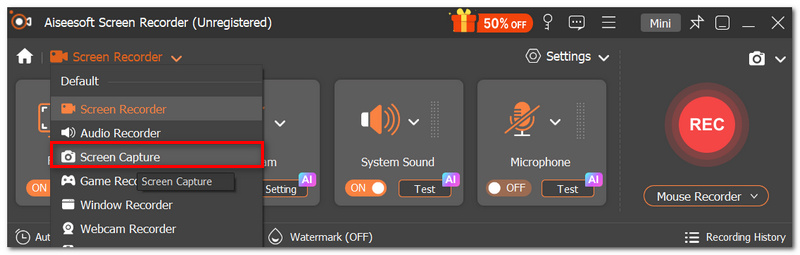
Step 1. Install our software and open FVC Screen Recorder first, then click on the Screen Capture tab within this application to launch it.
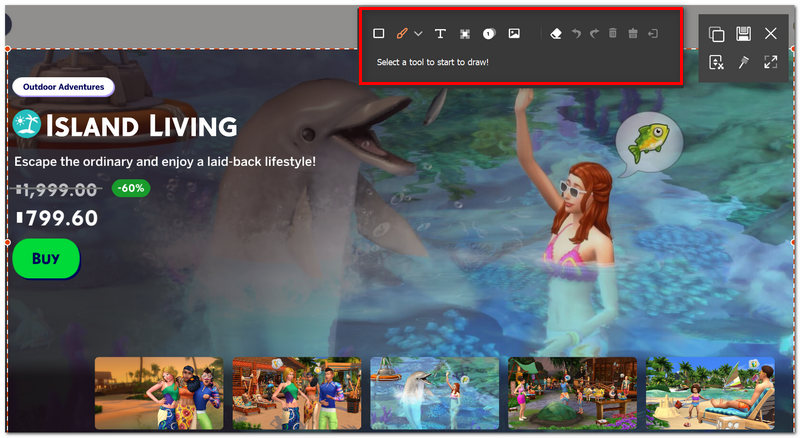
Step 2. Open up The Sims 4, then decide on the game scene, menu, or interface that you would like to get your image captured of. Use your mouse to click the left button and hold while moving to select the exact portion of the screen that you are interested in taking a still image of.
Step 3. Take care in releasing the mouse button, as FVC Screen Recorder will take a snapshot on your desktop at the moment it is done. If you wish to annotate, draw an arrow, write some text, or make a highlight, simply use the on-screen editing tool that comes preinstalled with the software.
Step 4. Locate a file type from the save dialog box that would best represent your preferences, and determine a suitable location for your image file in the folder.

Step 5. You can open your saved Sims 4 screenshot at any time you like to edit, view, or share it online with your friends.
Where are Sims 4 Screenshots Saved?
Are you curious about where to find Sims 4 screenshots? I'll be straight, when you take screenshots using the C key or by opening the in-game Camera tool, the game will take the pictures and automatically save them in the default 'Screenshots Manager' game folder. Assuming you haven't changed where your Documents folder is or you are not using some kind of cloud synchronizing service like OneDrive or iCloud, the pictures will be in one of these folders:
Windows
C:UsersDocumentsElectronic ArtsThe Sims 4Screenshots
If your Documents folder is synced with OneDrive, check this location instead:
C:UsersOneDriveDocumentsElectronic ArtsThe Sims 4Screenshots
Mac
/Users//Documents/Electronic Arts/The Sims 4/Screenshots
Can't Find Your Screenshots?
If your Screenshots folder is empty, go through these possible solutions:
- Confirm that you took the screenshots through the C key or the Camera button in the game and not via your operating system’s screenshot shortcut.
- Confirm that the Documents folder is not being synced with OneDrive (Windows) or iCloud Drive (Mac).
- Do a search on your machine for the Sims 4 folder if you have moved your Documents library to a different location.
- You can check if a screenshot has been successfully taken by looking for the confirmation in the game immediately after you have pressed the screenshot button.
By following these recommendations, you should be able to easily find your saved Sims 4 screenshots and still take the occasional screenshot of your in-game moments.
FAQs about Taking Screenshots in Sims 4
Is it possible to sort Sims 4 screenshots into different folders?
Sure! After they've been stored, you can either move or copy the files into new folders without impacting the game.
Is there a way to take screenshots with a controller?
Yes, you can still press the PC/ keyboard shortcut to take screenshots or use any other screenshot utility, regardless of a controller being the one being played on.
Are the game notifications and moodlets captured in screenshots?
Yes, but only enough that they appear on your display when the picture is taken. Alternatively, hiding the interface, if you don't want any interface elements to be there, will yield a much better-looking picture.
Conclusão
If getting a screenshot in The Sims 4 was a problem before, you are now all set. Whether you want to use the game's default screenshot key or software, there are many ways of selecting and using tools to suit your taste and preferences that will definitely help you get better screenshots of your gameplay moments.
-
 Descubra sites de download de jogos grátis para PC: 6 opções para você
 Se você está pronto para curtir jogos de computador emocionantes, mas não sabe onde baixar recursos, confira este guia. Aqui estão 6 sites gratuitos para baixar jogos de PC.
-
 Os 6 melhores gravadores de tela para Minecraft que te ajudarão a registrar seus melhores momentos no jogo.
 Precisa do melhor gravador de tela para Minecraft? Não perca este guia. Aqui estão 6 opções, cada uma com seus pontos fortes. Cada uma vem com uma introdução, prós e contras.
-
 Como obter qualidade 4K no OBS: descrição mais detalhada
 Se você joga um jogo de alta resolução e quer gravar suas ações com a maior nitidez possível, leia este guia. Ensinaremos como obter qualidade 4K no OBS.
