Iniciar
Baixe e instale
Baixe o software Video Converter Ultimate e instale-o em seu computador com instruções passo a passo. Abra o programa e prepare-se para o seguinte processo.
Registro
Uma conta oficial do Video Converter Ultimate garante acesso irrestrito a todas as funções. Recomendamos fortemente que você se registre e desbloqueie diversas opções durante o processo.
For users who purchased a registration code from a non-official website:
For users who purchased this tool from guranteed third-party source, you may find that you get a registration code, but are hard to find a box to enter it in the software. Then you need to follow the steps below:
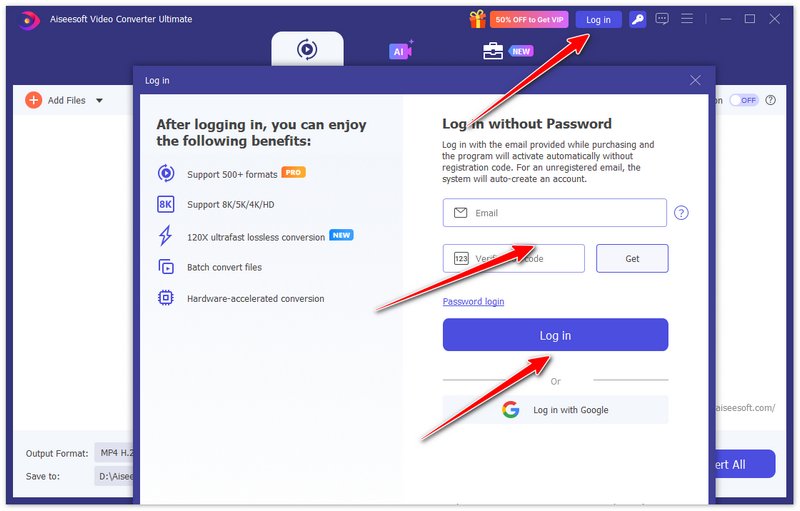
Step 1. After purchasing Video Converter Ultimate, you will get a registration code. Now, you can click the Log in button at the top to enter the Log in screen.
Step 2. Enter your email address and the verification code sent to your email to log in.
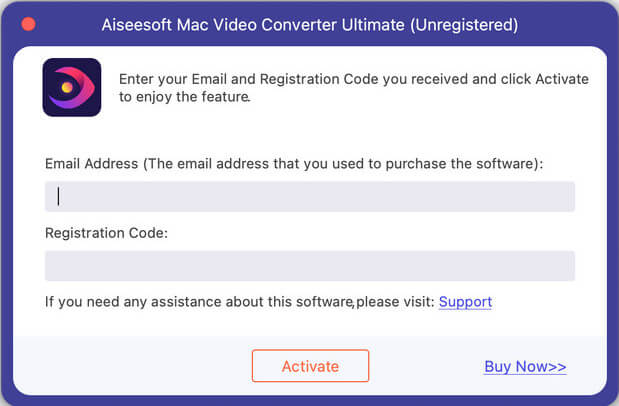
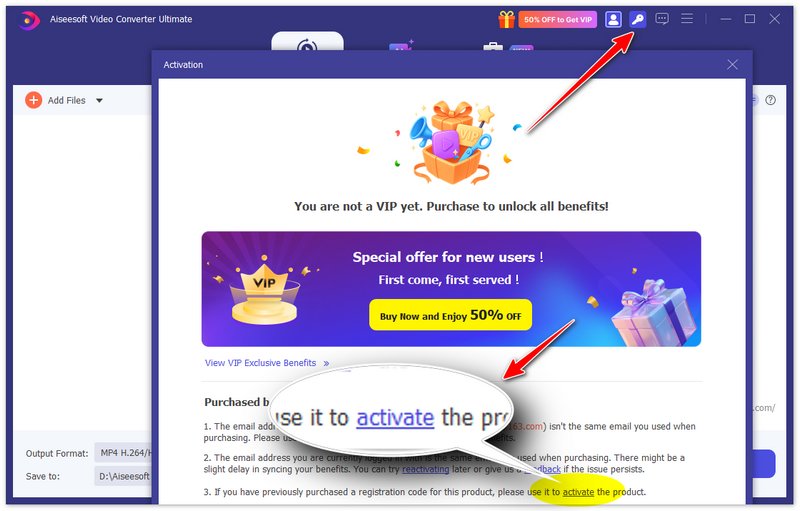
Step 3. After logging in successfully, the login button becomes a profile icon. Now, you can click the Key button next to the profile icon and click the blue anchor text “activate” to enter the registration code activation screen.
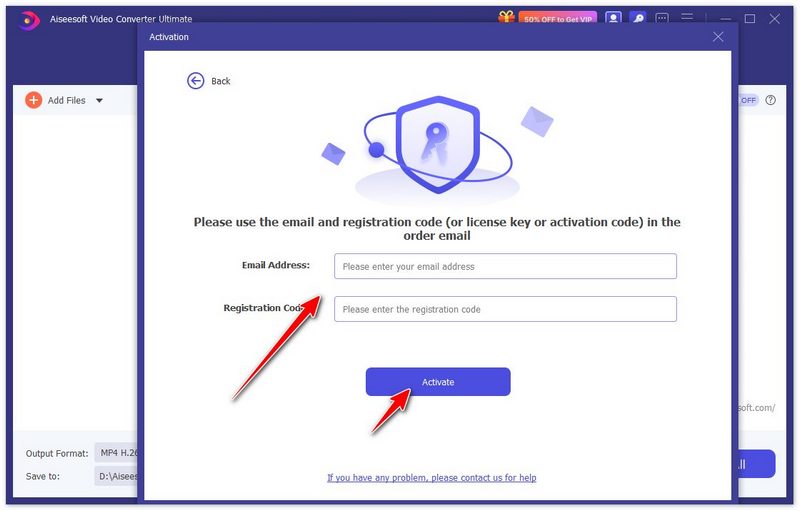
Step 4. Enter your email address and registration code sent to you when you purchased. Click Activate to make your VIP benefits effective.
For users who purchased from the program or the official website:
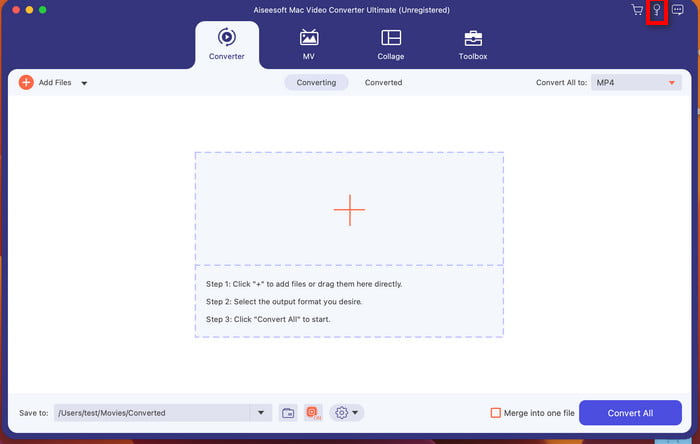
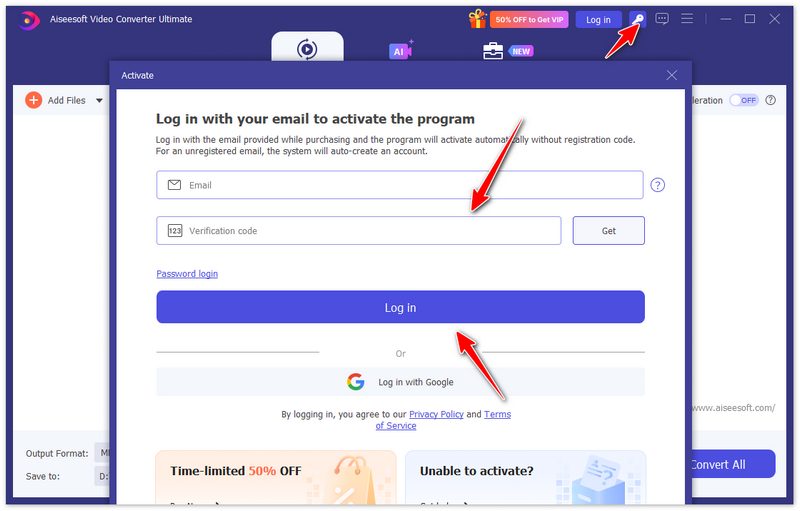
Step 1. After purchasing Video Converter Ultimate, the email you used for purchase will become your account certificate, so you can use it directly to activate your VIP membership. Just click the Key button at the top to open the Activate screen.
Step 2. Enter your email address and click Get to receive a verification code. After entering them, you can click Log in to activate your VIP benefits directly. Only note that the email must be your email you used for purchase, or else the benefits won’t be synced to your false email.
Atualizar
O Video Converter Ultimate se desenvolve com atualizações rápidas em uma plataforma mais confiável e poderosa. Para obter acesso a atualizações oportunas, você pode praticar estes canais:
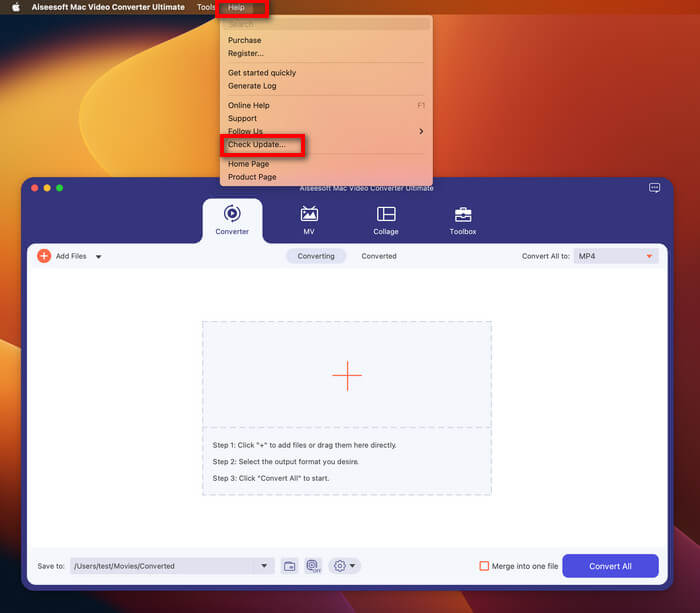
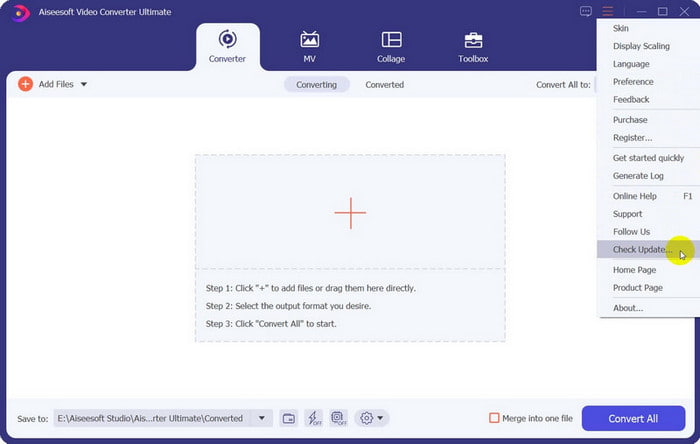
Channel 1: Click the Menu icon and enter Check Update.If there is a latest version, reach and renew your program instantly.
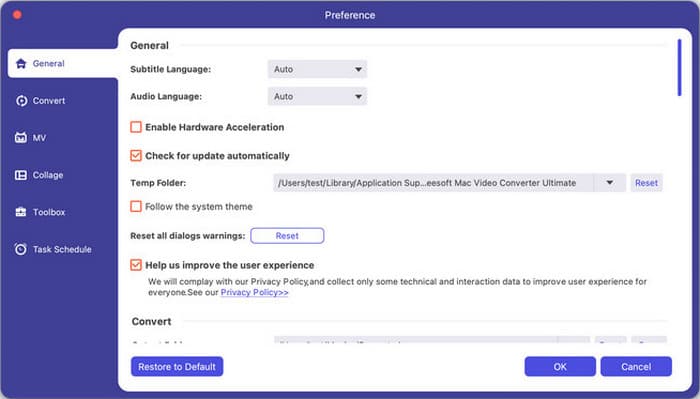
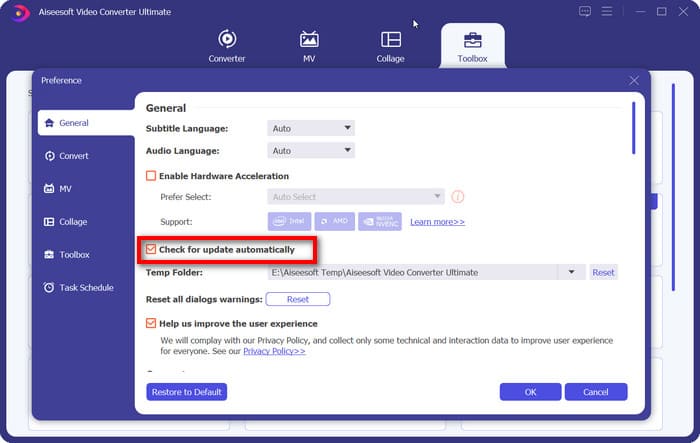
Channel 2: Go to Preference under the menu and you can see Check for update automatically. Tick the box and go on.
Channel 3: Link our product page and download the latest version.
Preferências
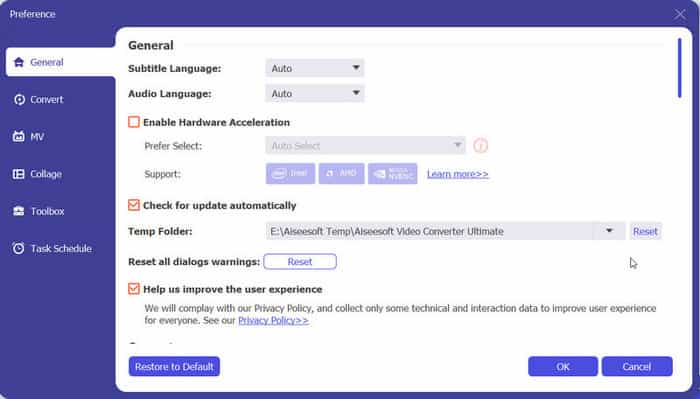
Launch Preference under the menu icon and head to the targeted section on the left side that goes with your requirements: General, Convert, MV, Collage, Toolbox and Task Schedule.
Em cada parte individual, você pode alternar entre as opções de configurações detalhadas e redefini-las de acordo com seu hábito de uso.
Converter vídeo e áudio
O Video Converter Ultimate conecta todos os usuários a diferentes formatos de vídeo e áudio e ajuda a obter o efeito ideal por meio de etapas simples. Siga as etapas abaixo para alcançar as reversões desejadas.
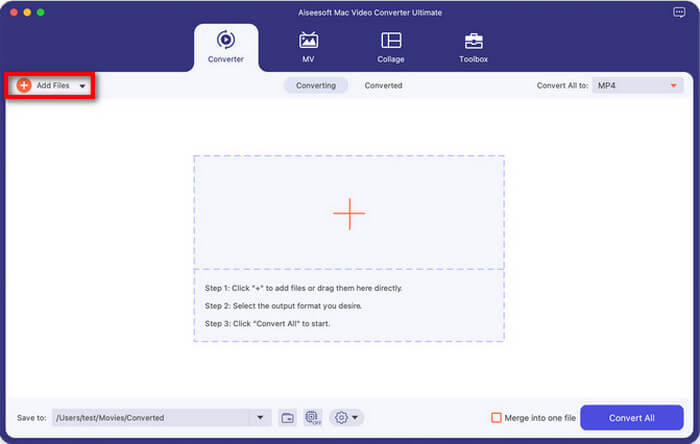
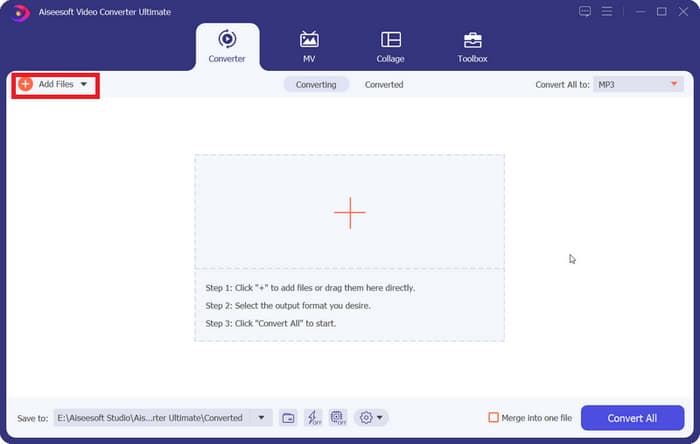
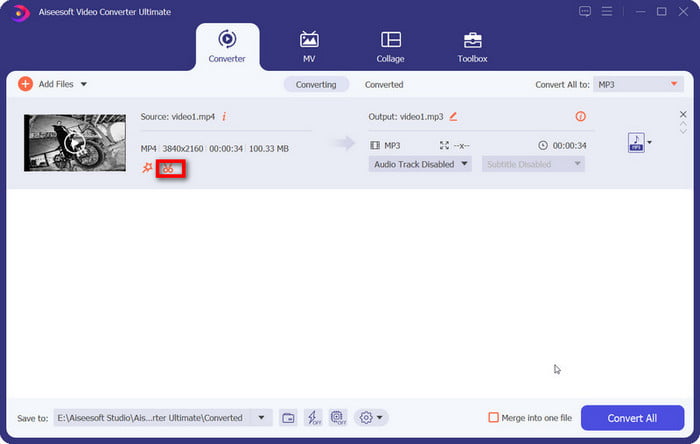
Step 1. Add video/audio file(s)
To add the file(s) you are going to convert, click Add Files button to select the subject or move it directly to the central area in the main interface.
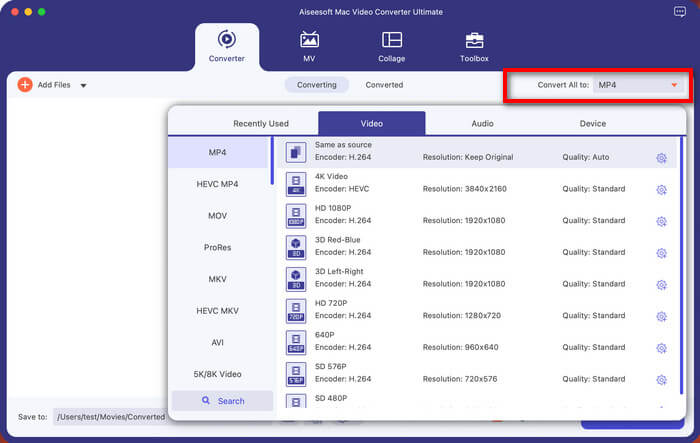
Step 2. Select the output format
With your file loaded, click the drop-down button next to Output Format to select your preferred format.
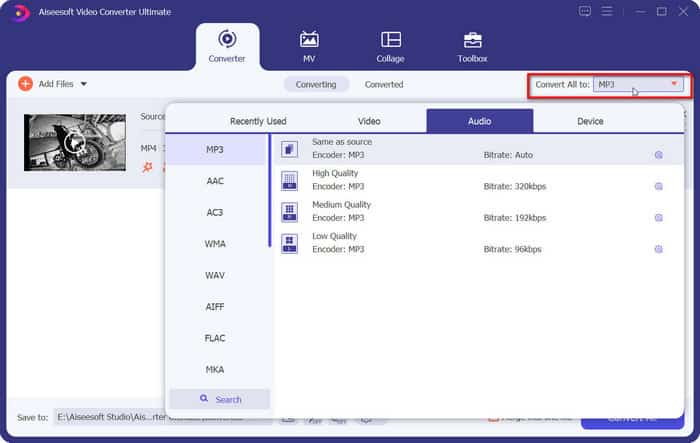
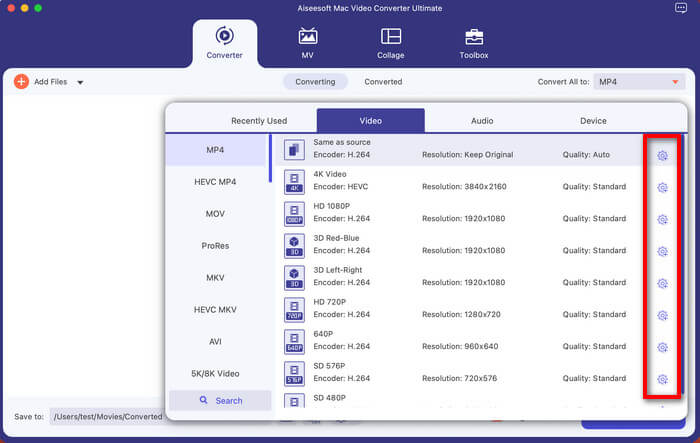
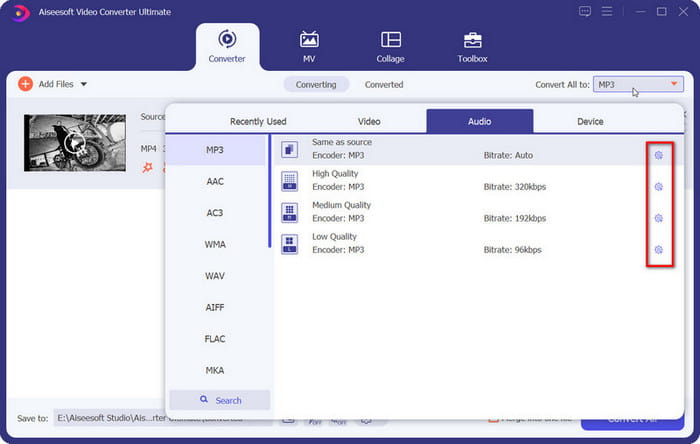
Additionally, more individual needs could be met for profile setting when you hover your mouse over the Custom Profile icon. Under this column, you can customize parameters of video and audio based on the format.
Step 3. Convert video/audio files
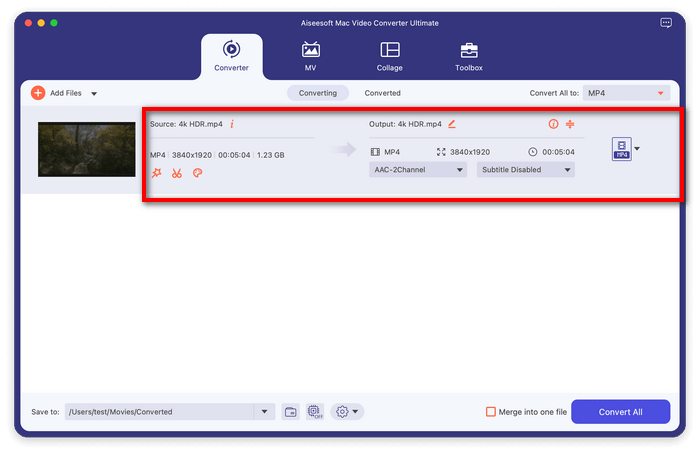
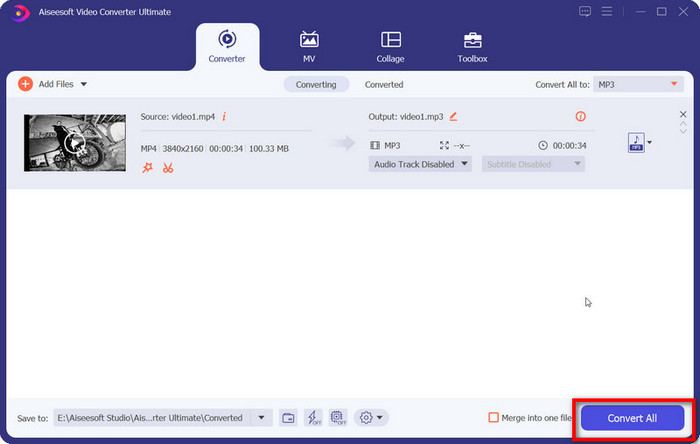
Antes de converter os arquivos de vídeo/áudio, você pode passar pelas informações básicas na interface, mostradas como formato, tamanho, duração, tudo junto. Em seguida, selecione as opções disponíveis para uso.
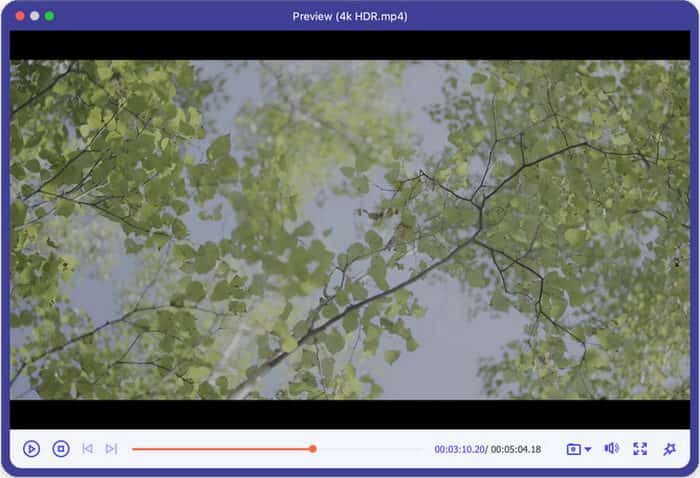
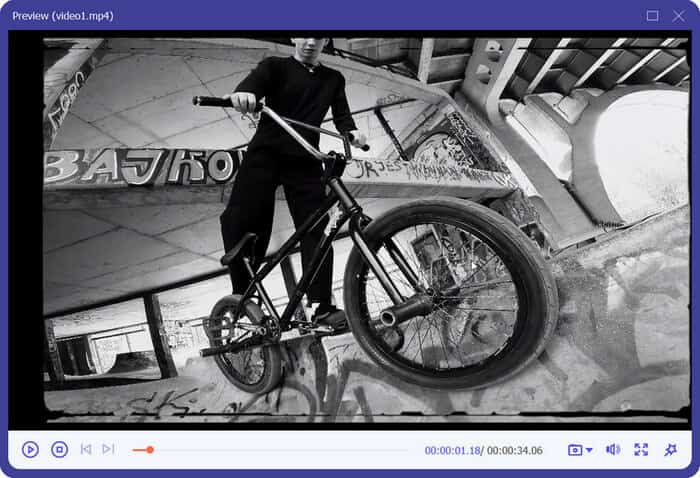
Para ver a versão ajustada, você pode visualizar o arquivo clicando no vídeo e reproduzi-lo.
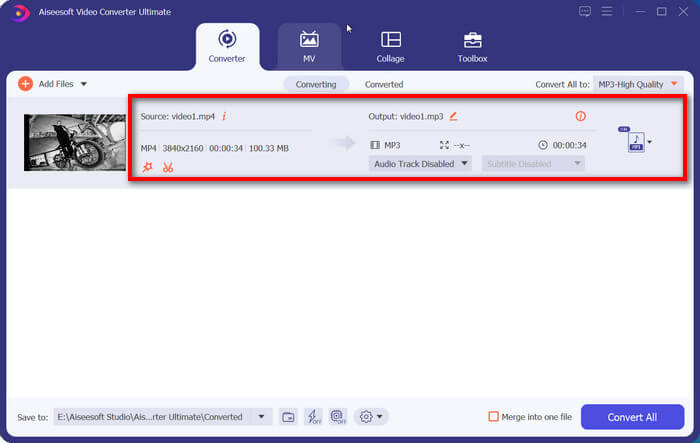
Na tela expandida, você recebe instantâneos e outras opções para sua conveniência.
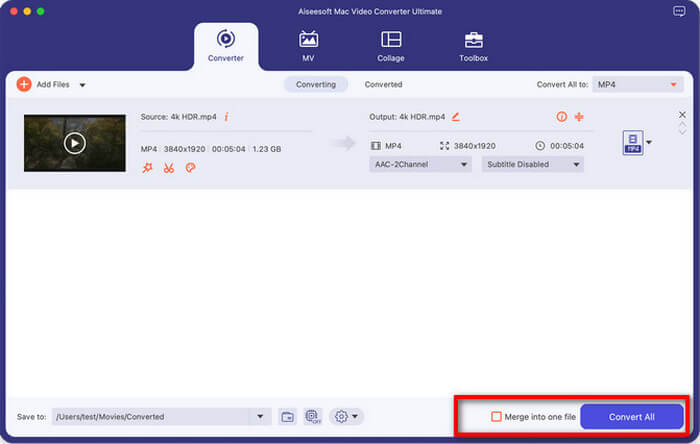
Followed by it, select the destination on the bottom bar. If you are in need of an integrated file for the final result, tick Merge into one file box and hit the Convert All button in the lower right corner to save all the settings.
Aprimore vídeos com IA
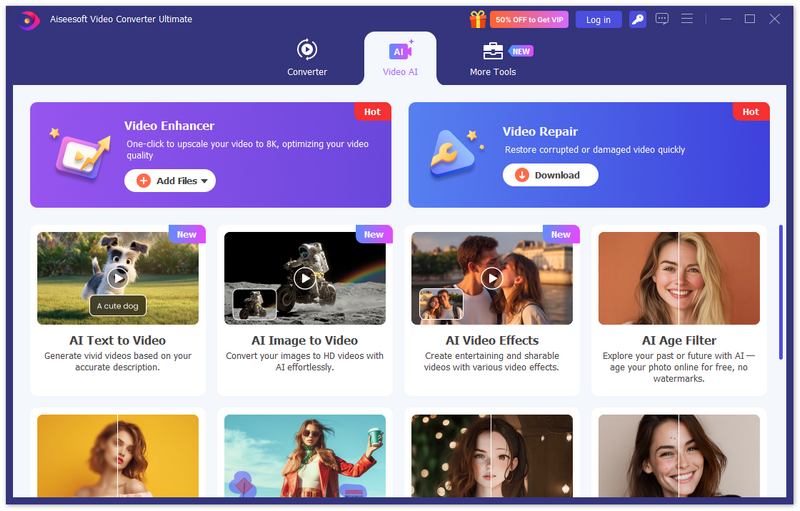
O Video Converter Ultimate agora também oferece suporte ao aprimoramento de vídeos com mais 10 modelos de IA, incluindo o Modelo de Aprimoramento Geral, Modelo de Rosto, Modelo de Anime, Modelo de Reparo da Qualidade de Vídeo, Modelo de Restauração de Detalhes, Modelo de Redução de Ruído de Vídeo, Modelo de Interpolação de Quadros, Modelo de Colorização, Modelo de SDR para HDR, Modelo de Aprimoramento de Cores e Modelo de Aprimoramento em Baixa Luminosidade. Agora, vamos ver como aprimorar seus vídeos para o próximo nível com esses modelos de IA.
Step 1. Click Add Files in the Enhancer tab, or Add Files in the Video Enhancer section on the home screen, to select a video file and upload it.
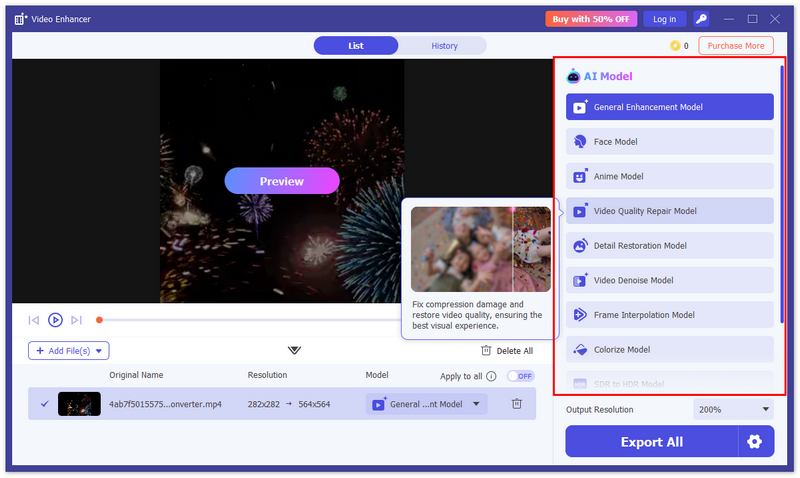
Step 2. Select an AI model based on your needs. If you want to improve the overall video quality, try General Enhancement Model; If you want to enhance the person's profile in the video, the Face Model is your top choice; If you prefer to enhance your anime videos, try Anime Model; If you want to remove video noise, choose Video Denoise Model; If you want to make your B&W video become colorful and vivid again, there is a Colorize Model for you! Overall, we offer different models to satisfy your needs to the maximum level.
Step 3. After choosing a proper AI model, you can click Preview to check the rendering effect before exporting. Here we offer 2 preview models for you to see their effect better.
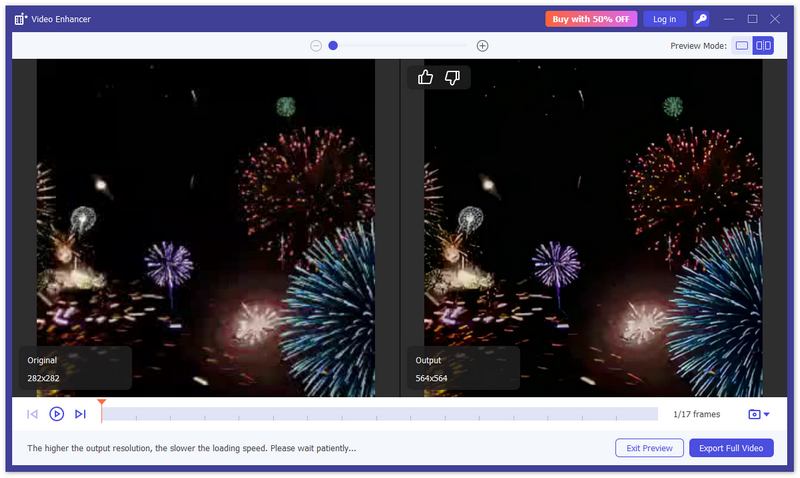
Step 4. If you are satisfied with the result, you can click Export Full Video in the preview window directly. Or if you want more customizing options, you can go back to the AI Model selection screen and choose output resolution, output video format, video encoder, bitrate, etc.
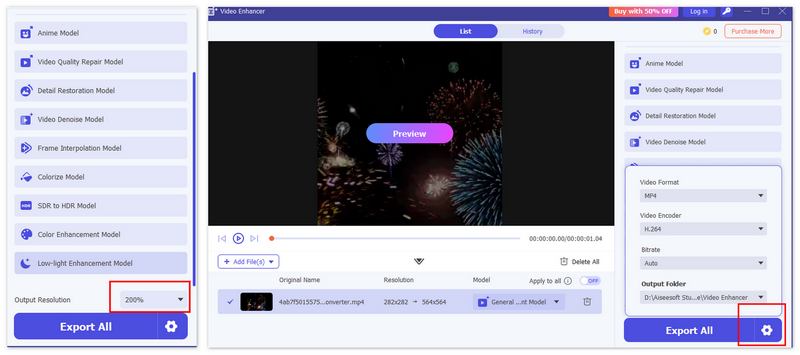
Step 5. Now, you can click Export All to start enhancing your videos. Note that this process might take some time based on your video length, size, and more. Please wait patiently.
Editar vídeo e áudio
O Video Converter Ultimate é um tesouro armazenado com várias opções de edição para enriquecer sua experiência ao processar seu vídeo e áudio.
Cortar e Dividir Vídeo
Para separar um vídeo longo em vários clipes, você pode seguir o procedimento a seguir.
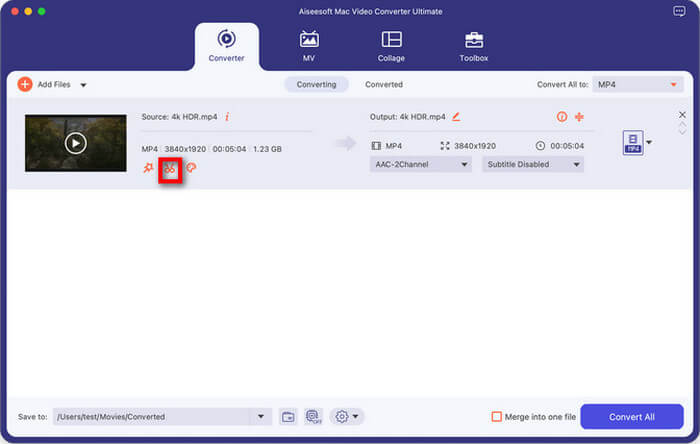
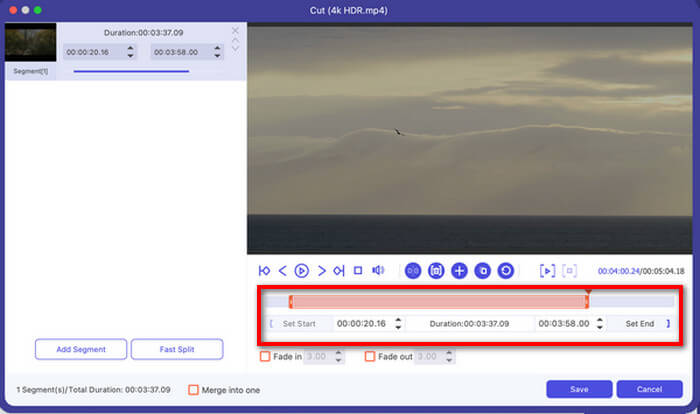
Step 1:Import a video file and click Cut icon to enter the cutting window.
Etapa 2: ao selecionar o momento certo para o seu clipe, você pode arrastar a barra de tempo para a direita
below the video or reset the time through the Set Start and Set End button.
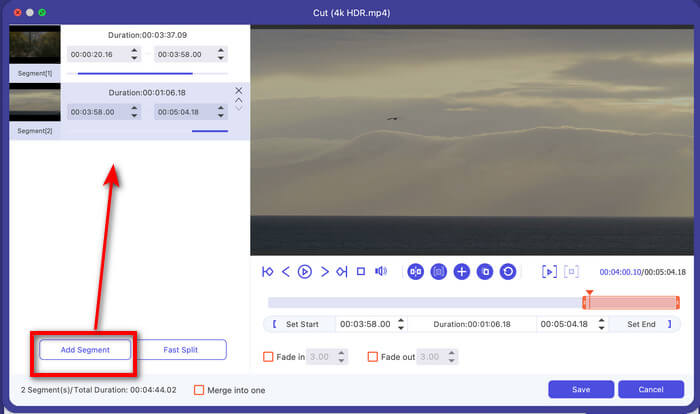
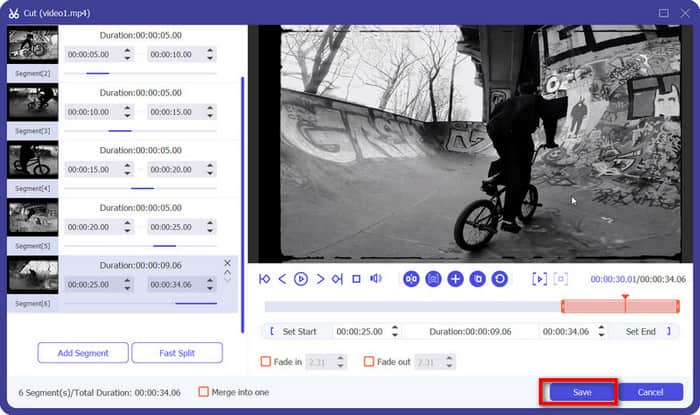
Step 3:If you want another video clip, hit the Add Segment button to add the current one to the list.
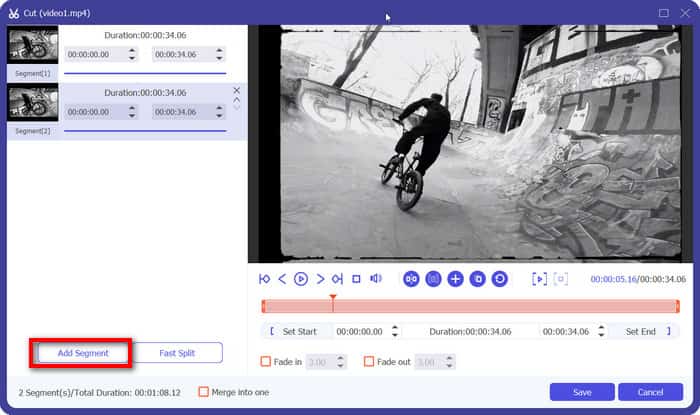
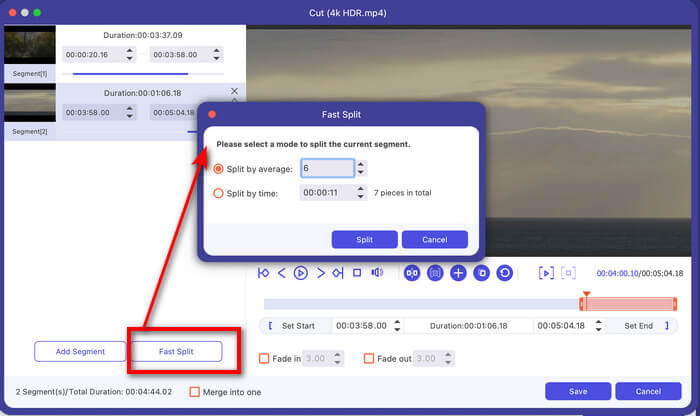
Step 4:A quick solution to video clips is also supported by Fast Split icon. Click it and insert the number you desire. You can decide on two modes as shown: split videos by average part or time. Once set, click Split to confirm.
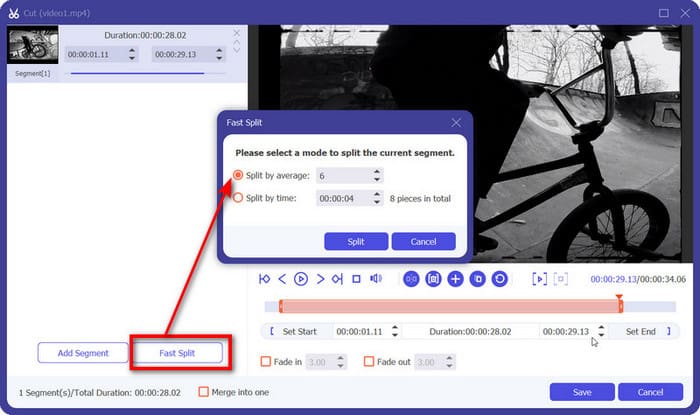
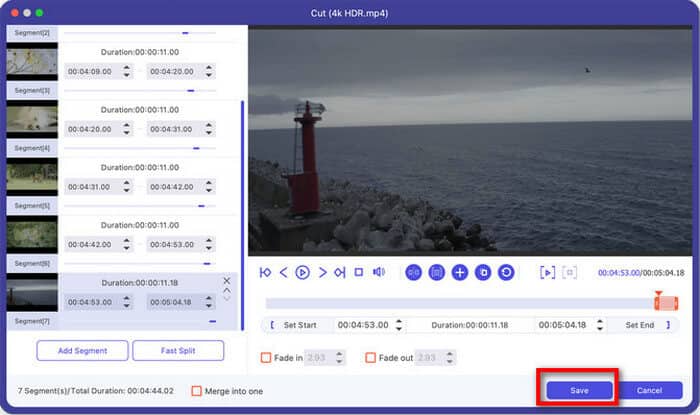
Step 5:After all the steps, reach the Save button to produce the final result.
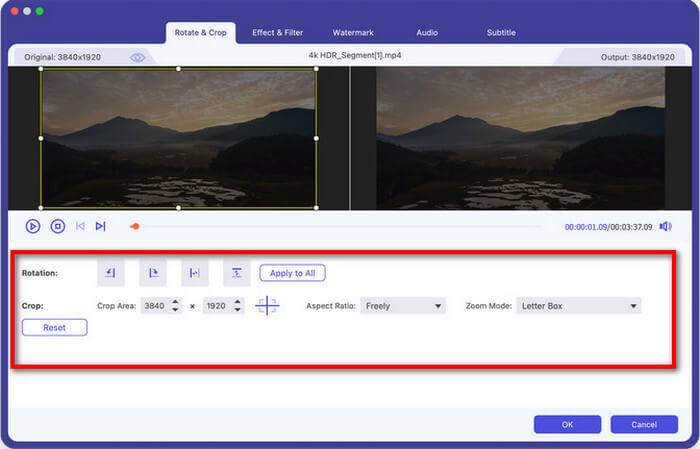
Girar e Cortar Vídeo
Este software oferece um acesso rápido para girar ou virar um vídeo.
Step 1: Find Edit icon and enter Rotate & Crop.On the area below you can change rotation into four modes. The result will synchronize above for you to see.
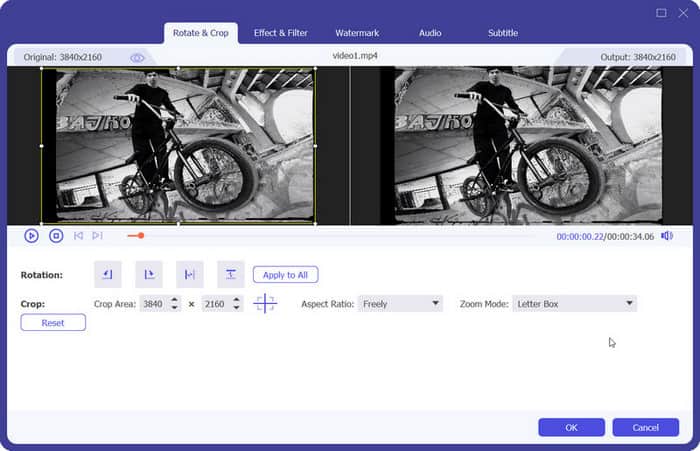
Step 2: Meanwhile, you can select the area to crop by moving the frame or setting the configurations on crop area, aspect ratio and zoom mode. Click Reset to restart anytime you want.
Step 3: Click the OK button to save all.
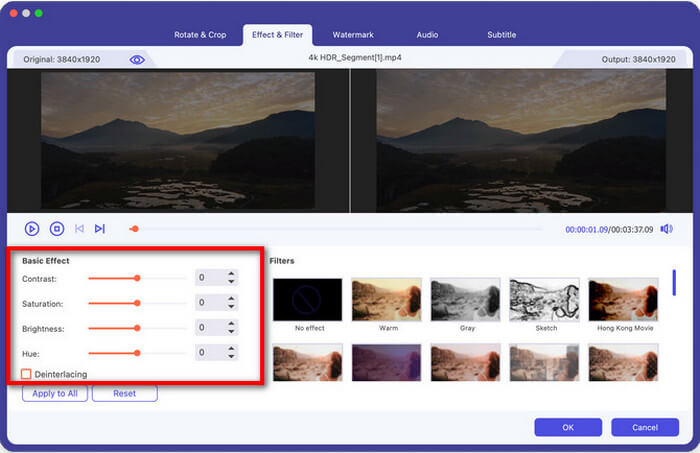
Ajustar efeito e filtro de vídeo
Os efeitos e filtros de vídeos podem ser modificados de forma fácil e rápida nesta plataforma.
Step 1: Find Edit icon and enter Effect and Filter.
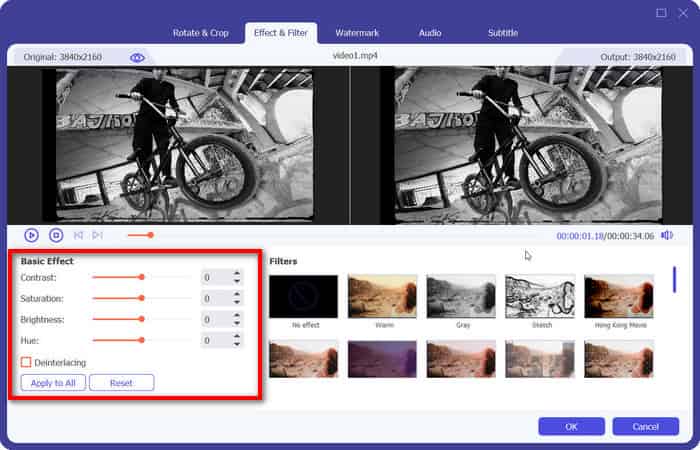
Step 2: Explore the function menu on basic effect and adjust the bar or number of contrast, saturation and hue. Tick Deinterlacing if necessary
Step 3: Select a filter on the right side to enhance more effect if you like. Then hit the OK button to save the changes.
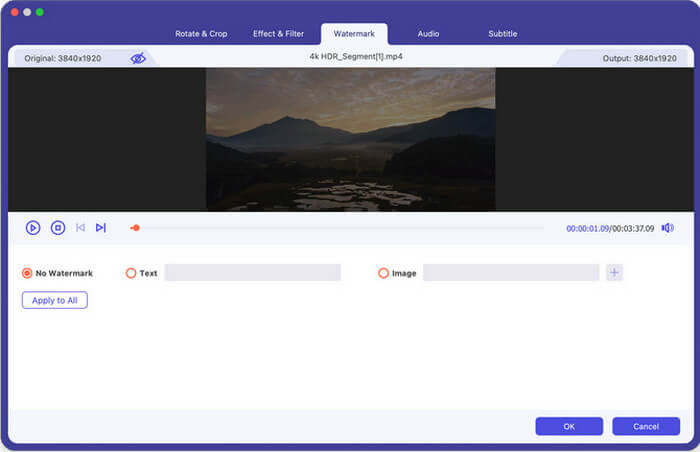
Adicionar marca d'água ao vídeo
Marcas d'água são introduzidas para importar em seu vídeo para necessidades individuais.
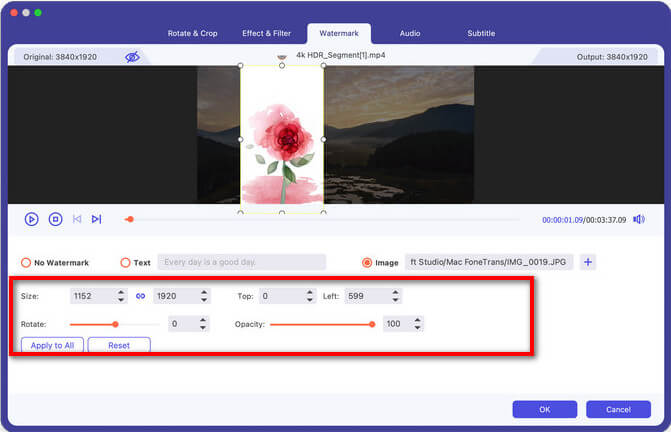
Step 1: Click the Edit icon and then go to Watermark.
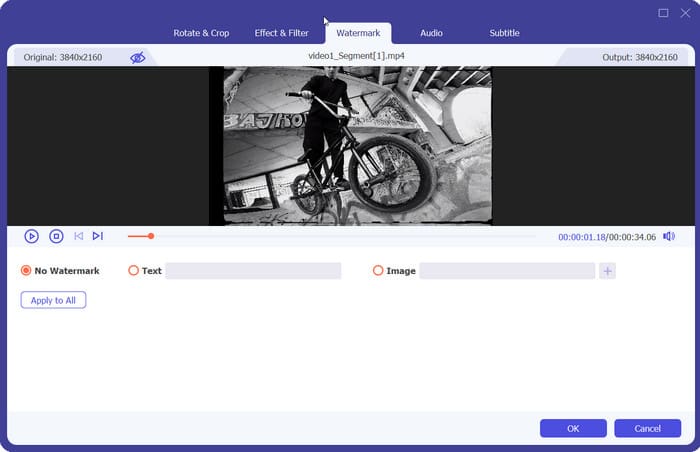
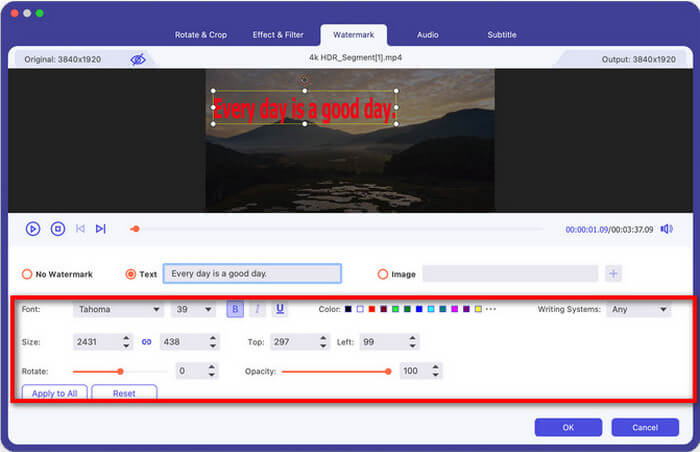
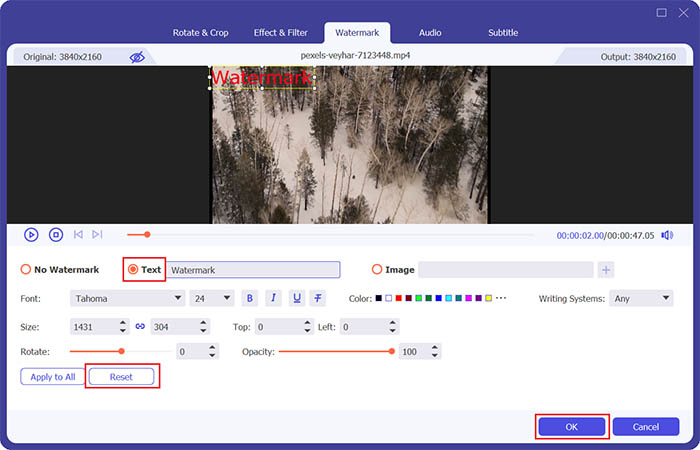
Etapa 2: Aqui temos dois tipos de marcas d'água para sua opção: uma marca d'água de texto e uma de imagem.
Para uma marca d'água de texto, você pode inserir o texto no espaço em branco e ajustar as fontes, cores, tamanho e estilos do texto também.
While for the latter one, choose Add Picture button to upload an image. And then adjust the size and place it wherever you like on the video.
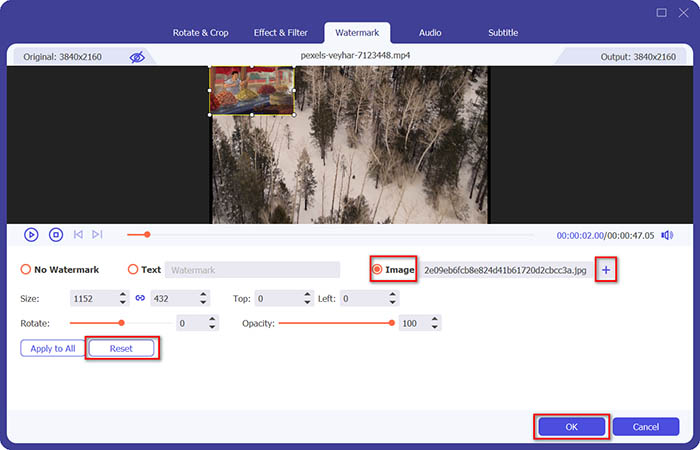
Step 3: Click the OK button to save your settings.
Ajustar áudio
O áudio pode ser modificado de forma fácil e rápida na plataforma.
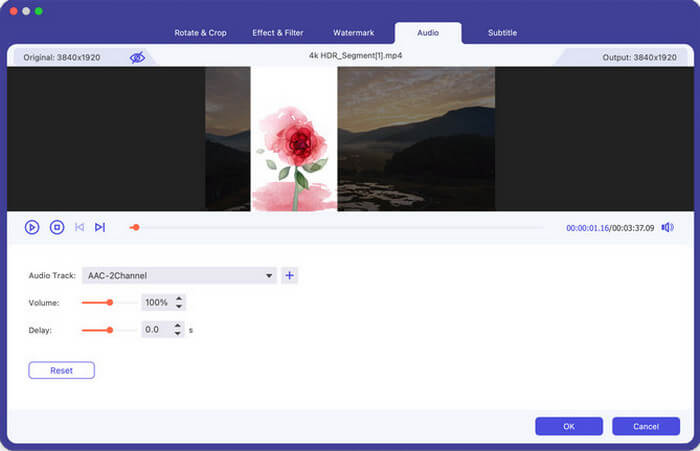
Step 1: Click the Edit icon and then choose Audio.
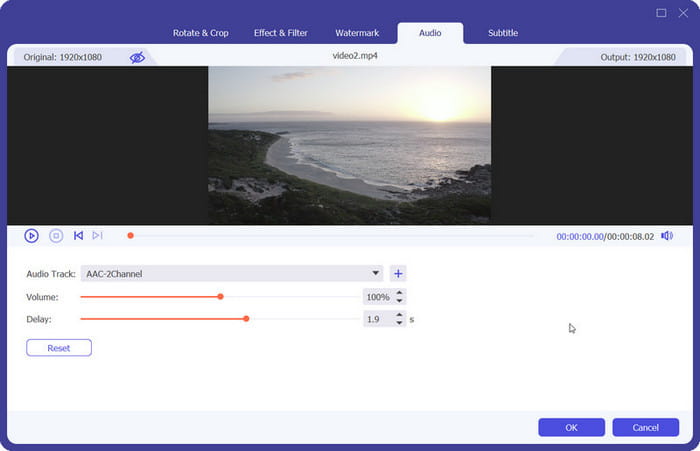
Etapa 2: selecione a faixa de áudio desejada e decida se deseja desativá-la ou não. Em seguida, altere o volume do áudio e o tempo de atraso para adequá-los.
Step 3: Click the OK button to generate the final file.
Adicionar legenda
Esta parte orienta você a editar e colocar legendas para adicionar mais detalhes.
Step 1: Click the Edit icon and hit Subtitle.
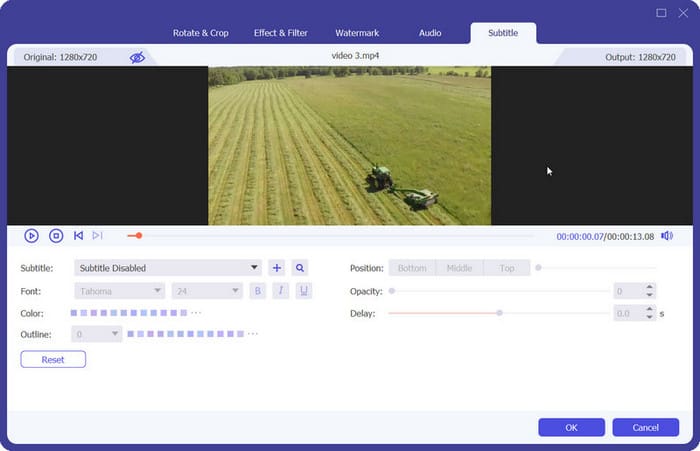
Etapa 2: Clique no botão + para soltar o arquivo de legenda. Então você pode fazer mais alterações na posição, fonte, opacidade e assim por diante.
Step 3: Click OK to save the adjustments.
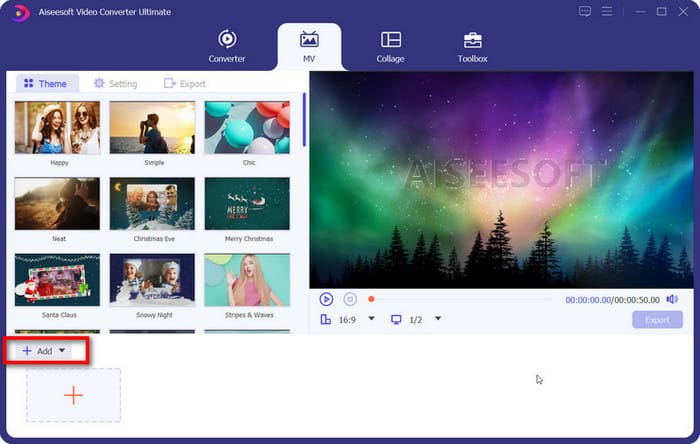
Faça filmes
Para atender a ocasiões e eventos verificados, apresentamos o MV como uma parte independente disponível no Video Converter Ultimate. Esta seção o levará a efeitos atraentes com diferentes temas, música de fundo e design de texto. Leia sobre como fazer seus próprios trabalhos.
Step 1: Add the target
Go to the More Tools menu and select MV Maker, in which you can click the add button to add the video you want to turn into an MV.
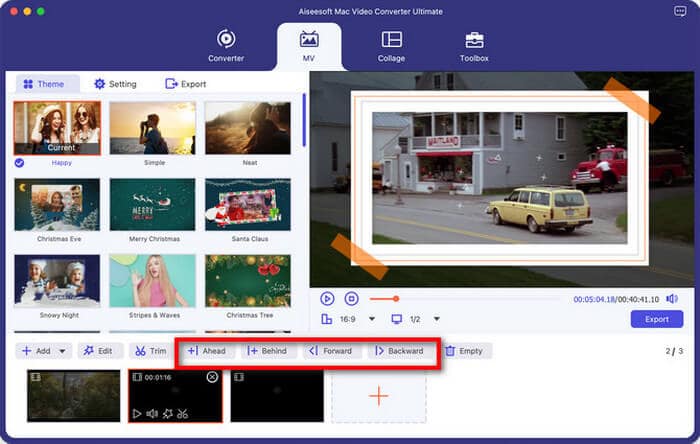
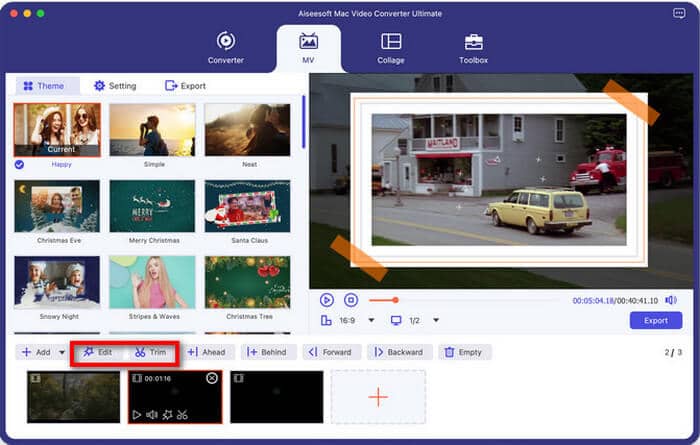
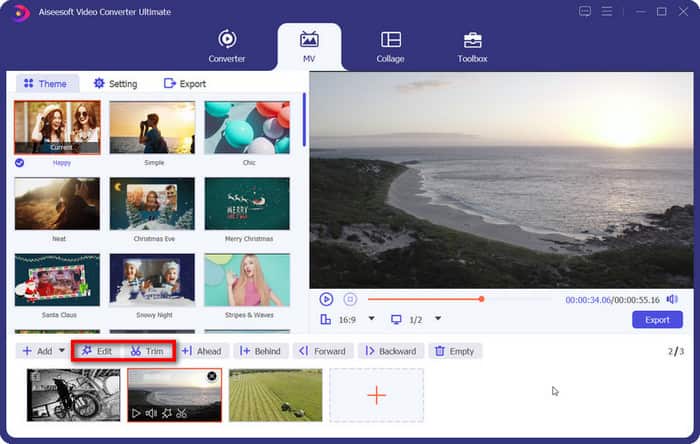
Step 2: Edit your video
After importing the files, you can rearrange them by directly dragging or clicking the Backward or Forward button on the foot page.
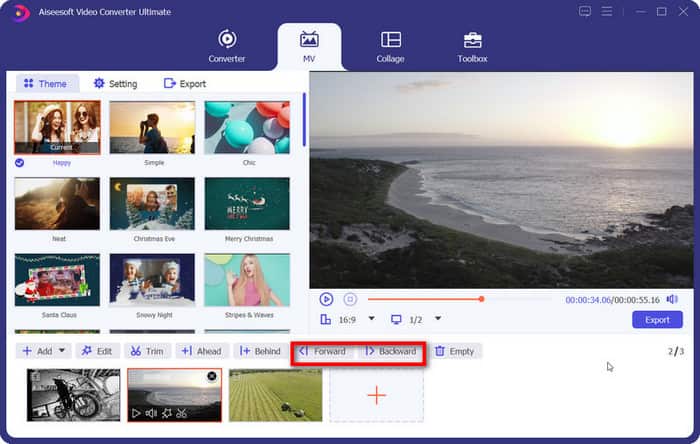
Also, you can Edit or Trim the target with the specific access above.
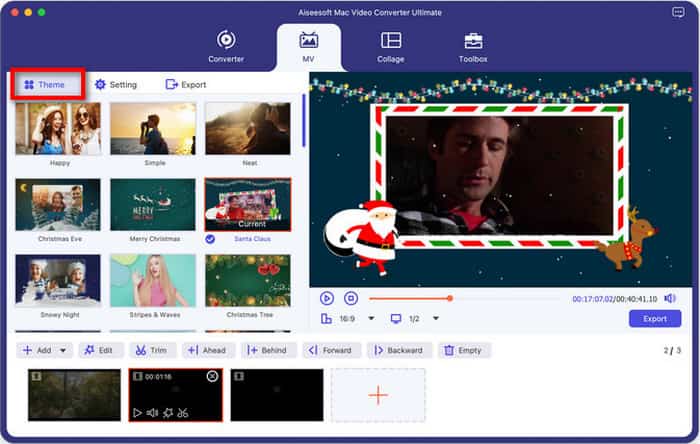
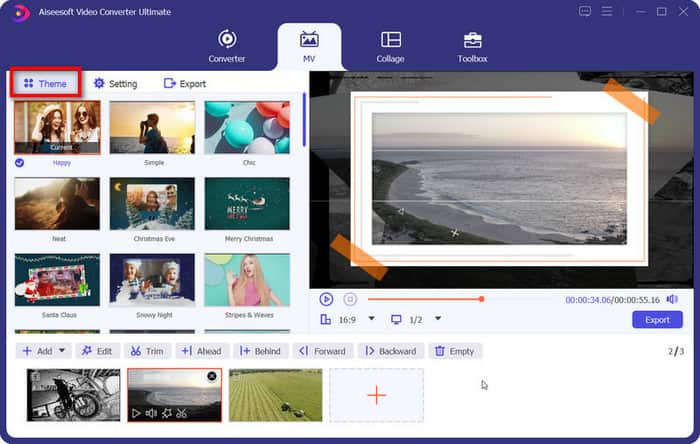
Step 3: Choose a theme
Você pode decidir o melhor tema que combina com seu projeto enquanto visualiza o efeito de suas opções.
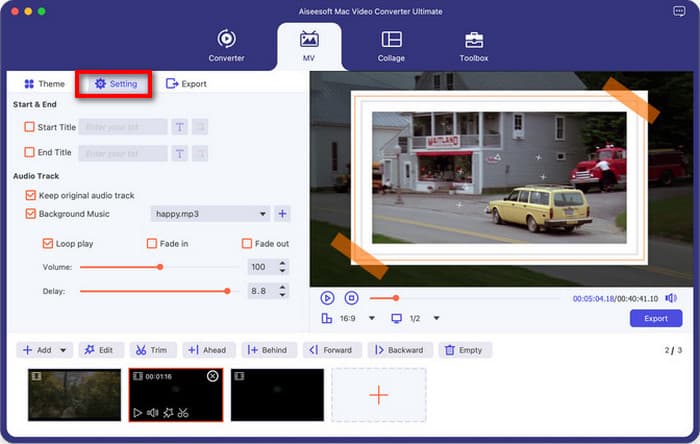
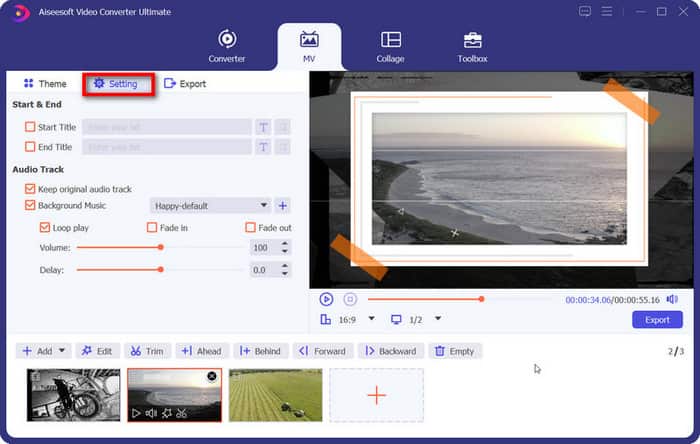
Step 4: Set other effects
For more vivid effects, try hitting the Setting button on the list where you are provided with options for the start and end titles as well as audio tracks to enhance your mv.
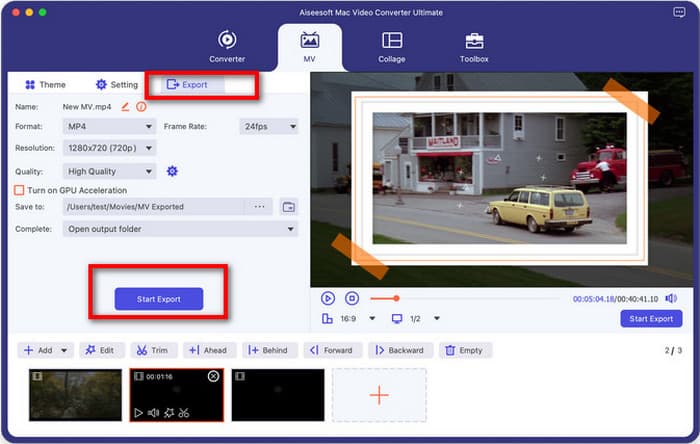
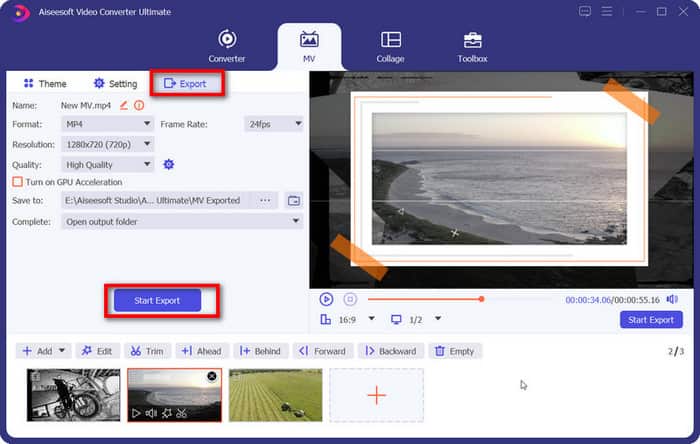
Step 5: Generate your movie
Now you can head to the Export section to complete the procedure before saving. You may rename the modified file and gain more options for format, frame rate, resolution, quality and GPU acceleration. Once all done, select the path to save and hit Start Export button to produce your creation.
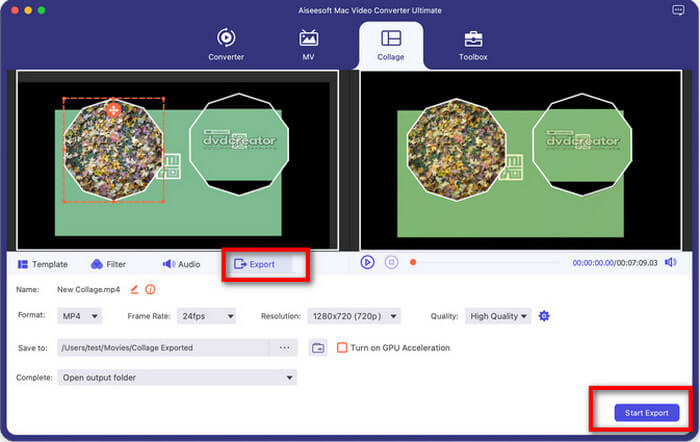
Colagem de vídeos e fotos
Se você está preocupado com problemas relacionados à combinação de tela e edição de arquivos simultaneamente, venha para o Video Converter Ultimate para obter a resposta perfeita. No recurso Colagem, você tem várias opções para aprimorar seus vídeos e fotos. Agora siga estas etapas para iniciar sua criação.
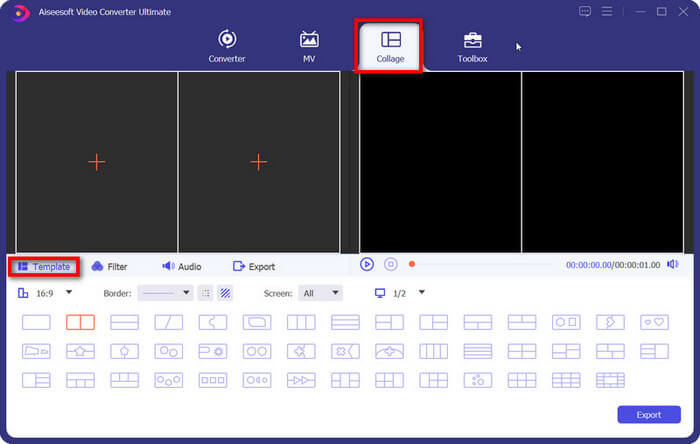
Step 1: Navigate to Collage Video Maker
Navigate to the More Tools menu and click Collage Video Maker.
Step 2: Upload your files
Importe o vídeo ou imagem na área mais para se preparar.
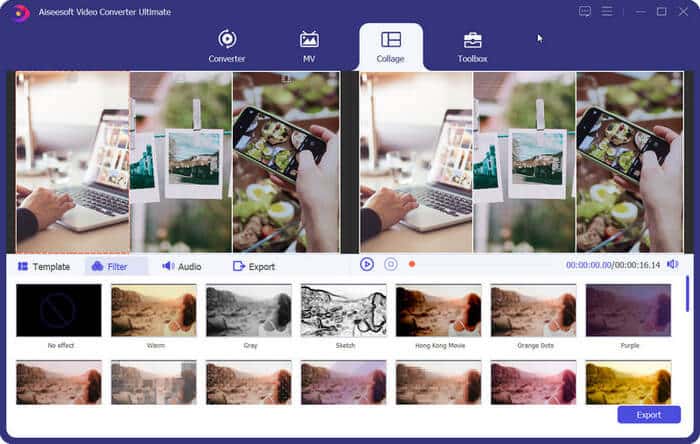
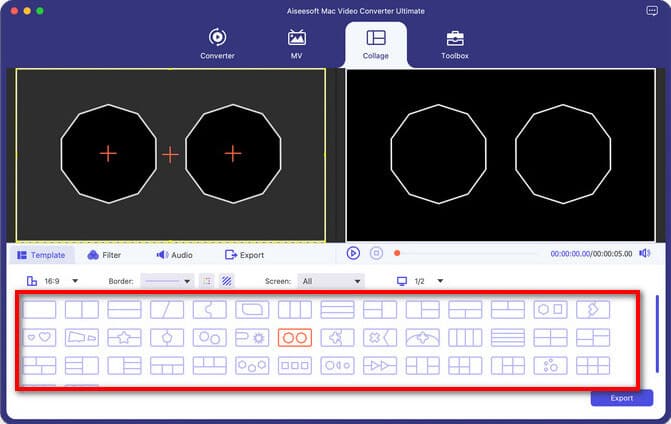
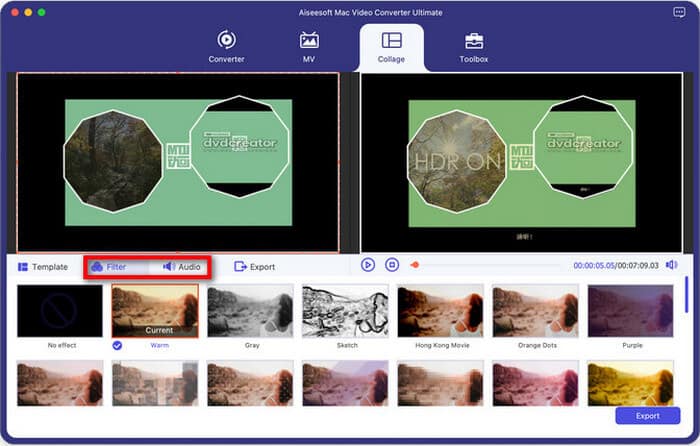
Step 3: Set the parameters to the most suitable
After importing your files, you can further modify the layout by dragging the split line. Then jump to Filter and Audio below the video to optimize the whole video effects.
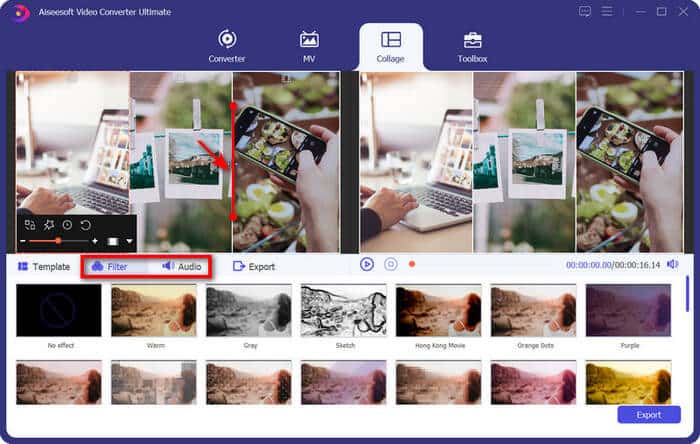
Em seguida, se você precisar editar cada arquivo inserido, mude para as subunidades em Colagem
Vídeos e fotos e veja o que você pode obter. Se não, vá em frente com o passo 4 seguido por eles,
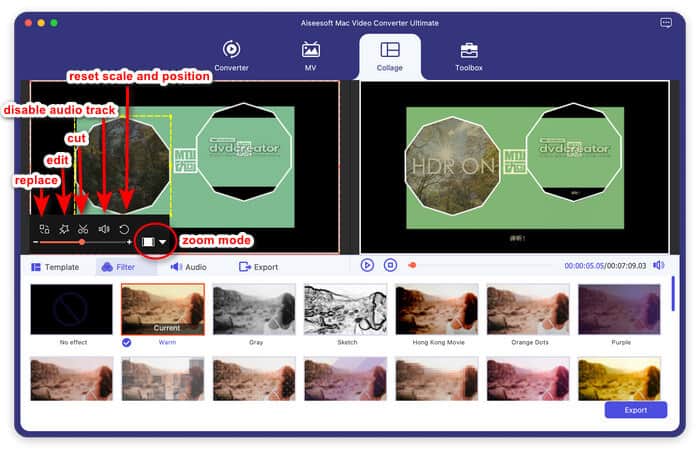
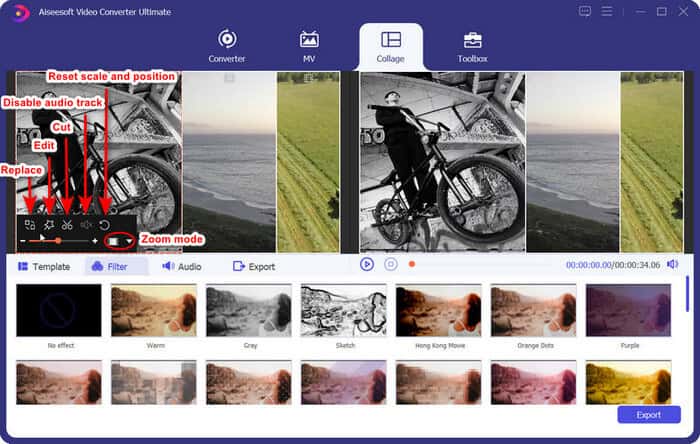
a. Edit video before splitting screen
After turning to individual video editing, you are offered six features set for different use, respectively replace, edit, cut, disable audio track, reset scale and position and zoom mode. Once you reach one feature, you are able to make detailed modifications on your videos.
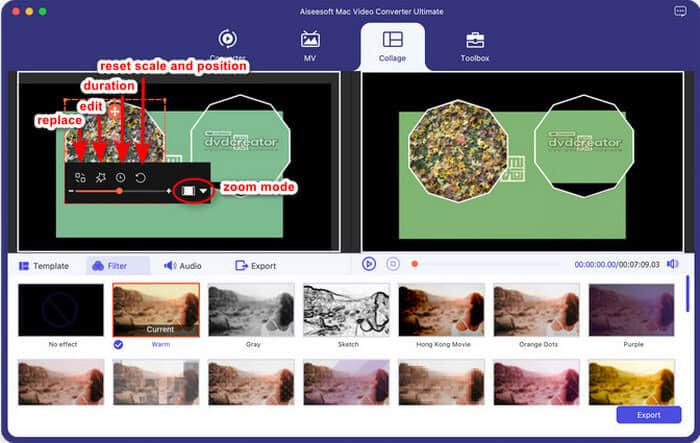
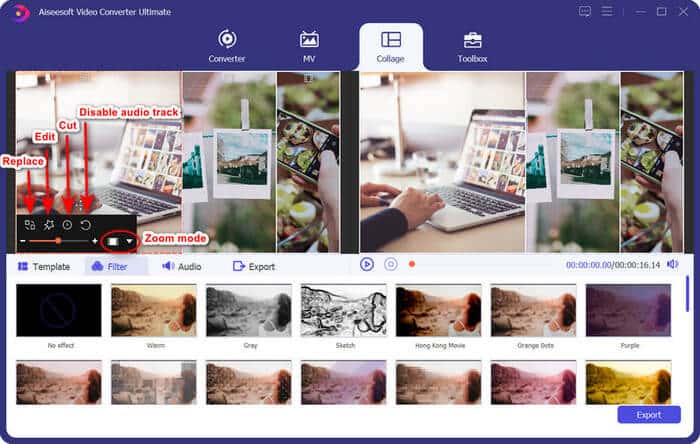
b. Edit picture before splitting screen
When customizing your pictures, there are also five blocks to advance the effect: replace, edit, duration, reset scale and position and zoom mode. Choose the one you want and better your images.
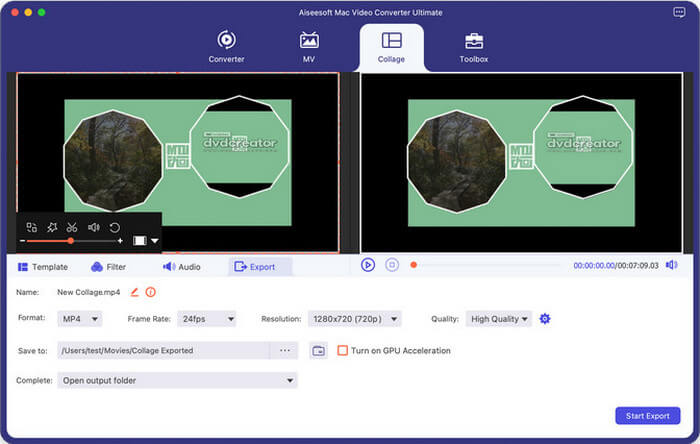
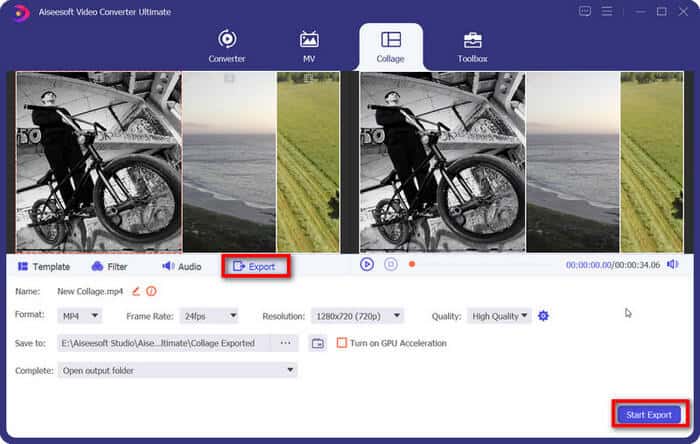
Step 4: Generate and Save your works
With all settings in place, hit the Export tab. Before you produce the final file, you can browse under the menu tab and reconsider other settings such as name, format, frame rate and more. After that, click Start Export to generate and save your works on your computer.
Mais ferramentas
De acordo com nosso princípio baseado no cliente e orientado para a inovação, introduzimos uma série de ferramentas poderosas para individualizar seu arquivo de destino. Prepare-se para ativar essas funções com a ajuda do nosso guia.
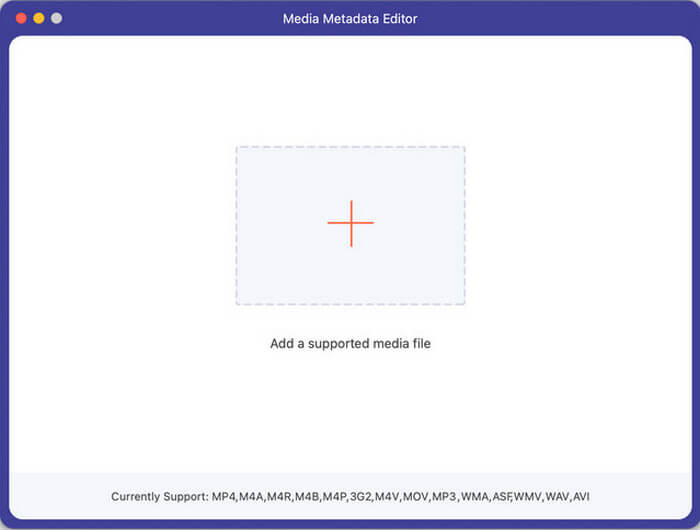
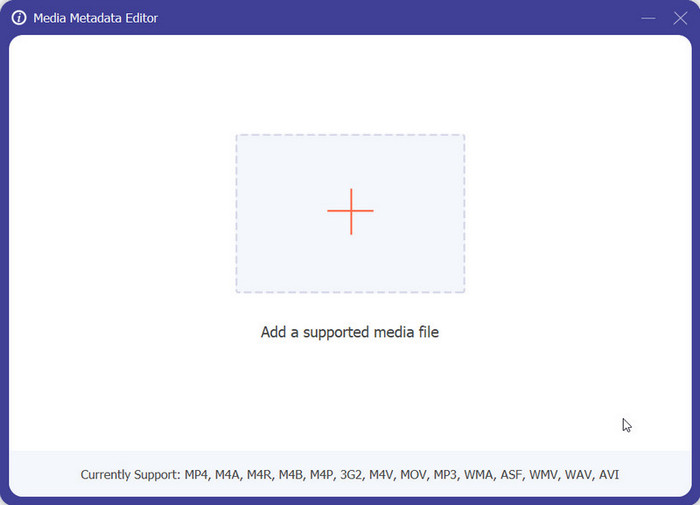
Editor de metadados de mídia
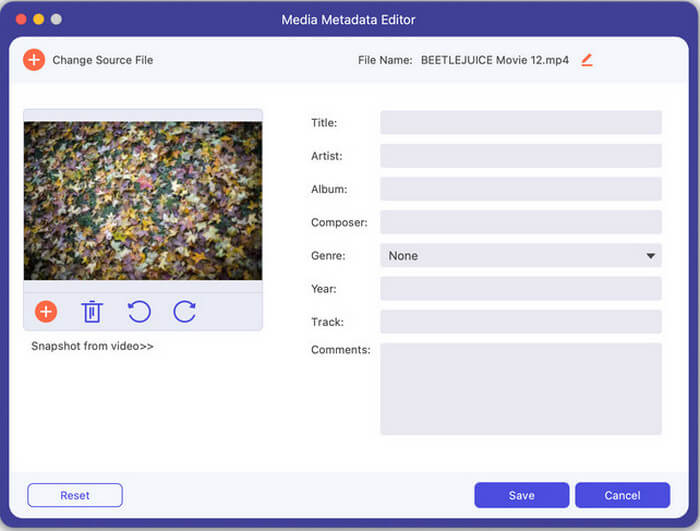
Este é um editor maravilhoso que ajuda você a manter as informações do arquivo original e editar conforme o esperado.
Passo 1: Clique no sinal + central para selecionar o alvo.
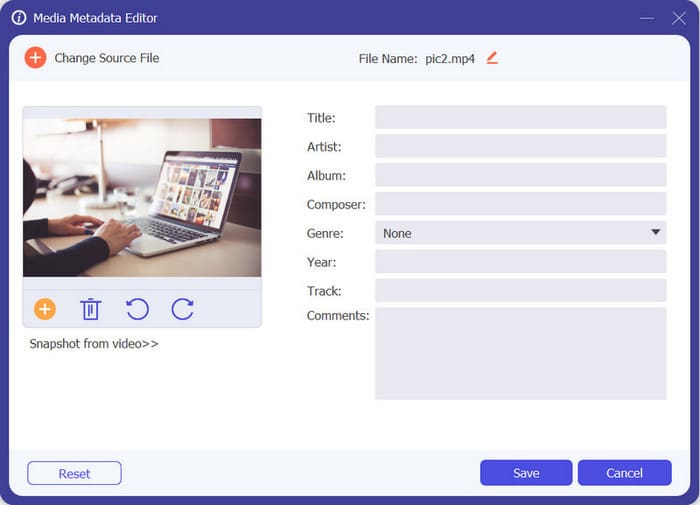
Etapa 2: na janela pop-up, personalize seu arquivo por meio de opções como capa, título, artista, álbum, compositor etc.
Step 3: With all segments considered, start Save button to complete.
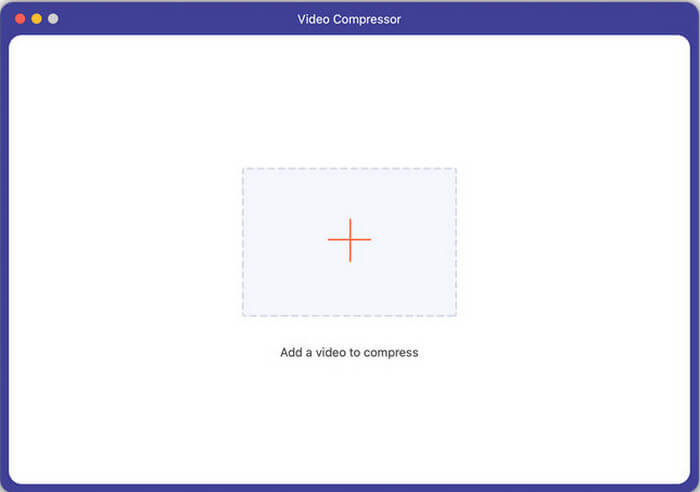
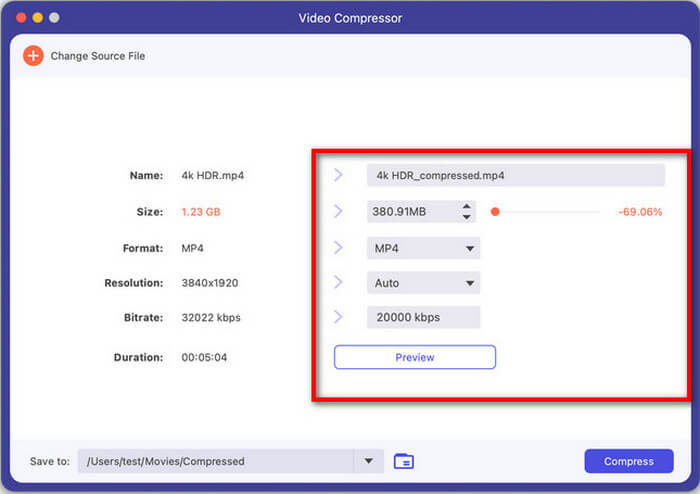
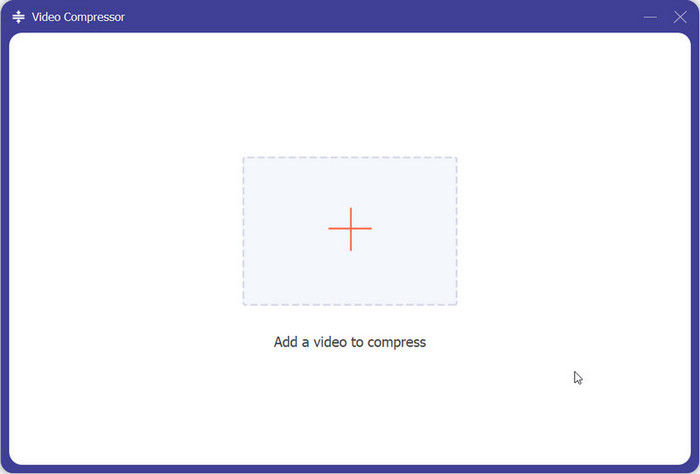
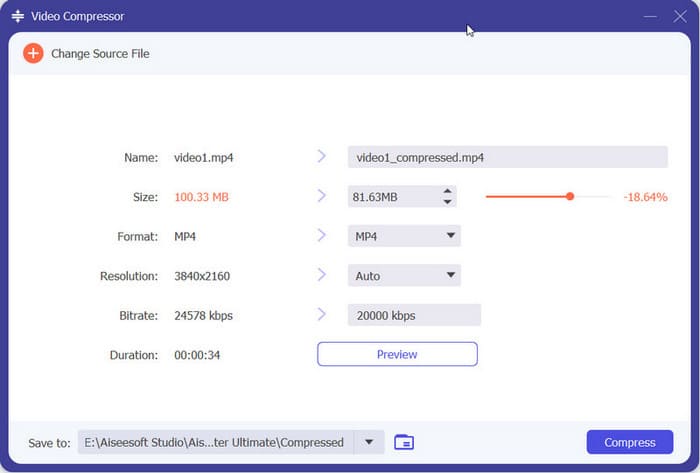
Compressor de vídeo
Entre nesta seção e comprima seus arquivos de vídeo com pouco esforço.
Etapa 1: adicione um vídeo na área central.
Step 2: Reset the related index of your file from name to duration. Click Preview to check the effect.
Step 3: Select a proper channel for your works and start Compress button to save.
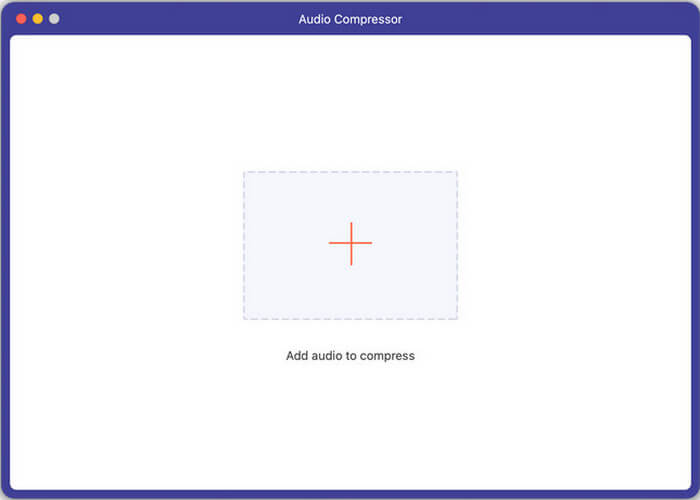
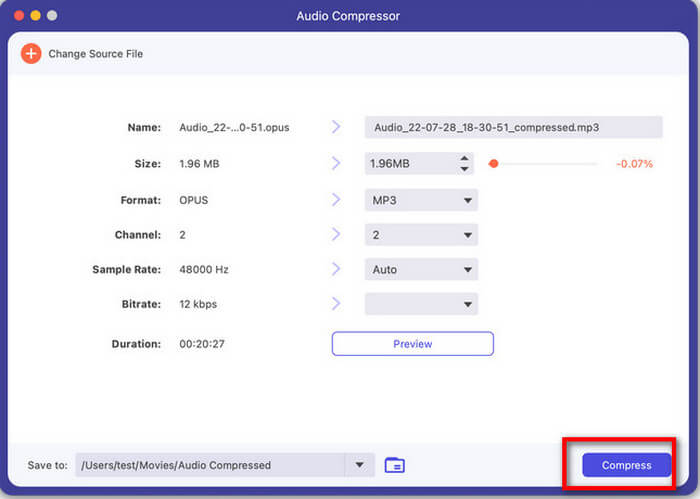
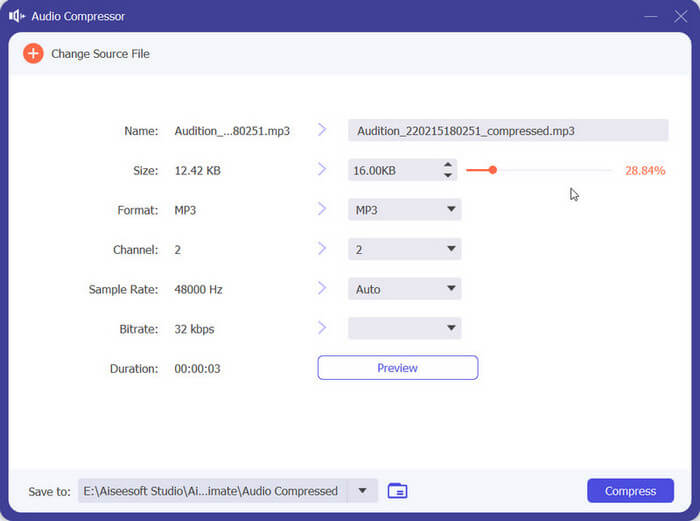
Compressor de áudio
Os arquivos de áudio podem ser compactados se você escolher esta ferramenta.
Passo 1: Importe seu arquivo na área central.
Step 2: Head to Size bar to adjust your file as you wish. Then finish other settings orderly and click the Compress button to save.
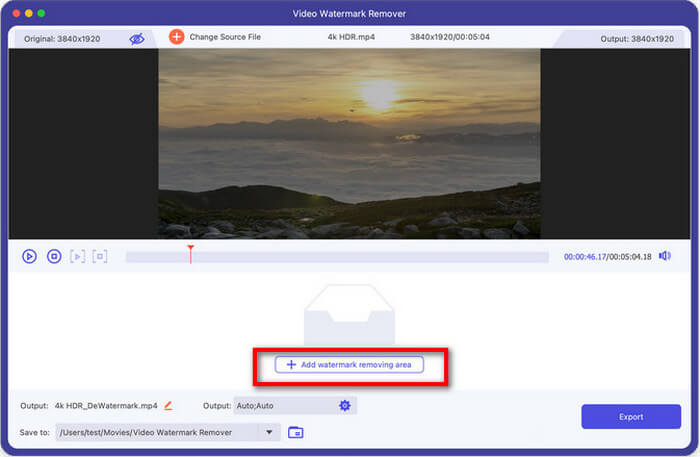
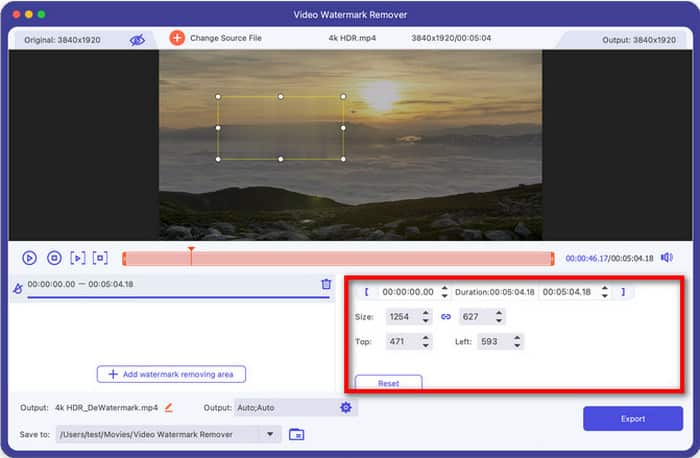
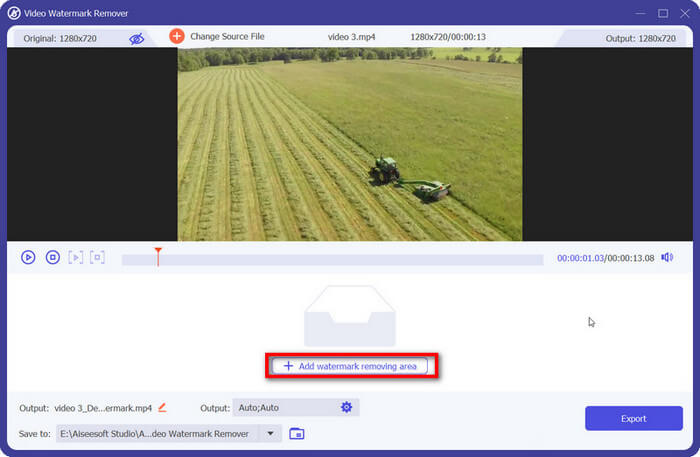
Removedor de marca d'água de vídeo
Você não pode perder esta ferramenta se estiver procurando uma solução fácil para remover marcas d'água em seu vídeo.
Passo 1: Selecione um vídeo para adicionar na área funcional.
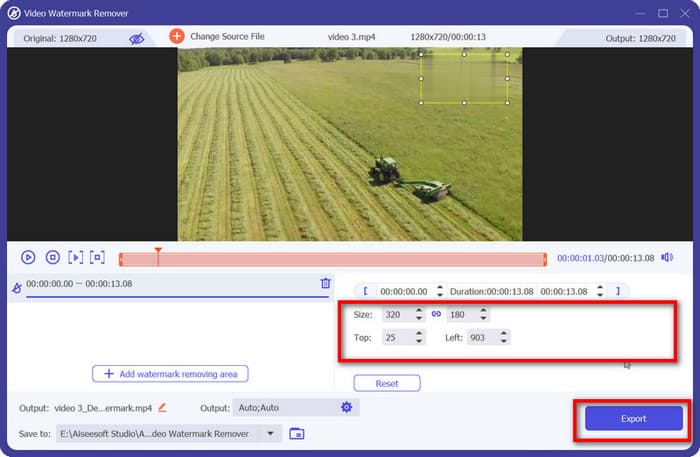
Step 2: Click Add watermark removing area button to decide the area you want to get off your video. In the meantime, adjust its size and location to the ideal effect.
After putting all elements in the right place, hit the Export button to save changes.
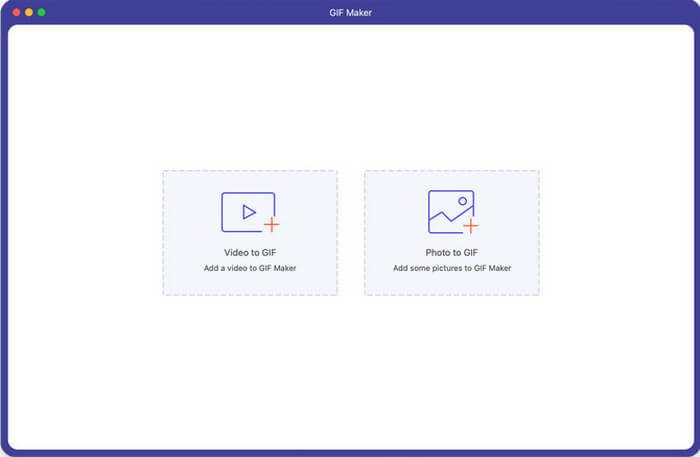
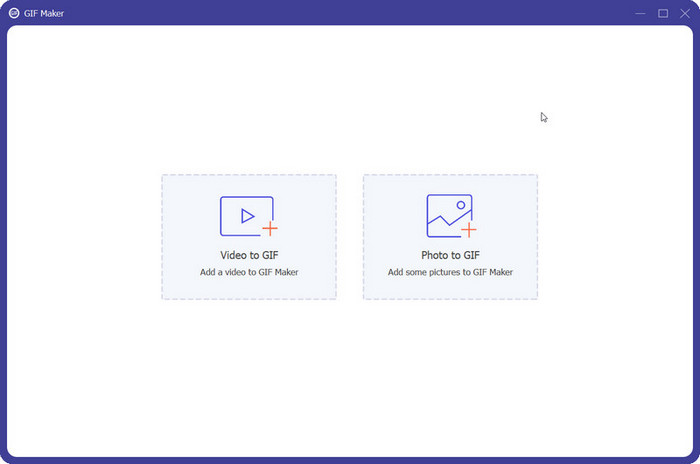
GIF Maker
Agora crie seu GIF exclusivo com seus arquivos de vídeo ou foto e divirta-se.
Etapa 1: adicione seu arquivo ao GIF Maker com base em seu formato.
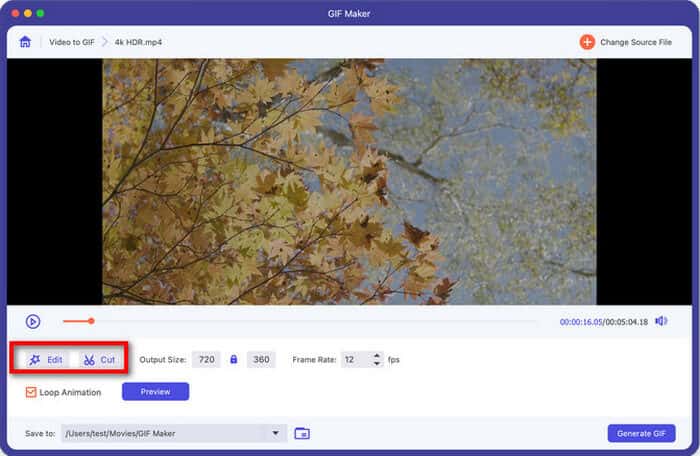
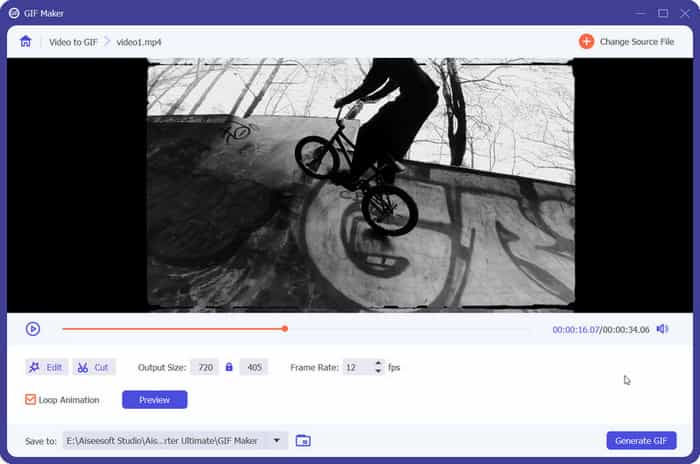
Step 2: As for a video GIF Maker, click Edit button to apply various features like Rotate & Crop, Effect & Filter, Watermark, Audio, and Subtitle or Cut button to decide the area you want for a GIF.
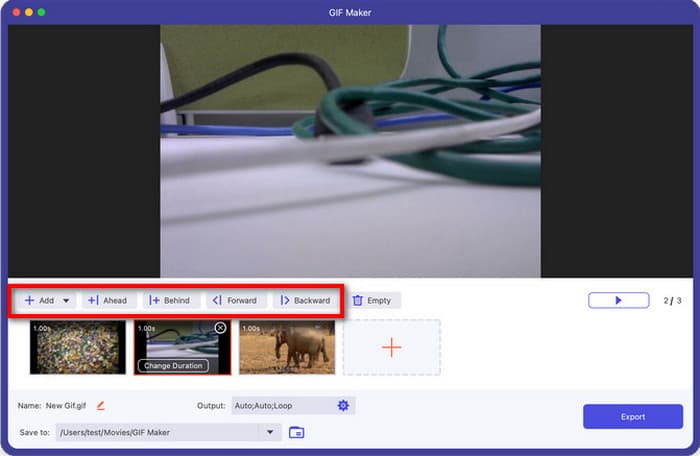
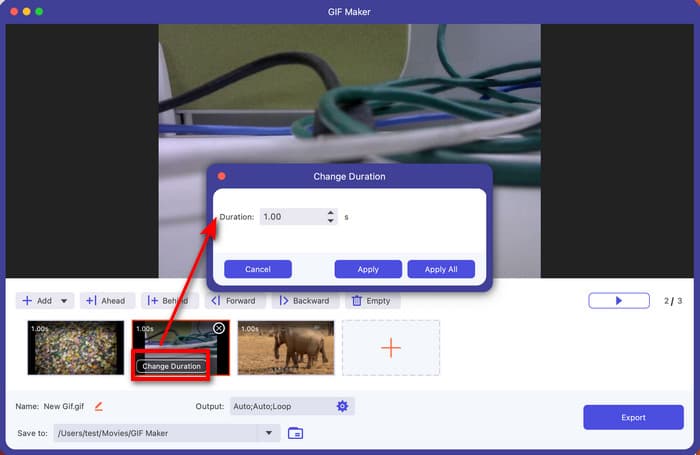
If you choose a photo as the original format, just follow on-screen tips to make output settings on format, resolution, zoom mode and more. Then you can add files through the Add button or insert them through Ahead or Behind. Here we also enable you to reorder photos through Forward or Backward button.
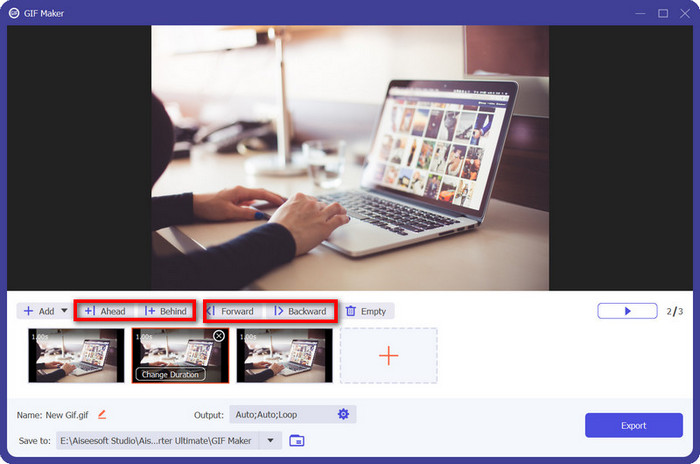
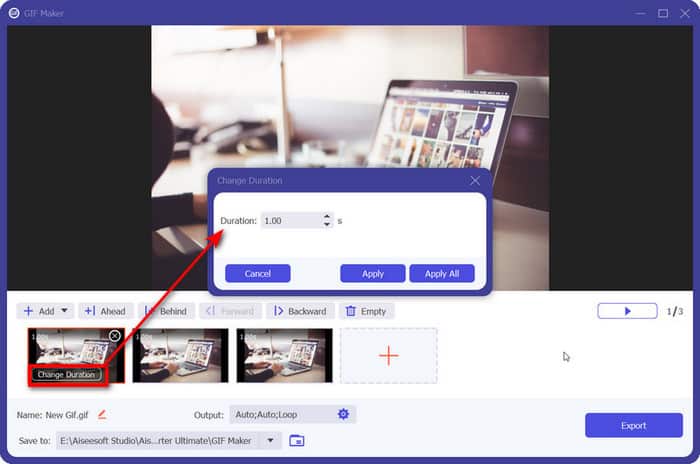
If you are making changes on the duration of each photo, move your mouse over the target and click Change Duration to reset the timing.
Step 3: Click Generate GIF for videos or Export for photos to create your animated GIF.
Conversor de imagem
Experimente esta ferramenta para converter suas fotos sem nenhum bloco.
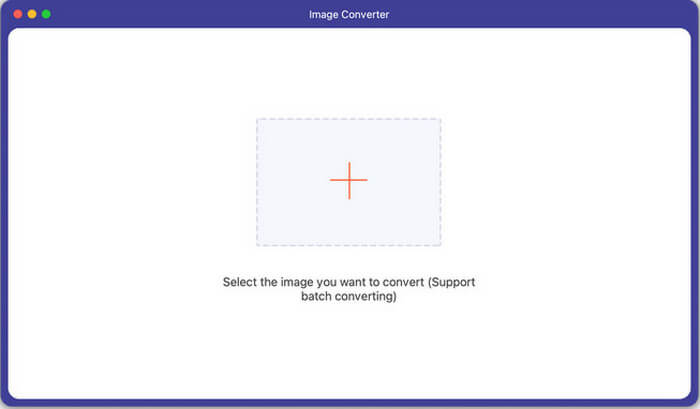
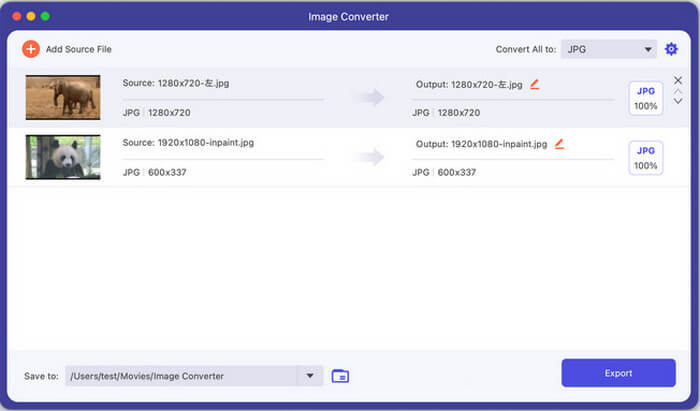
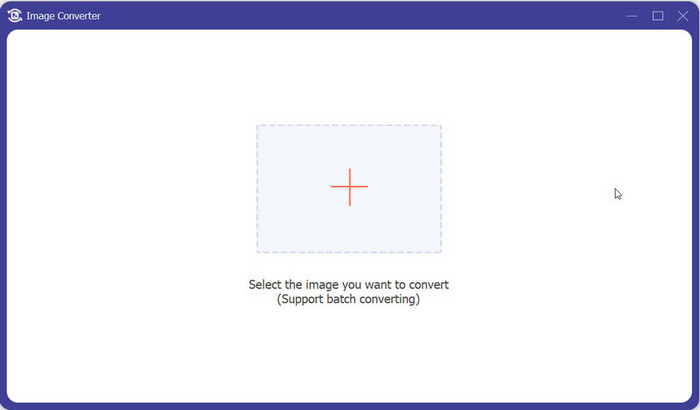
Etapa 1: selecione a imagem de destino para adicionar no centro. A conversão em lote é suportada se você tiver um grupo de arquivos a serem feitos.
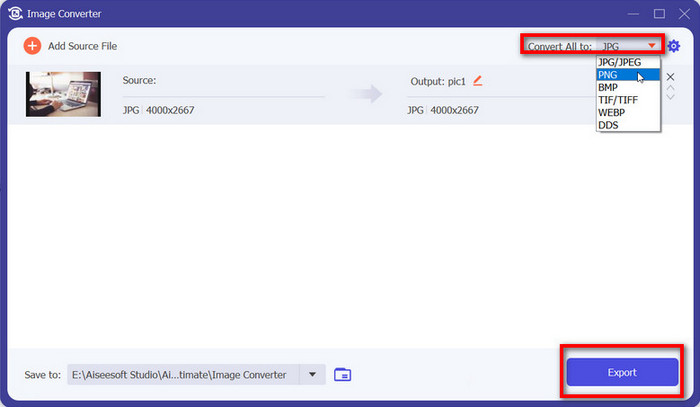
Step 2: Undraw the list next to Convert All and find the format you want. For adjusting the zoom, quality or background color, try the wheel icon or JPG button below.
Step 3: When all set, tap on Export button to complete.
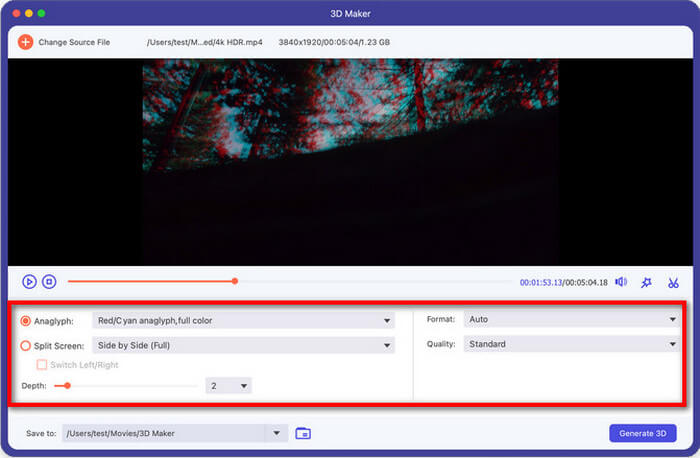
Criador 3D
Este programa torna possível a criação de vídeo 3D e adiciona mais diversão.
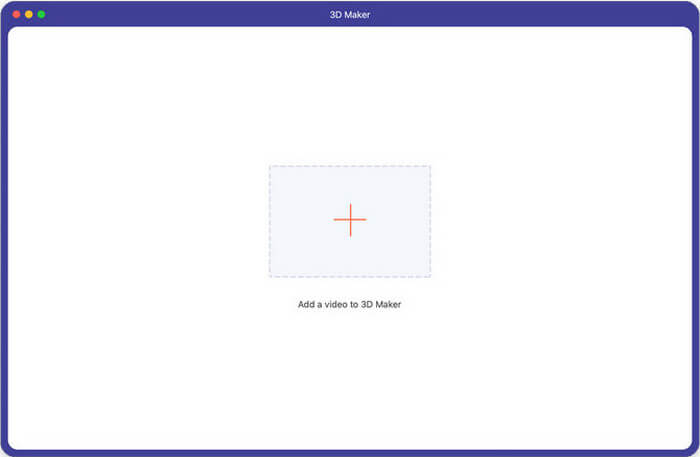
Etapa 1: adicione seu vídeo conforme necessário.

Etapa 2: Depois de entrar na janela do marcador 3D, você pode editar o vídeo redefinindo Anaglyph, Format, Split Screen, Quality e Depth. Visualize o efeito mostrado acima ao mesmo tempo.
Step 3: Select a suitable path to save your adjusted file, then click Generate 3D to produce the new version.

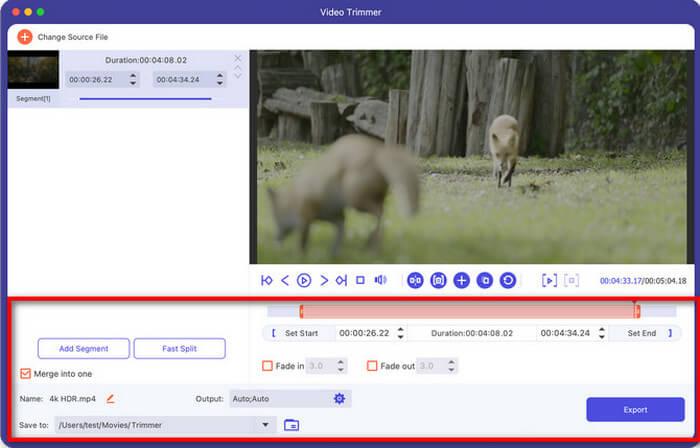
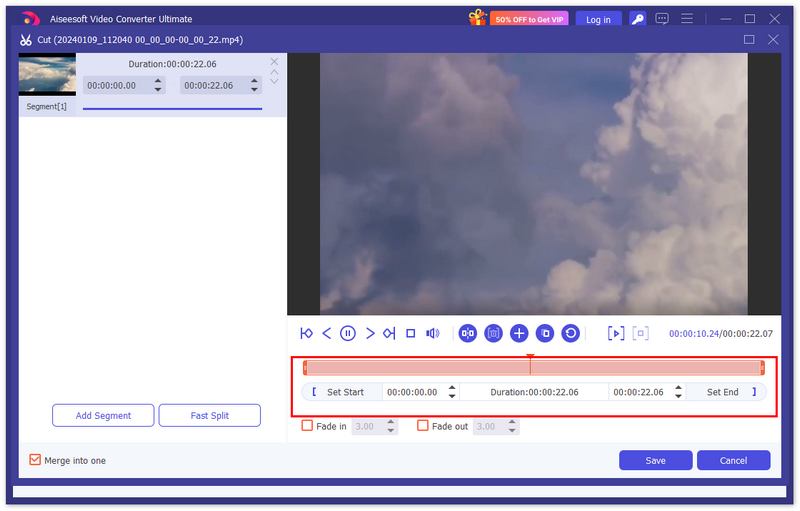
Aparador de vídeo
Use esta ferramenta para aparar ou cortar seu vídeo na duração perfeita.
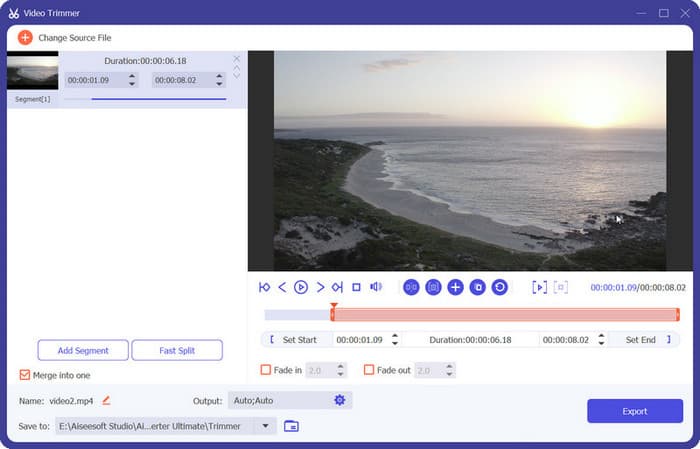
Passo 1: Carregue um vídeo na área central.
Step 2: Drag the progressing bar below the preview video to adjust the length. You can also change the time in Set Start and Set End and Add Segment or Fast Split the video clips. After that, tick the box of Merge into one if you want and hit the Export button.
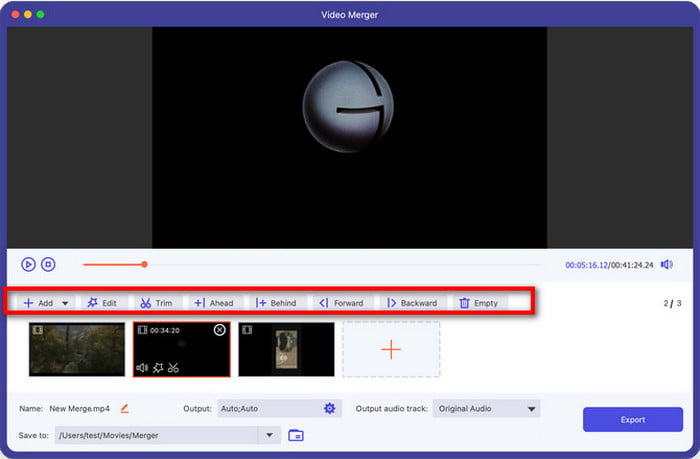
Video Merger
Integre seus videoclipes com facilidade e rapidez.
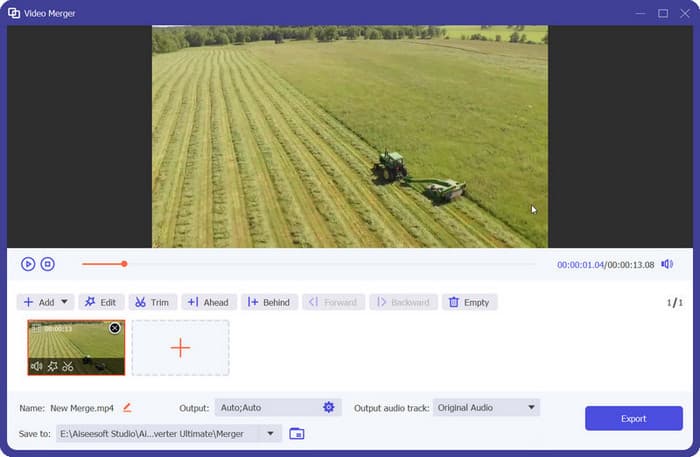
Etapa 1: selecione um vídeo e adicione-o à área central.
Step 2: To import additional videos, you can press the plus icon next to the previous video or the Add sign from the menu bar. Moreover, choose Edit and Trim to edit the videos and change the order by clicking Behind or Backward.
Step 3: Click Export to save,
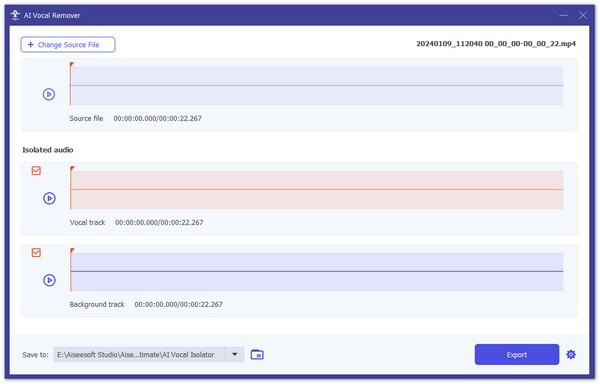
AI Vocal Remover
Separe sua voz humana do ruído de fundo com tecnologia de IA precisa e avançada.
Step 1. Choose the AI Vocal Remover under More Tools.
Step 2. Click the main rectangular area to add your audio or video file.
Step 3. It will download the corresponding AI models and start analyzing and separating your audio automatically.
Step 4. Now, you can listen to the separated audio content and check it before exporting.
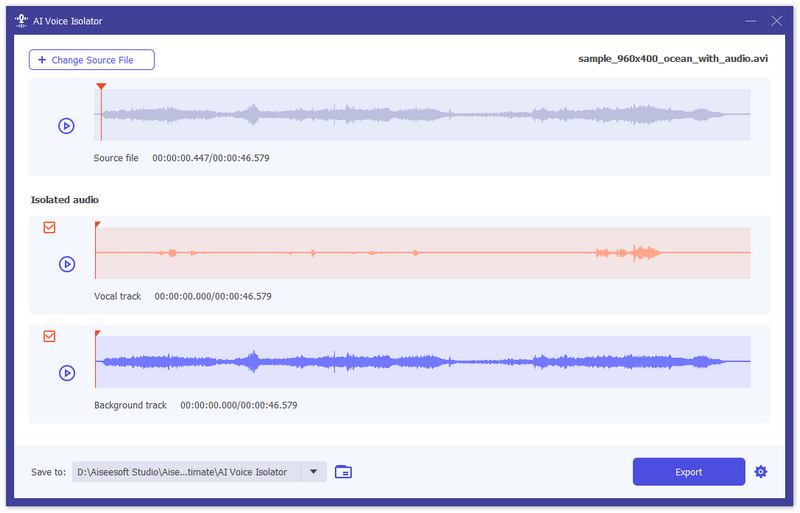
AI Vocal Isolator
Step 1: Choose the AI Vocal Isolator under More Tools.
Step 2: Add your audio or video file with soundtrack(s) into this tool.
Step 3: Then, the AI will auto-analyze your video/music to remove the background sound and keep the vocal track only.
Step 4: Click the Save to drop-down menu to choose a destination folder, then click Export to save the file.”
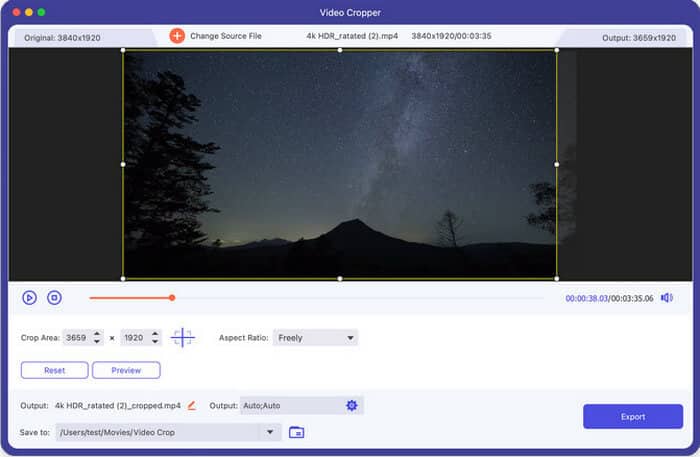
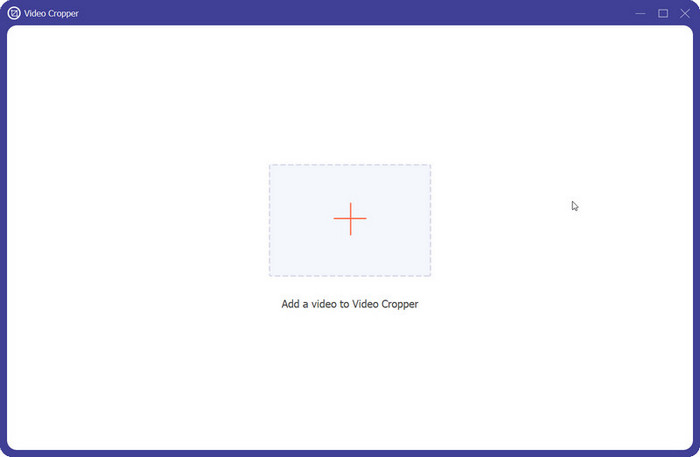
Cortador de vídeo
Pegue a ferramenta para recortar seu vídeo como desejar.
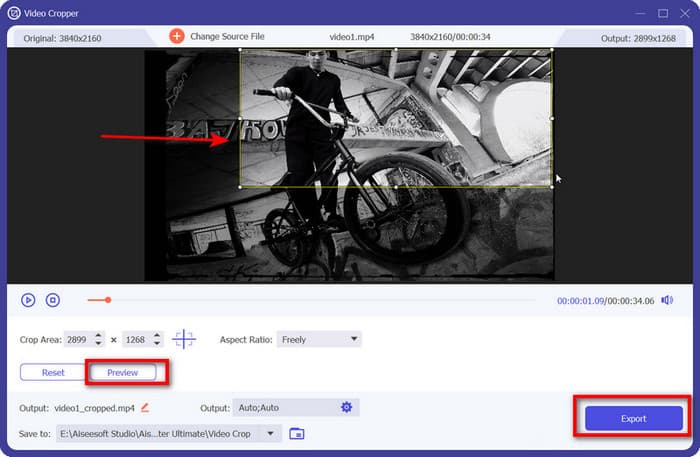
Etapa 1: adicione o vídeo à área específica.
Step 2: Place the frame with your mouse to areas you desire and reset the index on Crop Area and Aspect Ratio when needed. Click Preview button to view the result whenever you want and hit Export button to generate the result.
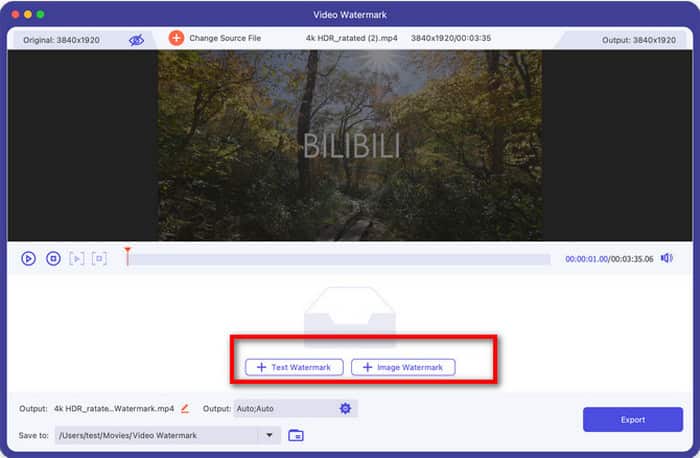
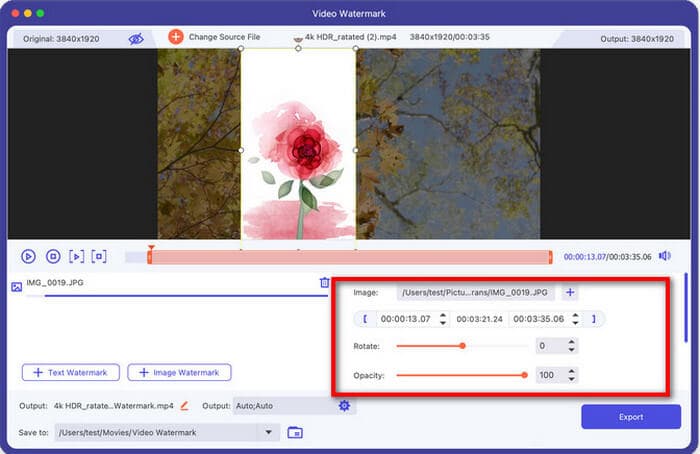
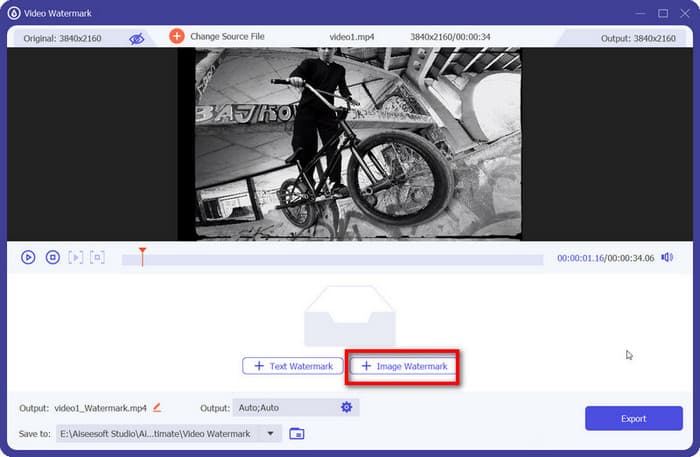
Marca d'água de vídeo
Esta seção seria uma escolha de ouro se você deseja proteger melhor seus direitos autorais.
Passo 1: Prepare um arquivo de vídeo e adicione-o na área central
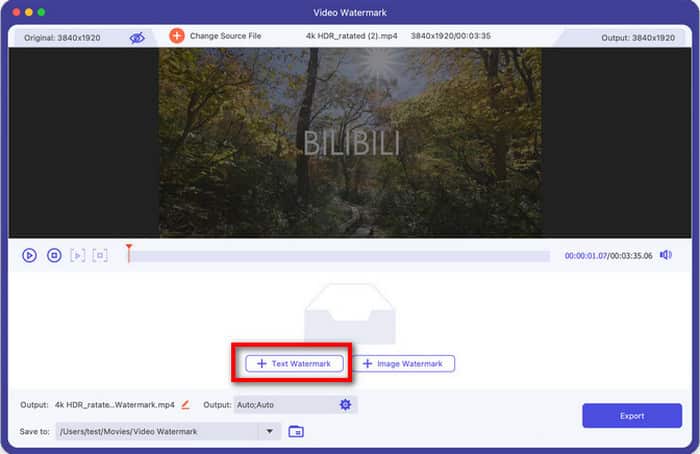
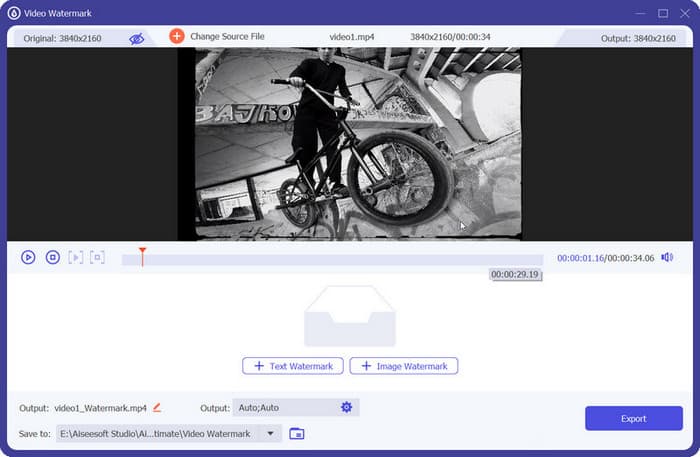
Etapa 2: escolha as marcas d'água relacionadas para corresponder. Aqui estão dois tipos no total: marca d'água de texto e marca d'água de imagem.
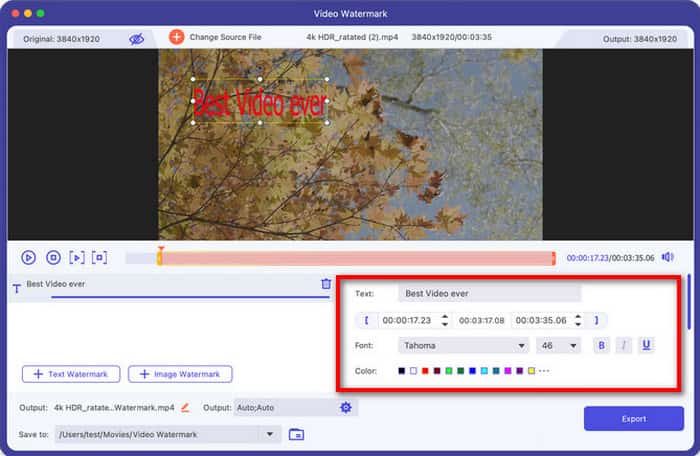
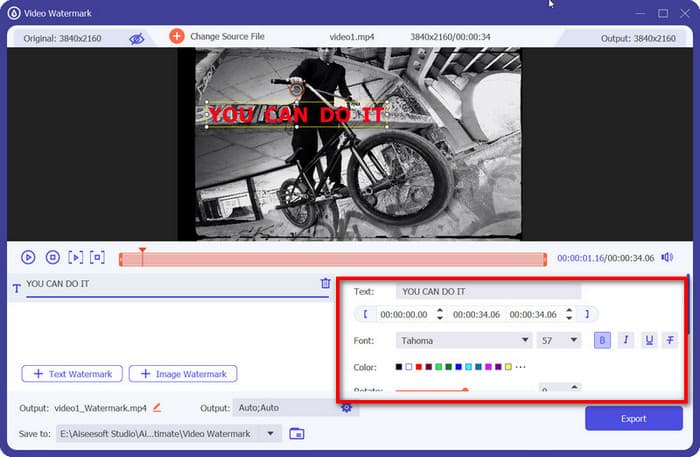
a. Click the Text Watermark button if you want your watermark in text.
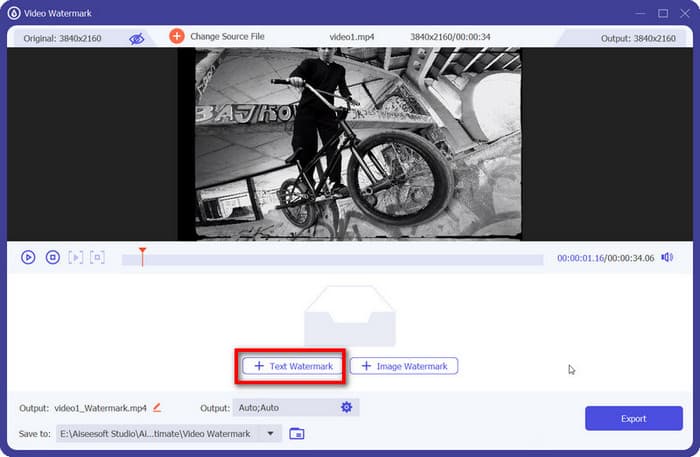
Em seguida, você verá uma janela onde poderá editar o conteúdo, o estilo da fonte e muito mais.
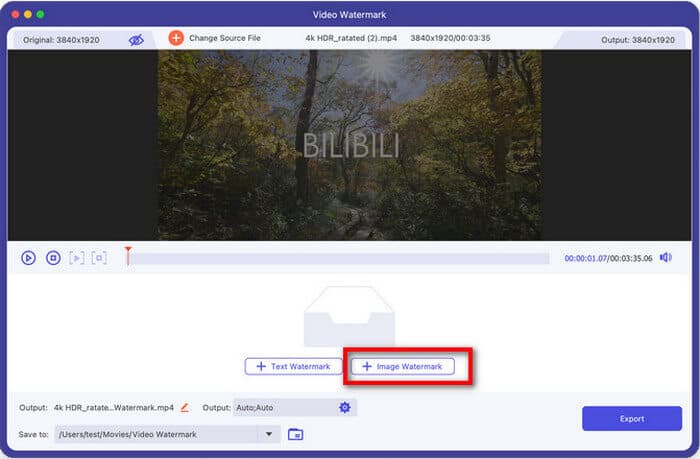
b. If you want an image watermark, then choose the Image Watermark button.
In the pop-up window following you can modify it by adjusting the configurations following Rotate, Opacity and Size.
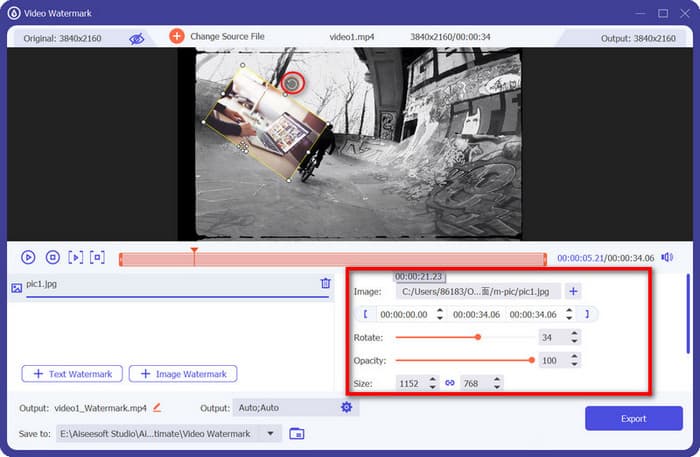
Step 3: Hit the Export button to produce the adjusted file.
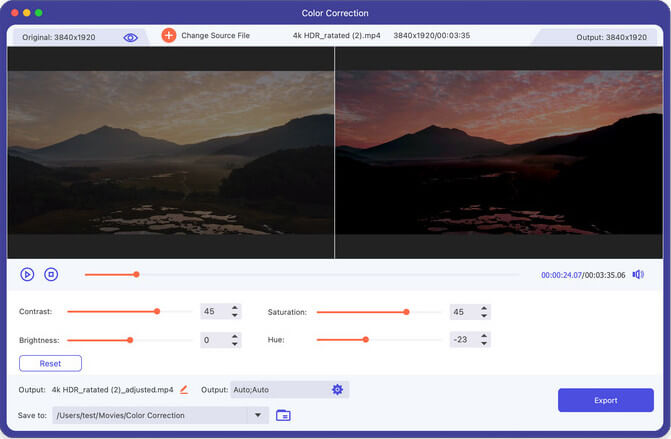
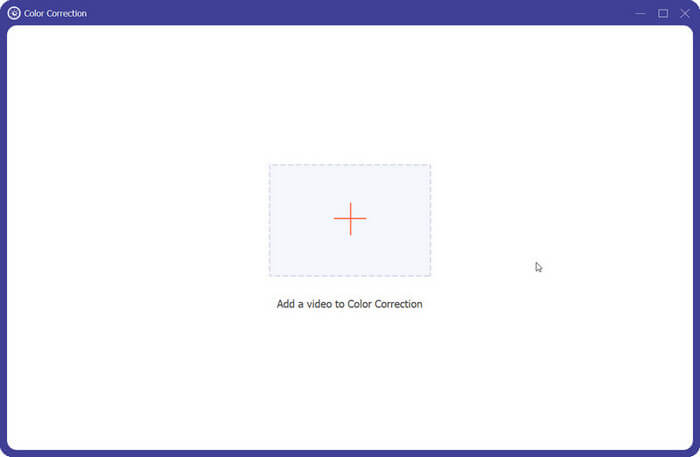
Correção de cor
Entre nesta seção e corrija as cores do seu vídeo de vários aspectos.
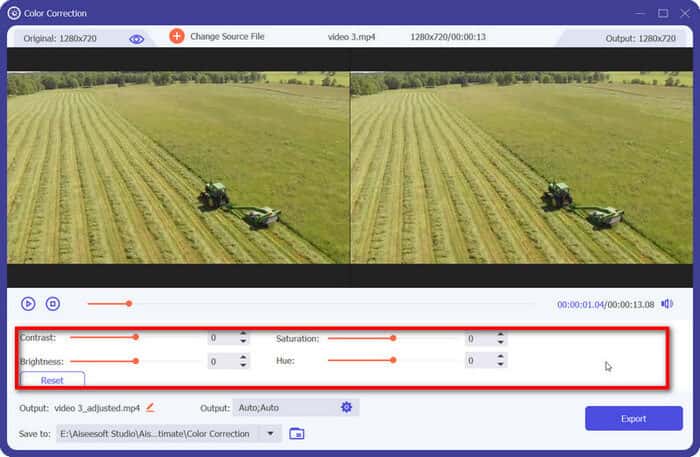
Etapa 1: toque no sinal + para adicionar seu vídeo.
Step 2: Find the working area below and correct your video color from Contrast, Saturation, Hue, and Brightness by moving the bar or inputting the figure on the box followed. Then head to Export button to finish the process.
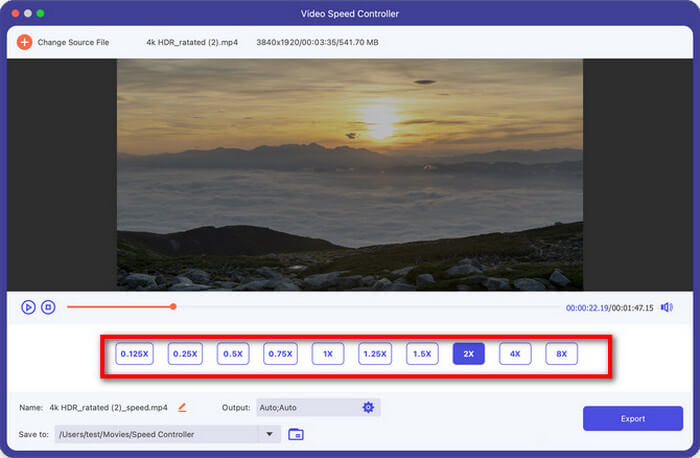
Controlador de velocidade de vídeo
Use esta ferramenta para acelerar ou desacelerar seu arquivo com facilidade.
Passo 1: Importe o arquivo de vídeo no controlador.

Step 2: Click the speed you want down below and preview the effect. Finally, tap on the Export button to save.

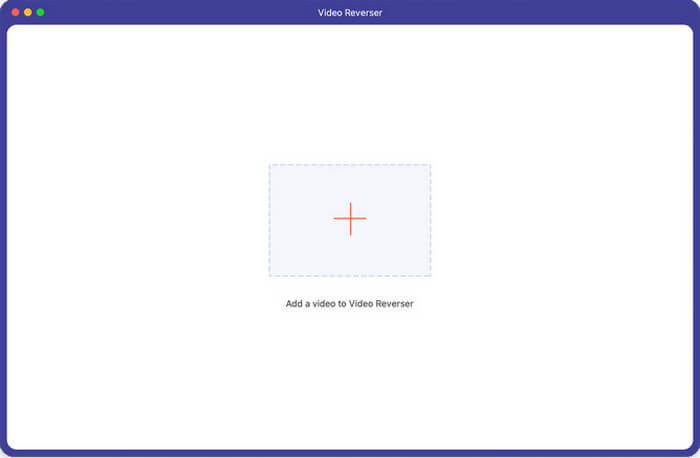
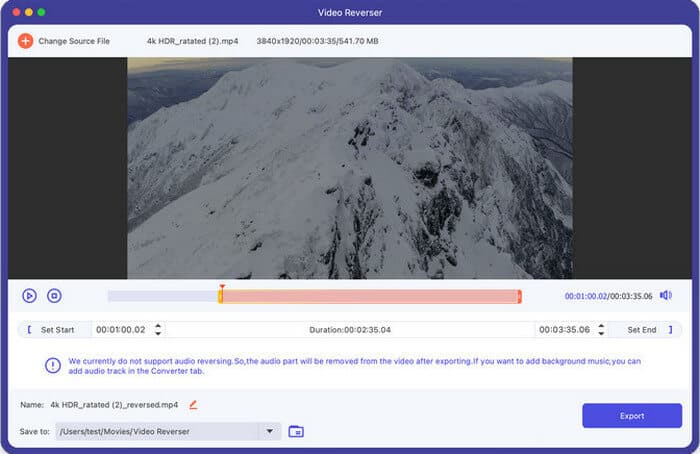
Video Reverser
Inverta seu vídeo com este serviço completo.
Etapa 1: adicione o vídeo que deseja reverter na área central.
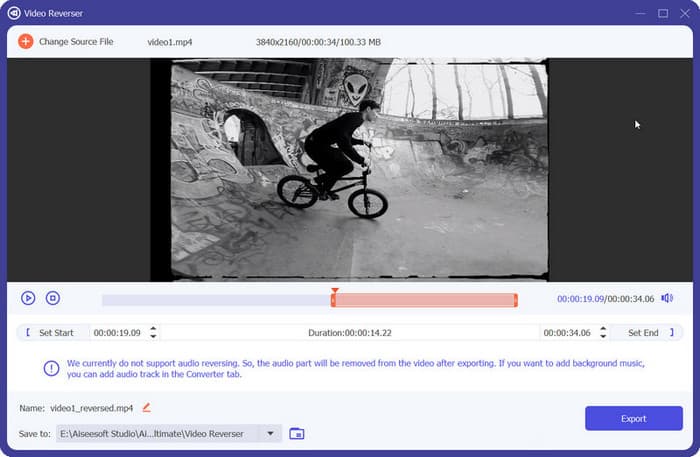
Step 2: If you need to change the time, drag the progressing bar or reset Set Start and Set End to pick up the wanted parts. Then tap on Export to save the final result.
Notice: Audio reversing is not available for current use. Try adding the audio track in the Converter tab.
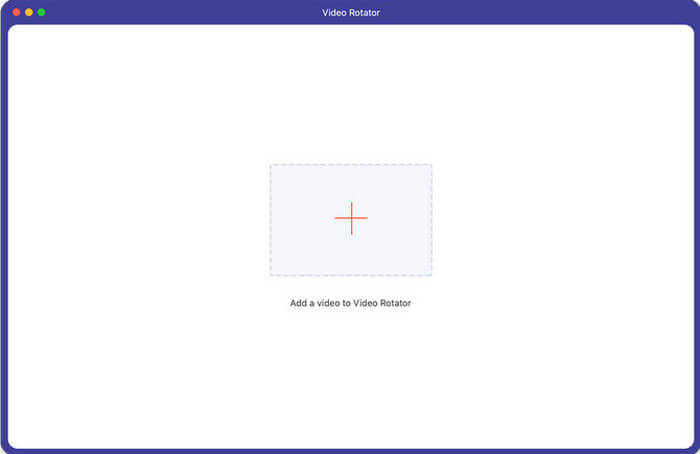
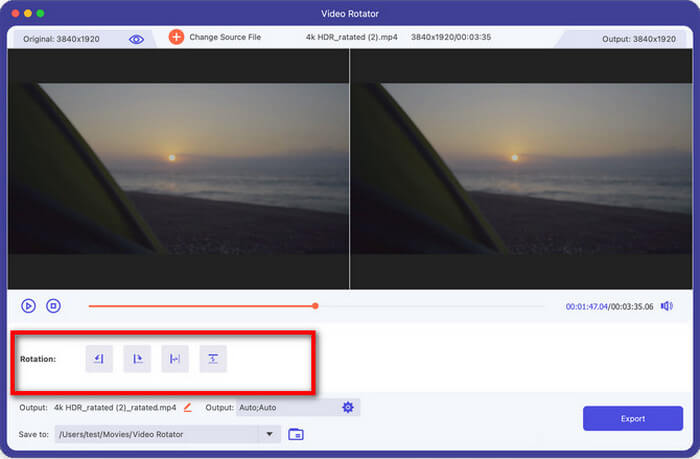
Rotador de vídeo
Inicie o programa e vire seu vídeo através de passos simples.
Etapa 1: adicione um vídeo ao painel central.
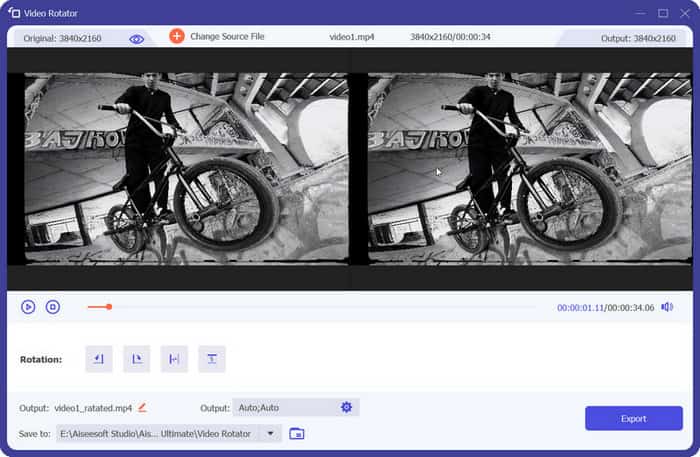
Step 2: Move your mouse to Rotation and choose the direction you want as the new version. The output effect can be previewed directly above.
In the end, go to Export and generate the rotated video.
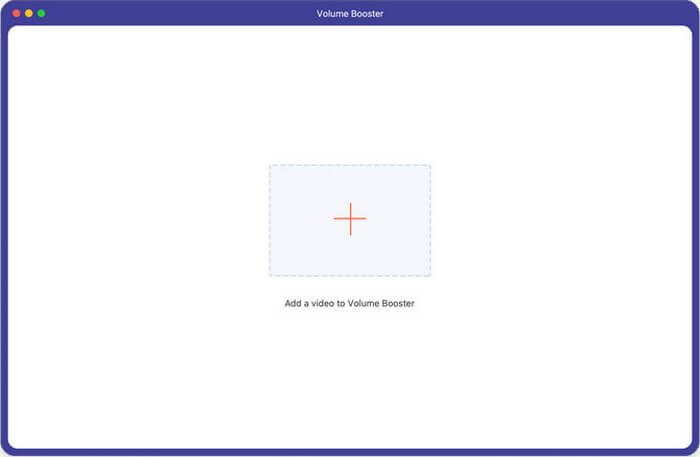
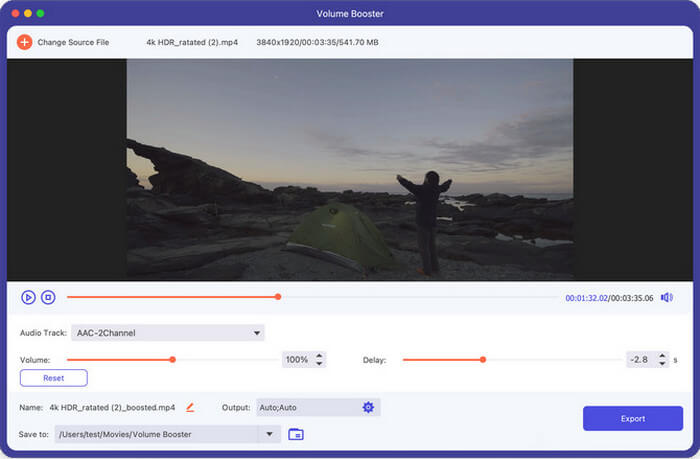
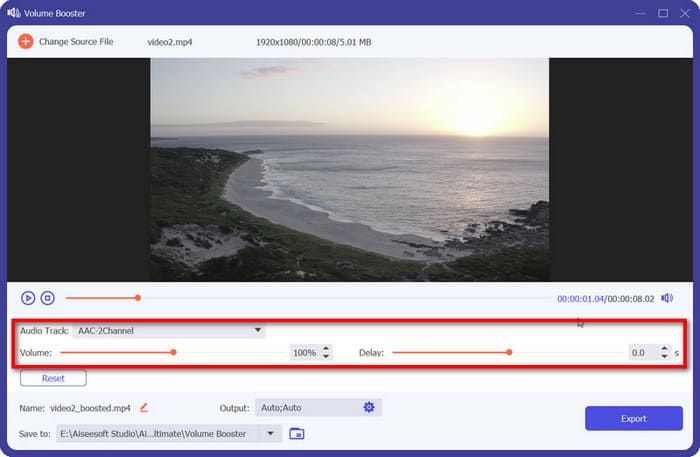
Aumentador de volume
Entre neste canal para ajustar o volume do seu vídeo.
Etapa 1: selecione um vídeo e adicione-o pelo botão +.

Step 2: Go through the options available for use and change the Audio Track, Volume and Delay part to fit. Then select a path to save your profile and click Export.
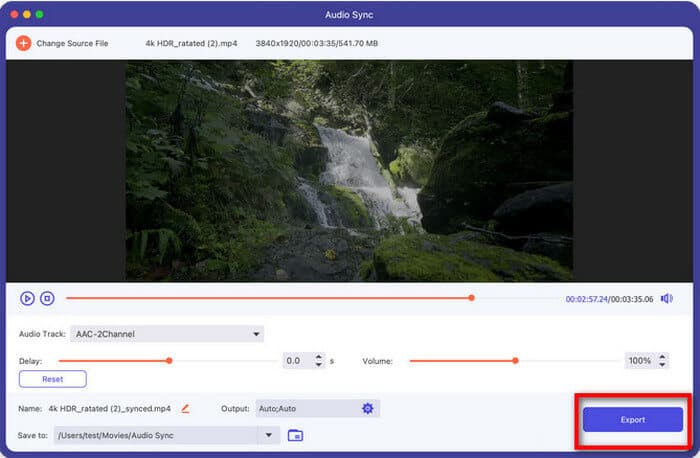
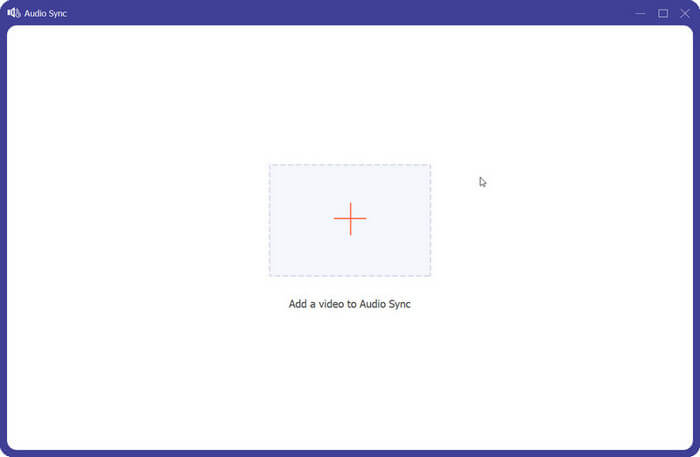
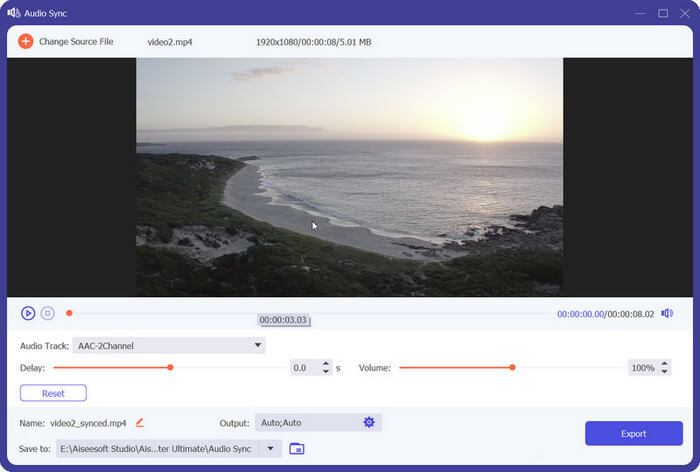
Sincronização de Áudio
Encontre soluções fáceis para sincronizar seu vídeo e áudio.
Etapa 1: envie seu vídeo para esta ferramenta.
Step 2: Click the audio bar and drag it to fit in with the motion above. Then tap on Export to get the new version done.
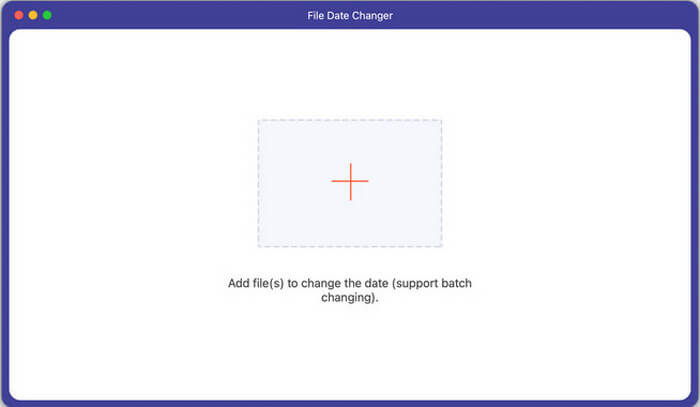
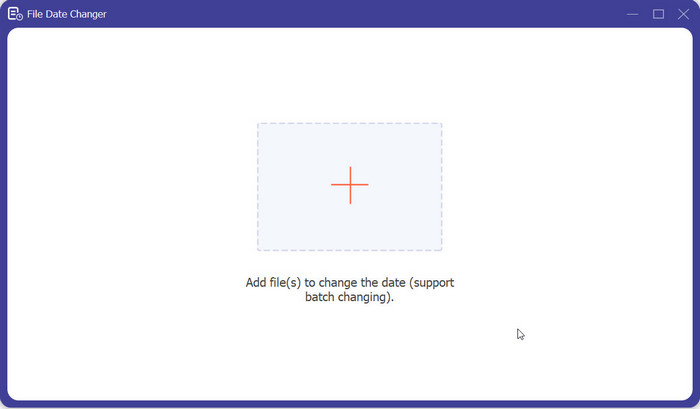
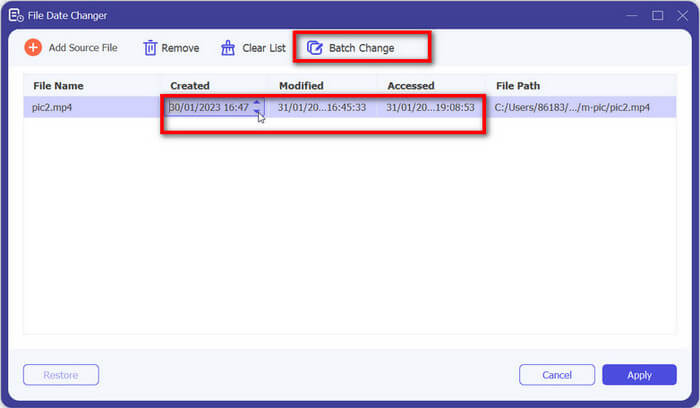
Alterador de data do arquivo
Redefina os detalhes da data do arquivo para suas demandas pessoais individualmente ou em lotes.
Etapa 1: adicione seu arquivo à área específica.
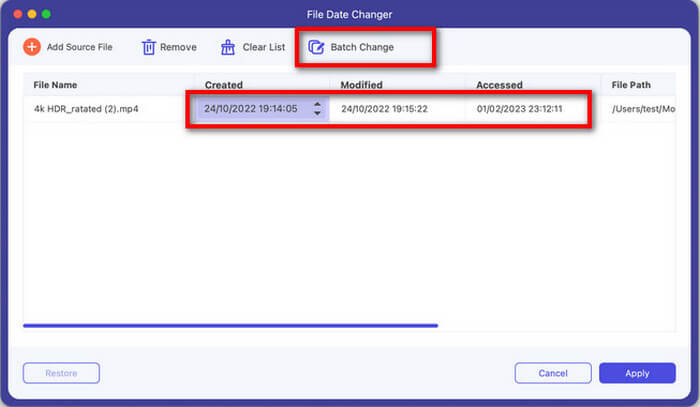
Step 2: Choose the date box and change it based on your needs. It’s worthwhile to note that you can turn to Batch change above if you want a quicker solution.
Step 3: Click Apply button to reach the latest file.
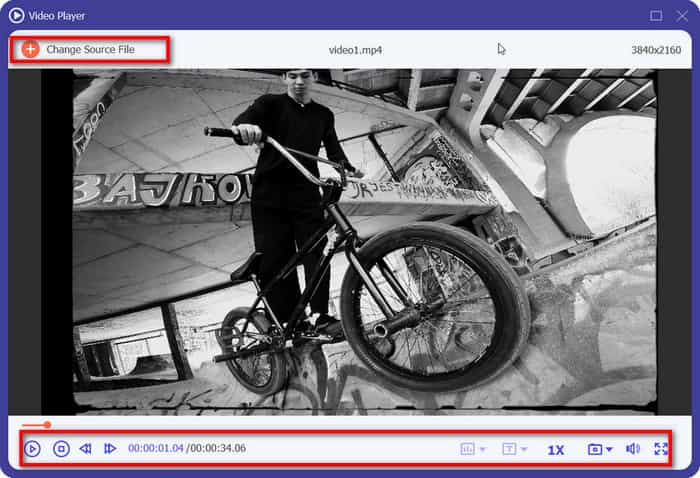
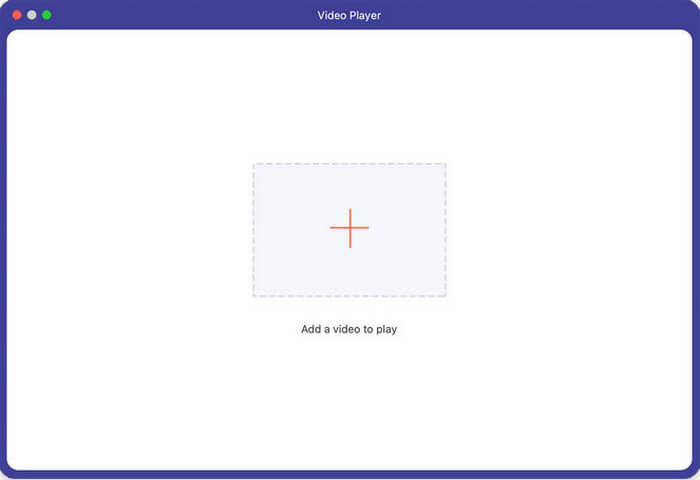
Leitor de vídeo
Reproduza seu vídeo em diversos formatos.
Etapa 1: selecione um vídeo e adicione-o ao player.
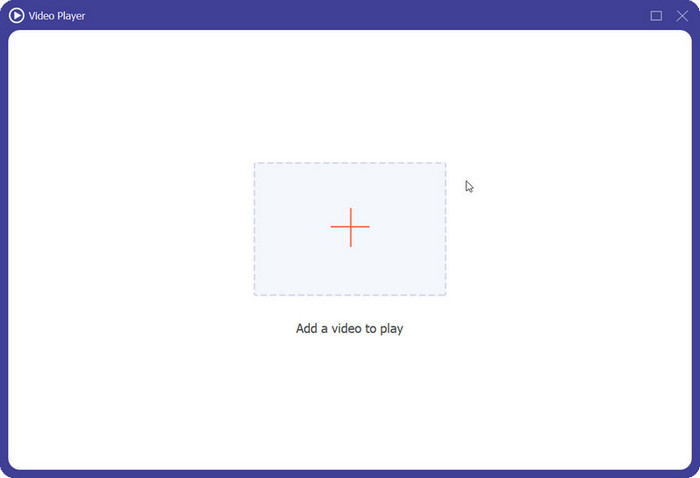
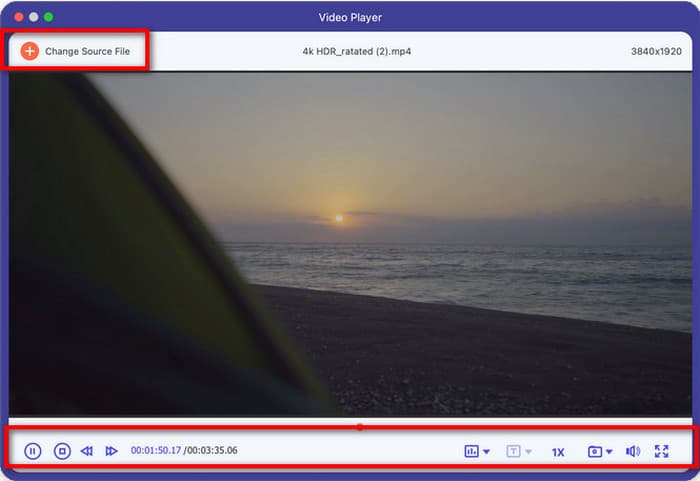
Step 2: Move your mouse and click the buttons to Play and Pause or Stop the video. Or choose Previous 5 seconds or Next 5 seconds to jump to different parts. Meanwhile, you can make options for channel, text, playing speed and more on the right.
Se você quiser reproduzir outro vídeo, toque em Alterar arquivo de origem e mude para um novo destino.