


 Video Converter Ultimate
 Gravador de ecrã
 Reparo de vídeo
 Secure Download
What’s True About HandBrake Trim Video: How to Use It?
There’s no HandBrake trim video, but there’s a feature where users can trim a video.
This often confuses users because HandBrake is primarily a video transcoder designed for converting and compressing videos, not a full‑featured video editing program. Unlike traditional editors, it doesn't include a dedicated Cut or Trim tool. Instead, it lets you specify a Range by choosing the chapters, frames, or time segments you want to encode, allowing you to keep only a specific portion of your video.
In this guide, you'll learn how HandBrake's trimming feature actually works, how to use the Range option to trim your videos, and when it's better to use an alternative tool if you need more precise editing.

Part 1. How to Trim Video In HandBrake
HandBrake's Range feature provides a simple way to trim a video by encoding only the section you want to keep. Instead of editing clips on a timeline, you can define a range based on chapters, seconds, or frames, depending on the level of precision you need. Once you've selected the desired portion, HandBrake creates a new video containing only that segment. Follow the guide below to learn how to use this feature.
Step 1. First, you need to download and install the HandBrake tool on your computer.
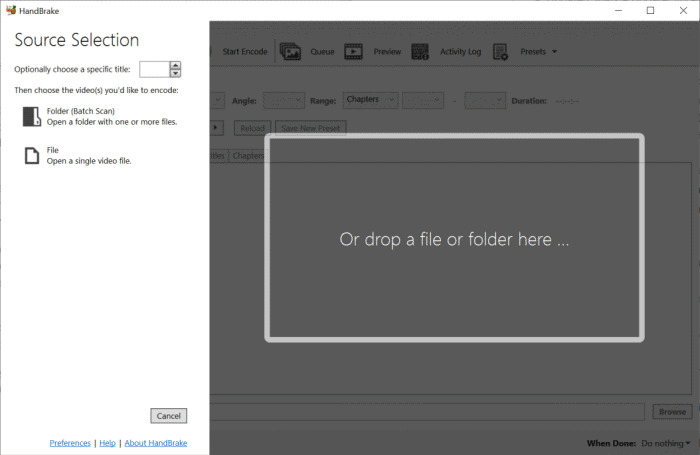
Step 2. Open HandBrake and click File to import the video you want to trim. You can also drag and drop your video directly into the main interface. Once HandBrake finishes scanning the file, the video's information will appear in the Source section.
Step 3. Click the Range drop‑down menu to choose how you want to trim the video. You have three options:
- • Chapters: Keep only the chapters you specify by selecting a starting and ending chapter.
- • Seconds: Enter the exact start and end times of the portion you want to keep. This is the most commonly used trimming method.
- • Frames: Specify the starting and ending frame numbers for frame‑accurate trimming.
Step 4. After that, click the Browse button to select where you want to save the trimmed video. Then, enter a filename for the new video.
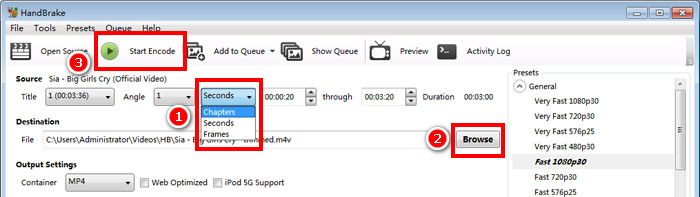
Step 5. Go to the Output Settings section and choose your preferred output format, such as MP4, MKV, or WebM. If needed, you can also adjust other encoding settings before exporting the video.
Step 6. Lastly, once everything is set, click the green Start Encode button. HandBrake will process the selected range and create a new video containing only the portion you specified.
Part 2. Why You Have to Re‑encode the Whole File Just to Trim?
HandBrake has to re‑encode a video because it is designed as a video transcoder, not a video editor. Instead of directly cutting the original video, it creates a new file by encoding the selected portion of the video.
Also, since this tool creates a new encoded file, trimming on HandBrake takes longer than using a traditional video cutter. The processing time depends on factors such as the video's length, resolution, and your computer's performance.
Meanwhile, the benefit of re‑encoding is that you can trim a video while also changing its format, quality, resolution, or compression settings. However, if you only want to make a quick cut without changing the video, a lossless video cutter is a better option because it can trim the file without re‑encoding it.
In short, HandBrake re‑encodes videos because it generates a new output file instead of directly editing the original one. This is why trimming in HandBrake takes more time than in software designed specifically for video editing.
Part 3. Faster Alternatives for Trimming (No‑Re‑encoding)
If HandBrake's trimming process feels too slow for simple trimming, FVC Video Converter Ultimate is a more efficient alternative. It includes a dedicated Video Trimmer that lets you cut unwanted parts of your videos quickly and accurately. Unlike HandBrake, the trimming process is designed for editing, making it faster and easier for users who only need to shorten a video without going through a full transcoding workflow. It also provides additional editing features if you want to do more than just trim your videos.
Main Features:
- • Dedicated Video Trimmer for quick and precise video cutting.
- • Fast trimming with a simple, beginner‑friendly interface.
- • Supports over 1,000 video and audio formats.
- • Merge multiple clips into a single video.
- • Preview your edits before exporting.
- • Has built‑in video editing tools.
- • GPU acceleration for faster processing and exporting.
How to Trim a Video Using FVC Video Converter Ultimate:
Step 1. First, download and install the FVC Video Converter Ultimate on your computer device.
Free DownloadFor Windows 7 or laterSecure Download
Free DownloadFor MacOS 10.7 or laterSecure Download
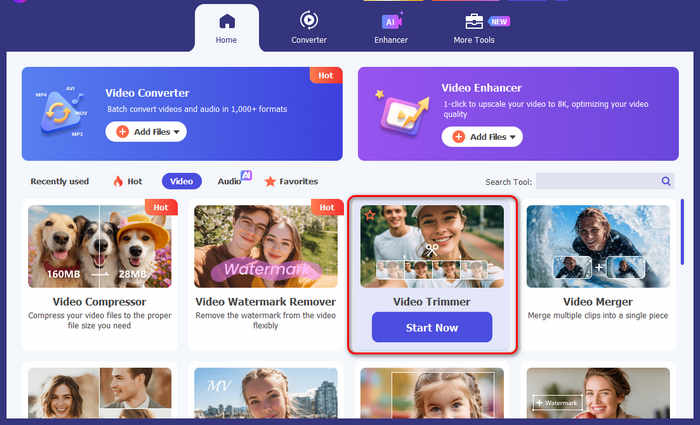
Step 2. Launch the tool, go to the Home tab, and choose Video Trimmer.
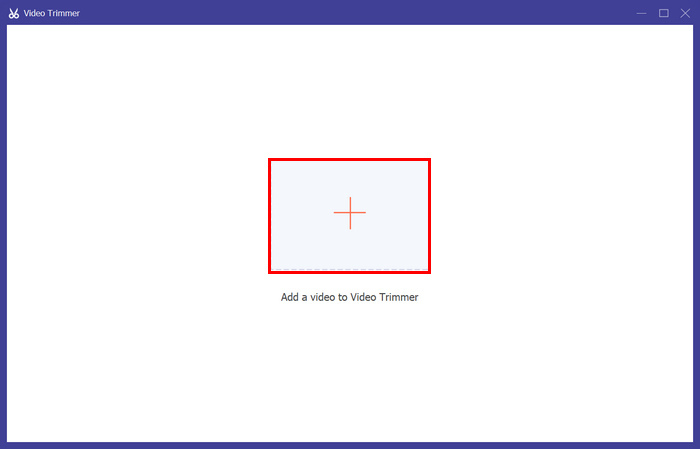
Step 3. Click on the Add a Video to Video Trimmer to add the video that you want to trim.
Step 4. After that, move the start and the end of the clip by dragging, moving it from left to right, or typing in the start and end times of the part of the video that you want to trim. Once done, click on the Export button below.
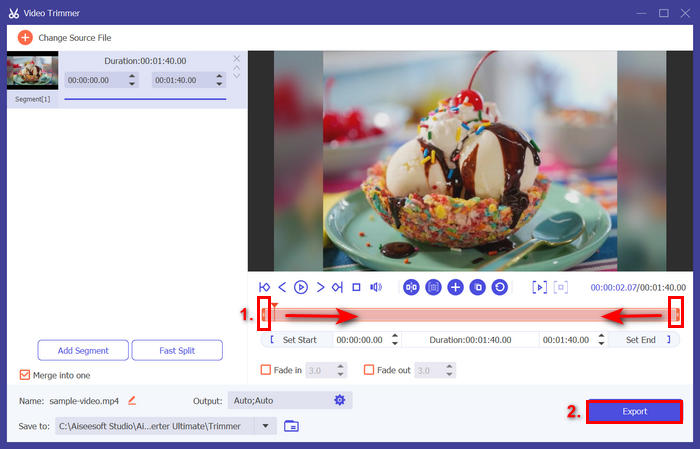
If you want to trim the video, use the Fast Split trimmer feature. You just need to click on the Fast Split button beside the Add Segment button. Next, select a mode in which you want to split the segment. If you choose to split it by average, then just indicate the number, but if you want to split it by time, then indicate the time. After that, click the Split button.
Part 4. FAQs about Trimming Videos in HandBrake
Does trimming a video in HandBrake reduce its quality?
Not always. When you trim a video in HandBrake, the software re‑encodes the file, which means the final quality depends on the settings you choose. Using higher‑quality presets or keeping settings close to the original file can help reduce quality loss. However, since the video goes through another encoding process, some minor quality changes may still occur.
Can HandBrake trim multiple videos at once?
Yes. HandBrake supports batch processing, allowing you to queue multiple videos for trimming. However, you'll need to set the Range and output settings for each video individually before adding them to the queue and starting the encoding process.
What's the difference between HandBrake's Range feature and a video trimmer?
HandBrake's Range feature trims a video by re‑encoding the selected portion into a new file, making it ideal if you also want to convert or compress the video. A dedicated video trimmer, on the other hand, is designed specifically for cutting videos quickly and often supports lossless trimming without re‑encoding, making it a better choice for simple editing tasks.
Conclusão
While there isn't a dedicated HandBrake trim video feature, the Range option lets you trim videos by selecting the chapters, seconds, or frames you want to keep. Although this method requires re‑encoding the video, it's still a useful choice if you're already converting or compressing your files. However, if you need a faster way to trim videos without waiting for the encoding process, a dedicated tool like FVC Video Converter Ultimate offers a more efficient solution. Choose the tool that best fits your workflow and enjoy hassle‑free video trimming.
-
 Como ripar DVD com o HandBrake: um guia para iniciantes [2025]
 Se você está se perguntando como ripar DVDs com o HandBrake, você está na página certa. Este artigo lhe ensinará maneiras e oferecerá alternativas cuidadosamente elaboradas para você.
-
 11 aparadores de vídeo notáveis para usar [gratuitos e pagos]
 Aqui estão as listas de software de edição de vídeo que você pode usar para cortar um vídeo. Analisaremos genuinamente esses programas e forneceremos todos os detalhes que você procura.
-
 Como cortar um vídeo com o TikTok [Instruções detalhadas]
 Quer saber como encurtar um vídeo com o TikTok? Em seguida, forneceremos maneiras fáceis. Além disso, você aprenderá outros métodos usando aplicativos/programas offline.
