

Como criar e aplicar facilmente filtros do Instagram em sua imagem e vídeo
Instagram filters are an essential part of your IG post to make it look eye-catchy to the audience. These filters can bring heat to the post, especially if you want to post it as a story. But you know what is good about it? You will not need to waste much time editing to make your video and photo unique. Although Instagram filters are easy to use, choosing which filter suits your post. So today, we will present to you the seven most-picked filters on Instagram. So, follow this guide to learn how to make an Instagram filter, find them, and use them.

Parte 1. 7 filtros mais selecionados disponíveis no Instagram que todos adoram
Mas antes de prosseguirmos em como usar os filtros, vamos primeiro determinar os filtros mais selecionados por seus influenciadores, vloggers, artistas e muito mais favoritos. Então o que estamos esperando? Vamos nos aprofundar em detalhes sobre esses filtros e saber se são os melhores filtros para suas fotos ou vídeos antes de ensiná-lo a adicionar um filtro a uma história do Instagram.
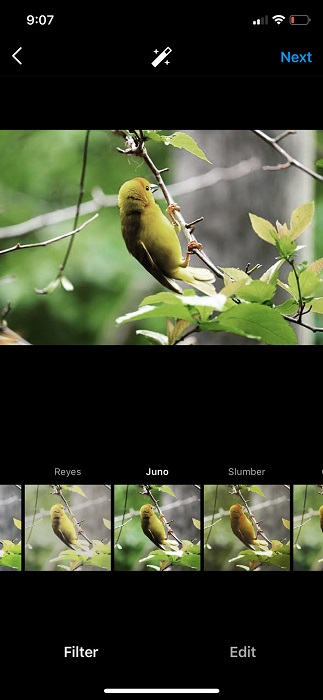
1. Juno

Juno is the most common filter many Instagram users use because it is the most flexible. This filter gives you an intense warm look while slightly increasing the contrast and saturation of the image. With this filter, you add warming effects to the photo and barely make it a bit dense basically, it is more on the tone.
2. Creme
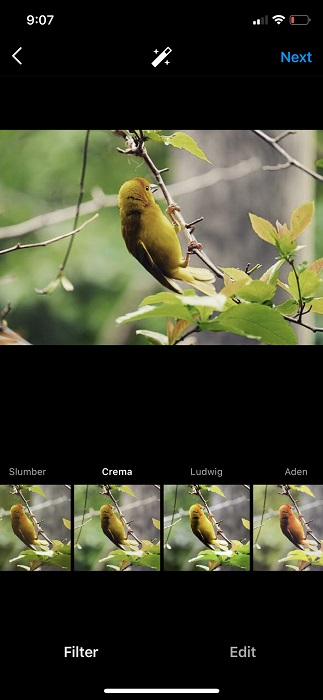
Crema came from its name creamy and smooth. It best fits if you use this to shoot outside because of the warming and cooling effects it provides.
3. Tinteiro
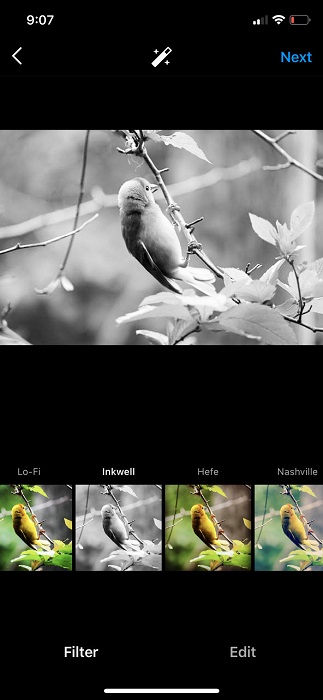
If you are a fan of classic black and white filters, Inkwell might be the befit for your photo or video. This filter works well if you feel to have a monochrome post.
4. Serra
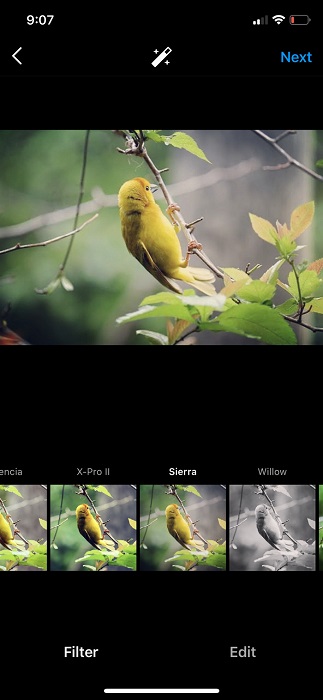
Sierra is into a more neutral vibe to provide a vintage look on your post. This filter is ideal for shooting food because it is soft and bright to have a classic look.
5. Lo-Fi

The Lo-Fi filter adds depth to your post as it provides a deep shadow while increasing the image's saturation. This filter is one of the oldest filters you can use on Instagram.
6. Nashville
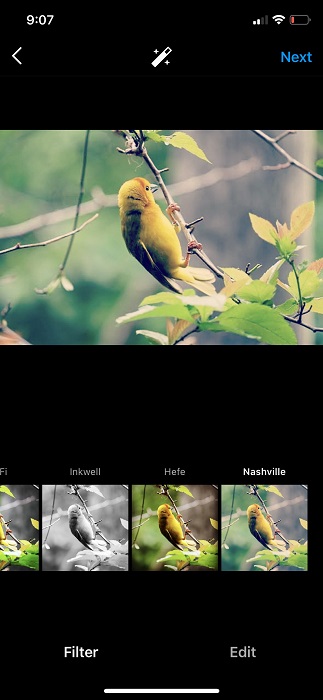
While Nashville provides a pastel tone to your post, it slightly increases the color pink and has a pleasant palette tone. This Instagram filter is high in exposure, but it has low contrast with warm temperatures.
7. Hefe
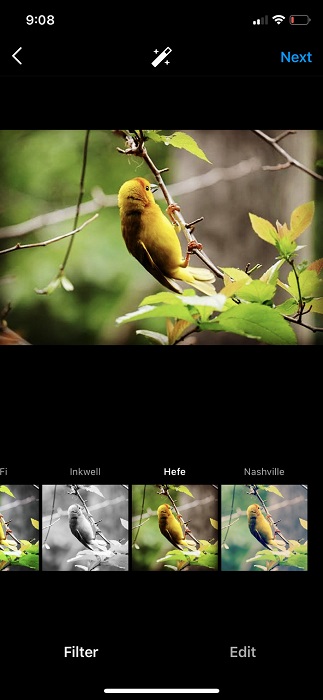
If you want to have a great landscape filter, then Hefe is here for you. With this filter, you can take any post to look sharper saturated while having an intense deeper shadow. So, if you love to shoot on landscapes and want to make them look majestic, this filter is your go-to.
Parte 2. Como posso encontrar os filtros no Instagram
Agora que conhecemos as características dos filtros, é hora de usá-los. Mas a questão é, onde você pode encontrar esses filtros? Não sabe onde? Nesse caso, você pode ler e seguir como encontrar os filtros no Instagram nestas etapas.
Step 1. Before anything else, you must download the app on your device first. After downloading it, open the app and follow the following steps.
Step 2. Click the + icon and click Post on your gallery; choose the image you want to add the filter on before posting it on Instagram.
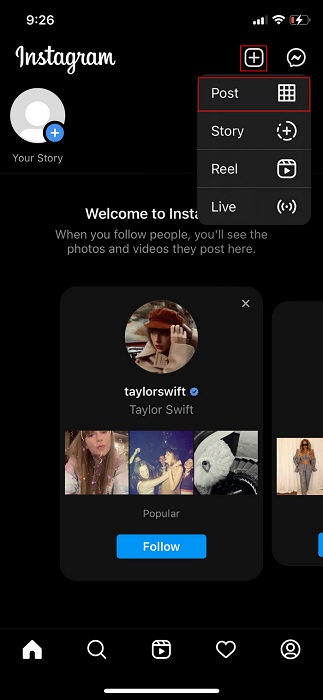
Step 3. After you've selected the image, click Next. With that, you have now found the filters on Instagram.
Parte 3. Como aplicar filtros no Instagram e publicá-los
Depois de encontrar os filtros, por que você não os experimenta? Portanto, as etapas seguintes ensinarão como usar um filtro no Instagram antes de publicá-lo.
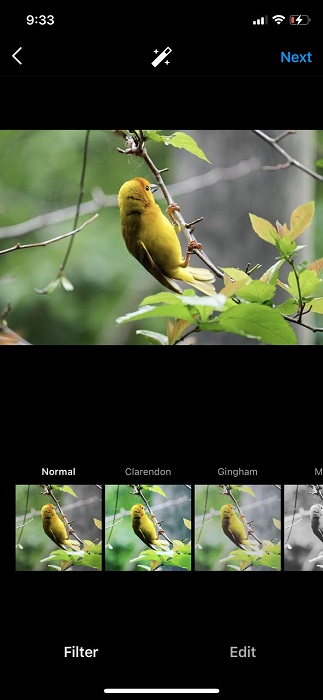
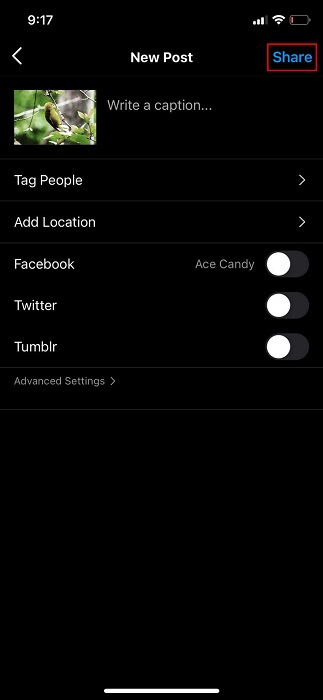
Step 1. Choose the filters underneath selection and slide it to the right to see the other Instagram filters available. Click the filter you want to use, then click the Next again.
Step 2. This time, you can now post the image with the filter on hit the Share icon to post it on Instagram.
Parte 4. Como criar seu filtro personalizado do Instagram
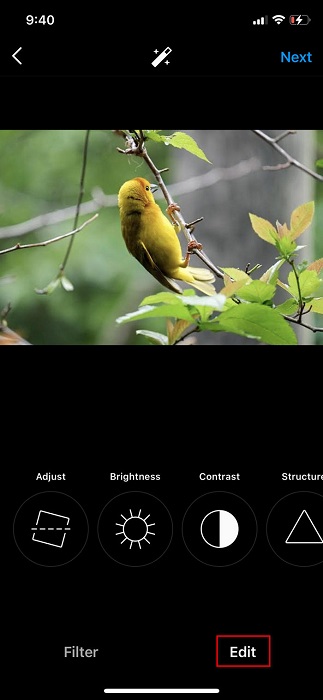
Agora podemos criar uma depois de determinar as marcas d'água, localizá-las e aplicá-las. Você sabia que criar seu filtro não é tão difícil, mas conhecer as funções dos ajustes disponíveis como estrutura, contraste, calor, vinheta e nitidez é difícil. Mas não precisa se preocupar porque vamos orientá-lo sobre como todas essas funções funcionam e aprender como criar um filtro do Instagram próprio.
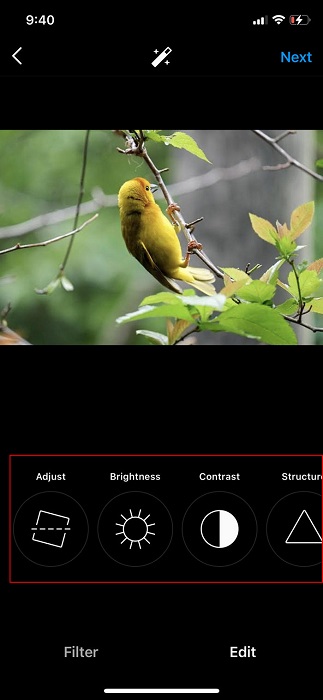
But before we proceed, we will add some kin information about the effects you will encounter under Edit. First, the Adjust is used to align or straighten the image or video. Next is the Brightness; it extends the brighten up or darken of the object. Warmth adds color tone to the object by making it look warm or cold. Saturation is for controlling the intensity of the color. Lastly, Sharpen enhances the edges of the image to make it look on point. These are the most common effects you will need to adjust to make your effects.
Os efeitos que você adicionou à sua imagem não serão salvos na sua lista de filtros do Instagram. Então, para usá-lo novamente, você precisará refazê-lo com as mesmas etapas abaixo.
Step 1. Click the Edit next to the Filter.
Step 2. You can make your filter by changing the brightness, contrast, structure, warmth, saturation, and more.
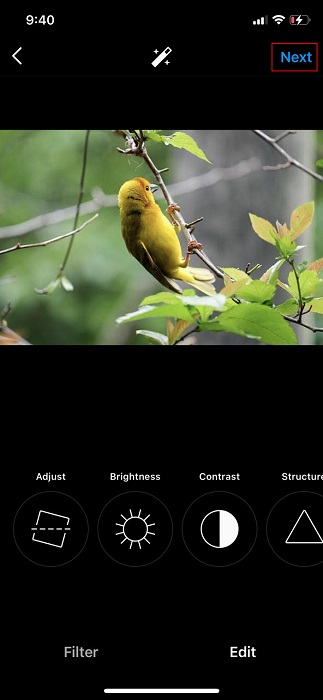
Step 3. Click the Next to process it, then hit Share to post it on Instagram.
Parte 5. Melhor ferramenta a ser usada para adicionar filtros incríveis aos seus vídeos na área de trabalho [sugerido]
Video Converter Ultimate offers you a set of high-quality filters that you can't find on Instagram. With this tool, you can create filters to make your video look phenomenal. However, this tool only works on Windows and Mac; if you don't have a desktop, you can't use it because it is not compatible with mobile devices. So now, if you want to use an anime filter for Instagram, follow the written demo below.
Step 1. To download the software on your desktop, click the download button presented below. After it, follow the installation process and open the tool to proceed to the succeeding steps below.
Free DownloadFor Windows 7 or laterSecure Download
Free DownloadFor MacOS 10.7 or laterSecure Download
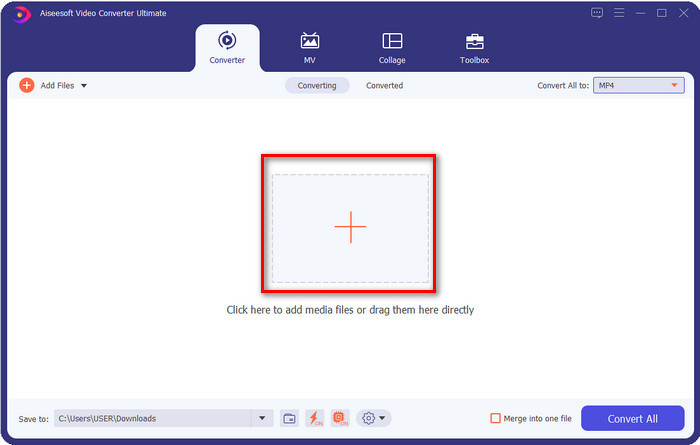
Step 2. On the tool's interface, click the + button, a folder will show, browse the video file, and click Open to upload it.
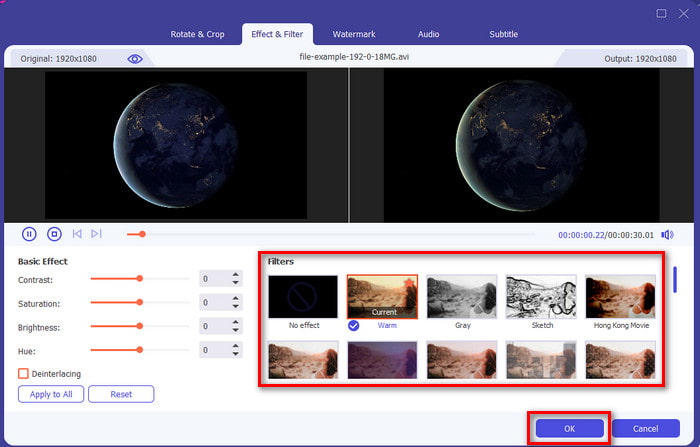
Step 3. To add the filter and effects, click the wand button. Editing windows will display, click Effect & Filter; under it, choose the filter you want; you can also change the effects according to your needs. To apply the changes, click OK.
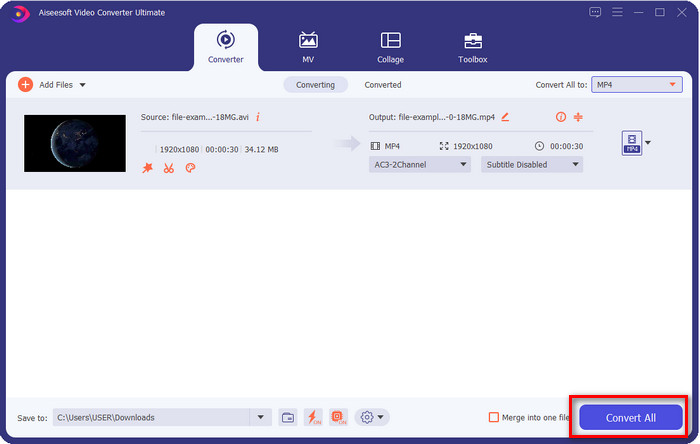
Step 4. The video file will export with a filter by clicking the Convert All button. You have now added filters to your video; you can now post it on Instagram.
Related:
Parte 6. Perguntas frequentes sobre como adicionar filtro no Instagram
Como fotografar e adicionar um filtro nas histórias do IG?
Em primeiro lugar, abra seu Instagram no botão adicionar no canto superior direito da tela, clique nele e, em seguida, clique no Story. Depois disso, sua biblioteca de imagens será exibida, mas se você quiser fotografar, clique em Câmera. Aperte o botão da câmera para tirar uma foto e segure-o por um longo tempo se for fazer um vídeo curto. Você pode deslizar para a esquerda para adicionar o filtro e o Instagram aplicará o filtro à imagem ou vídeo que você fizer. Depois de encontrar o filtro perfeito, clique na seta abaixo para publicá-lo.
Qual é o vídeo mais extenso que posso gravar no IG?
São aproximadamente 60 segundos por história, mas você pode postar qualquer vídeo mais curto do que isso, se quiser. No entanto, você não pode gravar um vídeo por mais de 60 segundos, mas pode postar vários vídeos em sua história e fazer um vídeo longo.
O Instagram é para todas as idades?
De fato é. Este aplicativo é popular hoje em dia com a maioria dos adolescentes, mas alguns idosos também podem usá-lo se quiserem. Mas lembre-se de que você deve se preocupar com o que publica porque não há limites de idade no Instagram, então todos que você segue ou segue verão sua postagem.
Conclusão
It is indeed an eye-opener for us; what are the other things you can do with Instagram, posting and sharing your video or image and editing on it before posting it. Although Instagram offers different filters, it is still not enough, but if you add the Video Converter Ultimate, you can say that options become wider. Before posting your videos on Instagram, start to add a filter on it with the help of the Video Converter Ultimate.
-
 Como adicionar áudio e música ao vídeo gratuitamente em seu computador / telefone
 Este artigo mostra 4 maneiras fáceis de adicionar áudio a vídeo gratuitamente. Não importa qual faixa de áudio você deseja adicionar ao seu vídeo, você pode obter resultados satisfatórios aqui.
-
 Transforme GIF em formato de vídeo: converta memes GIF em vídeo [2021]
 Determine como transformar GIF em formato de vídeo com a ajuda das ferramentas listadas abaixo. Escolha qual deles e aprenda como fazê-lo, à medida que coletamos evidências suficientes sobre eles.
-
 GIF maravilhoso para aplicativos de vídeo para dispositivos Android e iOS
 Você sabia que pode converter GIFs em qualquer formato de vídeo de que goste usando o telefone? Escolha os melhores aplicativos em seu Android ou iOS.