

چگونه از عکس های ذخیره شده در آیفون خود یک GIF بسازید
ما از GIFها استفاده کردیم تا متن سادهمان را جذابتر کنیم و به نسخهای بهتر از تصاویر ثابت تبدیل شویم، چون آنها تصاویر ایستای متحرک هستند. همچنین به دلیل محبوبیت این فرمت، بسیاری از کاربران همین حالا هم سعی میکنند GIFهای خودشان را بسازند، چه روی کامپیوتر و چه روی تلفن. حالا میخواهیم درباره این صحبت کنیم که چطور از عکسهایی که در حافظه آیفون ذخیره کردهاید روی آیفون GIF بسازید. به خواندن این مطلب ادامه دهید تا توضیح دهیم چگونه GIF بسازید و چه نرمافزارهای مختلفی میتوانید برای این کار استفاده کنید.

قسمت 1. نحوه ذخیره عکس زنده به عنوان GIF در برنامه Photos
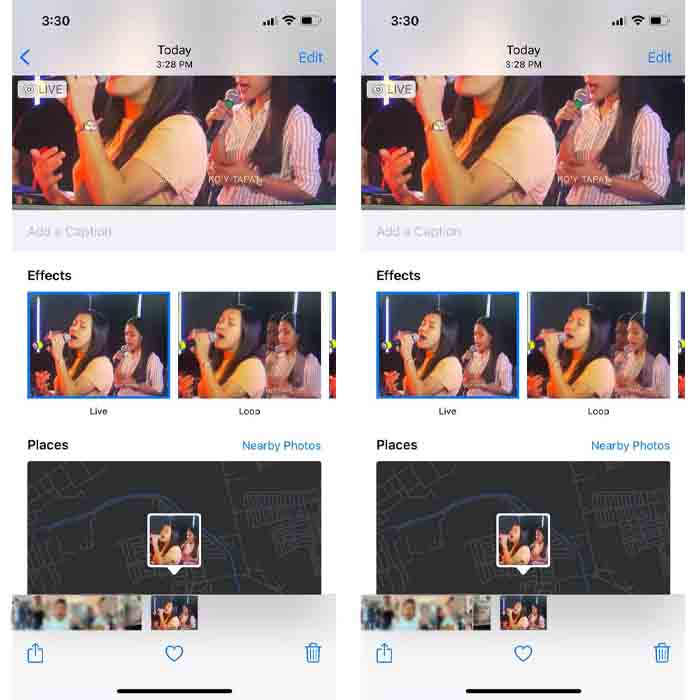
آیا میدانستید که میتوانید با استفاده از عکسهای آیفون خود GIFهای ساده بسازید؟ با استفاده از اپلیکیشن Photos. این برنامه از پیش نصبشده، تعداد زیادی عکس و ویدیو را روی گوشی شما ذخیره میکند. در اصل، مانند گالری در اندروید محل نگهداری عکسهایی است که میگیرید. اما این ابزار امکانات ویرایشی هم دارد که شاید از آنها خبر نداشته باشید. هرچند نوعی GIF ساز هم دارد، اما هنوز برخی قابلیتهای مهم ویرایشی را کم دارد تا GIFهای شما واقعاً جذاب و تازه به نظر برسند. علاوه بر این، اگر میخواهید این ابزار را امتحان کنید، مراحل زیر را دنبال کنید و یاد بگیرید چطور با استفاده از Photos روی آیفون GIF بسازید.
گام 1. اپلیکیشن Camera از پیش نصبشده را در آیفون خود باز کنید.
گام 2. سپس روی گزینه Live Photo در وسطِ بالای صفحه بزنید و دکمه Capture را فشار دهید.
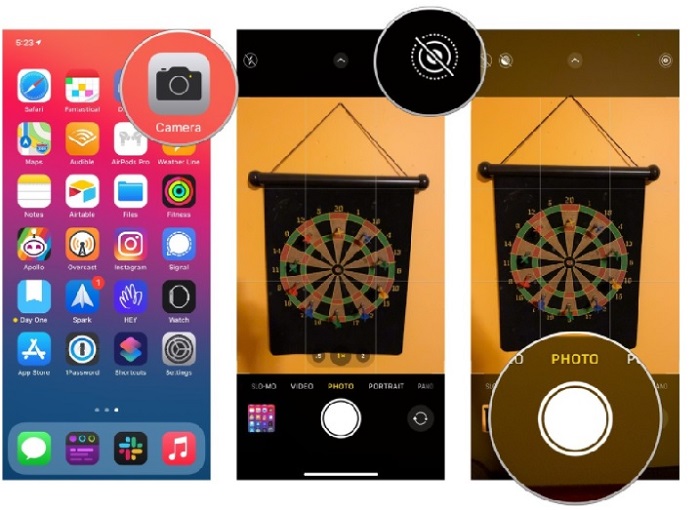
گام 3. بعد از آن، روی عکس مربع کوچک در پایینِ سمت چپ رابط دوربین بزنید. سپس عکس را به سمت بالا بکشید و از میان گزینهها، GIF effects را انتخاب کنید. بعد از انتخاب، فایل بهصورت خودکار ذخیره میشود و آماده است تا آن را برای افراد دیگر یا در شبکههای اجتماعی به اشتراک بگذارید.
طرفداران
- نیازی به دانلود نیست زیرا از قبل روی آیفون شما نصب شده است.
- ساده برای استفاده به عنوان یک ابزار ویرایش.
منفی ها
- اگر یک عکس زنده نباشد، نمی توانید تصاویر را به GIF تبدیل کنید.
- ویژگی های ویرایش زیادی را برای شگفت انگیز کردن GIF شما ارائه نمی دهد.
قسمت 2. نحوه ساخت GIF در آیفون با GIPHY
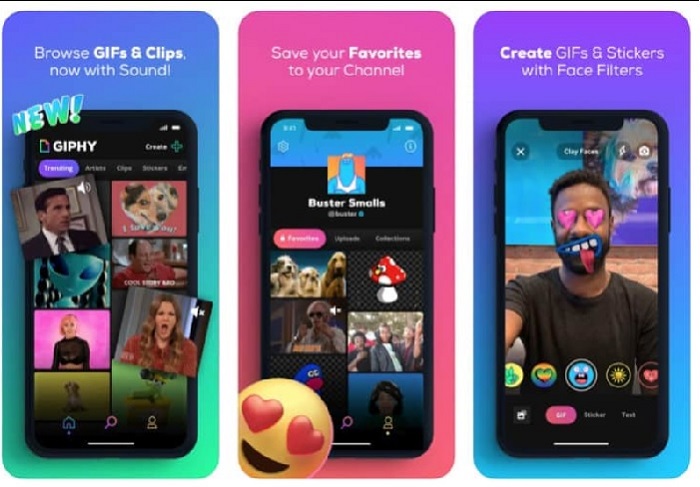
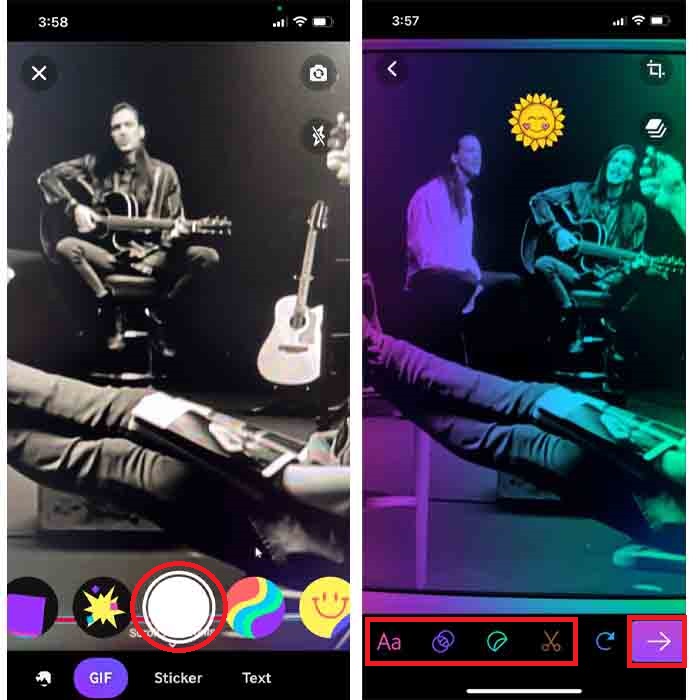
GIPHY یک مخزن عظیم GIF است که میتوانید آن را رایگان استفاده کنید، هرچند میتوانید در آن ثبتنام هم بکنید. همچنین میتوانید GIFهایی را که خودتان ساختهاید اینجا به اشتراک بگذارید تا دیگران هم از آنها استفاده کنند. اما این ابزار از ترکیب چند تصویر برای ساخت یک GIF پشتیبانی نمیکند. با این حال، فیلترهای موجود در آن عالی و کار با آنها آسان است. پس اگر میخواهید از GIPHY استفاده کنید و GIF بسازید، مراحل زیر را دنبال کنید.
گام 1. ابتدا GIPHY را روی آیفون خود دانلود کنید و بعد آن را اجرا کنید.
گام 2. روی Create بزنید و در بالا سمت چپ، دکمه album را لمس کنید و اجازه دسترسی ابزار به تصاویرتان را بدهید.
سپس تصویر خود را که می خواهید به GIF تبدیل شود انتخاب کنید و ویرایش را در رابط انجام دهید.
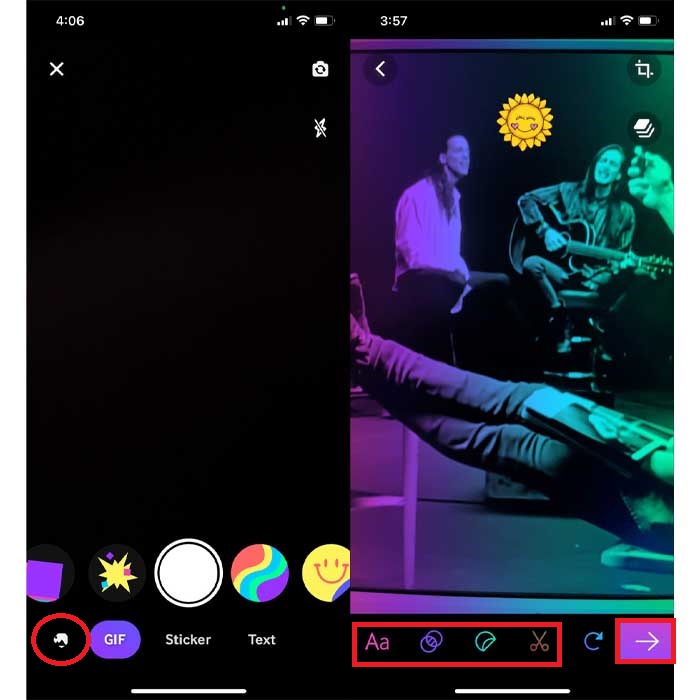
گام 3. شما نمیتوانید GIF را مستقیماً در آیفون ذخیره کنید، بنابراین دو گزینه پیش رو دارید. اول اینکه آن را در فضای ابری GIPHY آپلود کنید و عمومی یا خصوصیاش کنید، یا بلافاصله آن را به اشتراک بگذارید.
طرفداران
- این یک کتابخانه بزرگ از GIF است.
- جلوه بهتری نسبت به Photos دارد.
منفی ها
- نمیتوانید GIF تمامشده را مستقیماً در فضای ذخیرهسازی خود ذخیره کنید. یا آن را در حسابی که در GIPHY ساختهاید ذخیره میکنید یا آن را به اشتراک میگذارید.
- نمی توان تصاویر را برای ساخت GIF کامپایل کرد.
قسمت 3. حرفه ای ترین ابزار برای ساختن GIF از چندین عکس
اگر ابزاری که ابتدا معرفی شد نتوانست GIF دلخواه شما را بسازد، اینبار از Video Converter Ultimate استفاده کنید. این ابزار میتواند از عکسهای شما GIFهایی بسازد که از دو اپ بومی دیگر و اپهای قابلدانلود بهتر است. اما این برنامه فقط روی دسکتاپ در دسترس است، بنابراین باید ابتدا چندین عکس را به کامپیوتر منتقل کنید تا بتوانید GIF بسازید. همچنین فیلترهایی که اینجا در اختیار دارید فوقالعادهاند و میتوانند شما را شگفتزده کنند. پس برای اینکه یاد بگیرید چطور از چندین عکس آیفون یک GIF بسازید مراحل زیر را دنبال کنید.
گام 1. ابتدا Video Converter Ultimate را دانلود و نصب کنید.
دانلود رایگانبرای ویندوز 7 یا بالاتردانلود امن
دانلود رایگانبرای MacOS 10.7 یا بالاتردانلود امن
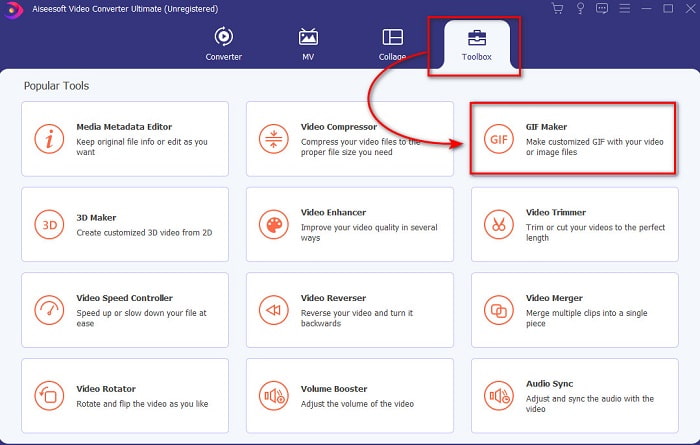
گام 2. در بخش Toolbox روی GIF Maker کلیک کنید.
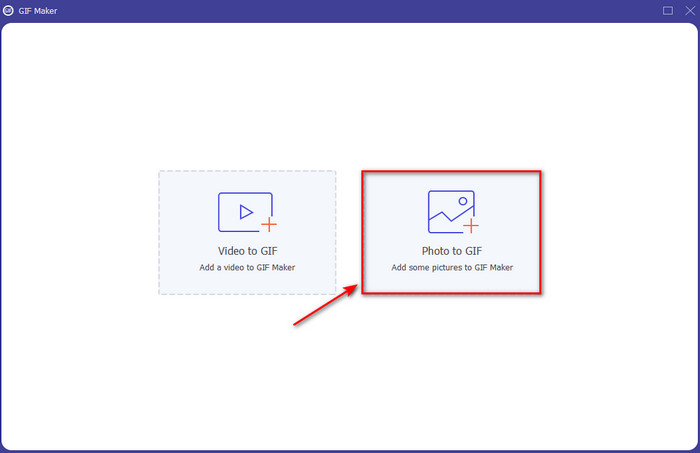
گام 3. روی Photos to GIF کلیک کنید و عکسی را که میخواهید به GIF تبدیل شود انتخاب کرده و روی Open بزنید. علاوه بر این، در ابتدا نمیتوانید چندین عکس را با هم اضافه کنید، اما بعداً میتوانید آنها را بیفزایید. سپس Output Settings مربوط به GIF را تنظیم کرده و روی OK کلیک کنید.
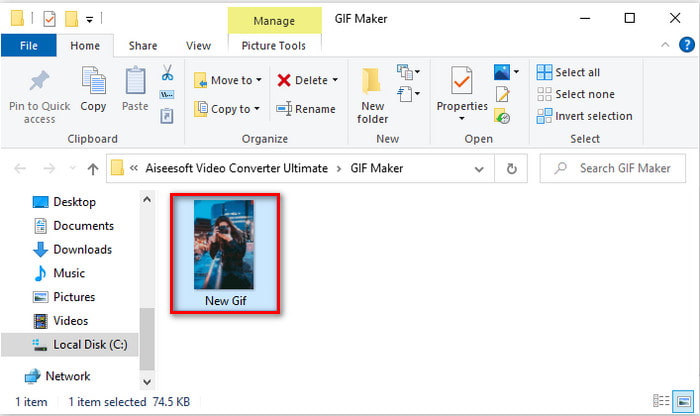
گام 4. برای افزودن بقیه تصاویر باید روی دکمه + کلیک کرده و آنها را انتخاب کنید. پس از اینکه همه تصاویر اضافه شد، روی Export کلیک کنید.
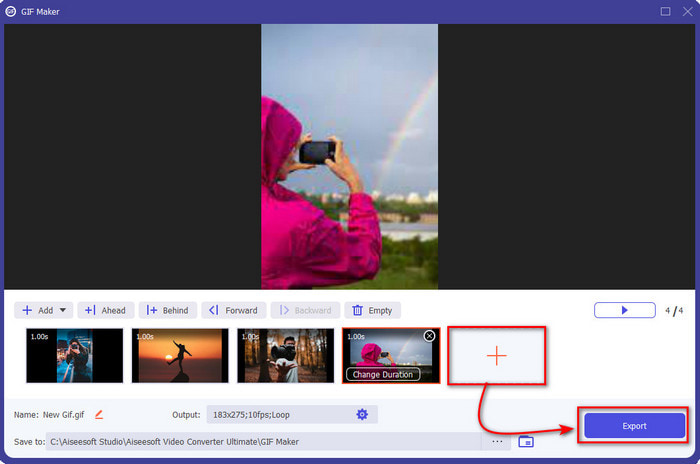
گام 5. چند ثانیه صبر کنید؛ سپس پوشهای روی صفحه نمایان میشود که حاوی GIF ساختهشده شما است.
طرفداران
- ویرایشگر فوق العاده ای که می توانید برای برجسته کردن GIF خود به آن تکیه کنید.
- دارای بسیاری از ویژگی های پیشرفته است که می توانید از آنها استفاده کنید.
- یادگیری نحوه استفاده از این ابزار به دلیل روی نقطه آن آسان تر است.
منفی ها
- شما باید تصاویر آیفون خود را به دسکتاپ انتقال دهید.
- قبل از اینکه بتوانید دسترسی داشته باشید، ابتدا باید روی دسکتاپ خود دانلود کنید.
بخش 4. سؤالات متداول در مورد ایجاد GIF از Photos در iPhone
چگونه از عکس ها در اندروید GIF بسازیم؟
می توانید مراحل قسمت 3 را تکرار کنید و همین کار را انجام دهید. اساساً باید تمام ویدیوهایی را که می خواهید به GIF تبدیل شوند به درایو خود منتقل کنید. سپس مراحل ارائه شده در زیر را دنبال کنید.
GIF چیست؟
این روزها GIFها بسیار محبوب شدهاند چون میتوانند پیام ساده ما را از همیشه پرمعناتر کنند. برای اینکه بیشتر درباره اینکه GIF چیست بدانید، روی این لینک کلیک کنید و توضیحات آن را بخوانید.
چرا وقتی تصاویر من آنها را به GIF تبدیل می کنم تار می شوند؟
زیرا GIF ها حداکثر از 256 رنگ مختلف پشتیبانی می کنند. این فرمت تصویر بر خلاف JPEG و PNG از بیش از 16 میلیون ترکیب رنگ پشتیبانی می کند. بنابراین، JPEG و PNG بالاترین کیفیت تصویر را در مقایسه با GIF تولید می کنند. اما JPEG و PNG نمیتوانند مانند GIF حاوی انیمیشن متحرک باشند.
نتیجه
در پایان، حالا برای ما بسیار سادهتر شده است که حتی روی آیفون هم GIFها را مدیریت و ایجاد کنیم. هرچند تمام ابزارهایی که در این مقاله معرفی شدند میتوانند به شما در ساخت GIFهای ساده کمک کنند، اما همچنان Video Converter Ultimate بهترین گزینه است. چون امکانات متنوعی ارائه میدهد که میتوانید با آنها ویدیو و GIF خود را آنقدر جذاب کنید که خودتان هم از نتیجهاش شگفتزده شوید. پس وقتی میتوانید بهترین ابزار را در اختیار داشته باشید، به نرمافزارهای ساده قناعت نکنید. همین حالا برنامه را دانلود کنید و مجموعه تصاویر خود را به GIF تبدیل کنید.
-
 بهترین GIF Cropper را به صورت آنلاین و آفلاین برای برش GIF انتخاب کنید [2021]
 انتخاب بهترین ابزار برش یک امر ضروری است و برخی از سازندگان GIF این ویژگی را ارائه نکرده اند. اما بهترین ابزار برش GIF برای استفاده چیست و چگونه از آن استفاده کنیم؟
-
 5 بهترین گزینه برای ضبط فرمت GIF با ضبط کننده های GIF برای کامپیوتر و مک
 بهترین ضبط کننده GIF که برای ضبط GIF باید استفاده کنید کدام است؟ لیست زیر شواهدی را ارائه می دهد که نشان می دهد بهترین ضبط کننده صفحه کدام است.
-
 نحوه تبدیل MPG به فرمت GIF [آنلاین و آفلاین]
 آیا می خواهید احساسات بسیار بهتری را بیان کنید؟ سپس باید به جای آن از GIF استفاده کنید. این نوشتار به شما آموزش می دهد که چگونه یک فایل MPG را به GIF تبدیل کنید تا احساس شما بسیار بهتر بیان شود.