

2 maneiras de alterar o fundo no Photoshop | Com alternativa
Photoshop is one of the most versatile editing tools, allowing users to edit their photos, including changing the background. Nowadays, people are becoming creative with their photos, whether for personal or professional use. With this, the need to learn and to master this skill on Photoshop is as vital as any editing skills that we can learn from this tool. Therefore, in this article, we’re going to learn this. This article has provided two methods on how to change a background in Photoshop, with each guide having a detailed step-by-step process. Moreover, there is an alternative free tool that can also be used to easily remove the background in photos. So, what are you waiting for? Let’s get started!

Parte 1. Como alterar o plano de fundo no Photoshop
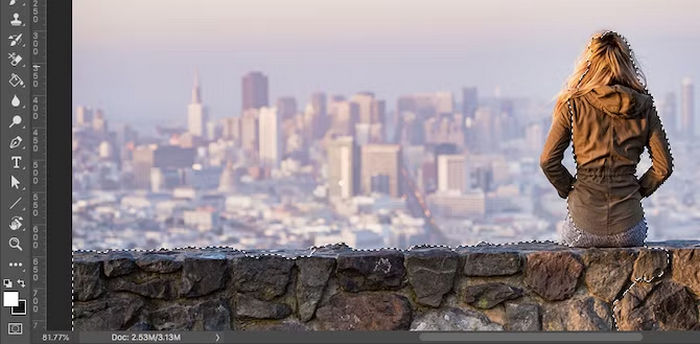
One of the most effective ways to change a background in Photoshop is by creating a precise selection that separates the subject from the background. In this method, we'll use the Quick Selection tool, which lets you easily highlight the area you want to keep while removing or replacing the rest. It’s a straightforward technique that gives you control over the editing process and works well for most types of images. So, here’s how you can change the background to another in Photoshop:
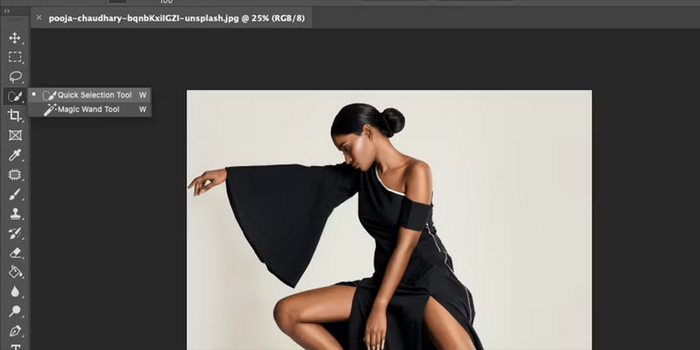
Step 1. First, select the Quick Selection Tool from the toolbar, or press W on your keyboard. Then, using a moderately hard brush, click and drag over the area you want to keep. Photoshop will automatically detect and select the area based on the contrast in the image.
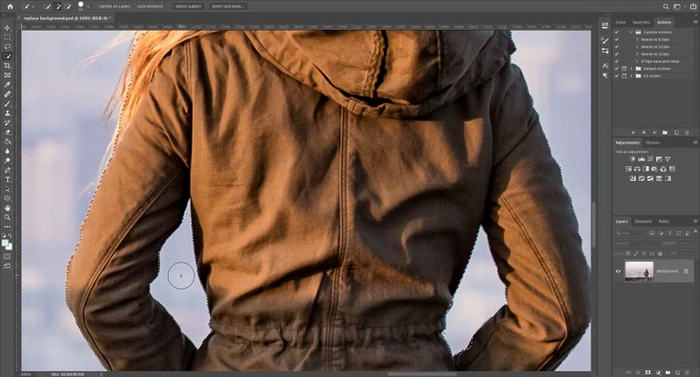
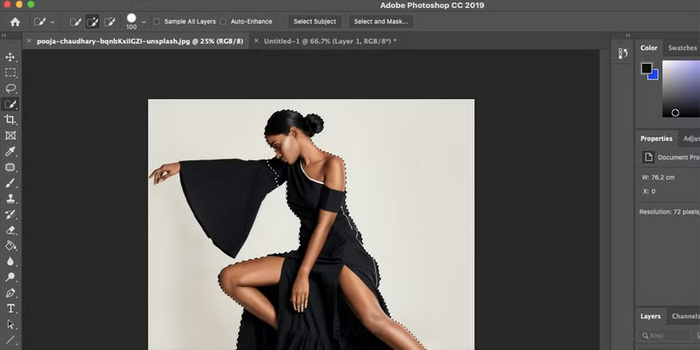
Step 2. fter that, fine-tune your selection. To do that, zoom in on your image and make your brush smaller by pressing the left square bracket. After that, just continue clicking and dragging to add the parts of the foreground object to your selection.
Step 3. Now, click Select and Mask in the options bar at the top of the screen to open a workspace where you can refine your selection and convert it into a mask.
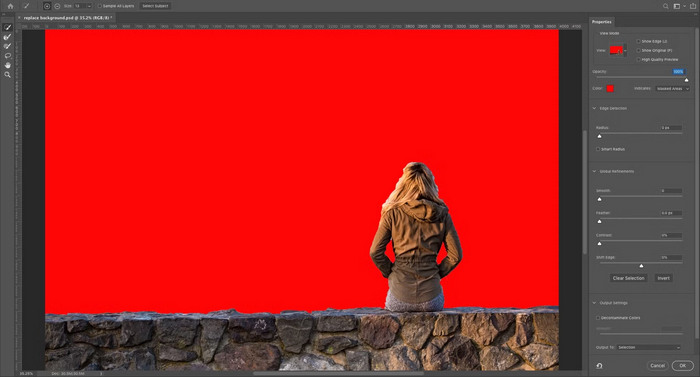
Step 4. Next, remove the color fringing. To do this, go to the Output Settings in the right-hand panel. After that, tick Decontaminate Colors.
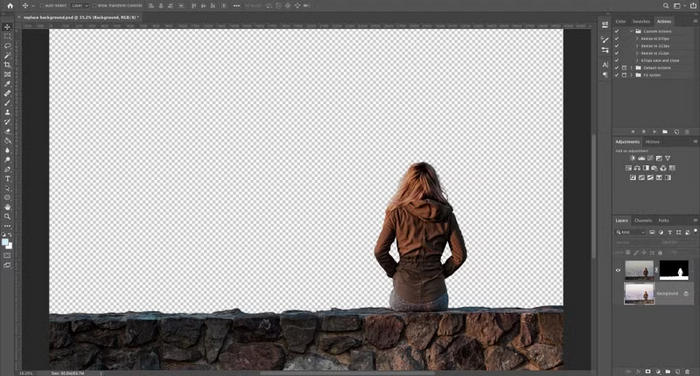
Step 5. Now, paste in the image containing your new background. To do this, place the image on a layer just below the layer containing your foreground.
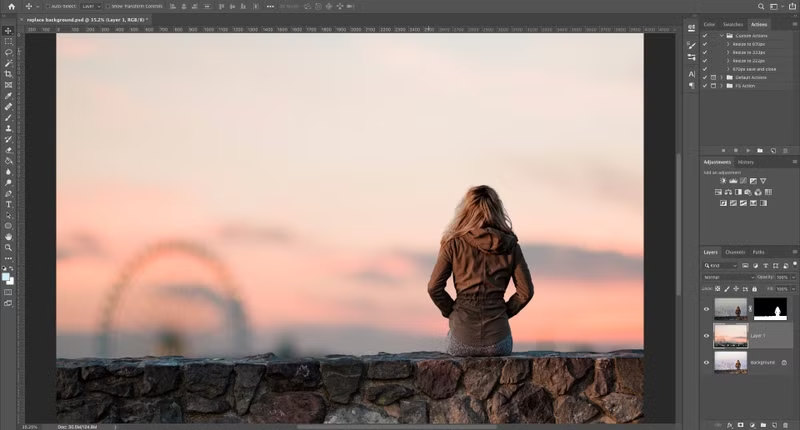
Step 6. Use the Hand tool to move the layer to your desired position, and if needed, resize it using the Free Transform tool by pressing Ctrl+T for Windows or Cmd+T for macOS. To adjust the size, drag the corner or side handles inward. Hold the Shift key while doing this to maintain the image’s proportions.
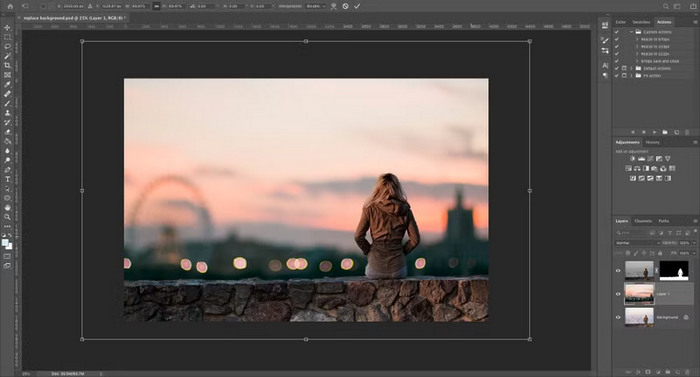
Step 7. Lastly, once done, click OK and save your file in PSD format to preserve all the layer information. Meanwhile, if you want to export it, go to Files, select Save As, and choose JPEG as your format.
Ao trocar o fundo, escolha sempre um novo que combine com a iluminação, a perspectiva e a profundidade de campo da sua foto original. Isso ajuda a integrar o assunto de forma mais natural à nova cena, evitando uma aparência de recorte e colagem.
Parte 2. Como alterar a cor de fundo usando o Photoshop
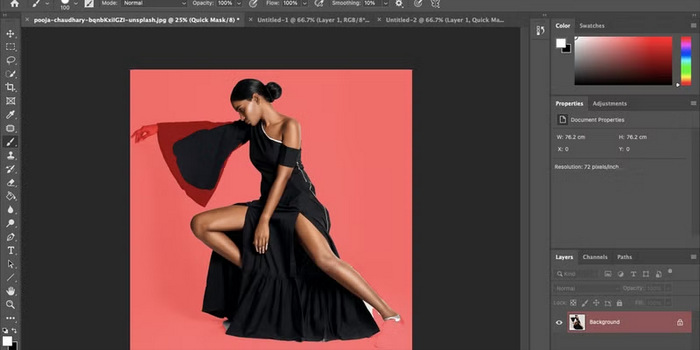
Alterar a cor de fundo usando o Photoshop não é uma tarefa difícil, principalmente se você já estiver familiarizado com a interface e os recursos da ferramenta. Se você deseja alterar a cor de fundo da sua foto, siga estes passos.
Step 1. Start by choosing the Quick Selection Tool. This assumes that you have already opened the image in Photoshop.
Step 2. Next, click the Select Object at the top of the screen.
Note: Photoshop uses its AI technology, powered by Adobe Sensei, to automatically detect and select the main subject in your image.
Step 3. If AI didn’t select some parts, zoom in on the image and use the Quick Selection tool.
Step 4. Alternatively, to check and adjust areas that the selection tool may have missed, press Q on your keyboard to enter Mask Mode, where a red overlay indicates the masked region. Then, switch to the Brush tool and use white to add to the mask and black to subtract.
Note: Don’t worry about getting it perfect right away, as you can always fine-tune the mask after applying the new background color.
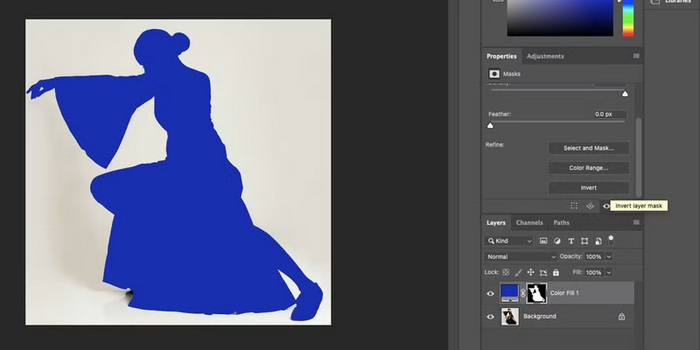
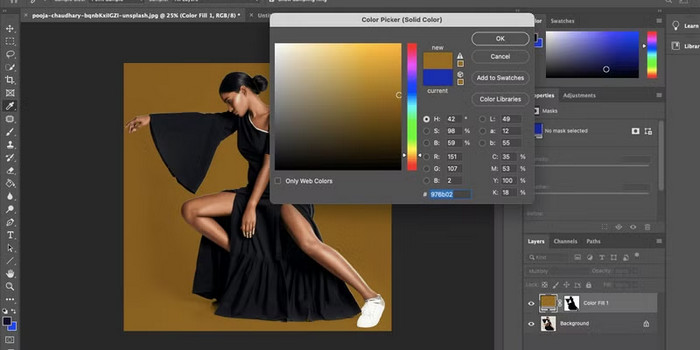
Step 5. Once the mask is done, go to the Adjustment Layer button at the bottom of the Layers panel and select Solid Color.

Step 6. Now, you’ll notice that your object is filled with the selected color. To apply it to the background instead, click on the mask icon that was created, then choose Invert in the Properties panel.
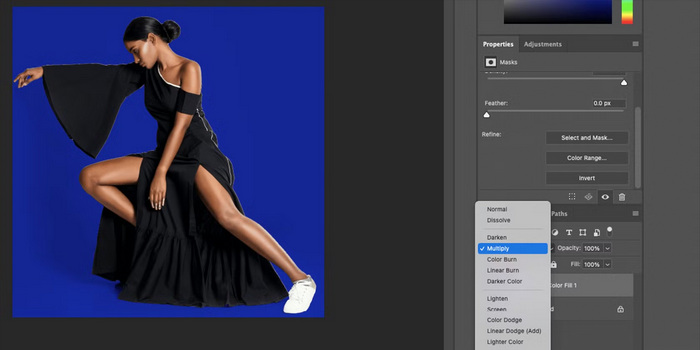
Step 7. At this stage, it’s time to refine the result. Start by going to the Blending Mode in the Layers panel and selecting Multiply. This will create a more realistic effect by enhancing shadows and other subtle details in the image. You can also adjust the Opacity to achieve a more natural look.
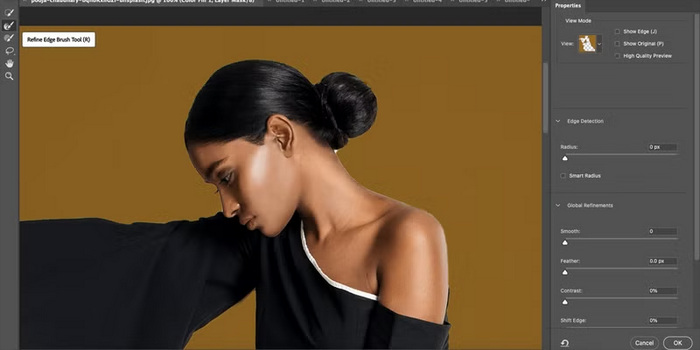
Step 8. On the new screen, choose the Refine Edge Brush. Then, go over all the edges to refine them.
Step 9. You can now pick a different background color.
Pronto! Ao selecionar uma cor sólida para o fundo da sua foto, certifique-se de escolher uma que harmonize com o assunto. Não hesite em ajustar a camada de cor sólida para combinar com a nova cor do fundo.
Parte 3. Como alterar a cor de fundo gratuitamente | Método mais fácil
In case you don’t have Photoshop and you are looking for a free alternative tool instead, don’t fret because there’s FVC Free Background Remover. This tool makes it easy for you to change the image background color without needing any editing experience. Moreover, the tool uses AI to remove the background from the photo quickly. After that, you can pick a new background color or upload your own.
Here’s how to change background color for free with FVC Free Background Remover:
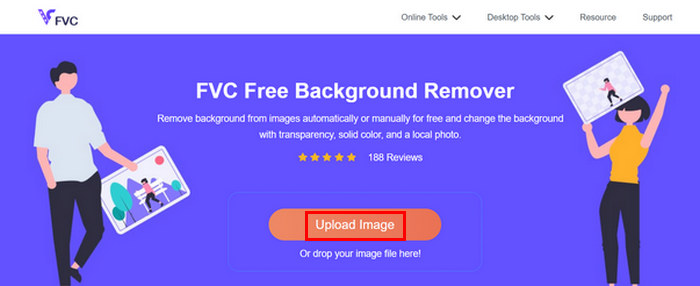
Step 1. Access the FVC Free Background on their official website.
Step 2. Click the Upload Image button to import your photo.
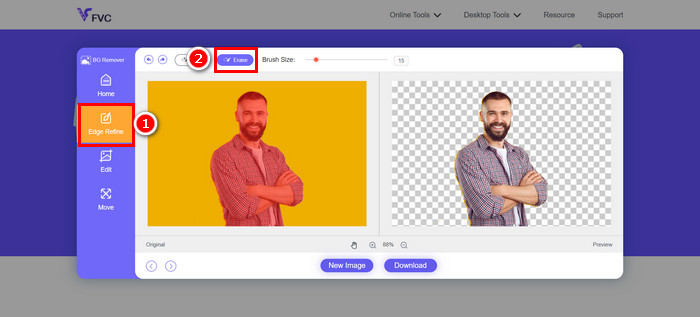
Step 3. Now, the background photo has been automatically removed. If you want to refine the edges, go to Edge Refine and use the erase option above, then gently brush over the parts you want to remove.
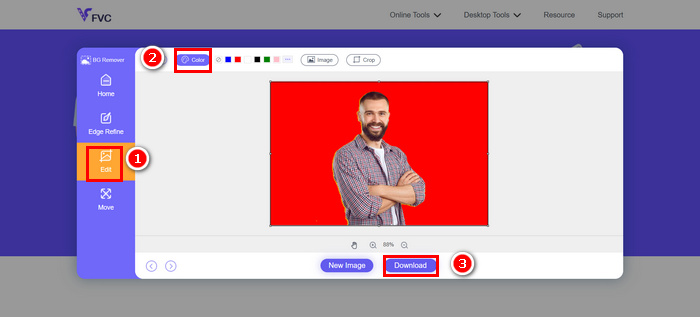
Step 4. Meanwhile, to change the background color, go to Edit and click Color to select a new background color for your photo. Once done, click the Download button.
Muito rápido e fácil, não é? De fato, o FVC Free Background Remover é uma das melhores alternativas para alterar as cores de fundo no Photoshop. Possui uma interface simples e muito intuitiva, utiliza inteligência artificial e é altamente personalizável.
Click here to learn more about adding background to image if interested.
Parte 4. Perguntas frequentes sobre como alterar o plano de fundo no Photoshop
Qual a melhor maneira de fazer o novo plano de fundo parecer natural?
Para que o novo fundo se integre bem, escolha um que combine com a iluminação, as sombras e a perspectiva da sua foto original. Refinar as bordas e usar modos de mesclagem como Multiplicar também ajuda a criar um efeito mais realista.
Posso desfazer ou editar a alteração de fundo posteriormente no Photoshop?
Sim. Se você salvar seu trabalho no formato PSD, o Photoshop preserva todas as camadas e máscaras, permitindo que você volte e ajuste ou substitua o fundo a qualquer momento.
Existe alguma maneira de suavizar as arestas ásperas em torno do assunto?
Sim. Você pode usar a ferramenta Pincel de Refinamento de Bordas no espaço de trabalho Selecionar e Mascarar para limpar e suavizar as bordas da sua seleção, resultando em uma aparência mais refinada.
Conclusão
Changing a background in Photoshop may seem complex at first, but with the right tools and methods, you can easily perfect it. Moreover, in case you don’t have Photoshop installed on your computer or it is not in your budget, you can try the FVC Free Background Remover tool to freely and easily change the background of your photos.
-
 Como cortar no Photoshop: Guia do iniciante [2025]
 Descubra como cortar imagens no Photoshop com este guia fácil de seguir. Além disso, aprenda como selecionar áreas, ajustar proporções e muito mais para cortar fotos.
-
 Como aguçar a imagem na foto usando 3 maneiras [Tutorial rápido]
 Problema com a imagem sem nitidez? Aqui, apresentaremos como aprimorar imagens no Photoshop usando as três maneiras que adicionamos.
-
 Como adicionar uma marca d'água no Photoshop [Guia para iniciantes]
 Quer saber como adicionar uma marca d'água a um vídeo no Photoshop? Nesse caso, este artigo fornecerá uma ou duas coisas que você precisa saber.