


How to Edit the Clarity of Photo In Less Than a Minute with Tips & Tricks
Every photography enthusiast loves to make the image they capture looks the best amongst the other photos other photographer captured. With different techniques, you can easily do it, sharpen, and add intense color to make it simple be detailed. What if you want to add a touch of crispiness to the image? Or want to smoothen everything? That is the role of clarity. With it, you can set the mid-tone and contrast on your image to add that extra punch you want to make the appearance stunning. Are you interested in learning how to do it? In that case, read the information we add here and learn how to edit the clarity of photos.

Part 1. How to Improve Photo Clarity Free Online by Upscaling Images
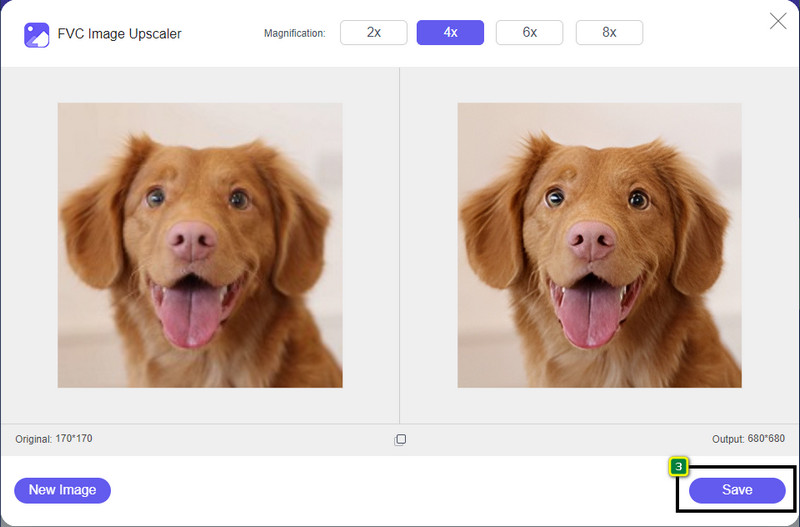
FVC Free Image Upscaler is the best photo clarity app you can use on your browser without downloading any files on your desktop. This app can fix photo quality, and beautifully improves the photo's quality that you have never seen before. Even though you aren’t tech-savvy, you can quickly master how to use this software in less than a minute. So, if you want to try using this software, you can follow the tutorial we add below.
Step 1. Go to the official website of this upscaler by clicking this link.
Step 2. Import the image you want to clarify by clicking the Upload Image. A folder will be open next, where you can search the file and press Open.

Step 3. Now that the image is uploaded, select the option you want to use to make your image improve clarity.

Step 4. After improving the clarity of it, click the Save button to download the image you enhance here.
Part 2. How to Increase the Clarity of Photos in Photoshop Quickly
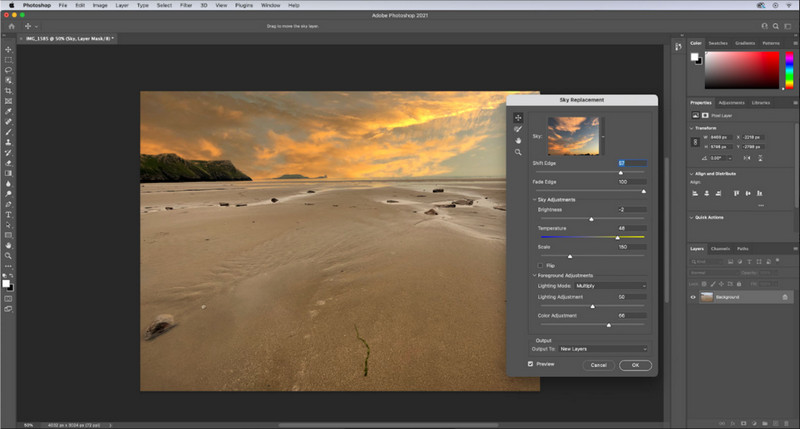
Adobe Photoshop is your photo clarity app to download if you want a professional tool on your device. This tool provides all-out image editing features to make your image look better by adjusting the options to impress people who are about to see it. There isn’t enough software to provide you with the same performance as this software can bring. To improve the clarity of your image then, you will need to adjust the contrast and the mid-tone. Want to know how to do it? Copy the provided tutorial.
Step 1. Download Adobe Photoshop and open the software. Start uploading the image by clicking the File and then Open.
Step 2. In the upper part, click the Image, under it, press the Adjustment, and choose the Brightness/Contrast.
Step 3. A dialogue box will show on your screen; change the image's contrast by dragging the slider. You can freely move it to increase or decrease the contrast, which could affect clarity.
Step 4. Press OK to save your changes on your image, which will be applied automatically.
Part 3. How to Enhance the Clarity of a Photo on Adobe Lightroom In Less Than a Minute
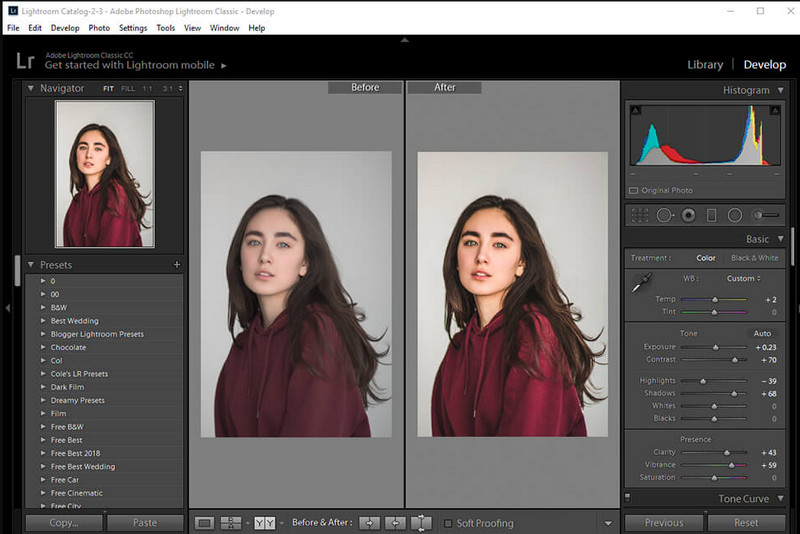
Unlike Photoshop, Adobe Lightroom has a reliable clarity option that you can use to increase image quality and make your image detailed with the colors on it once it is increased and smoother if you decrease it. Adobe manufactures Photoshop and Lightroom, so the assurance of having a professional output is 100%. You can follow the steps to add clarity to photos and improve the color of the raw image.
Step 1. Download and install the official software on Adobe, then launch the software and upload the image you want.
Step 2. Open the Develop module to open the options on where you can start adding clarity to your image.
Step 3. Under the presence option, move the slider of the clarity to your preferred percentage that you want to be applied. You can adjust other options to make your image look detailed and better than the original images.
Part 4. Tips about Editing Photos Clarity You Must Know
Now that you have the best photo clarity app you can use on the web, and offline the following information will give you tips about adjusting the clarity of an image.
Tip 1. DO NOT GO OVERBORED ON CLARITY!
What do we mean by this? These means do not add too much clarity to your image, for it will turn into a grainy one. Everyone doesn’t like to have a grainy image, so don’t increase it too much. Also, do not decrease the clarity to its maximum potential to avoid making the image looks blurry.
Tip 2. Contrast and Clarity Aren’t the Same
Contrast and clarity are often known the same, but they aren’t. If you adjust the clarity of an image, you are adjusting the mid-tone of it and then a certain region. While if you use contrast, you are changing, highlighting, and shadowing the overall image.
Tip 3. Know the Purpose of Clarity on Images Before Adding It
Many image editors studied these options that they can tweak to improve the image, such as clarity, exposure, gamma, and many more. So if you are a new user, it is better to know the purpose of the clarity before applying it to the image. Also, if you read information about clarity, you will know if it is the right option to tweak to make the image look better. If not, then don’t add clarity.
Tip 4. Use Clarity on Large Scale
If you are dealing with a small-scale image, it is better to sharpen them rather than change its clarity. It will help you sharpen the edges of your photo easily and better. But if the image you have you consider as a large scale, then you better use the clarity.
Part 5. FAQs on How to Edit Photos Clarity
Why my image becomes grainy after adding clarity?
If you have set the clarity to 100%, then the possibility of having a grainy image is, without a doubt, surely will happen. We suggest you set the percentage to 40% to 70%; you can go higher depending on your preference.
Do I need an editor to add clarity to photos?
Indeed, you will need to download or use software to add clarity to your image. Many software says that it can adjust the clarity, but don’t be fooled by them. You can use the software we add in this article as we prove that they can change the clarity of your image to make it more detailed than before.
Can I add contrast to the image to make it clear?
Yes, you can add contrast to the image to make it clearer and more presentable. But if you want to be more precise rather than affecting the whole picture, it is better to adjust the clarity of it.
Conclusion
We hope this article taught you how to edit clarity on photos with different tools and steps added. If you think we did a great job, we would love it if you gave us 5-stars below. Thank you for reading this article!
-
 How to Increase the Resolution of the Image [5 Ways to Improve]
 Having trouble because the resolution of your image is low? Worry no more! Here, we will teach you how to increase the resolution of the image.
-
 Make iPhone Photo Resolution Better with the Top Enhancers
 Do you want to need improve iPhone photo resolution? Well, in this article we cover the best tools you can use and other tricks you must know!
-
 Old Photo Restoration Online and Offline [Easy Steps]
 Want to restore an old photo? With these tools, you will know the old photo restoration process. Read this post to learn the most straightforward methods.