

How to Crop Photos on iPhone to Resize Them Quickly
Cropping is a fundamental tool in photo editing to remove unwanted things from the overall visual of your photos. Learning and having complete mastery over it is an advantage to elevate and enhance composition in your photos for a much clearer portrayal of the story or message in one's photo. On the other hand, cropping photos on an iPhone is a different story, as iOS is known for its adaptive features and software interface, which sometimes make a task quite a hassle as iOS can be extra with the way how functionalities and commands are located in their devices. That's why this article exists, as you make changes in the visual impact of your photos by cropping, and doing it shouldn't be much of a hassle. Continue reading this article to find out the steps, ins and outs of cropping photos on the iPhone.

Part 1. How to Crop Photos on iPhone
Are you among those new iOS users who are troubled to do simple tasks and take forever to figure out? Wondering how to crop an iphone photo. Worry no more as we listed quick ways to crop out your photos using your iPhone without the need to stress over it.
Regular Steps
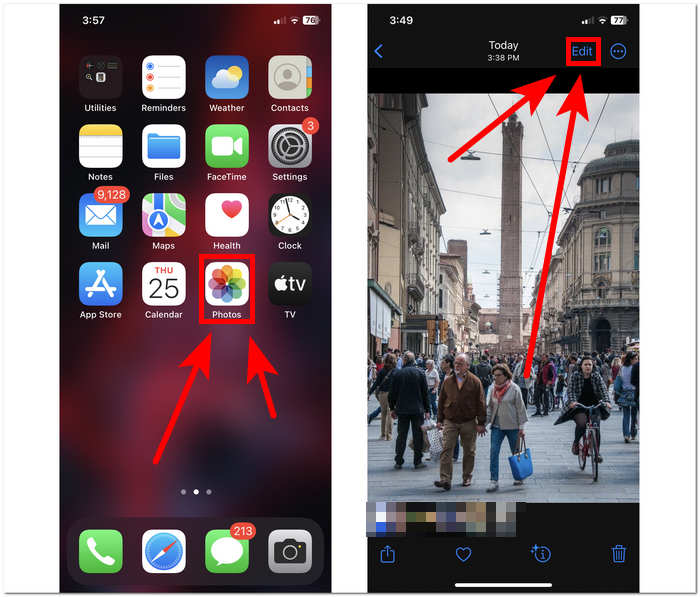
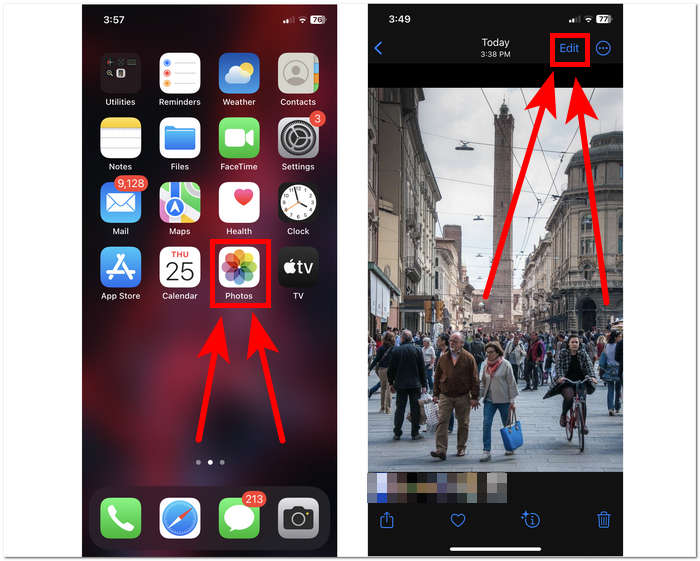
Step 1. On your iOS device, go to your Photos and select or go to the image you want to crop.
Step 2. Locate the Edit button on your upper-right corner screen and click on it.
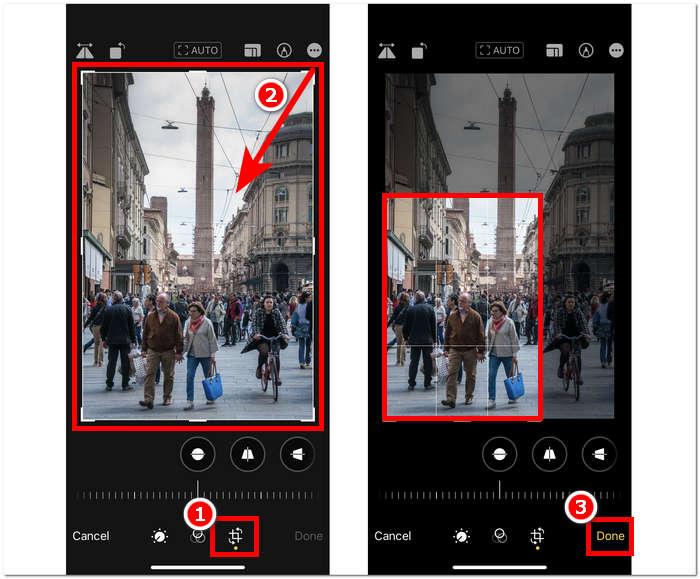
Step 3. In the Edit settings, locate and click on the Size settings in your lower screen.
Step 4. Once the rectangle corners appear, manually drag it to enclose the area you want to keep in your photos and once satisfied with it, proceed to click Done to save the changes in your photos.
Quick Crop Feature on iOS 17
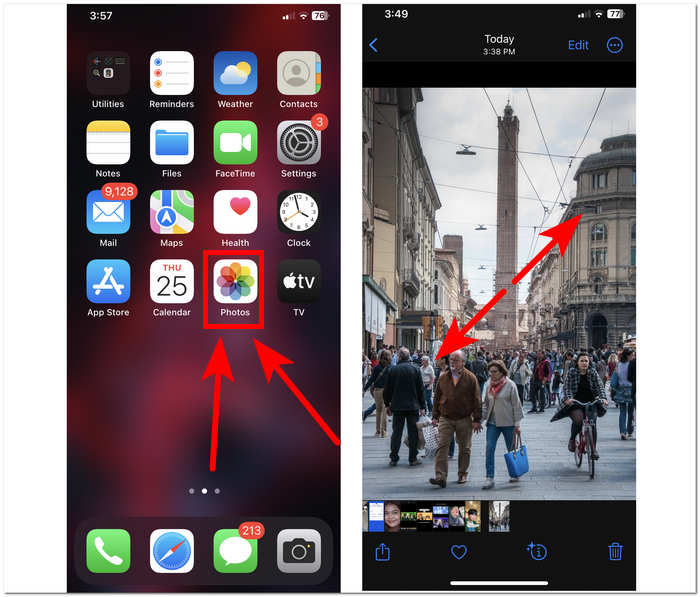
Step 1. Navigate to your Photos app on your iOS device and either choose or locate the image you wish to crop.
Step 2. Using your two-finger, proceed to do an expand gesture.
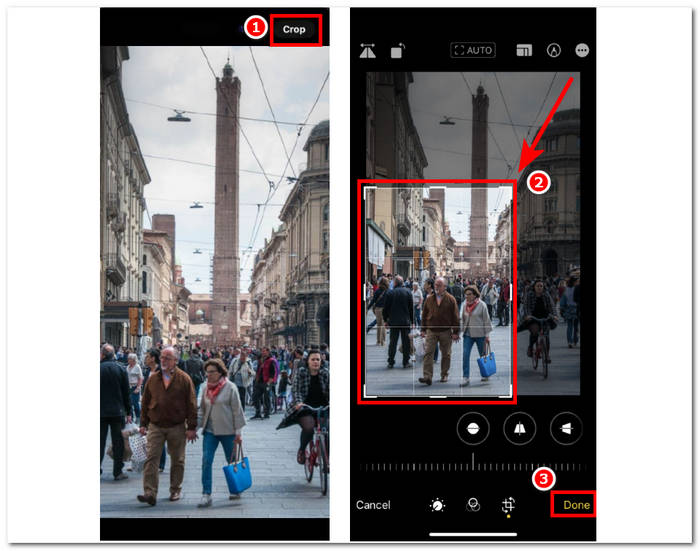
Step 3. A Crop button will then appear on your upper-left screen. Just click on it to proceed.
Step 4. When the rectangle corners appear, you can manually drag them to enclose the area you want to keep in your photos. Hence, proceed to click Done when you want to save your photos.
Automatic Crop Photos with iPhone Shortcut
Step 1. Go to the photo you want to crop on your iOS device, go to your Photos, and select the image.
Step 2. Find the Edit button in the upper-right corner of your screen and select it.
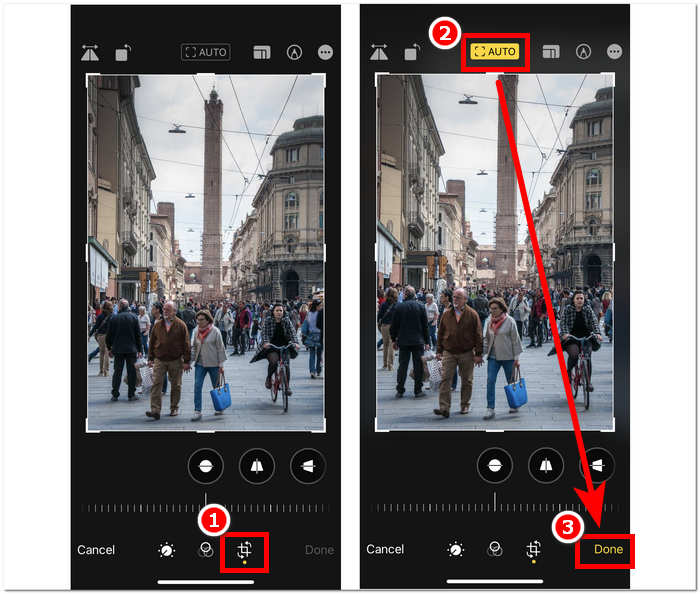
Step 3. In the Edit settings, find and select the Size settings located at the bottom of your screen.
Step 4. Locate the AUTO crop shortcut in your upper screen, click on it to automatically crop your image, and click Done to save your image.
The Cropping tool on iOS doesn't have to be as complicated as you think it to be. IOS offers three ways, which are listed above; whether you use the usual cropping, quick crop, or iPhone automatically cropping photos shortcut, all of them work just fine. It's only a matter of the user's preference and convenience on which to use.
Part 2. How to Quickly Crop Someone Out of an iPhone Photo
In the context of cropping your photos, users sometimes come across unwanted subjects or objects that are impossible to crop in your device's settings. That's why the use of third-party tools comes in handy. FVC Free Background Remover is one of the trusted web-based tools available on the internet today for a variety of reasons. One of those reasons is security and availability; by means of availability, FVC means all access to users across devices for free, and that includes your iOS devices. Its interface is easy to understand as it is created with a straightforward outlook in mind hence, it offers straightforward advanced features for removing unwanted subjects or backgrounds in your photos. To utilize the said free background remover tool in cropping Someone out in your photo, see the steps below.
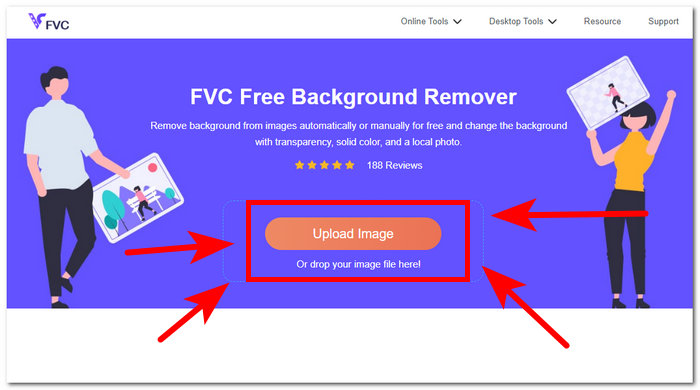
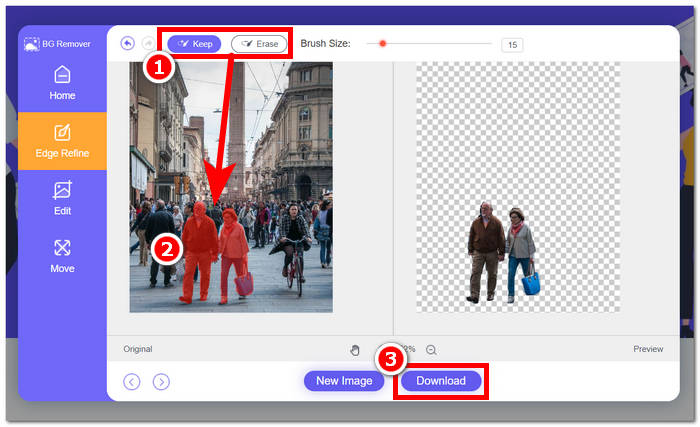
Step 1. Go to the FVC Free Background Remover website on your iOS device Safari browser and upload your desired image into the designated Upload Image field.
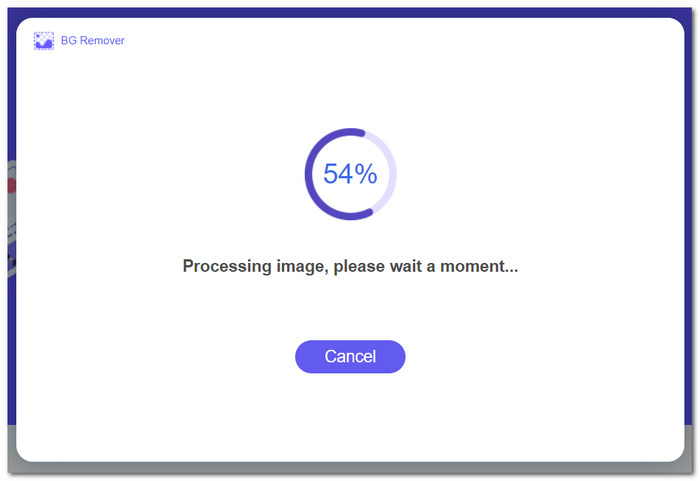
Step 2. Its AI will automatically process the image on which it thinks you want to remove.
Step 3. After FVC completes processing your photo, navigate to the Edit section at the upper part of the tool. Manually crop someone in your photos by dragging the corners to your desired space, including them in your photos.
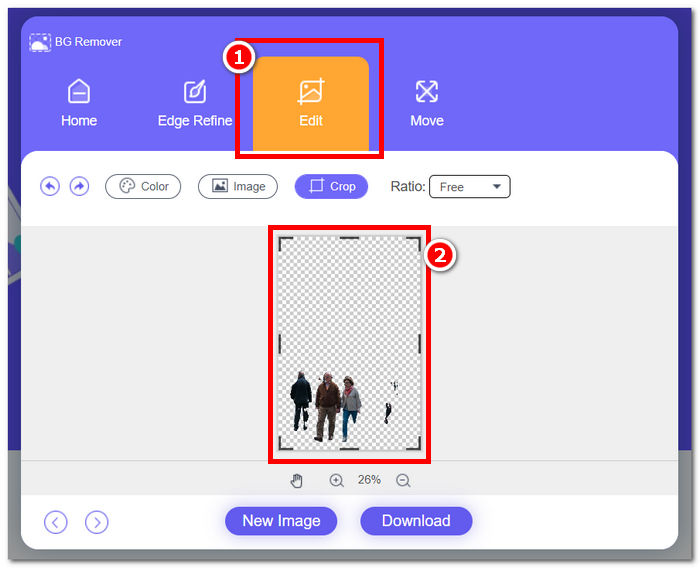
Step 4. Once satisfied, crop Someone out in your photo to save your image on your iPhone by clicking the Download button will save it.
Never again ponder the question of how to crop someone out of a photo on an iPhone; instead, start finding out ways to effectively crop and remove someone in your photos either using your device's crop settings or photo resizer app, as both live up to what they offer.
Part 3. FAQs About How to Crop Photos on iPhone
Where is the crop button on iPhone Photos?
The crop button in iPhone Photos is typically found in the editing interface. After selecting a photo, tap on the Edit option, and you'll see the crop button, which looks like a square overlapping two right-angle triangles at the bottom of the screen.
How to stop iPhone from cropping wallpaper?
To prevent your iPhone from automatically cropping wallpapers, go to Settings, then Wallpaper, and tap on Choose a New Wallpaper. When selecting a photo, make sure to adjust the zoom level to your liking, ensuring that the Wallpaper isn't automatically cropped. You can use the pinch-to-zoom gesture to fine-tune the wallpaper size.
Can the iPhone create a circular photo?
While the iPhone's native Photos app doesn't have a direct feature for creating circular photos, you can achieve this effect using third-party apps with circular cropping tools. These apps will let you crop your photos into a circular shape, providing a unique and aesthetically pleasing result.
Can I maintain the original aspect ratio when cropping?
Yes, when cropping a photo on your iPhone, you can maintain the original aspect ratio by making sure the Constraint option is enabled. This ensures that the proportions of the cropped image remain the same as the original.
Does cropping reduce image quality?
Cropping itself doesn't necessarily reduce image quality on the iPhone. However, if you crop a photo significantly and then zoom in on the cropped area, you may notice a loss of detail, as the image is effectively being enlarged beyond its original resolution. It's essential to strike a balance between cropping for composition and maintaining the desired level of image quality. Also, if you find your image quality is lower after compressing, you can use a third-party image resolution enhancer tool to upscale it.
Conclusion
Finally, learning to crop photos on your iPhone is an essential ability that may dramatically improve the visual impact of your images. This does not just apply to iOS users but to the general use of cropping tools from other devices. The procedure may differ, but with the advice and easy steps shown in this article, you may easily convert ordinary photographs into visually spectacular masterpieces. Whether you like the classic cropping approach, the fast crop function in iOS 17, or the automated crop shortcut, iOS provides a variety of options to meet your needs and tastes. Followed by an FVC Free Background Tool that offers the same quality of not just cropping but also removing unwanted objects in your photos, making cropping photos in your iPhone much easier.
-
 Top 9 Image Background Remover for Fast and Accurate Results
 Experience the fast and accuracy of the top-performing background image eraser. Say goodbye to complex background remover and embrace nine efficient ways today!
-
 How to Remove Background From Image: Hassle-Free Tools
 Discover six tools to remove the background from any image effortlessly. Say goodbye to complicated editing and erase image backgrounds with ease today!
-
 How to Remove Background From Image Using GIMP
 Get started on GIMP and the step-by-step process of removing backgrounds from images. Discover efficient ways to create transparent images using GIMP today!