

3 Ways to Remove Text From Image Photoshop
Adding text to images can significantly elevate communication and creativity, making it more visually and easily to convey a message. However, situations may arise where the need to remove text becomes imperative for various reasons. Whether you are working with a professional-grade tool such as Photoshop, opting for the versatility of PicsArt, or exploring online solutions like FVC Online Watermark Remover. Worry less, this article is designed to assist you in efficiently eliminating text from your images, whether for software or web-based tools.
Pondering the question of how to remove text from an image? This article provides sections that will help you learn the step-by-step instructions tailored to each platform, empowering you to navigate the process and achieve polished visuals seamlessly. Remove text in a snap by continuing to read this article, experience the convenience of text removal, and elevate the quality of your visual content today!

Part 1. How to Remove Text From an Image in Photoshop
Adobe Photoshop is renowned as a powerhouse for image editing. When removing text from an image in Photoshop, it's crucial to remember to work on a duplicate layer and such. This ensures the preservation of your original image, allowing you to experiment and make changes without altering the source file. But in this case, you’ll be learning the capabilities of the Content-Aware Fill tool in Photoshop to remove unwanted text from your images.
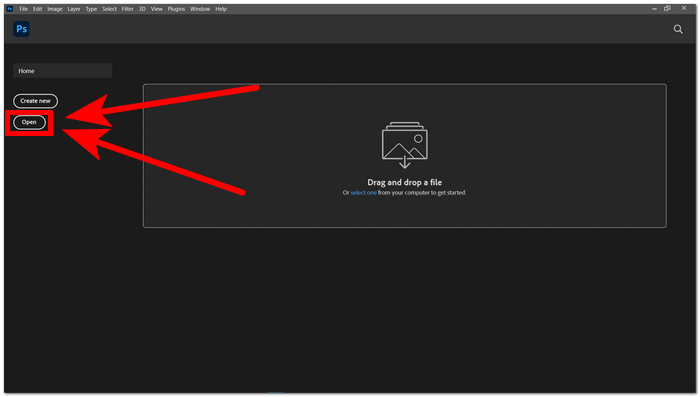
Step 1. Open Adobe Photoshop from your desktop. If you don’t have the software, you can go to their official website to install it. Once installed, open the software and in the interface, Open the image you want to remove text from it.
Step 2. Once your image is loaded in the software, select the Lasso Tool located in your left navigation tool.
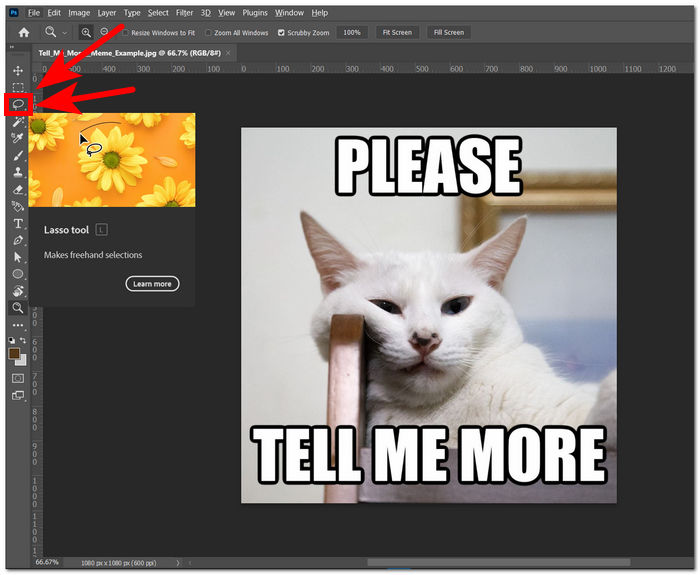
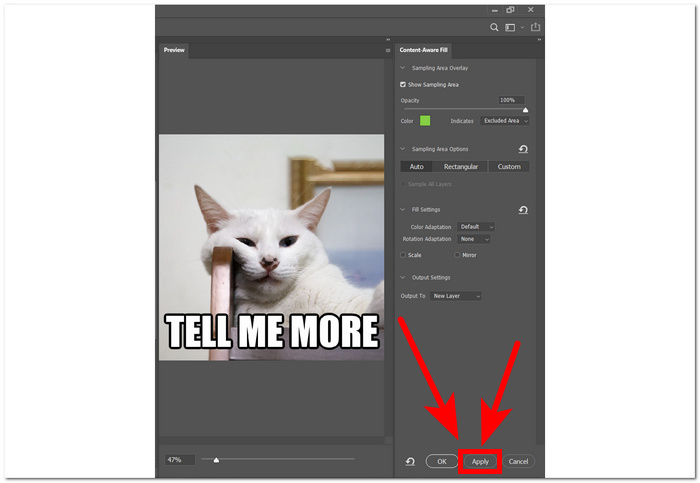
Step 3. You will have to trace or circle the unwanted text in your image. After tracing the unwanted text, right-click your mouse and select the Content-Aware Fill in the settings.

Step 4. After selecting the content-aware fill, you’ll be able to preview the result when you remove the text from your image. Once satisfied with the result, just click Apply to save changes.
Embracing this precautionary step reflects a professional approach to image editing in Photoshop, providing a secure and flexible environment for creative exploration. Also, you can use Photoshop to change your image background after removing the text.
Part 2. How to Remove Text From Images Online
Pondering the question of how to remove text from an image for free? FVC Online Watermark Remover is a web-based text or watermark remover tool that removes unwanted text in your images in a snap and is free. The said tool supports formats that are most likely to be used in any images. The tool is integrated with AI to remove text from images quickly and safely to achieve promising accuracy in its result.
Step 1. Go to FVC Online Watermark Remover official website.

Step 2. On the website, load your image in the upload image field. Once your image is loaded, select the Lasso tool located in the upper part of your screen, and trace the tool around the text you want to remove.
Step 3. After tracing the tool around the unwanted text, click on the Remove button to automatically erase the text from your image.

Step 4. Once the tool is finished removing the text from your image, click on Save to download your image to your desktop.

In conclusion, online tools like FVC Online Watermark Remover are a great help to anyone new in the field of digital editing and who wants to remove text without having to download software and work their way on lots of tools. That is to say, it is only right to use tools that are convenient and will save you time. That’s one strong point of using online tools.
Part 3. How to Remove Text From Image Using Adobe Illustrator
Adobe Illustrator, primarily recognized as a vector graphics editor, possesses the versatility to extend its utility to specific image editing tasks. This extends its applicability beyond the realm of vector graphics. In particular, Illustrator proves exceptionally useful when confronted with images that intertwine both text and vector elements. The seamless integration of vector and text-editing capabilities allows users to handle diverse design elements within a single platform. This makes Illustrator a preferred choice for those working on projects that demand a combination of graphic precision and textual elements.
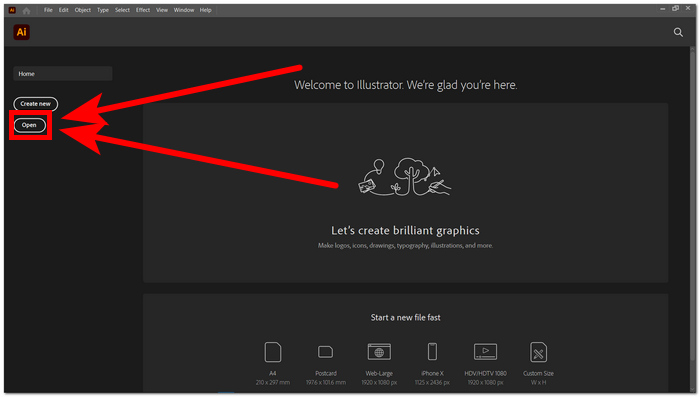
Step 1. Open your image in your Illustrator. If you don’t have the Adobe Illustrator software, proceed first to their official website to download and install the software. Once the software is installed, you may open the software and load your image.
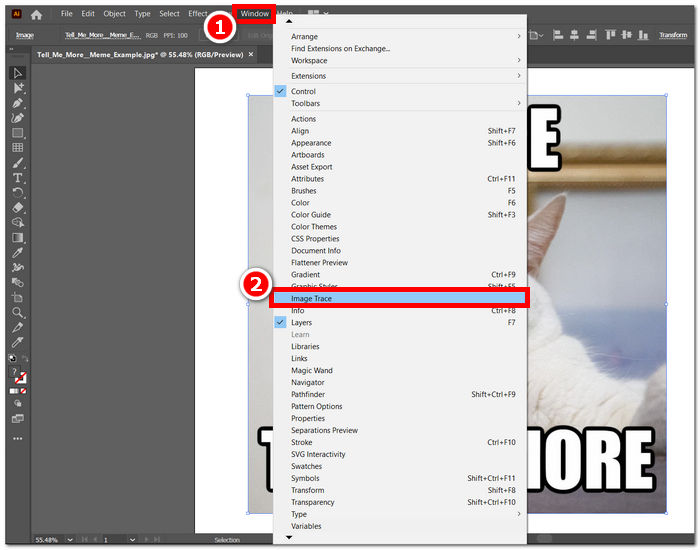
Step 2. Once your image is loaded in the software, click on the Windows section located in the upper-left corner of your screen. Under the Window section, click on Image Trace.
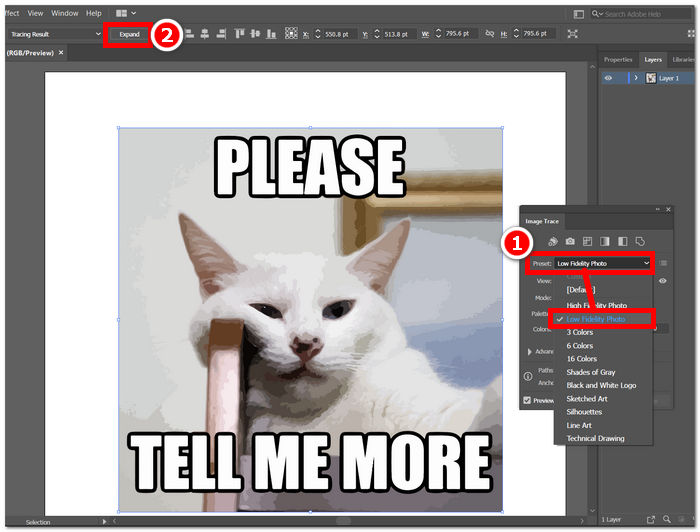
Step 3. A pop-up window settings of image trace will appear and under the preset field, select Low Fidelity Photo. The expand button will appear on the upper-left corner of your screen. Just click on it to proceed.
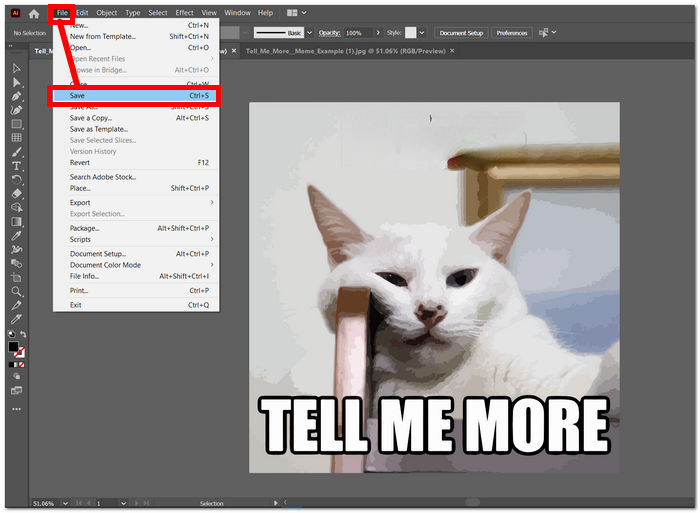
Step 4. You can now manually delete text on your image by double-clicking on the specific text and the Del button on your keyboard. Once all the text has been manually removed, you can now save it to your desktop. Just locate File in the upper-left corner of your screen and click on Save.
Adobe Illustrator removing text from images is not its main use. It is mainly on Vector graphics. You can also resize images in Illustrator easily. Adobe Illustrator’s strengths lie within the dimensions of shapes; it is not possible to fully erase or remove text from Illustrator alone, you need to use another Adobe software to fully remove the text from your image.
Part 4. How to Remove Text From the Image Using PicsArt
PicsArt, renowned for its creative editing versatility, operates as a mobile and web-based platform. To eliminate text from an image using PicsArt, users can take advantage of its user-friendly features. Users can open their images in the PicsArt app and employ tools like the eraser or brush tool to erase unwanted text meticulously. Adjusting transparency and blending options ensures a seamless result, enhancing the overall image quality.
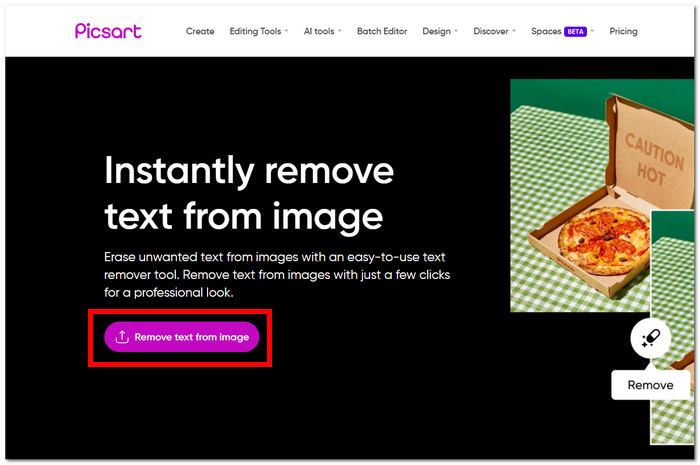
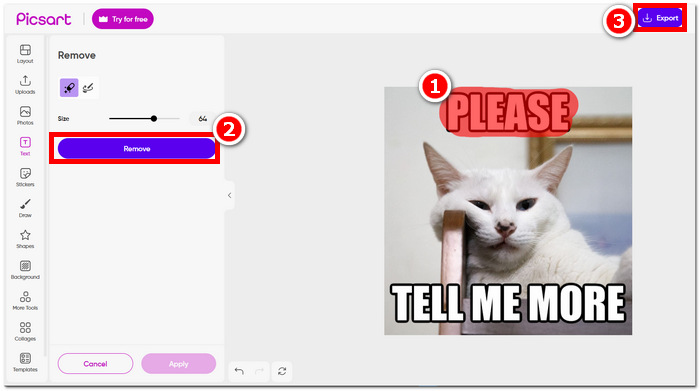
Step 1. Go to PicsArt web-based text remover. You can choose any of your local browsers in doing
Step 2. Once the website is done loading, upload the image in the Text Remover field.
Step 3. In the tool interface, select Remove tool and erase the text on your image by tracing the unwanted text from it.
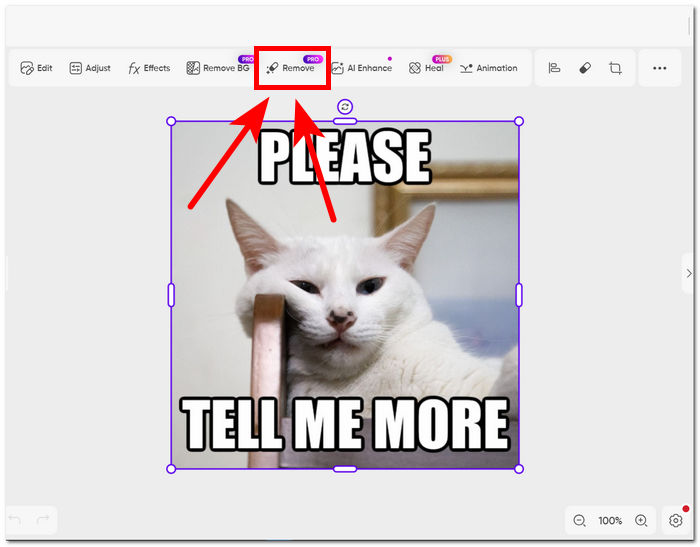
Step 4. Once done with tracing the text, click on Remove to erase the text from your image and click Export to save your text-free images on your desktop.
On the other hand, the platform may have offered a convenient and straightforward way of removing text in your images; it still needs a subscription to fully export the image without the watermark of picsart in them. Embracing the platform's capabilities, users can achieve clean and polished images free from the destruction of undesired text.
Part 5. FAQs About Removing Text From Images
Can you erase text from an image on an iPhone?
Yes, you can erase text from an image on an iPhone using apps like TouchRetouch or Adobe Photoshop Express, both readily available on the App Store. Simply install the chosen app, open your image, and utilize the provided tools to remove unwanted text effortlessly. Enhance your mobile editing experience with these user-friendly applications.
How to remove text from an image in MS Word?
In MS Word, removing text from an image is simple: select the image, navigate to the Format menu, and choose Remove Background. Afterward, manually crop or adjust the image as necessary to eliminate the unwanted text and achieve the desired result. This straightforward process allows for efficient text removal directly within the familiar MS Word environment.
How do I remove fill from text in Illustrator?
To eliminate fill from text in Illustrator, simply select the text and navigate to the Appearance panel. From there, click on the Opacity option and reduce it to make the text transparent. This straightforward process allows you to achieve the desired level of transparency for the selected text in Illustrator.
How to delete text from an image?
Deleting text from an image is achievable through photo editing software such as Adobe Photoshop. Simply open the image and use an appropriate tool to remove the text seamlessly. This process allows for precise and efficient removal of unwanted text from images.
How do I remove text from a picture without blurring it?
To remove text from a picture without blurring it, utilize tools like the clone stamp or healing brush in photo editing software like Photoshop. These features enable you to seamlessly replace the text with the surrounding background, maintaining the clarity and integrity of the image. This method ensures a clean and professional result without compromising the overall quality.
Conclusion
Whether you're a professional graphic designer or a casual photo enthusiast, knowing how to remove text from images is a valuable skill. With the right tools like Photoshop, FVC, Adobe Illustrator, and PicsArt, you can choose the method that best fits your preferences and workflow. Experiment with these techniques to achieve clean and polished images without the distraction of unwanted text.
-
 How to Remove Background From Image Using GIMP
 Get started on GIMP and the step-by-step process of removing backgrounds from images. Discover efficient ways to create transparent images using GIMP today!
-
 Great Methods Using GIMP to Remove Watermarks from Images
 You must agree that an image without a watermark is more pleasing to the eye of viewers. Read this post to learn about how to remove watermarks using GIMP.
-
 Method on How to Use Photoshop to Remove Text from an Image
 Try this amazing technique regarding how to remove text from images in Photoshop. This will help you become an expert in erasing these unwanted elements.