How to Record on PS4 Via Default and the Best Alternatives
PS4, or the PlayStation 4, has been impressing many gamers with its awesome power and great performance ever since it first came out. Even now, it's still a big part of many gamers' lives today due to its wide range of games and ability to do more than just gaming. Now, when you are playing your favorite games with PS4, it is only natural if you want to capture those epic moments to share with others, right? Regardless of your reasons, knowing how to record on PS4 is pretty important. That's why we are here to help you out!
In this post, we are going to break down the steps you need to follow to record your gameplay on your favorite console using its default way, together with the best alternatives you can use! So, pay attention and follow along closely to make sure you get it right.

Part 1. How to Record PS4 Screen in Full Quality Without a Limit Besides the Default Way
Since PS4 comes with a time limitation, let’s jump to the best alternative first. So, since you are looking to record your gaming sessions on console your console, the FVC Screen Recorder is your reliable option. This is a desktop software that focuses on capturing gameplay, along with screens, videos, sounds, phones, and more. With support for lossless recording at 60 frames per second, you can capture your gameplay smoothly and in high quality. Furthermore, it is particularly handy for those on a task to capture unlimited gameplay. Moreover, this FVC Screen Recorder offers editing and sharing options for your recorded clips across various platforms like YouTube, Twitter, Facebook, Instagram, and more.
What’s more interesting is that it provides preferences where you can customize your recordings to suit your needs. Thus, whether it is adjusting output settings, cleaning up your voiceover with noise cancellation, or incorporating your webcam in a picture-in-picture mode, this tool has got you covered! Also, with features like snapshotting, quick sharing to popular websites, and enhancement, this screen recorder is still a versatile tool for gamers. Therefore, here’s how to record a PS4 screen without any time limitations.
Step 1. Firstly, you must download the right version of the game recorder on your computer and open it. Before you start recording, make sure that your PS4 is connected to the same computer through screencast remote play.
Free DownloadFor Windows 7 or laterSecure Download
Free DownloadFor MacOS 10.7 or laterSecure Download
Step 2. When the recording software opens up, you will have some choices to make. But for this task, click the Game Recorder tool. Now, choose the window where your PS4 is aired when you click the arrow button on the first box selection. Then, feel free to set the other setting according to your preferences.
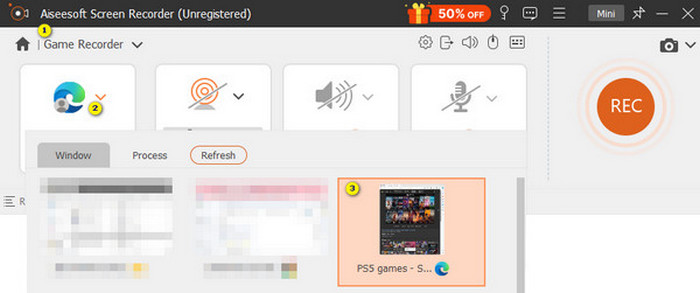
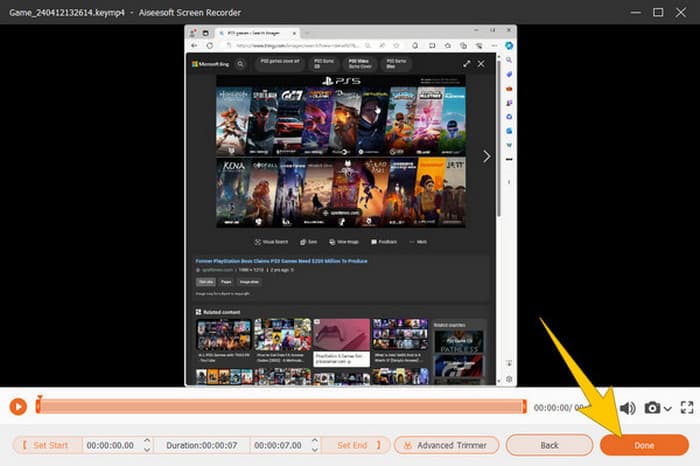
Step 3. After the setup, click the REC button to start the recording. When you're done recording, hit the Stop button. When done, the software will then take you to a window where you can make some adjustments to your recording. You can trim, take a snapshot, and set the volume if you want. Then, click the Done button to proceed to save the output.
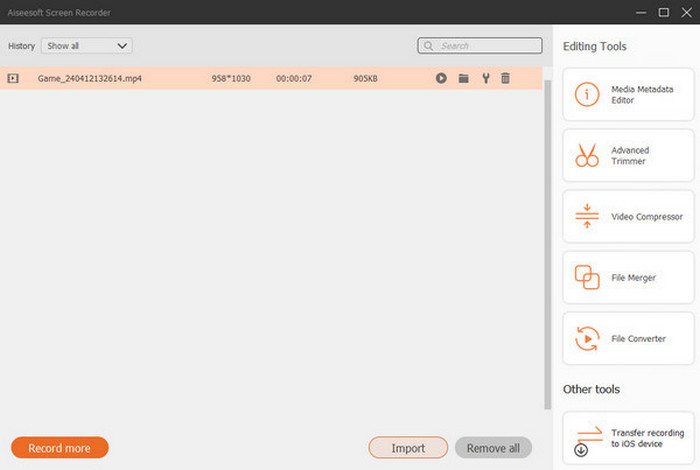
Step 4. When the video is saved, a new window will appear. You may try to right-click your recorded game, then choose an advanced setting you want to apply. Also, you can choose to share it on your desired platform if you're going to. That’s how to record a PS4 screen without any limit.
Part 2. How to Record on PS4 the Default Way
Apart from the third-party game recorder, you also have a built-in recorder on PS4. Now, let us proceed with the steps of using the built-in PS4 recorder.
Step 1. Start by turning on your PS4 and selecting the game that you want to capture. Then, jump into your game of choice and get playing. When you're ready to start recording, simply double-tap the Share button on your controller
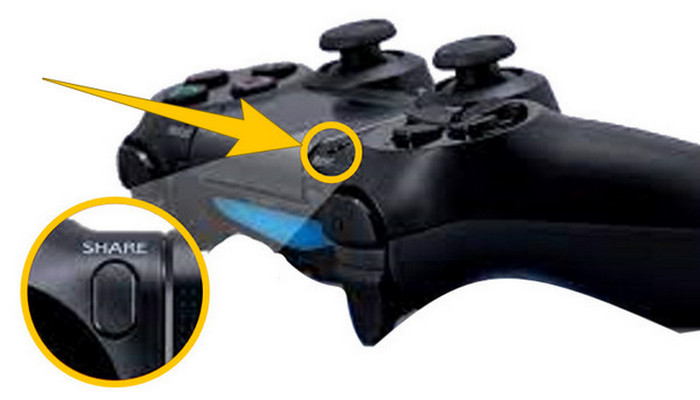
Step 2. You will be notified that the recording has started. But how do you stop gameplay recording on PS4 after you finish? To do so, you just need to press the Share button long.
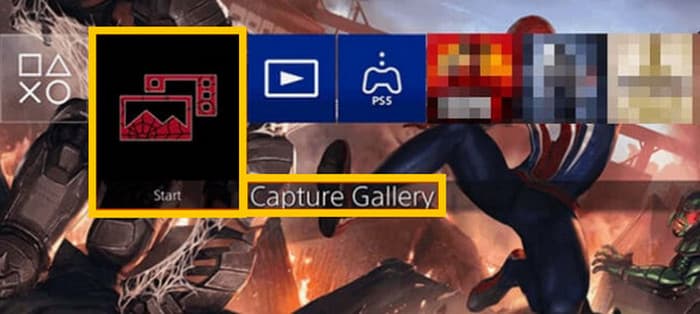
Step 3. After that, see your recording by accessing the Main Menu and then selecting the Capture Gallery from the options given.
Part 3. How to Record Gameplay on PS4 Using a Capture Card
Another popular alternative to the default PS4 recorder is the use of a capture card. Sure thing! A capture card will help you connect your PS4 to other devices and let you record everything on your PS4. If you didn't know about this yes, then keep reading and follow the instructions we give below.
Step 1. Connect the capture card to your PS4, your computer, and your TV monitor via HDMI. Then, make sure that your computer has an OBS to make the recording work.

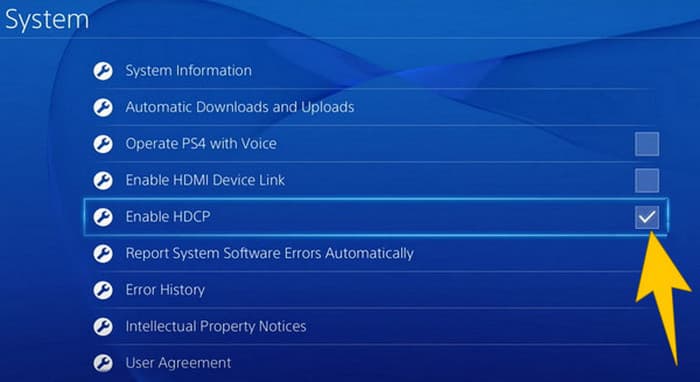
Step 2. Now, set your PS4 by navigating to Settings and selecting the System, then the System Information. From there, tick the Enable HDCP option.
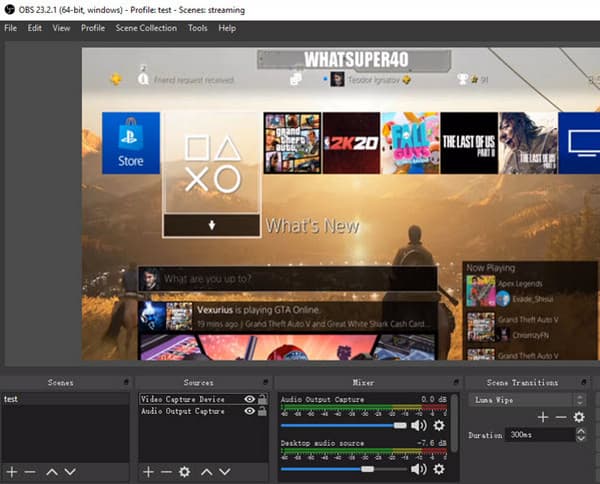
Step 3. Launch your OBS, then navigate to the Source Section>Plus>Video Capture Device, and then click the OK button. You can now click the Start Recording button and begin playing to record your gameplay. To end the recording, click the Stop Recording button anytime you want.
Part 4. FAQs about Recording on PS4
How to stop gameplay recording on PS4?
To stop the gameplay recording using the default recorder of your PS4, you just need to long-press the Share button. After pressing this button, you will see the Stop Recording option on your screen. Click it to apply it.
Do I need special software to utilize a capture card on my PS4?
Yes. Basically, you will need special software like OBS to make the capture card work on your PS4. Aside from that, you will also need monitor devices and connectors such as HDMI and USB cables to successfully operate the screen recording using a capture card.
What are the limitations to recording on PS4 on the built-in recorder?
It is true that the built-in recording feature on PS4 has limitations on recording. The most common limits are in the length and quality of the recorded gameplay.
Conclusion
Those are the guidelines on how to record on PS4. You can record using the console’s built-in way, a capture card, and specialized software that is best for screen recording. But we don’t want you to disregard the limitations of the built-in recorder that hinder you from capturing lengthy and qualitative recordings. In the same manner, capture cards may also have limitations based on your computer's hardware and storage capacity. Thus, if you don’t want these limitations to go your way, then go for FVC Screen Recorder as your best option.


 Video Converter Ultimate
 Screen Recorder