If you want to record the playing video with audio on your computer, you can use Screen Recorder. Besides, you also can use this software to capture the gameplay on your computer. Apart from these, the Phone Recorder function of Screen Recorder enables you to record your iPhone and Android phone screens on the computer.
You can click the Free Download button on this page to download the installation package on your computer first. Then you need to click on the package to open it for installing Screen Recorder on your device.
If you need to record a video for more than three minutes or you want to trim your recorded videos, you have to register for Screen Recorder.
Step 1. After launching Screen Recorder, please click the Register icon.
Step 2. If you have purchased this software and received the registration code, you can directly input it and your email address into this window and click the Activate button.

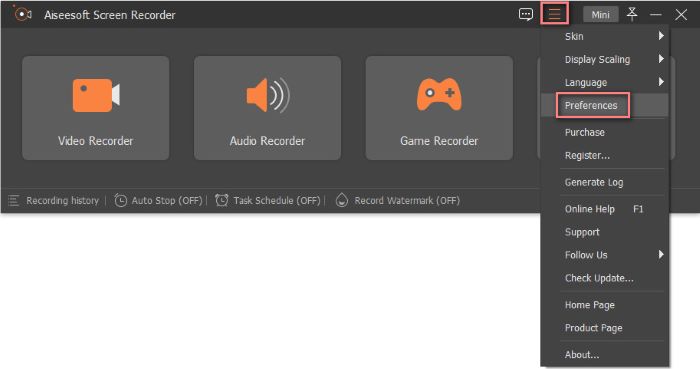
If you want to set preferences for Screen Recorder, please click the Menu icon and choose Preference.
1.Recording
In this window, you can set operations before, when, and after recording, like Hide desktop icons when recording, etc.
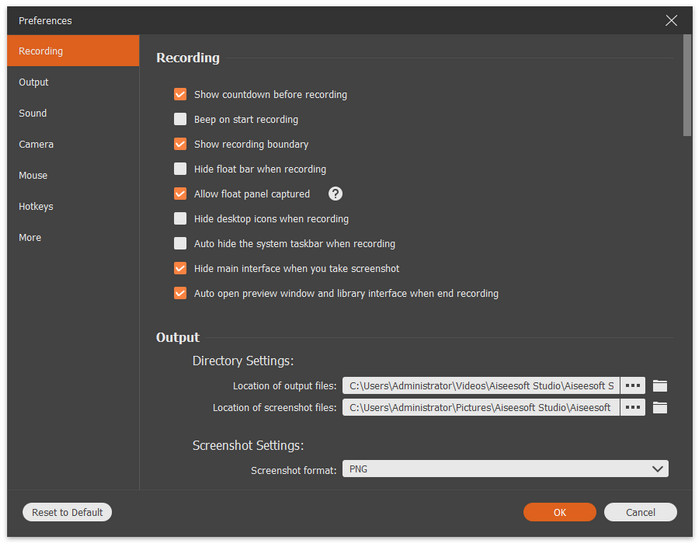
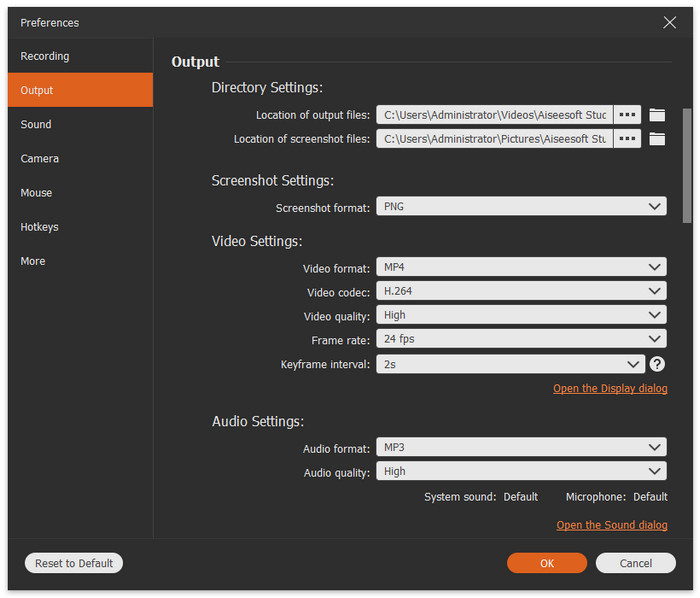
2.Output
You can adjust in this window if you want to change the output formats, store paths, and the quality of recording video, audio, and screenshots.
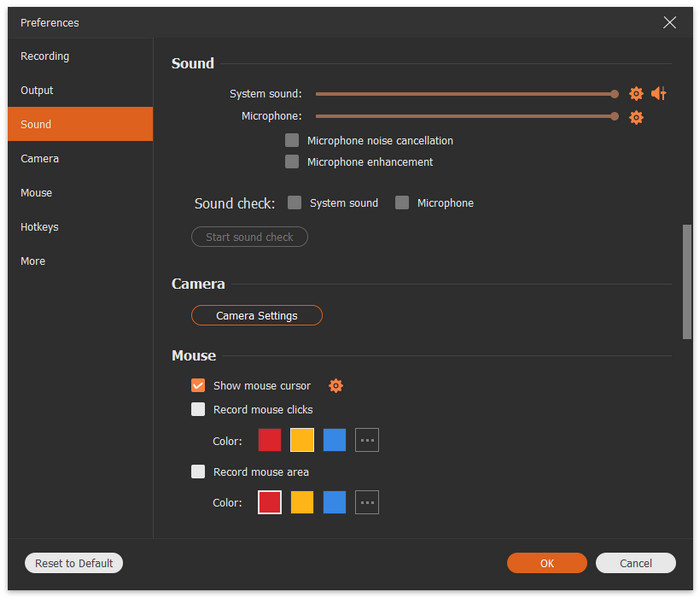
3.Sound
Here you can control the volume of system sound and microphone sound.
4.Moused
In this window, you can select whether to show the mouse cursor or not. And you can choose the color of mouse clicks and area when recording.
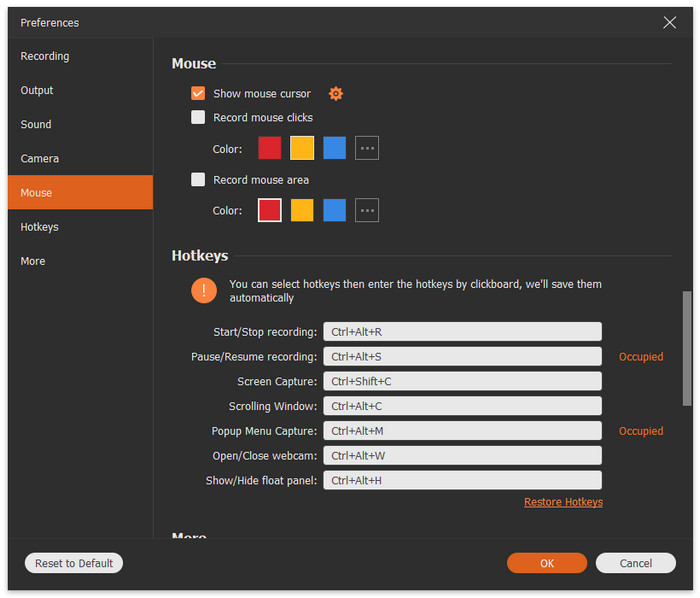
5.Hotkeys
You can set hotkeys here if you want to make the recording process more convenient.

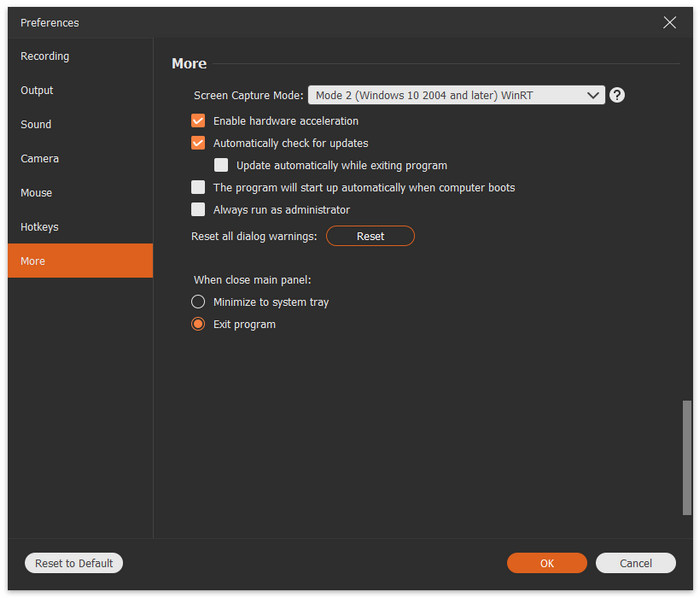
6.More
Here you can choose Screen Capture Mode, enable or disable hardware acceleration, adjust settings of update checking, and more.
| Supported OS | CPU/Processor | RAM | |
| Windows | Windows 11/10/8.1/8/7 | 1GHz Intel/AMD CPU or above | 1GB RAM or more |
| Mac | Mac OS X 10.12 or above | 1GHz Intel® processor and Apple M1/M2 chip | 512 MB or more |
| Supported Formats | |
| Video | MP4, WMV, MOV, F4V, TS, WebM |
| Audio | MP3, WMA, M4A, AAC |
| Image | PNG, JPG/JPEG, BMP, GIF, TIFF |
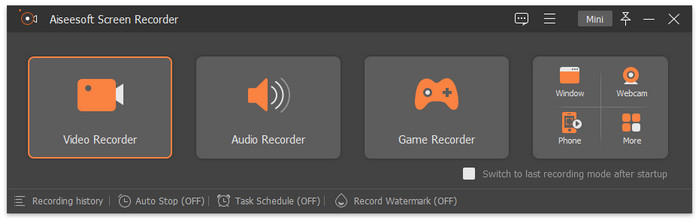
Step 1. Choose Video Recorder
Please select the Video Recorder button to begin video capturing on your computer.
Step 2. Choose Recording Area
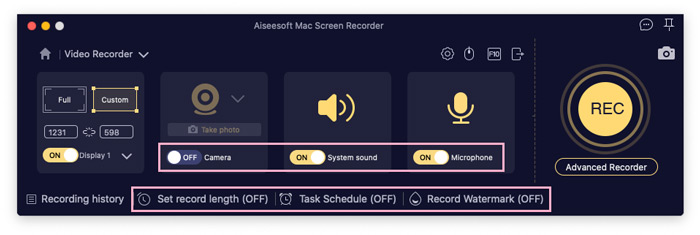
If you want to capture the whole screen of your computer, you can click the Full icon. If you only want to record a specific area of your video, you can click the Custom icon and move the borderline to customize the capture area as you like.
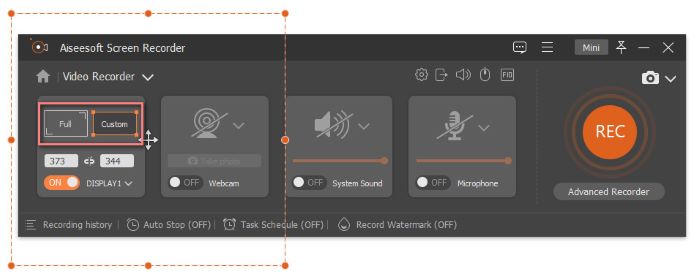
Step 3. Adjust Video Capture Settings
If you need to record the webcam content while recording the video on a desktop, you can switch to On under Webcam.
If you want to record video with audio and the microphone sound, you can turn on System Sound and Microphone.
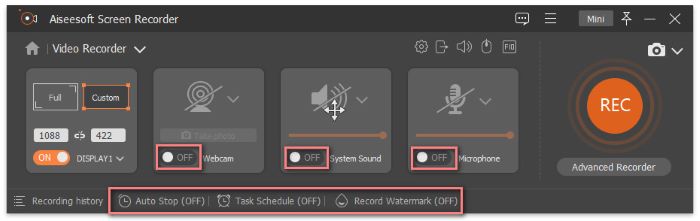
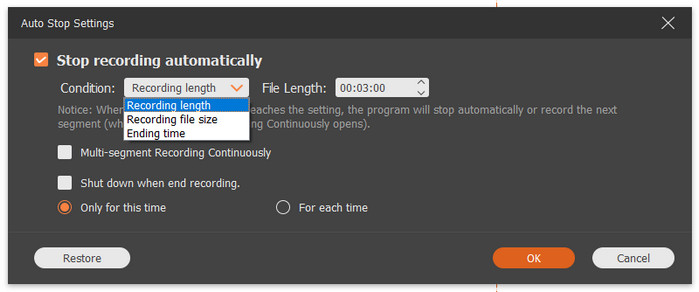
You also can turn on Auto Stop to make your video recording stop automatically. In this window, you can set the Auto Stop Condition by adjusting the Recording length, Recording file size, and Ending time.
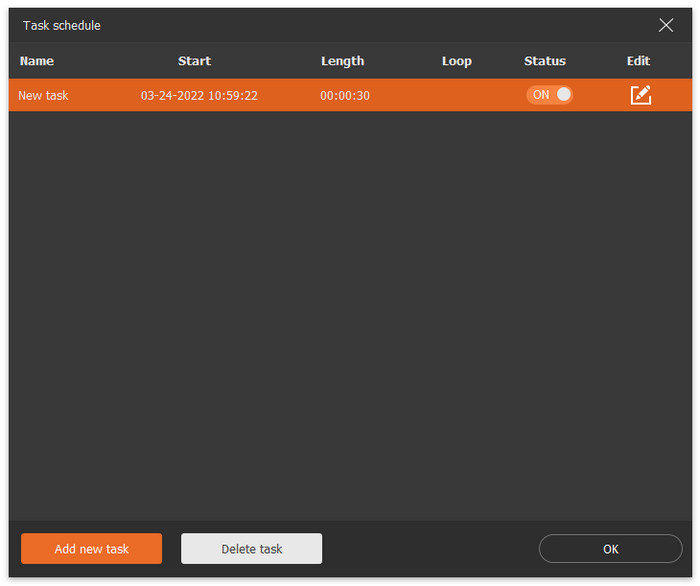
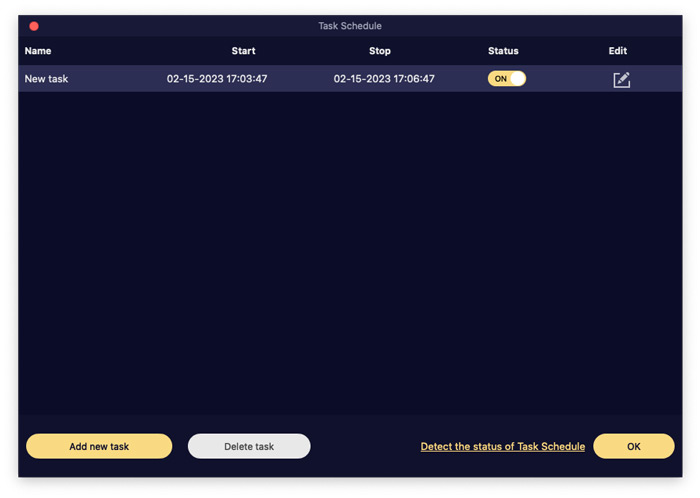
If you need to set the starting and ending time of recording, you can turn on Task Schedule and click the Add new task button to create a task for recording.
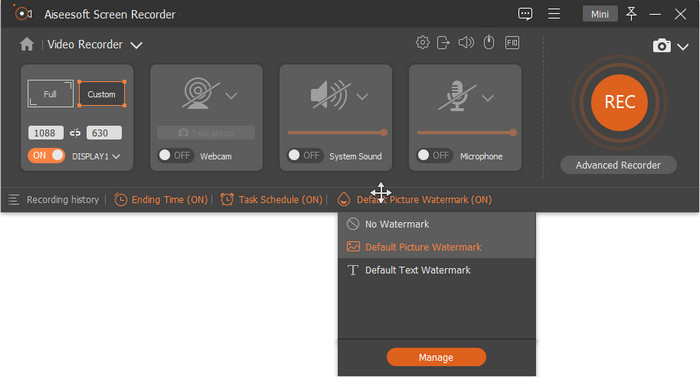
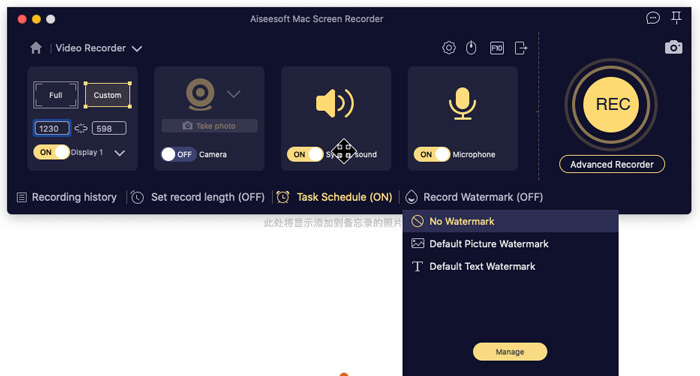
What’s more, you also can choose to record videos with a watermark or not. And you can click the Manage button to make your exclusive watermark and change the watermark position based on your need.
Step 4. Start Recording
After all settings are done, click the REC button to begin recording the video on your computer.

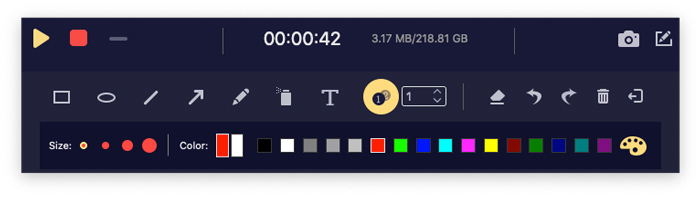
When you are recording, you can click the Snapshot icon to take screenshots of your video for sharing with your friends.

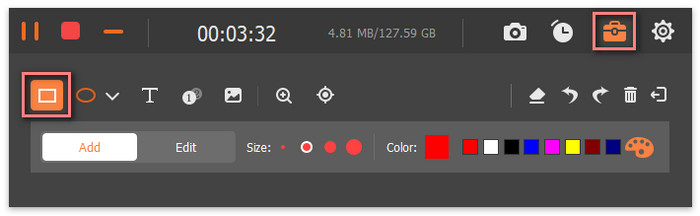
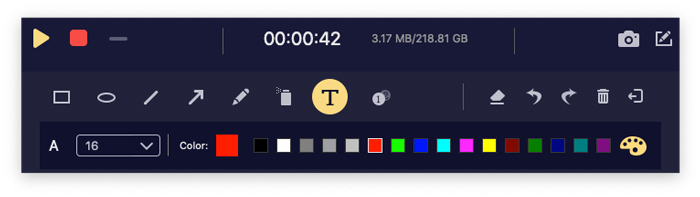
If you want to use a rectangle to mark the critical content when recording, you can click the Edit icon and choose the Rectangle icon.
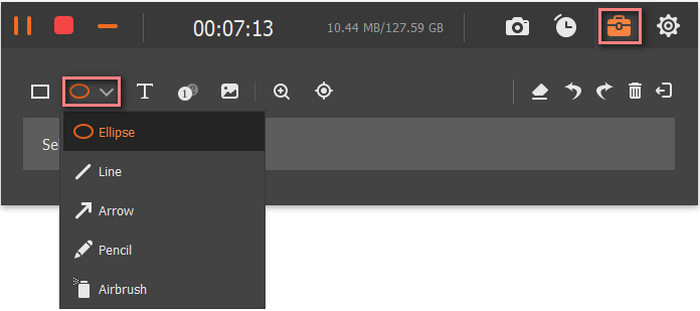
If you want to use other tools like an ellipse, a pencil, or an arrow to mark out, you can click the Edit icon and the pull-down icon to select.
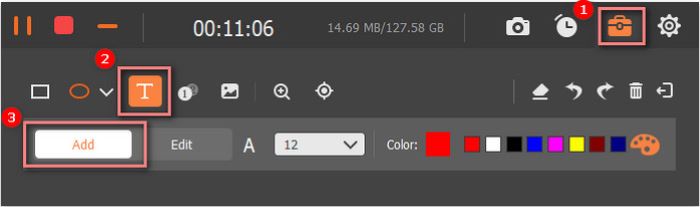
If you need to add text to your recording videos, you can click the Edit icon, choose the Text icon, and click the Add button to place texts on your video.
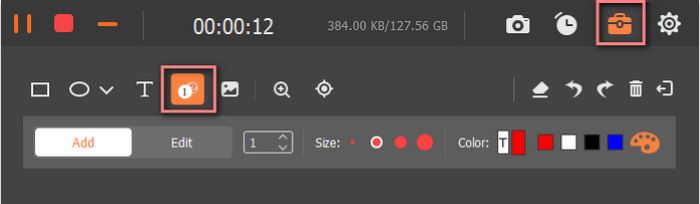
If you want to number the content while recording on your computer, you can click the Edit icon, choose the Callout icon, and use your mouse to click the content you want to number.
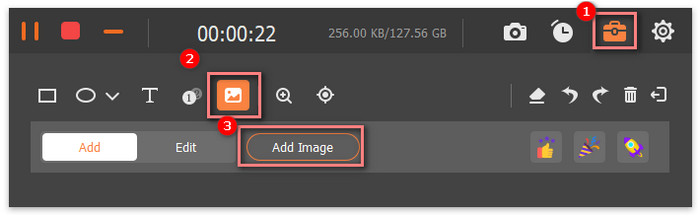
You also can add the image to the screen when you are recording videos by clicking the Edit icon, selecting the Image icon, and clicking the Add Image button.
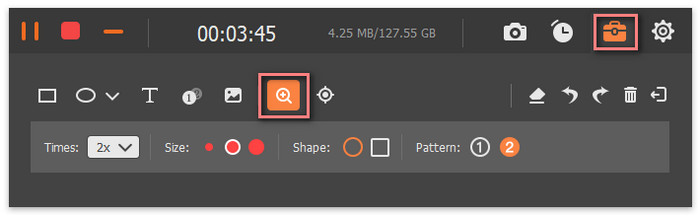
When you need to magnify something of the video you are recording, you can click the Edit icon and choose the Magnifier icon.
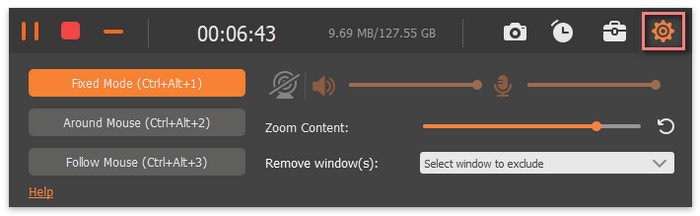
Click the Settings icon, and then choose the recording mode from Fixed Mode, Around Mouse, and Follow Mouse.
Step 5. Finish Recording
Finally, click the Stop icon to complete the recording process.

Once you stop recording, a window where you can preview the recording file will pop up. If you want to record a new video, you can click the Back button to return to the Video Recorder function. Or you can click the >Done 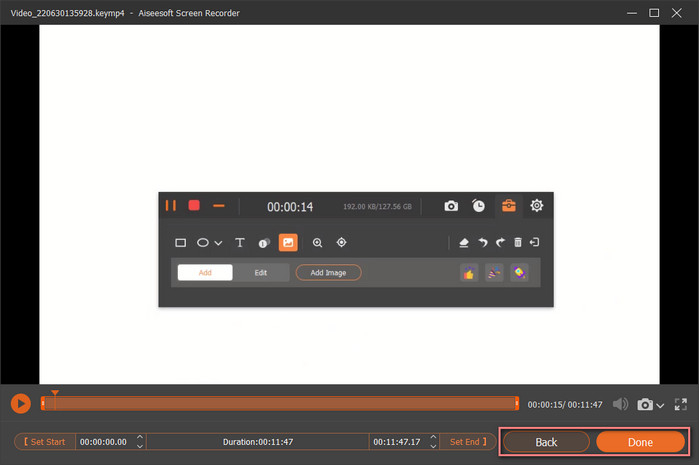
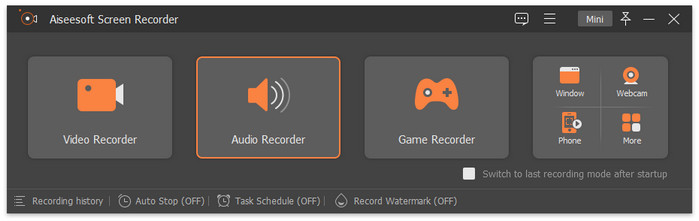
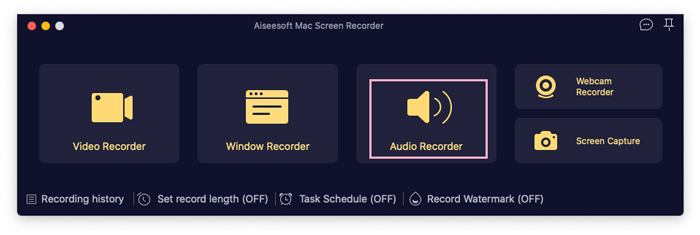
Step 1. Select Audio Recorder
Launch Screen Recorder on your computer and choose the Audio Recorder button.
Step 2. Adjust Audio Recording Settings
Then you can control the volume of the System Sound by moving the bar. And you can turn on Microphone if you want to record your voice too.
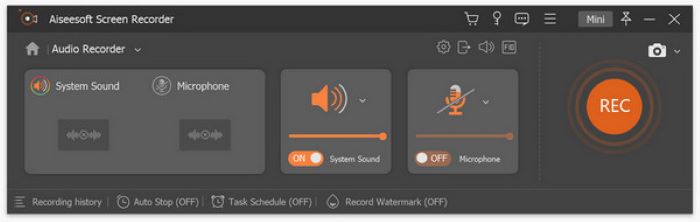
Step 3. Start Recording Audio
Next, you can click the REC button to start recording the audio on your computer.
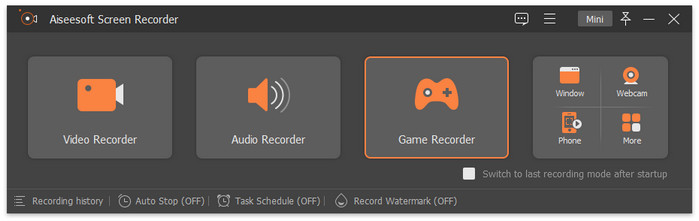
Step 1. Choose Game Recorder
You can click the Game Recorder button to start if you want to record your gameplay screen on your computer.
Step2. Select Game Process
After that, you need to click the Select the game button to choose the gameplay process.
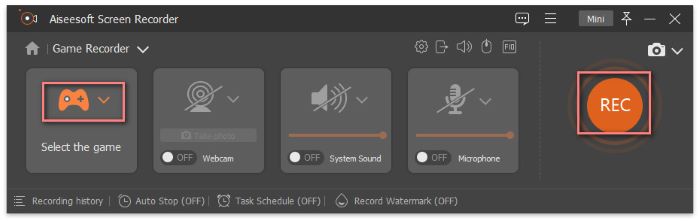
You also can turn on Webcam, System Sound, and Microphone to record the gameplay with music, your face, and your voice.
Step 3. Start Recording Gameplay
In the end, click the REC button to start recording the gameplay on your computer.
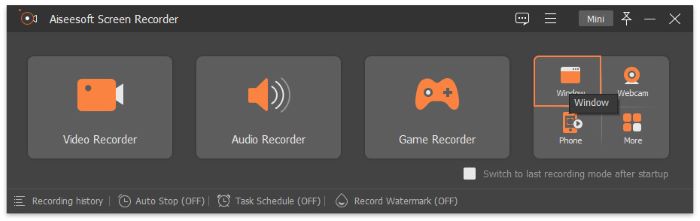
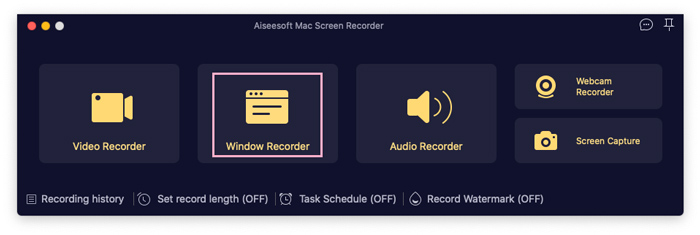
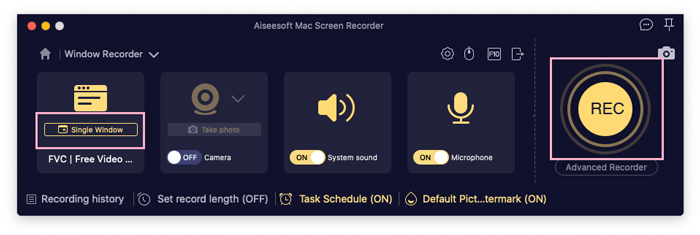
Step 1. Choose Window Recorder
If you open multiple windows on your computer and want to record a window only, you can click the Window button.
Step2. Select Window
Later, you can click the pull-down icon to choose the window you want to capture.
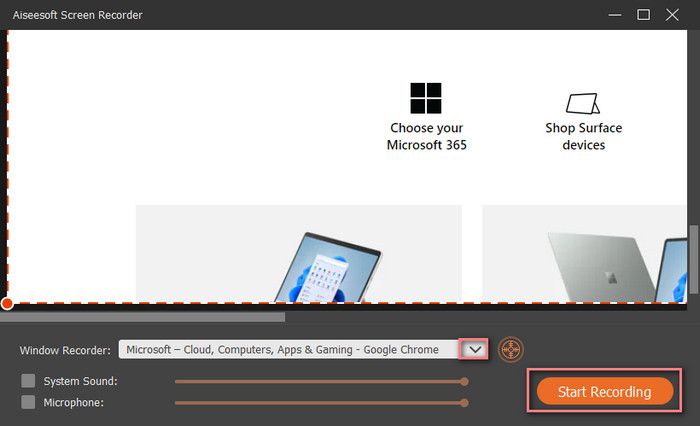
Step 3. Start Recording Window
After choosing the window, you can click the Start Recording button to begin.
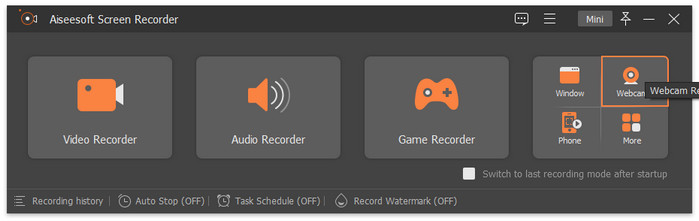
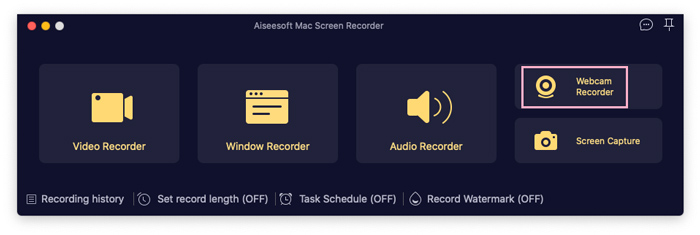
Step 1. Select Webcam Recorder
You can choose the Webcam Recorder button if you want to record the webcam content on your computer.
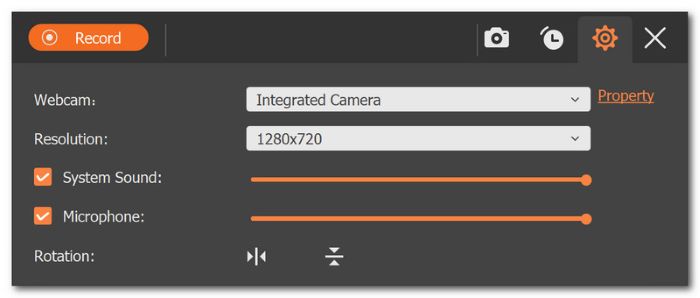
Step 2. Adjust Settings
Then you will see a window with your webcam content on your computer. And you can click the Settings icon to select the camera source, resolution, etc.
Step 3. Start Recording Webcam
Click on the Record button on the top of the previewing window to start.
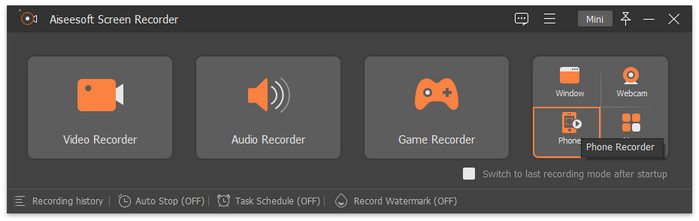
Step 1. Choose Phone Recorder
You can click the Phone Recorder button if you need to record your phone screen on the computer for a larger screen.
Step 2. Connect Phone to PC
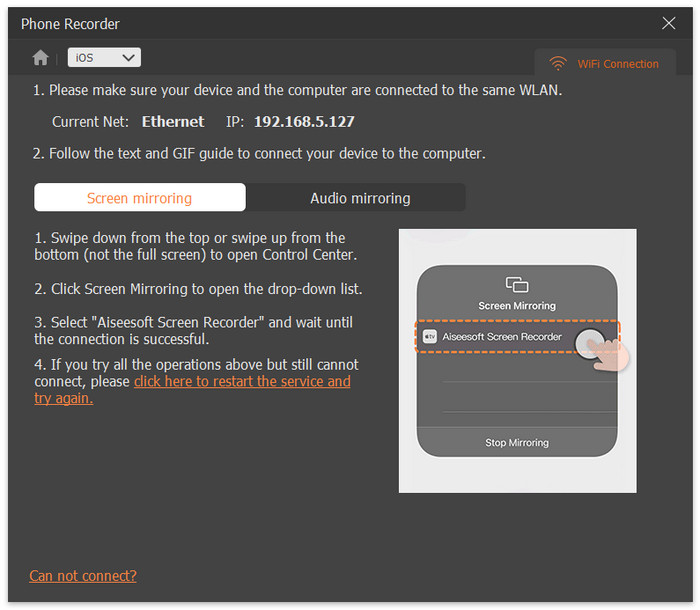
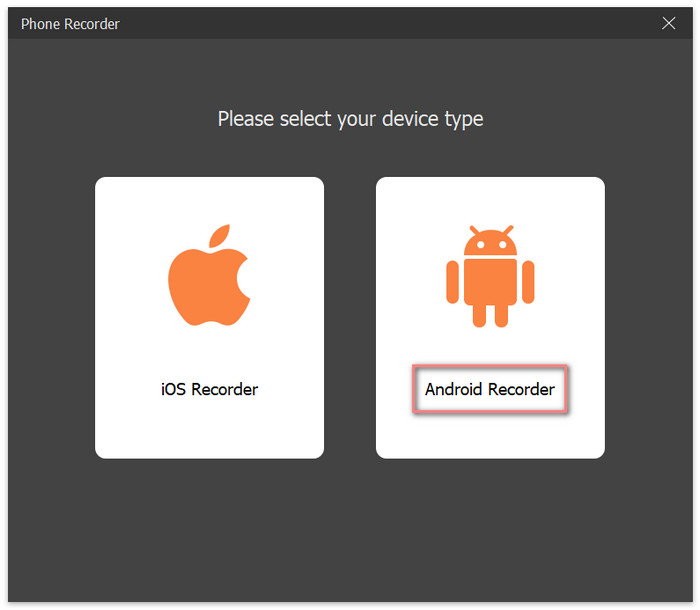
If you are an iOS user, you should choose iOS Recorder first.

Then you can connect your iOS devices as the on-screen instruction says: make sure that your iOS device and the computer are connected to the same LAN, open Control Center on your iOS device by swiping down or swiping up, tap on Screen Mirroring, and choose Screen Recorder to wait for connecting succeeds.
If you are an Android user, please select Android Recorder.
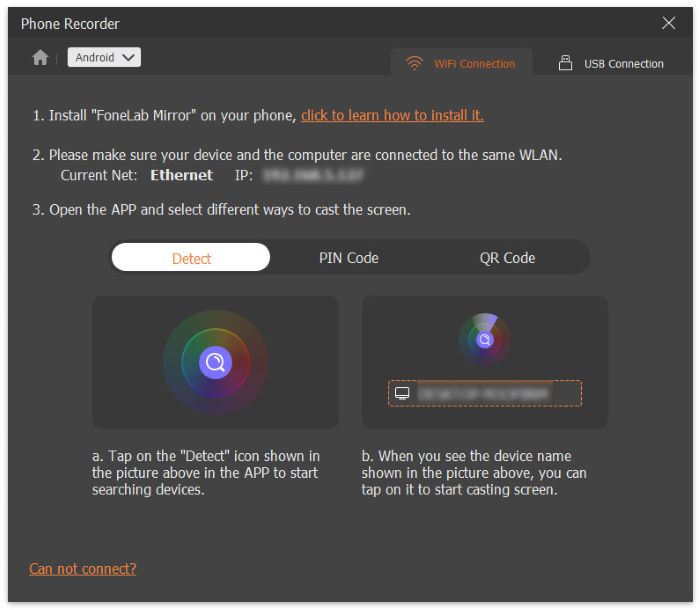
Then you can connect your Android device to the computer via WiFi or USB. To start, please download and install FoneLab Mirror on your Android.
If you want to use WiFi to connect, you have to ensure your Android device and the computer are connected to the same LAN. And there are three ways you can select: Detect, PIN Code, and QR Code.
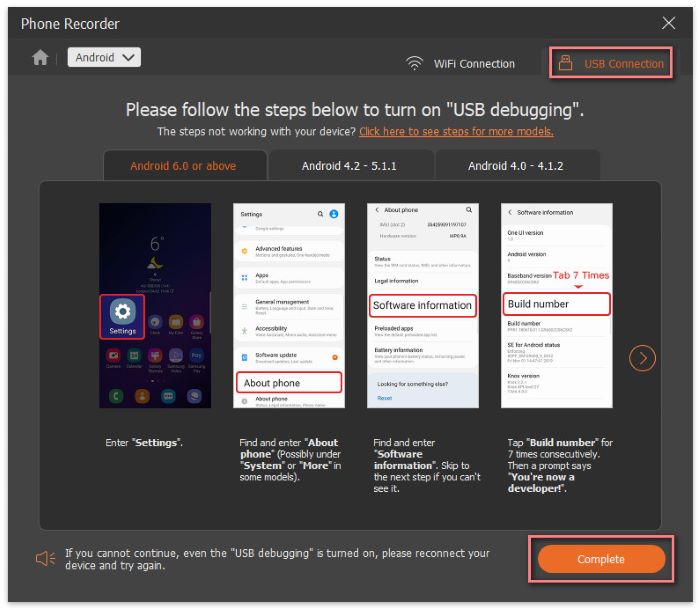
If there is no network connection, you can switch to USB Connection. And connect your Android phone to your PC as the on-screen instruction says: enter Settings on your Android phone and turn on USB debugging, then click the Complete button on the computer and tap on Allow or Start Now on your Android phone to finish this connection.
Step 3. Adjust Phone Recording Settings
After connecting successfully, you can see your phone screen on your computer using Screen Recorder, like the photo below.
Here you can choose the screen resolution from Device, 4K, 2K, etc., and select the output resolution and the recording content.

Step 4. Start Recording Phone Screen
Next, you can click the Record button to begin recording the phone screen on your computer.
After recording the screen, video, or audio on your device, you can go the Recording History window to trim, compress, merge, and convert your recorded files, and you can edit the media metadata of your recorded files.
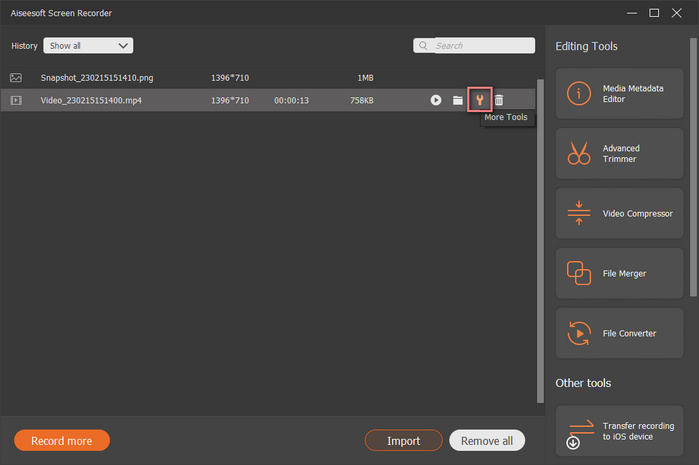
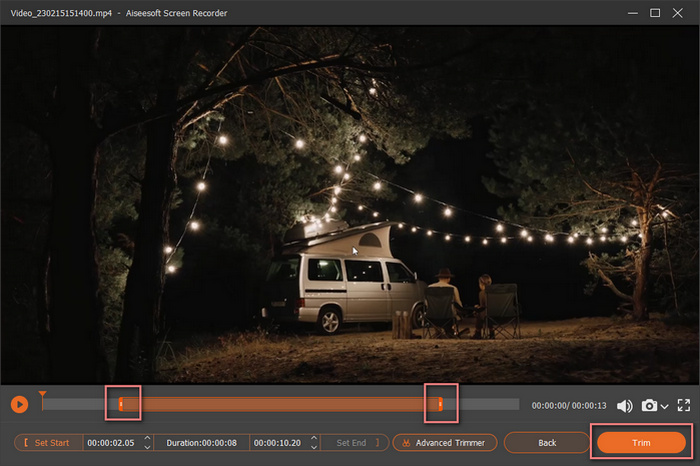
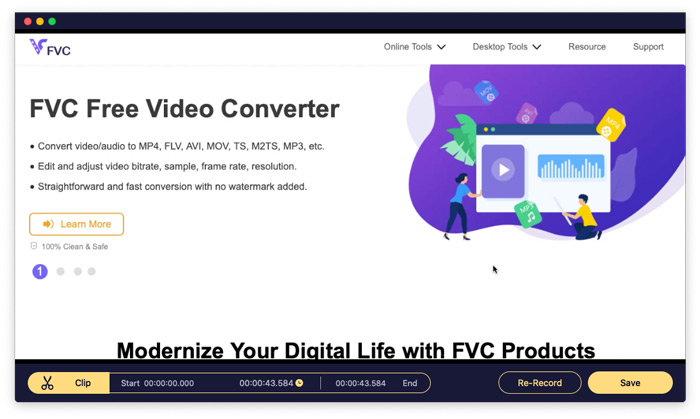
Step 1. At first, please select the file you want to cut and click the More Tools icon to select the Video Cutter option.
Step 2. Then you will enter the video cutting window. In this window, you can shorten your recorded file by dragging the start and end points to the center on the bar. Later, click the Trim button to saving your editing till you are satisfied.
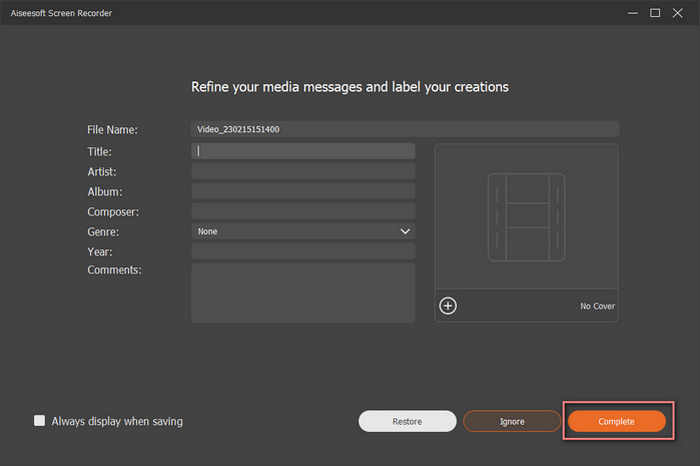
Step 1. Click the recorded file you want to edit, and then in the Editing Tools section, you need to select the Media Metadata Editor option.
Step 2. Next, you can directly change or edit the name, title, artist, album, composer, genre, year, and comment of your recorded file. Lastly, click the Complete button to save.
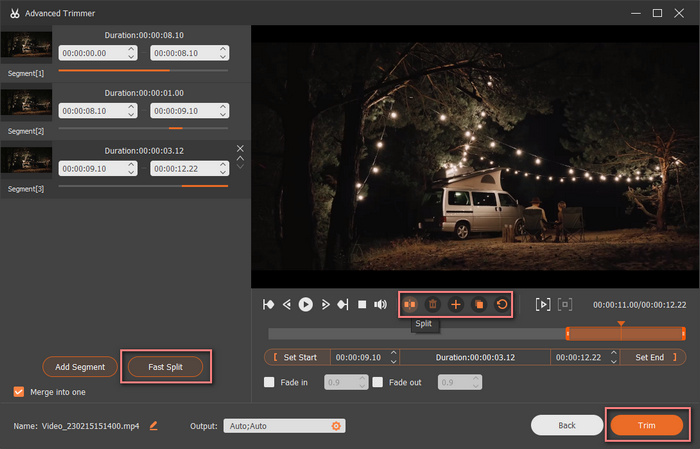
Step 1. If you want split your recorded file into multiple clips, you can use the Advanced Trimmer feature. To enter the function, you can select the recorded file you want to trim in the Recording History window and click Advanced Trimmer in the Editing Tools section.
Step 2. To split your recorded file, you can slide the pointer and click the Split icon. You also can click the Fast Split button to set the number of clips for splitting quickly. Finally, click the Trim button to save your editing.
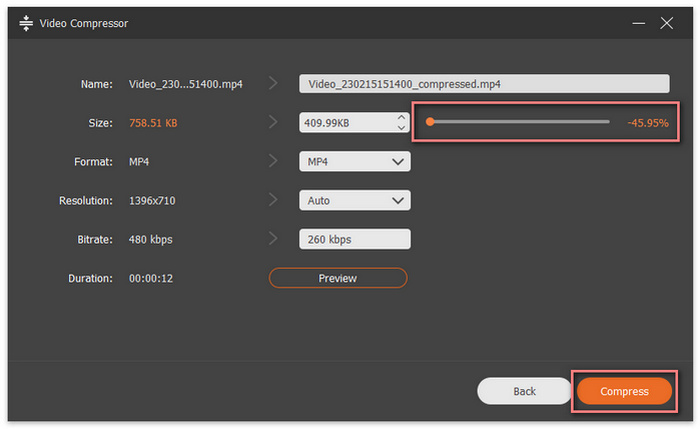
Step 1. After recording, if you think that your recorded video size is too large, you can go to the Editing Tools section and click the Video Compressor button to reduce its size.
Step 2. Then your recorded video will be compressed automatically. You also can slide the point on the Size bar to reduce your video size based on your needs. Next, click the Compress button to save.
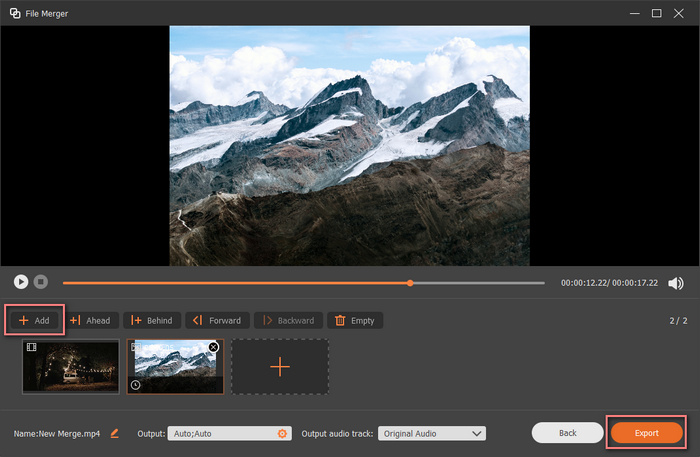
Step 1. If you want to combine your recorded files and your local file into one file, you can use the File Merger function.
Step 2. After selecting File Merger, you can click the Add button to import more videos or images from your existing recorded files and local files. You also can adjust the order of each file by click Forward or Backward. Lastly, click the Export button.
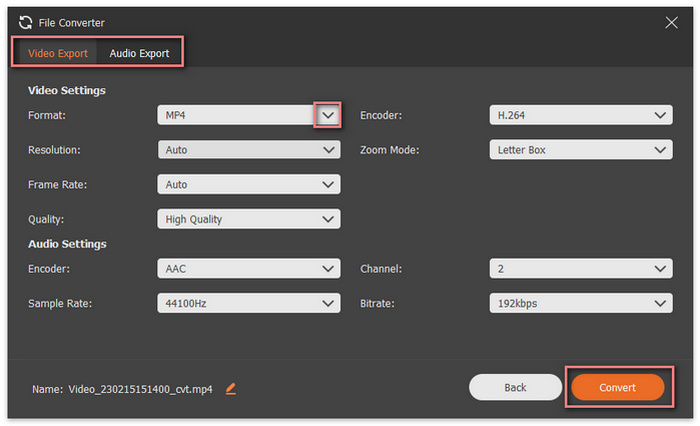
Step 1. To change your recorded file format, you can select your file and click the File Converter button.
Step 2. If you want to change your recorded video format to another video format, you can select the export format in the Video Export section and click the Convert button. If you want to convert your recorded video to audio, you should go to the Audio Export section, select the audio format, and click the Convert button.
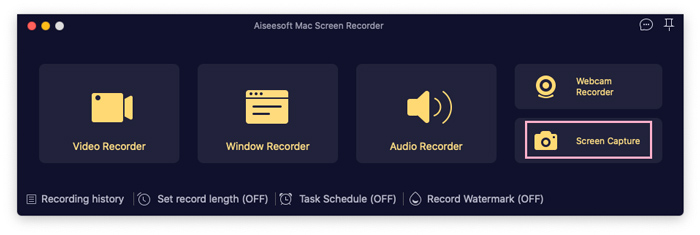
Step 1. Enter Either Function
If you want only to take screenshots on your computer using Screen Recorder, you can enter either function like Video Recorder to start.
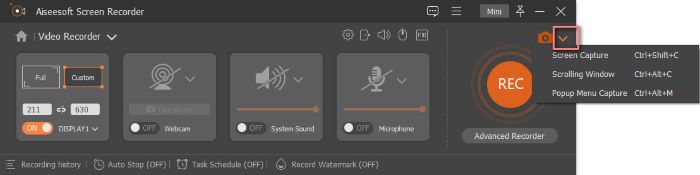
Step 2. Open Screen Capture
Then you can click the pull-down icon next to the Screen Capture icon to select the screenshot mode from Screen Capture, Scrolling Window, and Popup Menu Capture.
If you want to record the playing video with audio on your computer, you can use Screen Recorder. Besides, you also can use this software to capture the gameplay on your computer. Apart from these, the Phone Recorder function of Screen Recorder enables you to record your iPhone and Android phone screens on the computer.
You can click the Free Download button on this page to download the installation package on your computer first. Then you need to click on the package to open it for installing Screen Recorder on your device.
If you need to record a video for more than three minutes or you want to trim your recorded videos, you have to register for Screen Recorder.
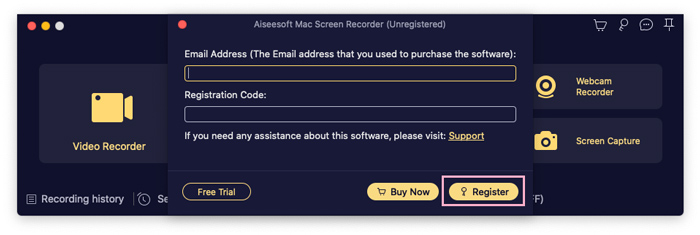
Step 1. After launching Screen Recorder, please click the Register icon.
Step 2. If you have purchased this software and received the registration code, you can directly input it and your email address into this window and click the Register button.
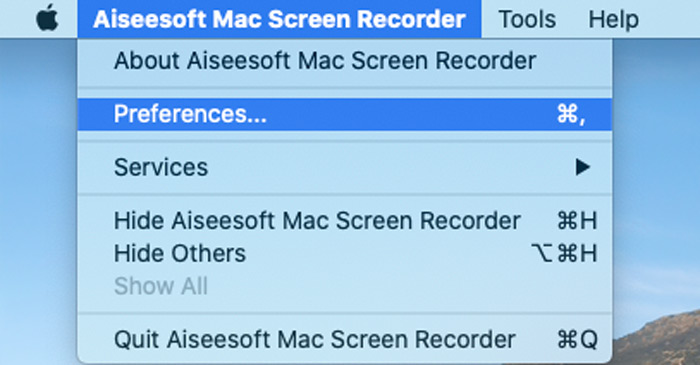
If you want to set preferences for Screen Recorder, please click Aiseesoft Mac Screen Recorder and choose Preference.
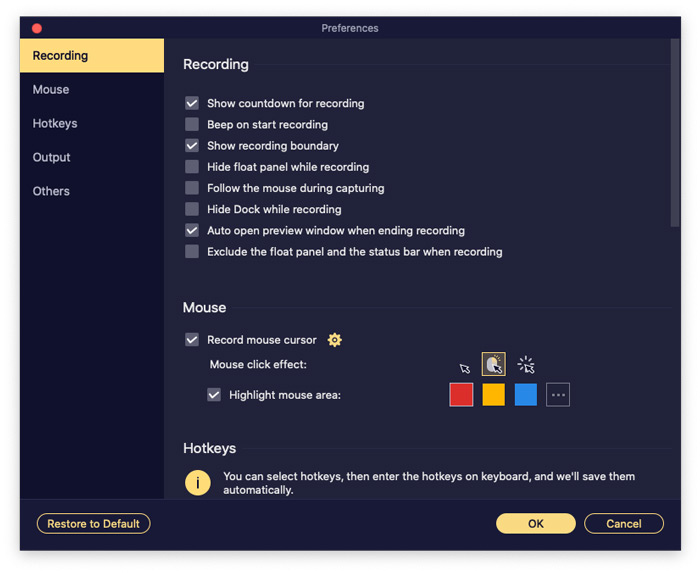
1. Recording
In this window, you can set operations before, when, and after recording, like Hide desktop icons when recording, etc.
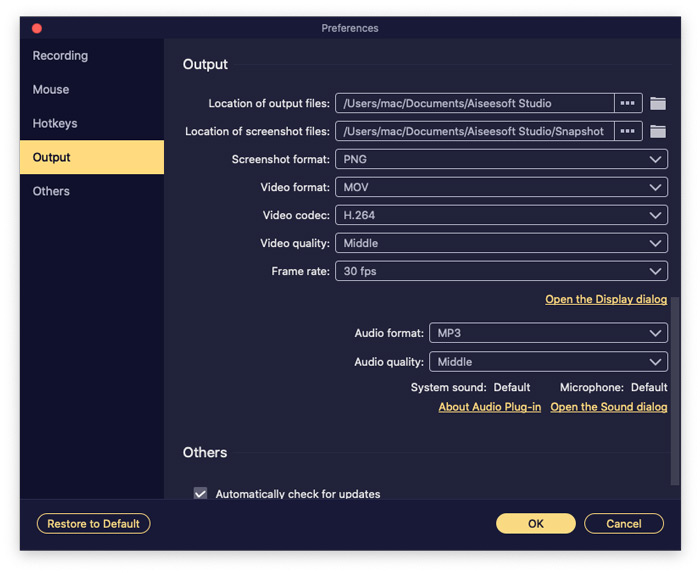
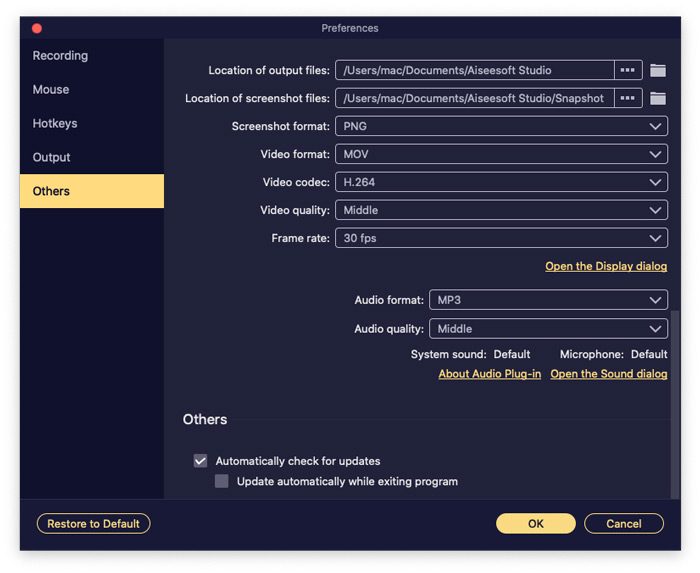
2. Output
You can adjust in this window if you want to change the output formats, store paths, and the quality of recording video, audio, and screenshots.
3. Moused
In this window, you can select whether to show the mouse cursor or not. And you can choose the color of mouse clicks and area when recording.
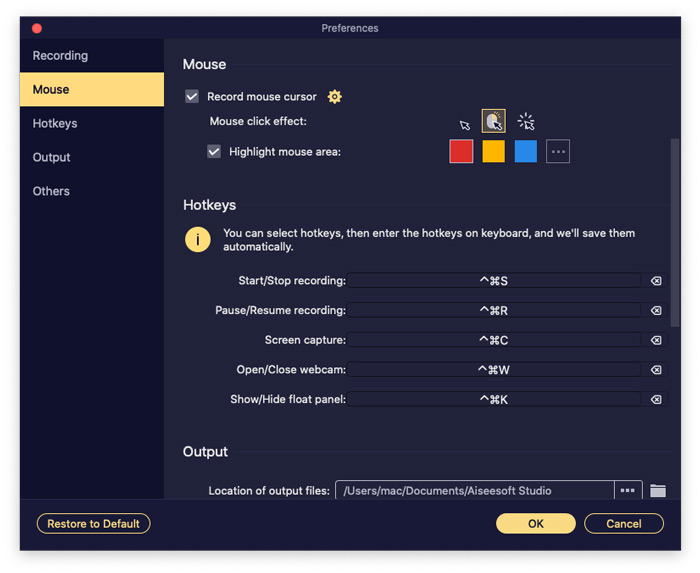
4. Hotkeys
You can set hotkeys here if you want to make the recording process more convenient.
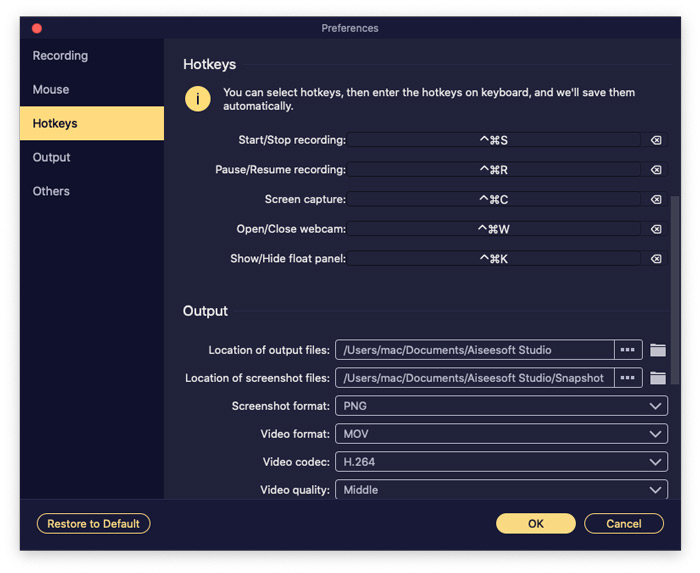
5. Others
Here you can adjust settings of update checking.
| Supported OS | CPU/Processor | RAM | |
| Windows | Windows 11/10/8.1/8/7 | 1GHz Intel/AMD CPU or above | 1GB RAM or more |
| Mac | Mac OS X 10.12 or above | 1GHz Intel® processor and Apple M1/M2 chip | 512 MB or more |
| Supported Formats | |
| Video | MP4, WMV, MOV, F4V, TS, WebM |
| Audio | MP3, WMA, M4A, AAC |
| Image | PNG, JPG/JPEG, BMP, GIF, TIFF |
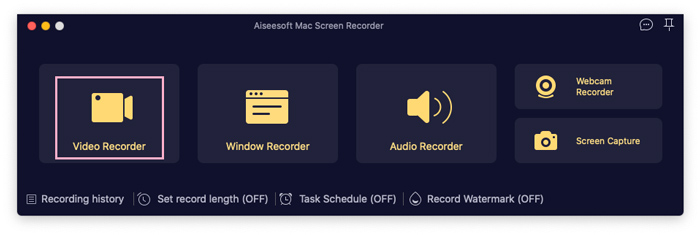
Step 1. Choose Video Recorder
Please select the Video Recorder button to begin video capturing on your computer.
Step 2. Choose Recording Area
If you want to capture the whole screen of your computer, you can click the Full icon. If you only want to record a specific area of your video, you can click the Custom icon and move the borderline to customize the capture area as you like.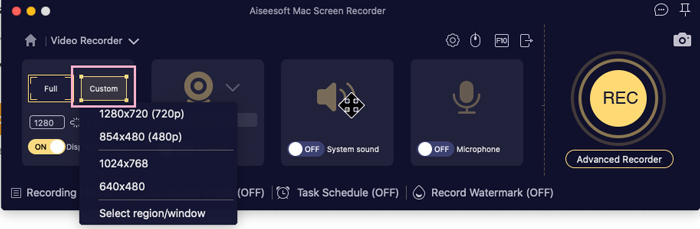
Step 3. Adjust Video Capture Settings
If you need to record the webcam content while recording the video on a desktop, you can switch to On under Webcam.
If you want to record video with audio and the microphone sound, you can turn on System Sound and Microphone.
If you need to set the starting and ending time of recording, you can turn on Task Schedule and click the Add new task button to create a task for recording.
What’s more, you also can choose to record videos with a watermark or not. And you can click the Manage button to make your exclusive watermark and change the watermark position based on your need.
Step 4. Start Recording
After all settings are done, click the REC button to begin recording the video on your computer.

When you are recording, you can click the Snapshot icon to take screenshots of your video for sharing with your friends.

If you want to use a rectangle to mark the critical content when recording, you can click the Edit icon and choose the Rectangle icon.You also can user other tools, including an ellipse, a pencil, or an arrow, to mark out.

If you need to add text to your recording videos, you can click the Edit icon, choose the Text icon, and click the Add button to place texts on your video.
If you want to number the content while recording on your computer, you can click the Edit icon, choose the Callout icon, and use your mouse to click the content you want to number.
Step 5. Finish Recording
Finally, click the Stop icon to complete the recording process.

Once you stop recording, a window where you can preview the recording file will pop up. If you want to record a new video, you can click the Back button to return to the Video Recorder function. Or you can click the >Done button to save the recording video.
Step 1. Select Audio Recorder
Launch Screen Recorder on your computer and choose the Audio Recorder button.
Step2. Adjust Audio Recording Settings
Then you can control the volume of the System Sound by moving the bar. And you can turn on Microphone if you want to record your voice too.

Step 3. Start Recording Audio
Next, you can click the REC button to start recording the audio on your computer.
Step 1. Choose Window Recorder
If you open multiple windows on your computer and want to record a window only, you can click the Window button.
Step2. Select Window
Later, you can click the pull-down icon to choose the window you want to capture.
Step 3. Start Recording Window
After choosing the window, you can click the Start Recording button to begin.
Step 1. Select Webcam Recorder
You can choose the Webcam Recorder button if you want to record the webcam content on your computer.
Step 2. Start Recording Webcam
Click on the Record button on the top of the previewing window to start.
You can select the Screen Capture button and select the area to take a screenshot.
Lifetime License
1 Month License
Business License
Lifetime License
1 Month License
Business License


 Secure Payment
 30-Day Money Back Guarantee
 Problems Resolved in 48 Hours
Copyright © 2026 FVC Studio. All rights reserved.