Get Started
Download & Install
Download Video Converter Ultimate software and install it on your computer with step-by-step instructions. Open the program and get ready for the following process.
Register
An official account of Video Converter Ultimate is guaranteed with border permissions on functions. We highly recommend that you register and unlock abundant choices during the process.
For users who purchased a registration code from a non-official website:
For users who purchased this tool from guranteed third-party source, you may find that you get a registration code, but are hard to find a box to enter it in the software. Then you need to follow the steps below:
Step 1. After purchasing Video Converter Ultimate, you will get a registration code. Now, you can click the Log in button at the top to enter the Log in screen.
Step 2. Enter your email address and the verification code sent to your email to log in.
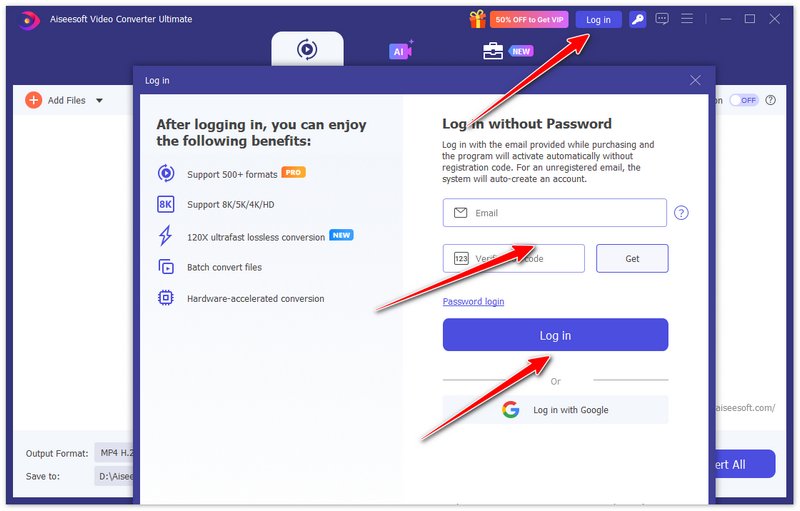
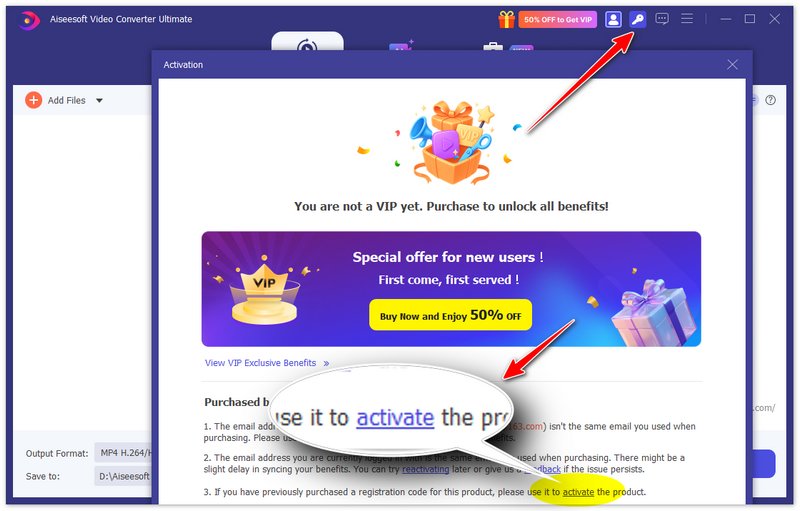
Step 3. After logging in successfully, the login button becomes a profile icon. Now, you can click the Key button next to the profile icon and click the blue anchor text “activate” to enter the registration code activation screen.
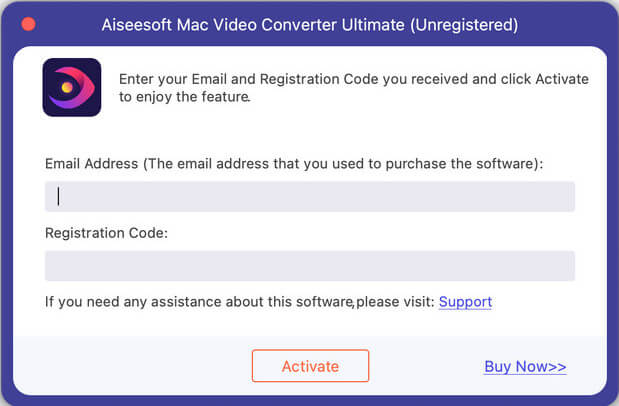
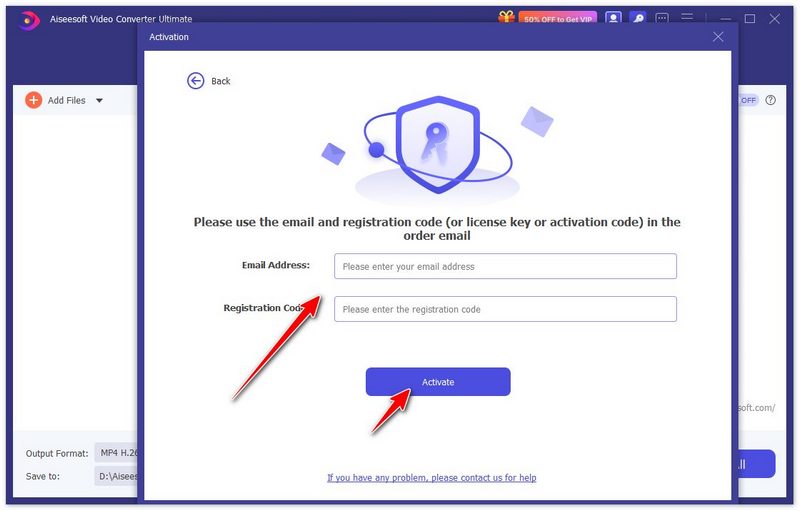
Step 4. Enter your email address and registration code sent to you when you purchased. Click Activate to make your VIP benefits effective.
For users who purchased from the program or the official website:
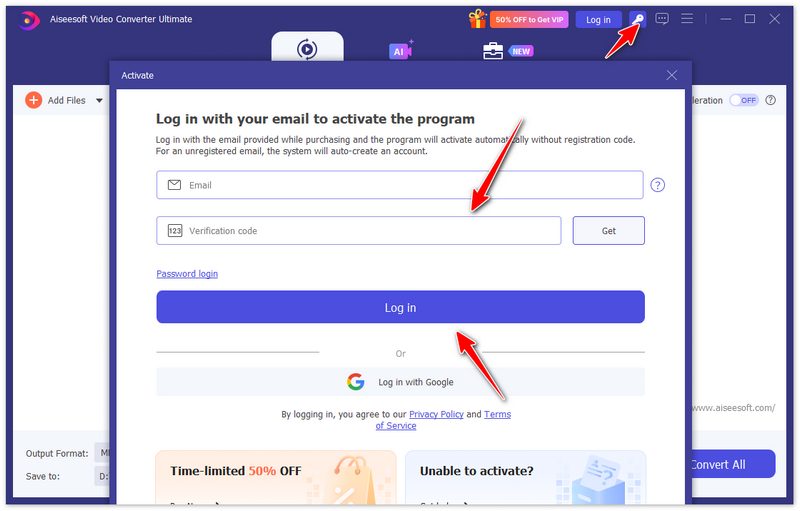
Step 1. After purchasing Video Converter Ultimate, the email you used for purchase will become your account certificate, so you can use it directly to activate your VIP membership. Just click the Key button at the top to open the Activate screen.
Step 2. Enter your email address and click Get to receive a verification code. After entering them, you can click Log in to activate your VIP benefits directly. Only note that the email must be your email you used for purchase, or else the benefits won’t be synced to your false email.
Update
Video Converter Ultimate develops with quick updates into a more reliable and powerful platform. To get access to timely updates, you can practice these channels:
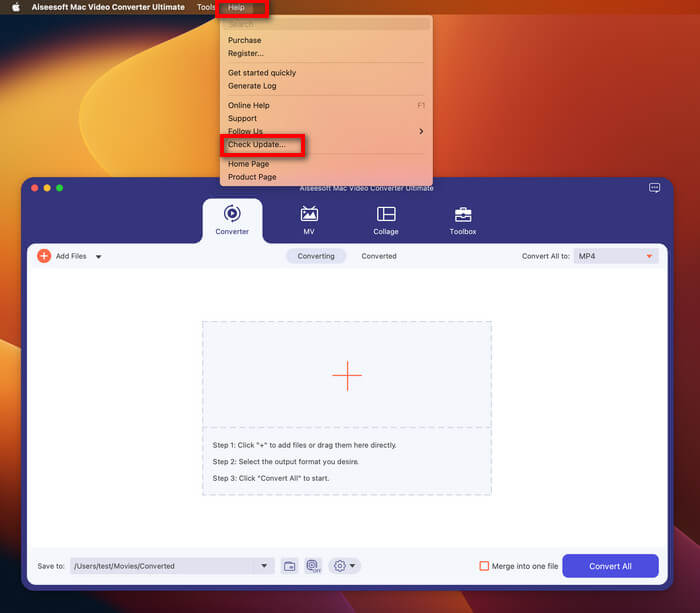
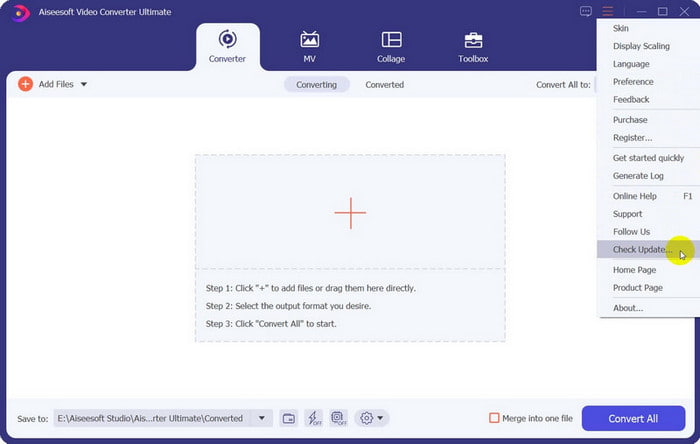
Channel 1: Click the Menu icon and enter Check Update.If there is a latest version, reach and renew your program instantly.
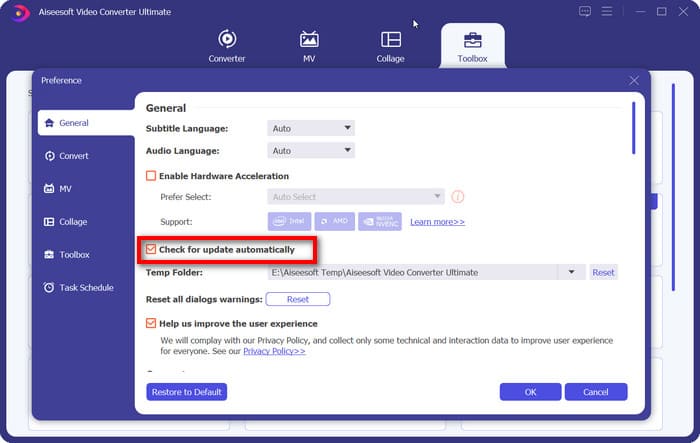
Channel 2: Go to Preference under the menu and you can see Check for update automatically. Tick the box and go on.
Channel 3: Link our product page and download the latest version.
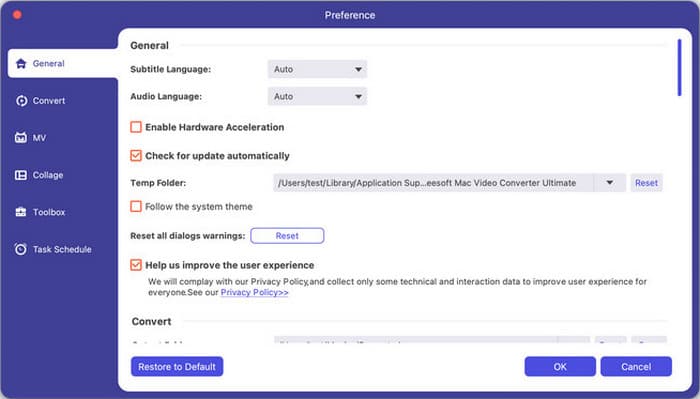
Preferences
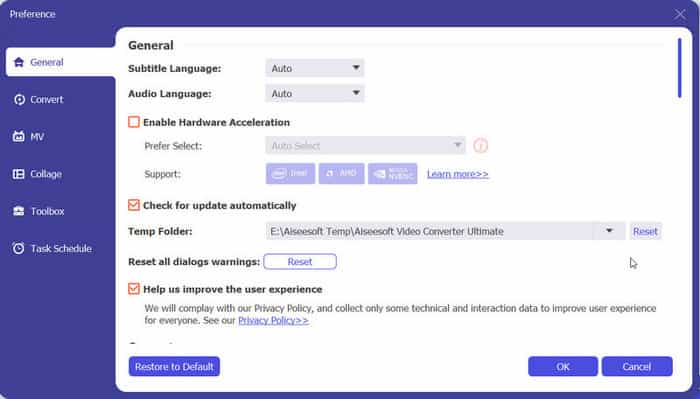
Launch Preference under the menu icon and head to the targeted section on the left side that goes with your requirements: General, Convert, MV, Collage, Toolbox and Task Schedule.
Under each individual part, you can switch between options for detailed configurations and reset them to suit your using habit.
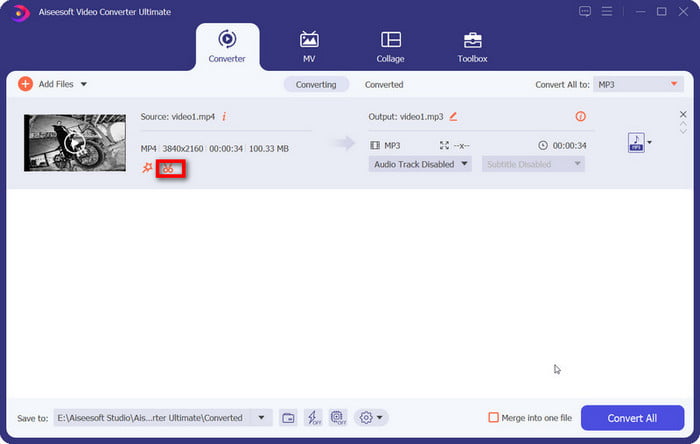
Convert Video & Audio
Video Converter Ultimate connects every user to different video and audio formats and helps to achieve the ideal effect through simple steps. Follow the steps below to reach the reversions you want.
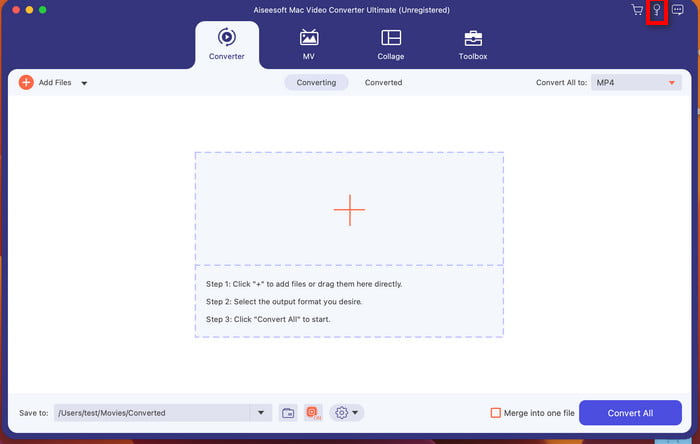
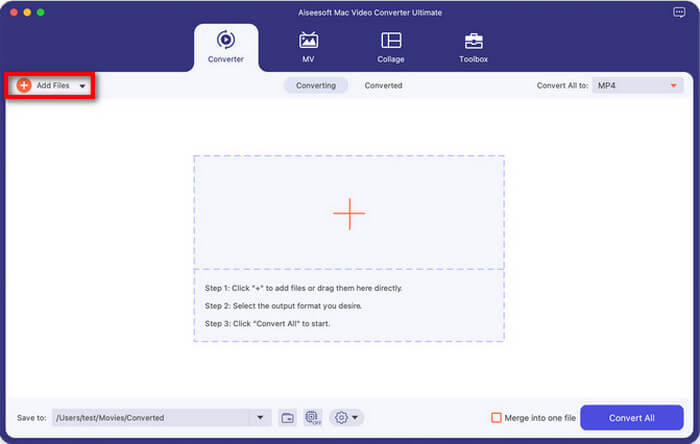
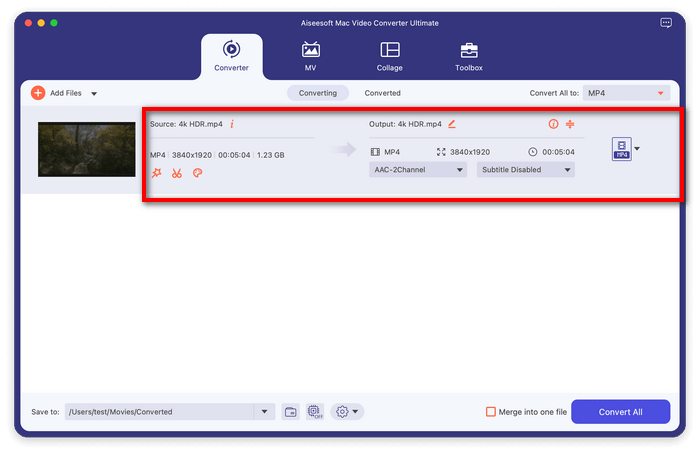
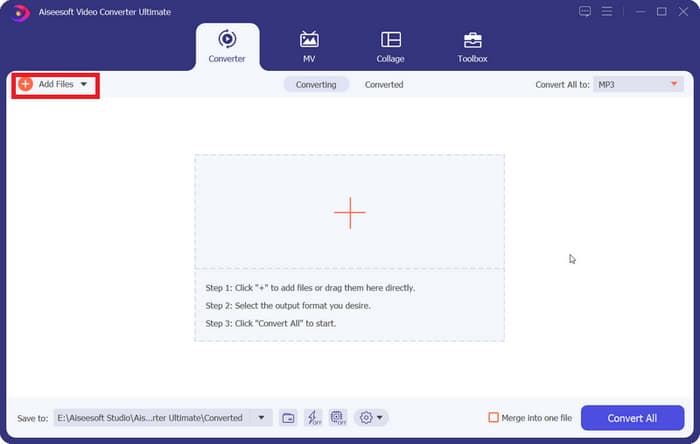
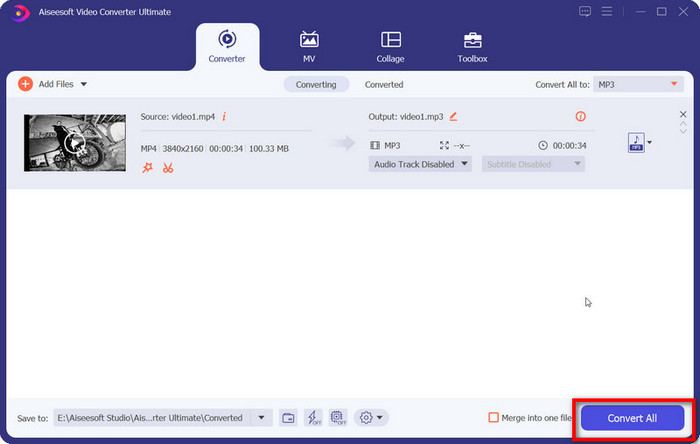
Step 1. Add video/audio file(s)
To add the file(s) you are going to convert, click Add Files button to select the subject or move it directly to the central area in the main interface.
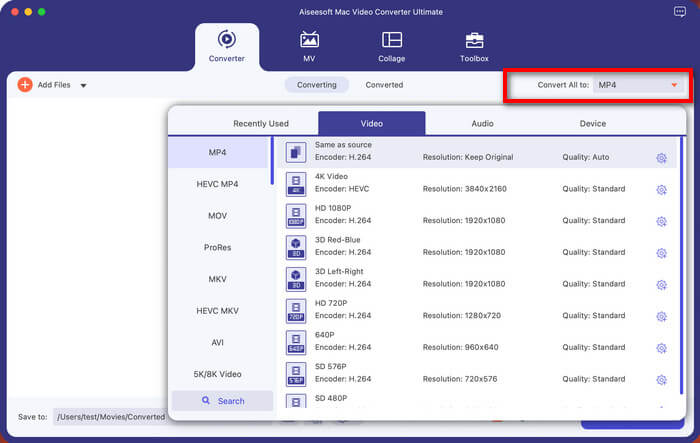
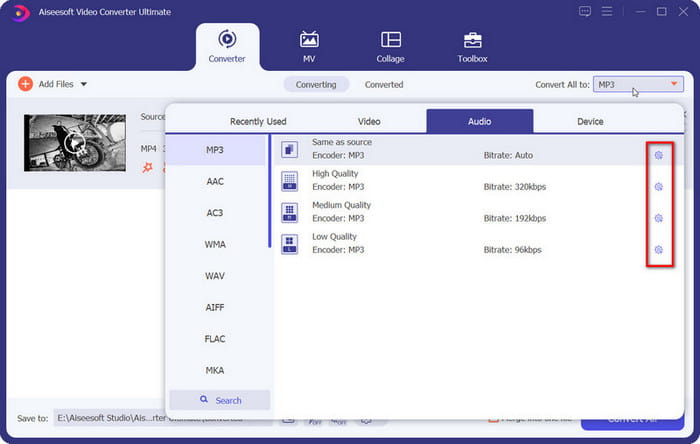
Step 2. Select the output format
With your file loaded, click the drop-down button next to Output Format to select your preferred format.
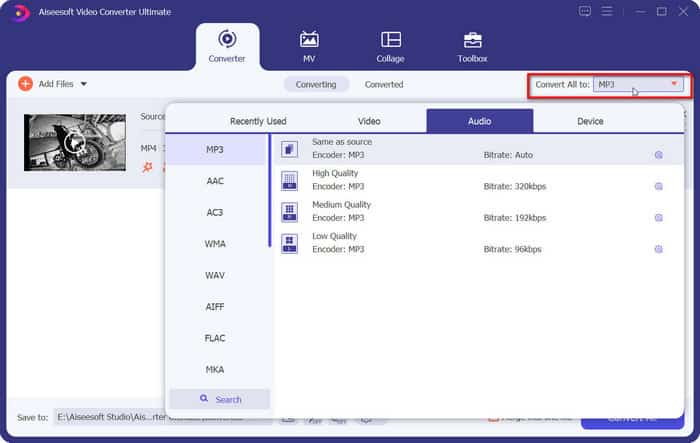
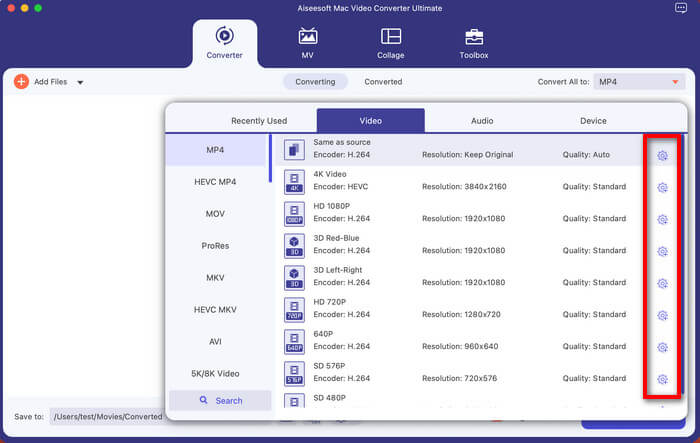
Additionally, more individual needs could be met for profile setting when you hover your mouse over the Custom Profile icon. Under this column, you can customize parameters of video and audio based on the format.
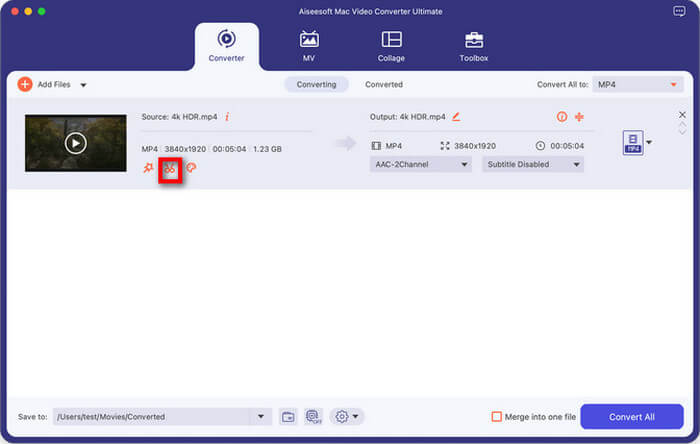
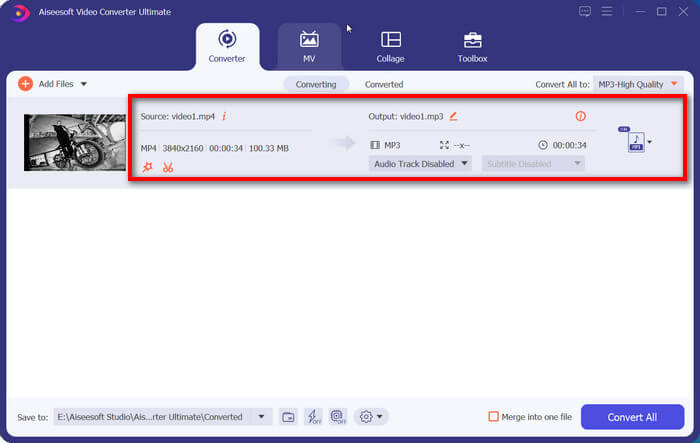
Step 3. Convert video/audio files
Before converting the video/audio files, you can go through the basic information on the interface, shown as format, size, length all together. Then select the options available for use.
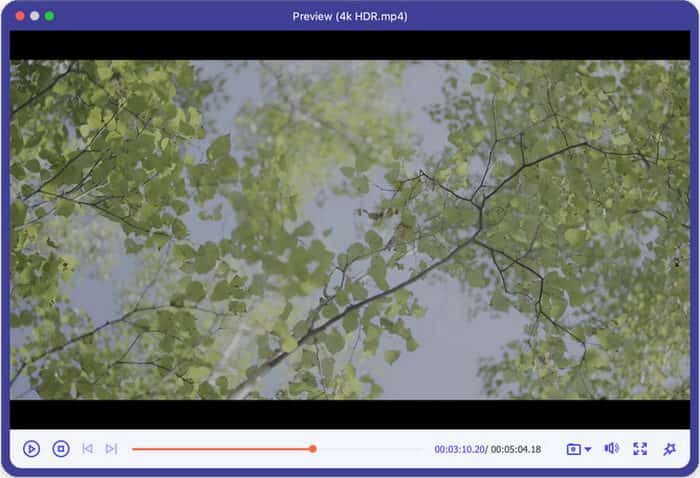
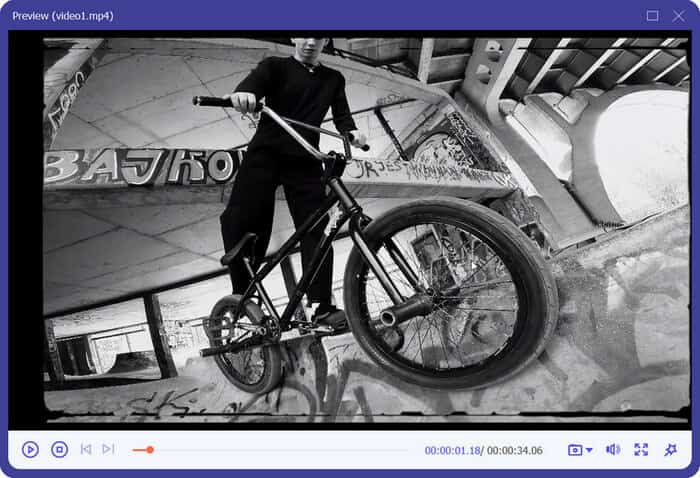
To see the adjusted version, you can preview the file by clicking the video and play it.
On the expanded screen, you are provided with snapshots and other choices for your convenience.
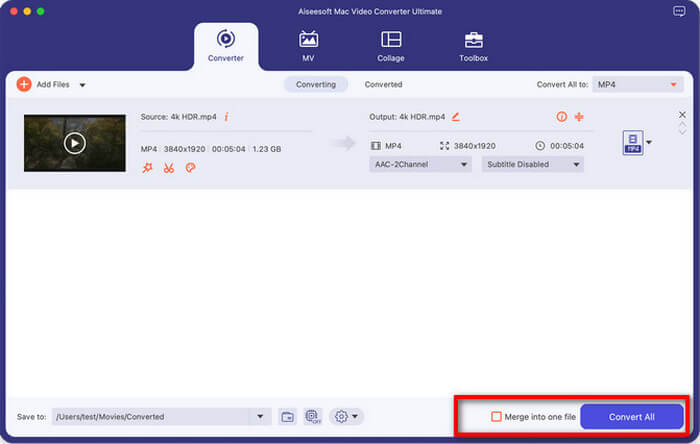
Followed by it, select the destination on the bottom bar. If you are in need of an integrated file for the final result, tick Merge into one file box and hit the Convert All button in the lower right corner to save all the settings.
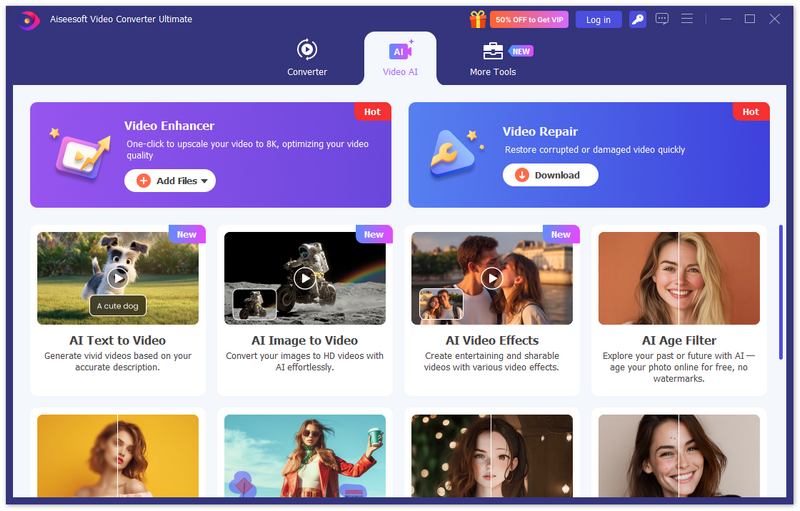
Enhance Video with AI
Video Converter Ultimate now also supports enhancing video with 10 more AI models, including General Enhancement Model, Face Model, Anime Model, Video Quality Repair Model, Detail Restoration Model, Video Denoise Model, Frame Interpolation Model, Colorize Model, SDR to HDR Model, Color Enhancement Model, and Low-light Enhancement Model. Now, let’s see how to enhance your video to the next level with these AI models.
Step 1. Click Add Files in the Enhancer tab, or Add Files in the Video Enhancer section on the home screen, to select a video file and upload it.
Step 2. Select an AI model based on your needs. If you want to improve the overall video quality, try General Enhancement Model; If you want to enhance the person's profile in the video, the Face Model is your top choice; If you prefer to enhance your anime videos, try Anime Model; If you want to remove video noise, choose Video Denoise Model; If you want to make your B&W video become colorful and vivid again, there is a Colorize Model for you! Overall, we offer different models to satisfy your needs to the maximum level.
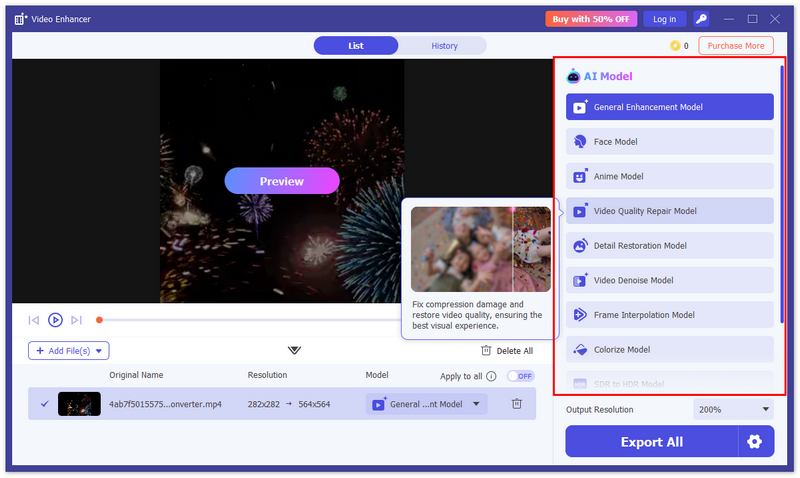
Step 3. After choosing a proper AI model, you can click Preview to check the rendering effect before exporting. Here we offer 2 preview models for you to see their effect better.
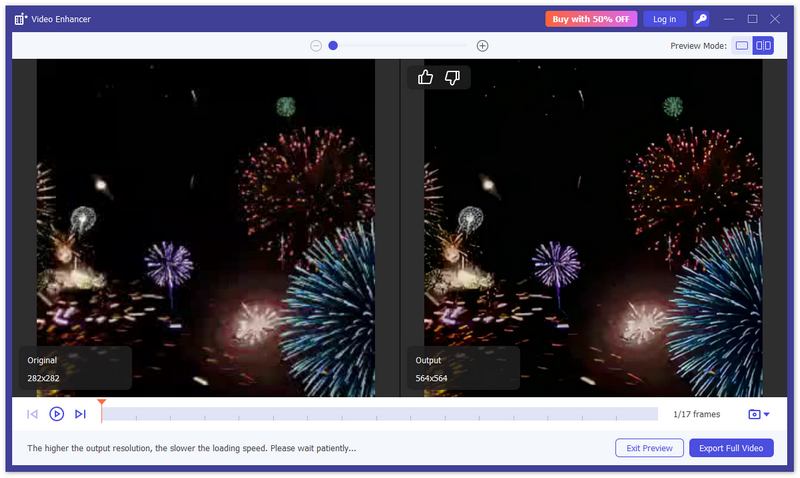
Step 4. If you are satisfied with the result, you can click Export Full Video in the preview window directly. Or if you want more customizing options, you can go back to the AI Model selection screen and choose output resolution, output video format, video encoder, bitrate, etc.
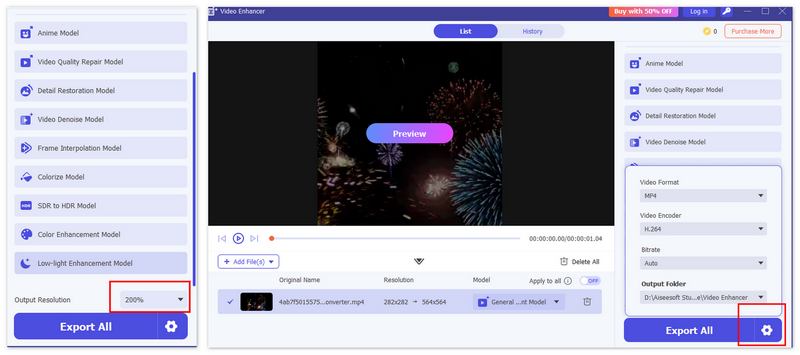
Step 5. Now, you can click Export All to start enhancing your videos. Note that this process might take some time based on your video length, size, and more. Please wait patiently.
Edit Video & Audio
Video Converter Ultimate is a treasure house stored with various editing options to enrich your experience when processing your video and audio.
Trim & Split Video
To separate a long video into several clips, you can take the following procedure.
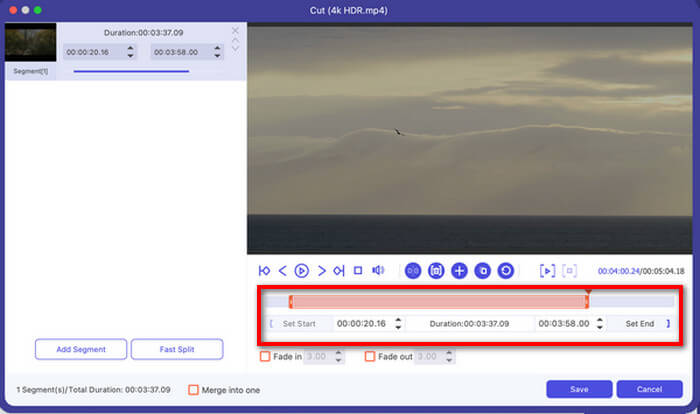
Step 1:Import a video file and click Cut icon to enter the cutting window.
Step 2: When selecting the right time for your clip, you are free to drag the time bar right
below the video or reset the time through the Set Start and Set End button.
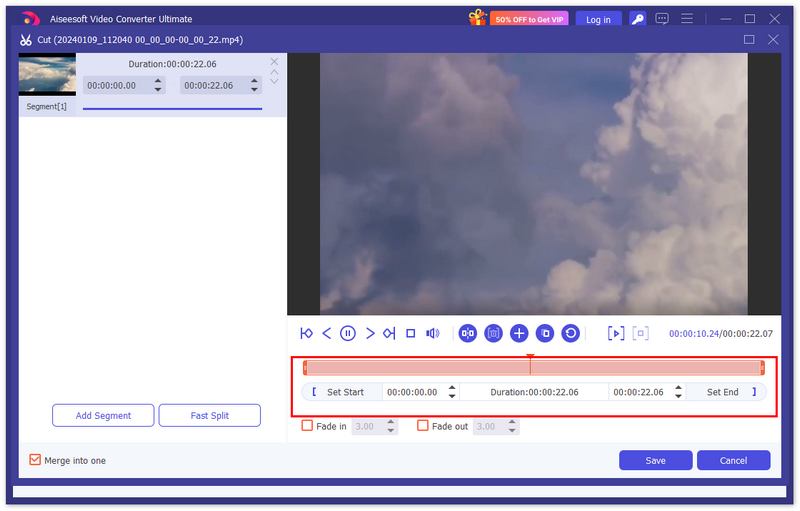
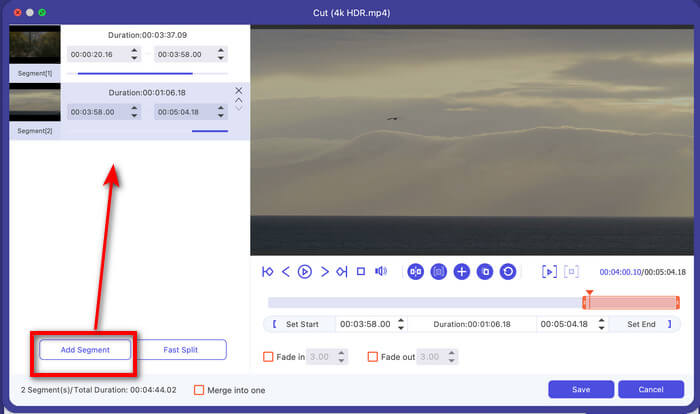
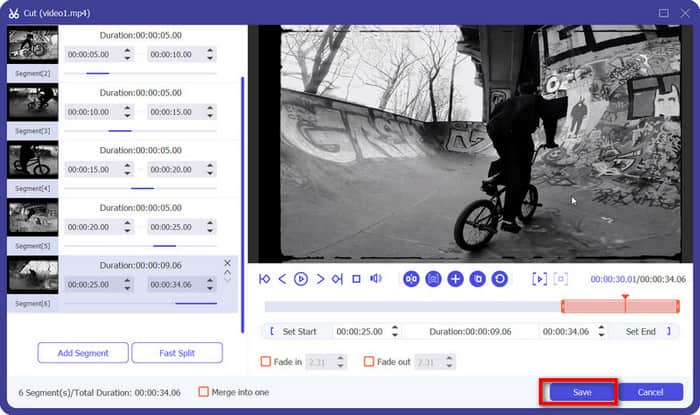
Step 3:If you want another video clip, hit the Add Segment button to add the current one to the list.
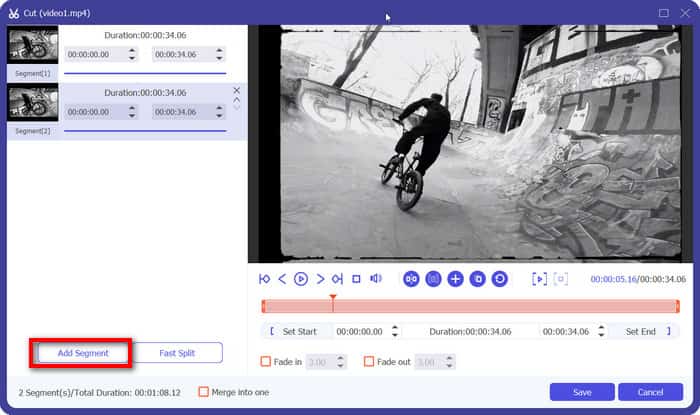
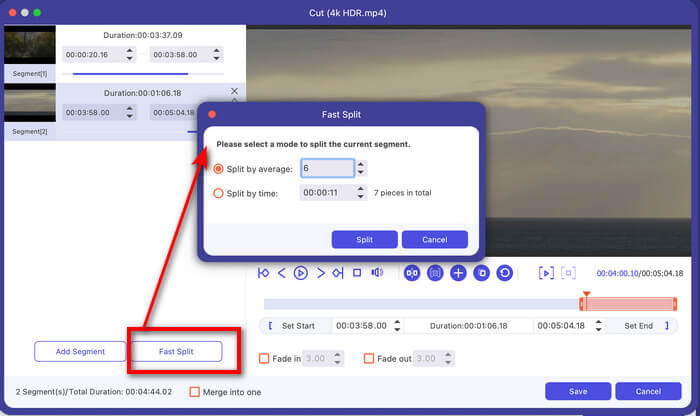
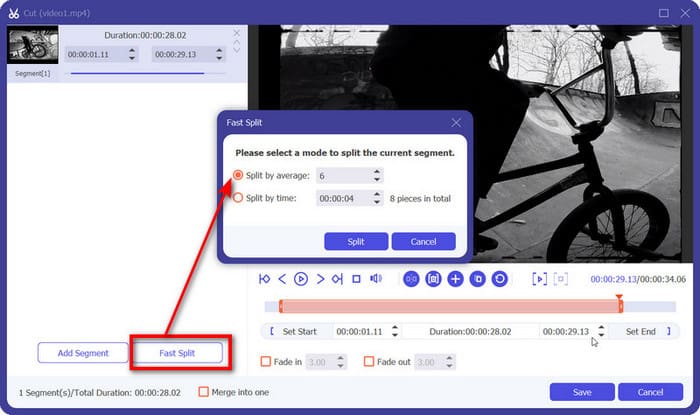
Step 4:A quick solution to video clips is also supported by Fast Split icon. Click it and insert the number you desire. You can decide on two modes as shown: split videos by average part or time. Once set, click Split to confirm.
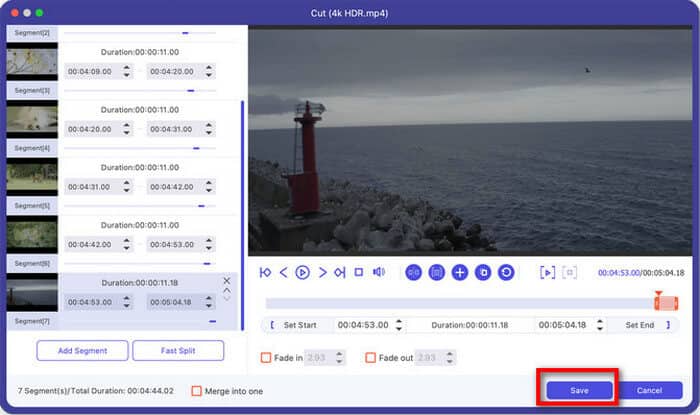
Step 5:After all the steps, reach the Save button to produce the final result.
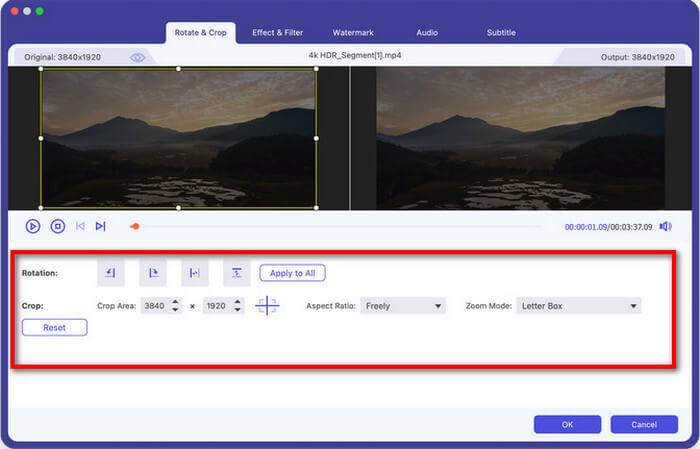
Rotate & Crop Video
This software brings you a quick access to rotate or flip a video.
Step 1: Find Edit icon and enter Rotate & Crop.On the area below you can change rotation into four modes. The result will synchronize above for you to see.
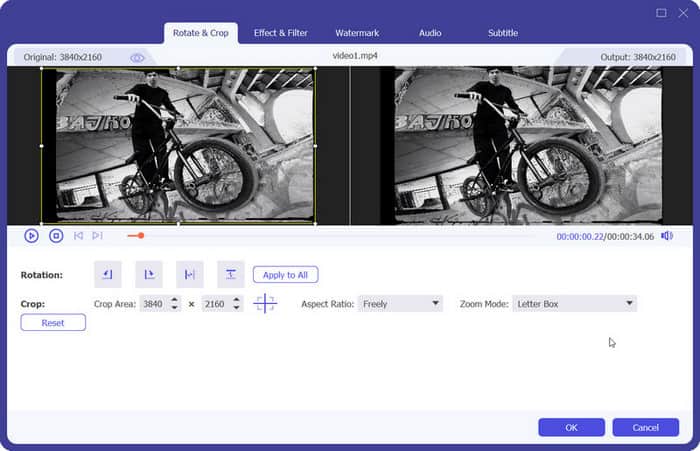
Step 2: Meanwhile, you can select the area to crop by moving the frame or setting the configurations on crop area, aspect ratio and zoom mode. Click Reset to restart anytime you want.
Step 3: Click the OK button to save all.
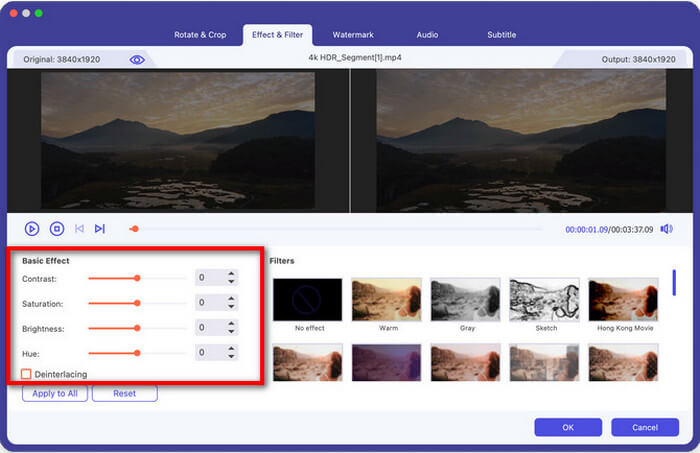
Adjust Video Effect & Filter
Videos effects and filters can be modified easily and quickly on this platform.
Step 1: Find Edit icon and enter Effect and Filter.
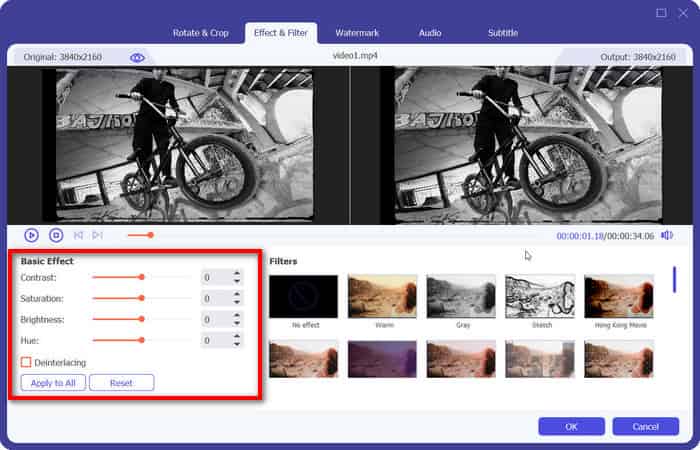
Step 2: Explore the function menu on basic effect and adjust the bar or number of contrast, saturation and hue. Tick Deinterlacing if necessary
Step 3: Select a filter on the right side to enhance more effect if you like. Then hit the OK button to save the changes.
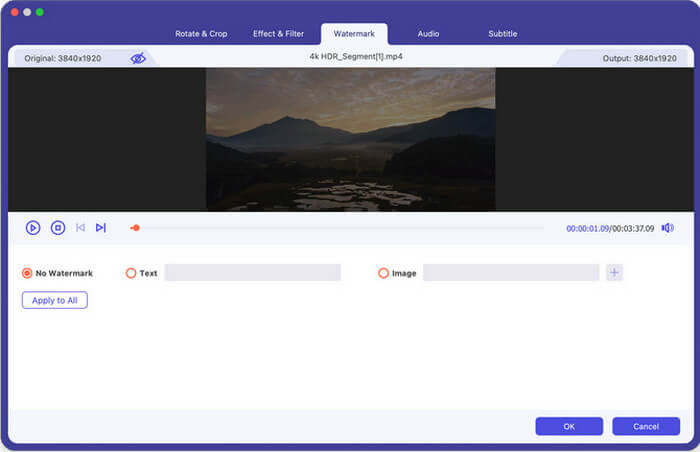
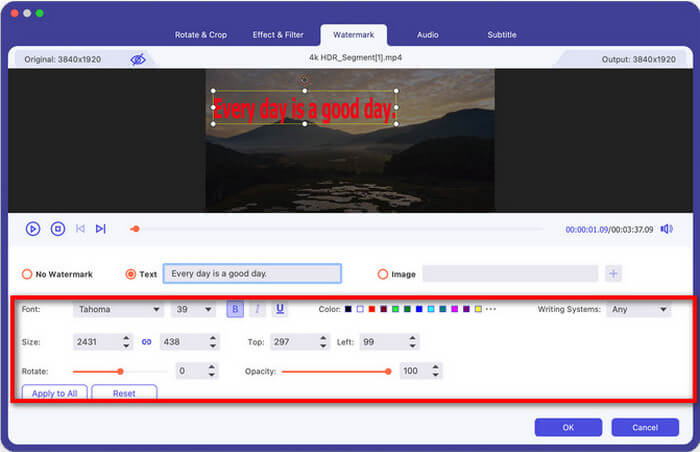
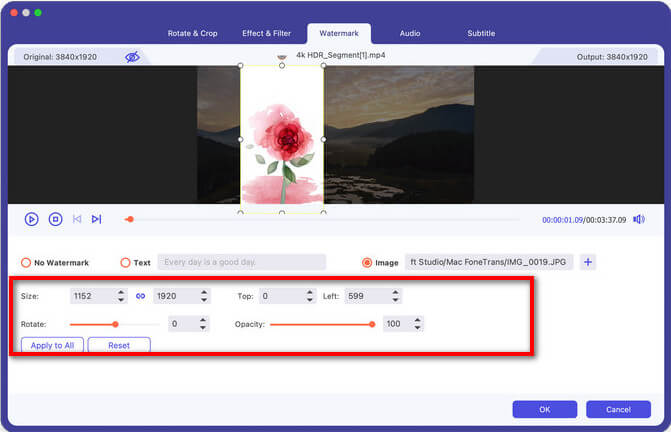
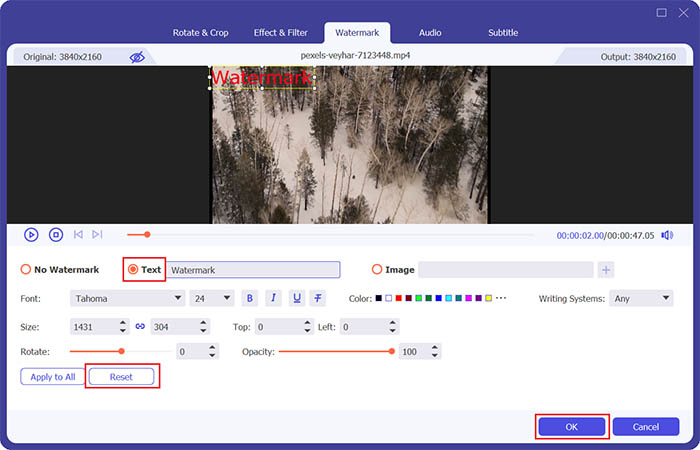
Add Watermark to Video
Watermarks are introduced to import on your video for individual needs.
Step 1: Click the Edit icon and then go to Watermark.
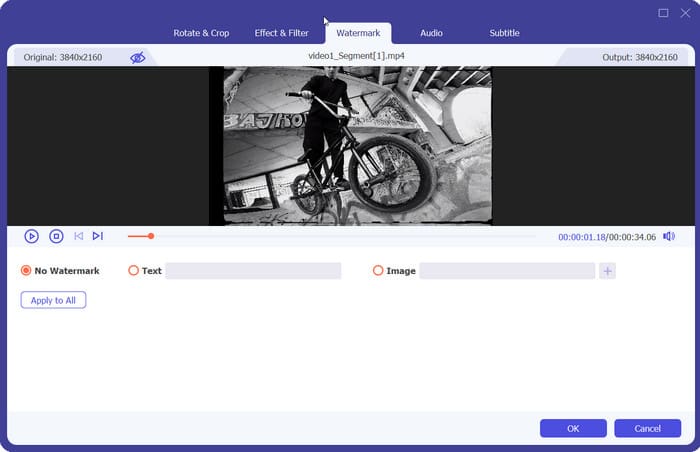
Step 2: Here we have two types of watermarks for your option: a text watermark and an image one.
For a text watermark, you can insert the text on the blank and adjust the text fonts, colors, size and styles as well.
While for the latter one, choose Add Picture button to upload an image. And then adjust the size and place it wherever you like on the video.
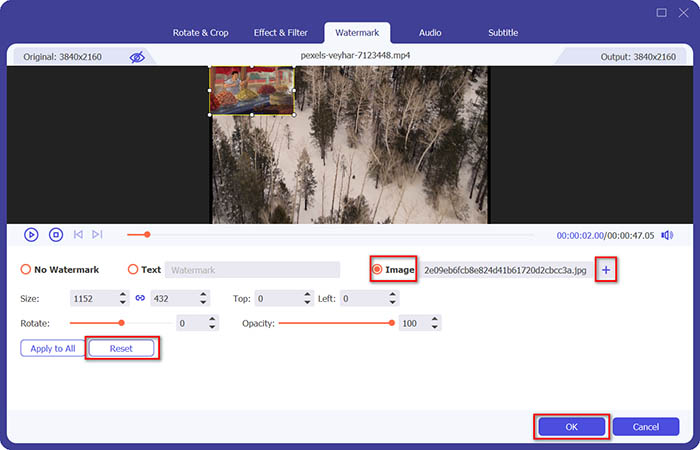
Step 3: Click the OK button to save your settings.
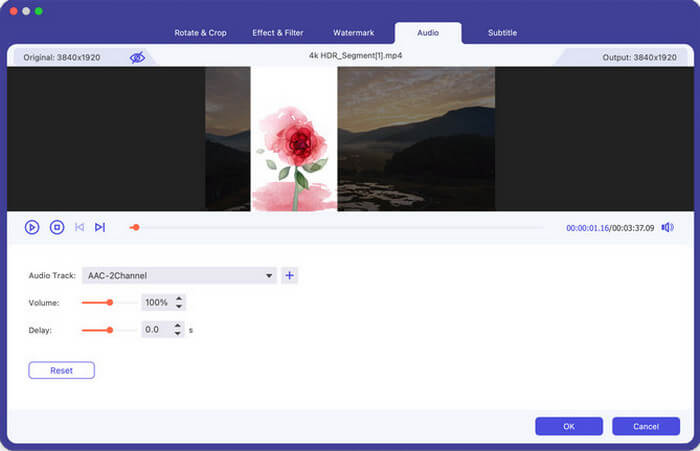
Adjust Audio
Audio can be modified easily and quickly on the platform.
Step 1: Click the Edit icon and then choose Audio.
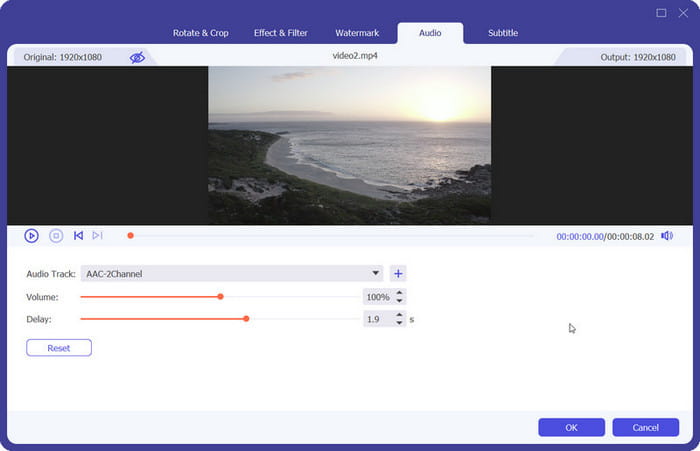
Step 2: Select the targeted audio track and decide whether you want it disabled or not. Then change the audio volume and delay time to make them suit.
Step 3: Click the OK button to generate the final file.
Add Subtitle
This part guides you to edit and place subtitles to add more details.
Step 1: Click the Edit icon and hit Subtitle.
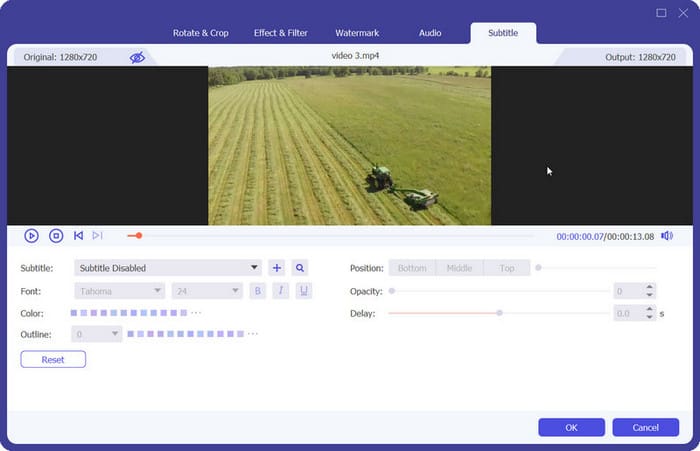
Step 2: Click + button to drop the subtitle file. Then you can make further changes on the position, font, opacity and so on.
Step 3: Click OK to save the adjustments.
Make Movies
To cater to verified occasions and events, we introduce MV as an independent part available on Video Converter Ultimate. This section will lead you to eye-feasting effects with different themes, background music and text design. Read on how to make your own works.
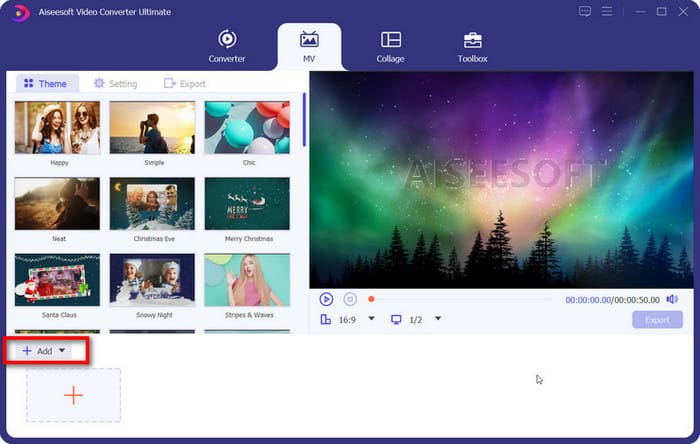
Step 1: Add the target
Go to the More Tools menu and select MV Maker, in which you can click the add button to add the video you want to turn into an MV.
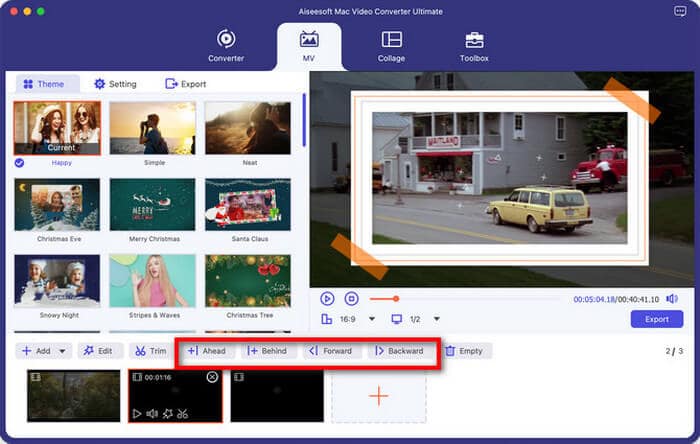
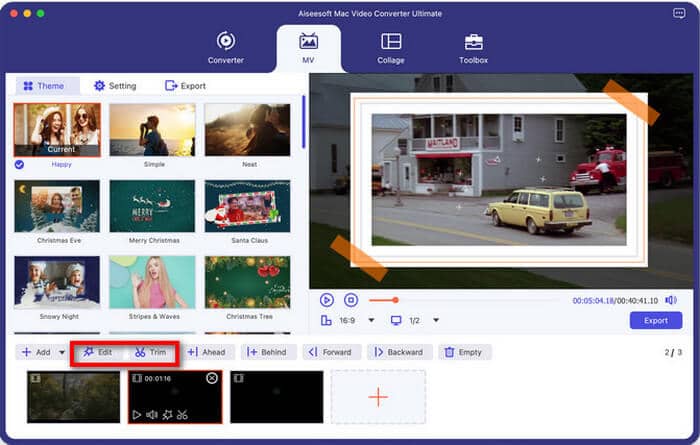
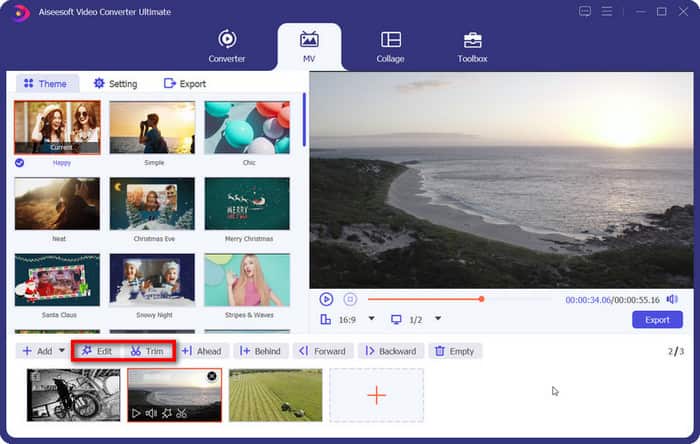
Step 2: Edit your video
After importing the files, you can rearrange them by directly dragging or clicking the Backward or Forward button on the foot page.
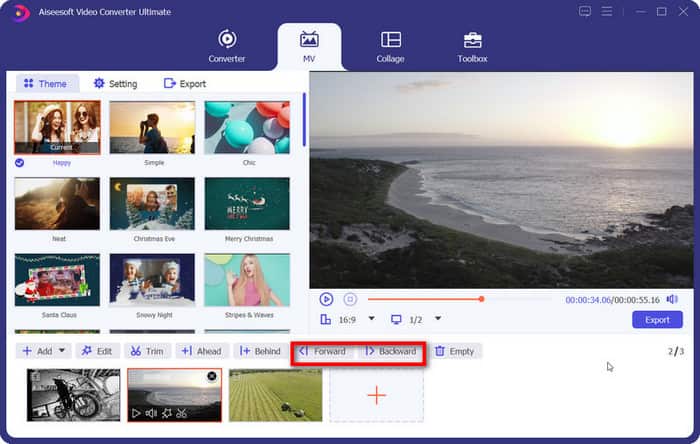
Also, you can Edit or Trim the target with the specific access above.
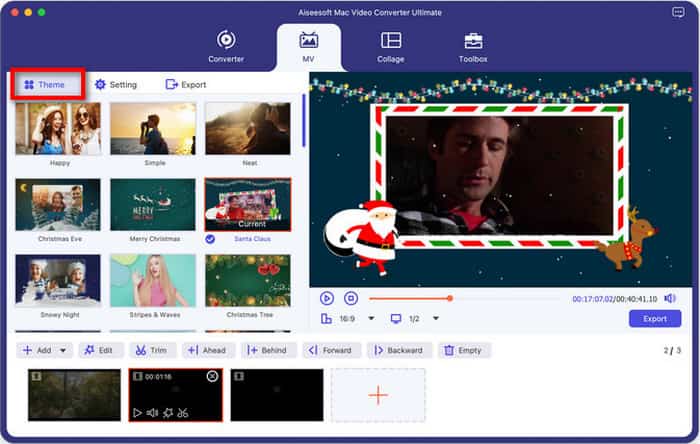
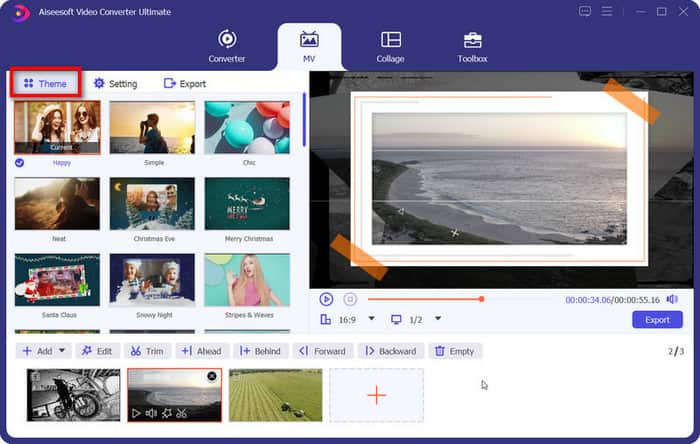
Step 3: Choose a theme
You can decide the best theme that goes with your project while previewing the effect of your options.
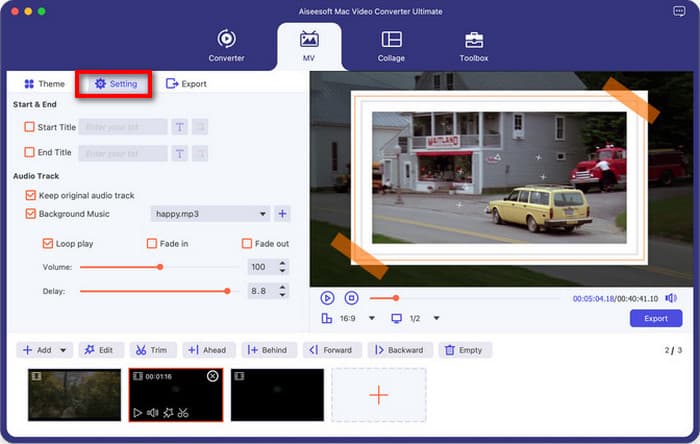
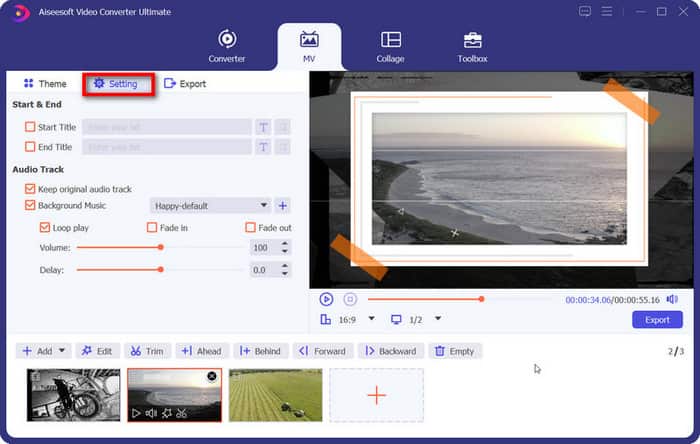
Step 4: Set other effects
For more vivid effects, try hitting the Setting button on the list where you are provided with options for the start and end titles as well as audio tracks to enhance your mv.
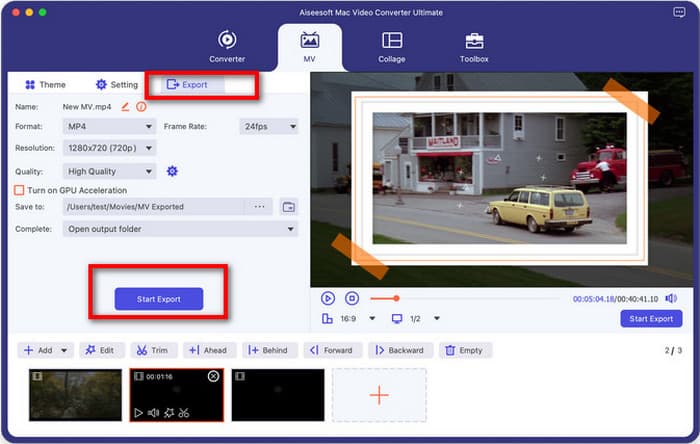
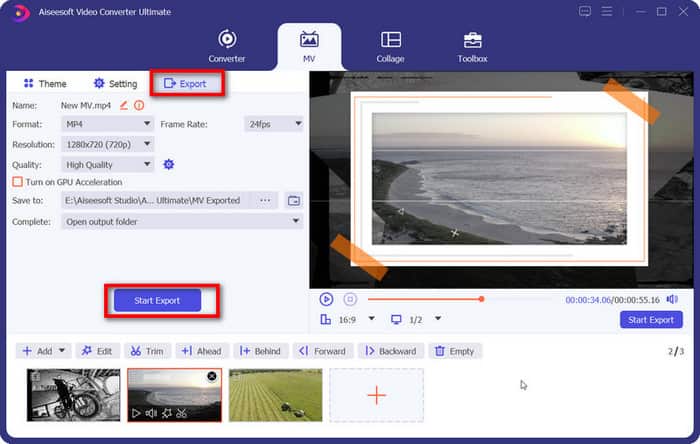
Step 5: Generate your movie
Now you can head to the Export section to complete the procedure before saving. You may rename the modified file and gain more options for format, frame rate, resolution, quality and GPU acceleration. Once all done, select the path to save and hit Start Export button to produce your creation.
Collage Videos &Pictures
If you are bothered with problems concerning screen-combing and file-editing simultaneously, come to Video Converter Ultimate for the perfect answer. In Collage feature, you are permitted multiple choices to enhance both your videos and pictures. Now follow these steps to start your creation.
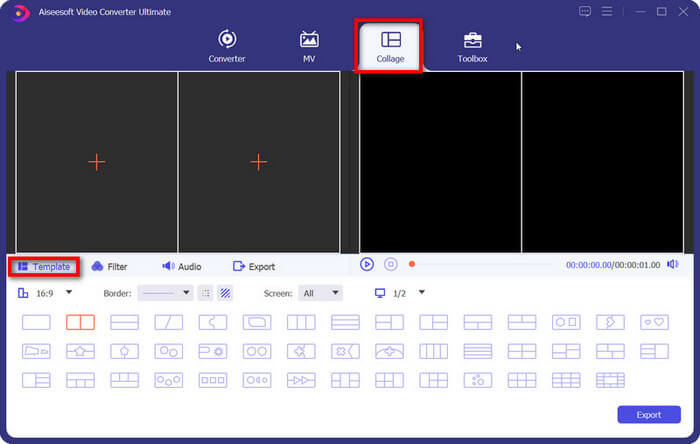
Step 1: Navigate to Collage Video Maker
Navigate to the More Tools menu and click Collage Video Maker.
Step 2: Upload your files
Import the video or picture in the plus area to prepare.
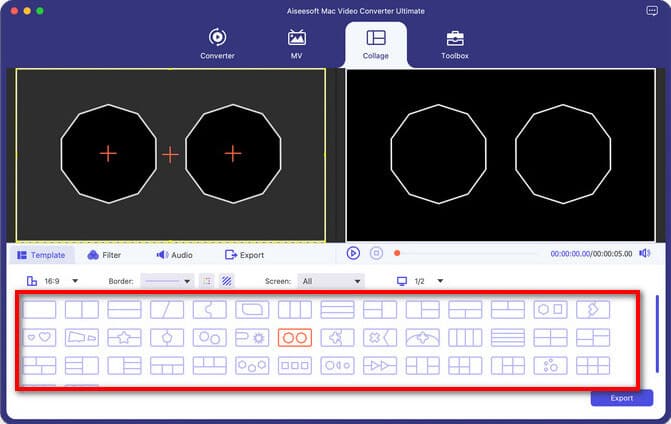
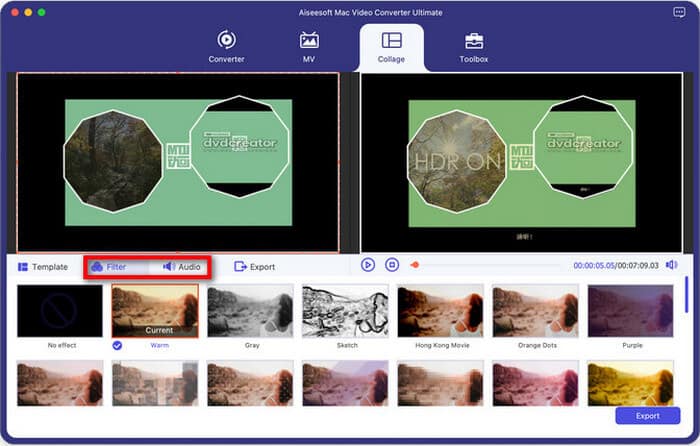
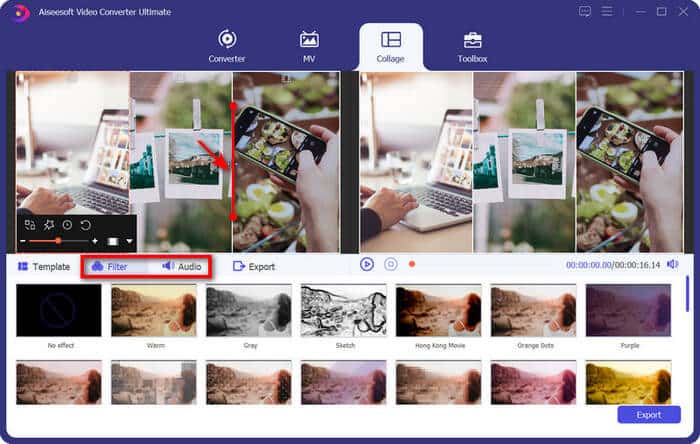
Step 3: Set the parameters to the most suitable
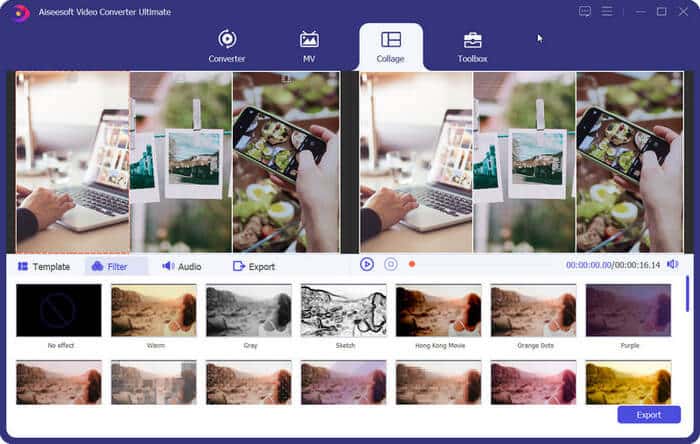
After importing your files, you can further modify the layout by dragging the split line. Then jump to Filter and Audio below the video to optimize the whole video effects.
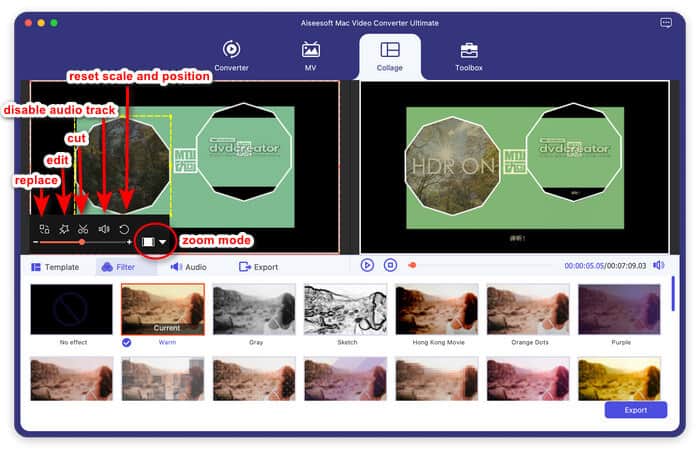
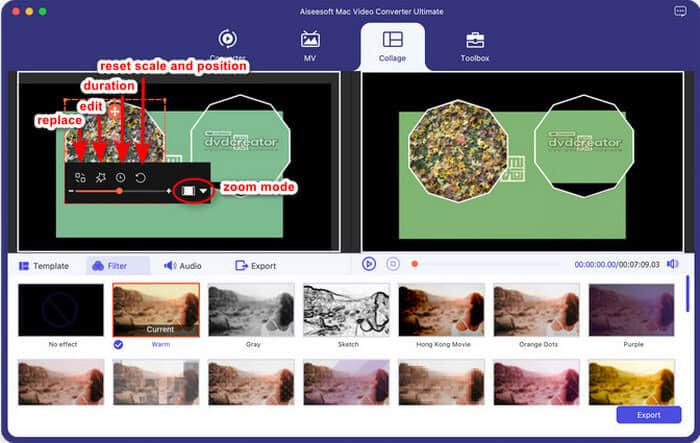
Next, if you need to edit each file you have inserted, switch to the subunits under Collage
Videos & Pictures and see what you can get. If not, go ahead with step 4 followed by them,
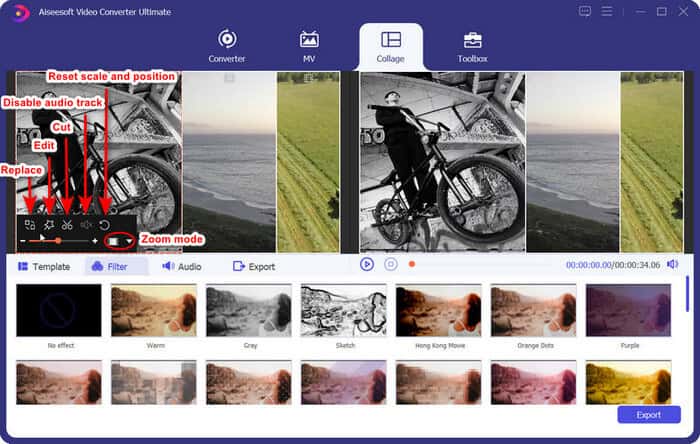
a. Edit video before splitting screen
After turning to individual video editing, you are offered six features set for different use, respectively replace, edit, cut, disable audio track, reset scale and position and zoom mode. Once you reach one feature, you are able to make detailed modifications on your videos.
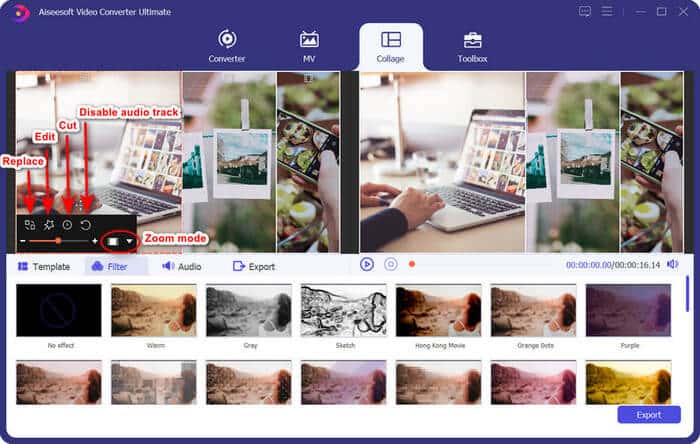
b. Edit picture before splitting screen
When customizing your pictures, there are also five blocks to advance the effect: replace, edit, duration, reset scale and position and zoom mode. Choose the one you want and better your images.
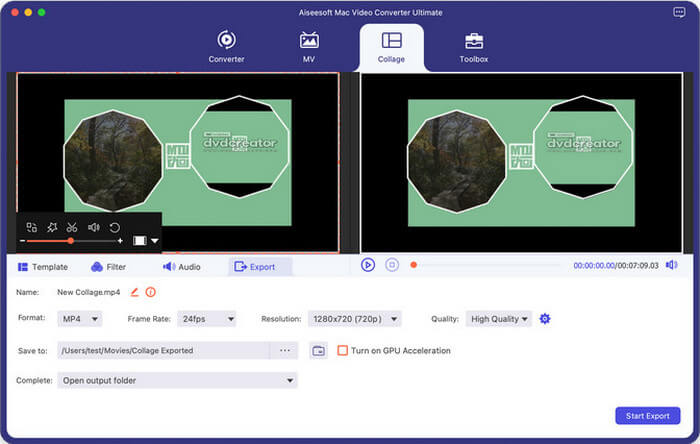
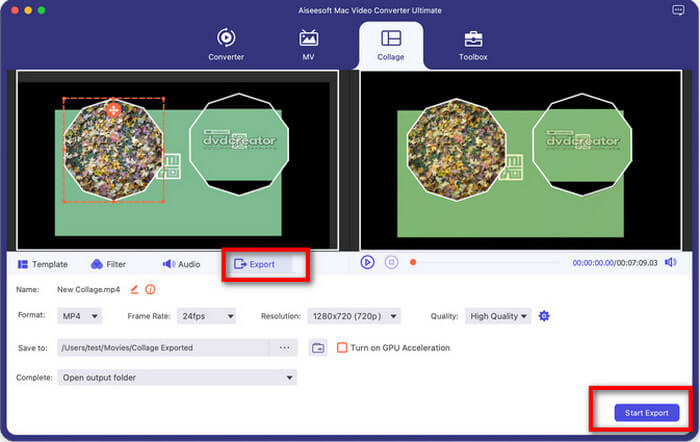
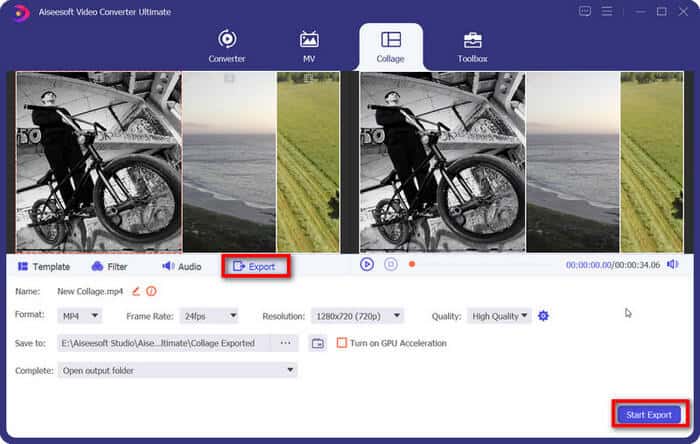
Step 4: Generate and Save your works
With all settings in place, hit the Export tab. Before you produce the final file, you can browse under the menu tab and reconsider other settings such as name, format, frame rate and more. After that, click Start Export to generate and save your works on your computer.
More Tools
In accordance with our customer-based and innovation-driven principle, we have introduced a series of powerful tools to individualize your targeted file. Prepare to activate these functions with the help of our guide.
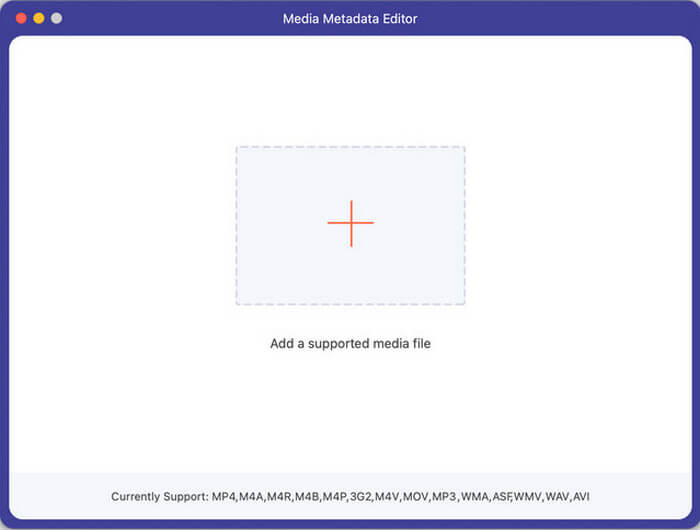
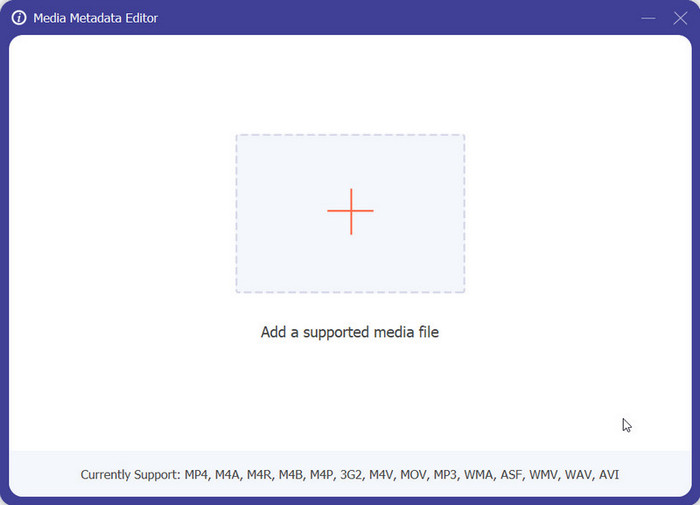
Media Metadata editor
This is a wonderful editor which helps you to maintain the original file information and edit as expected.
Step 1: Click the central + sign to select the target.
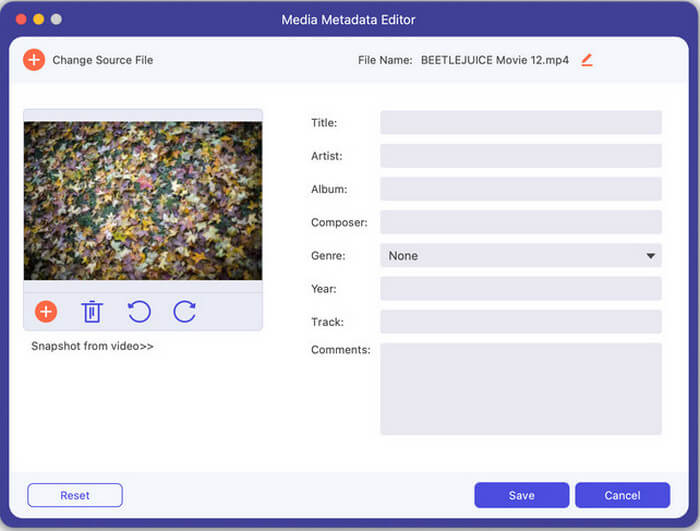
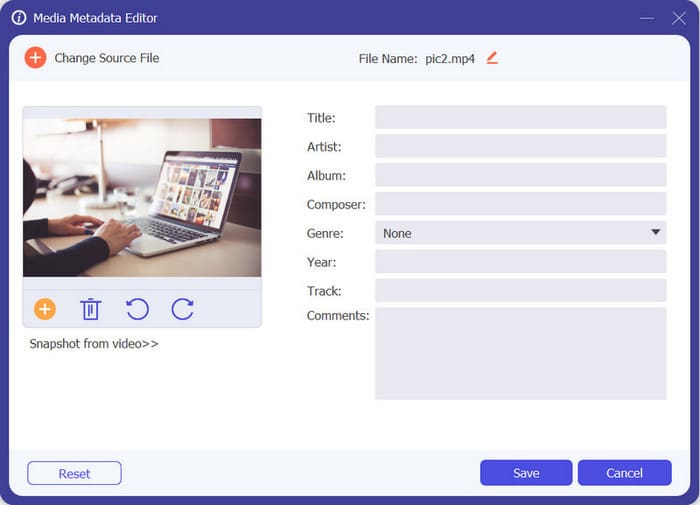
Step 2: In the pop-up window, personalize your file through options including cover, title, artist, album, composer, etc.
Step 3: With all segments considered, start Save button to complete.
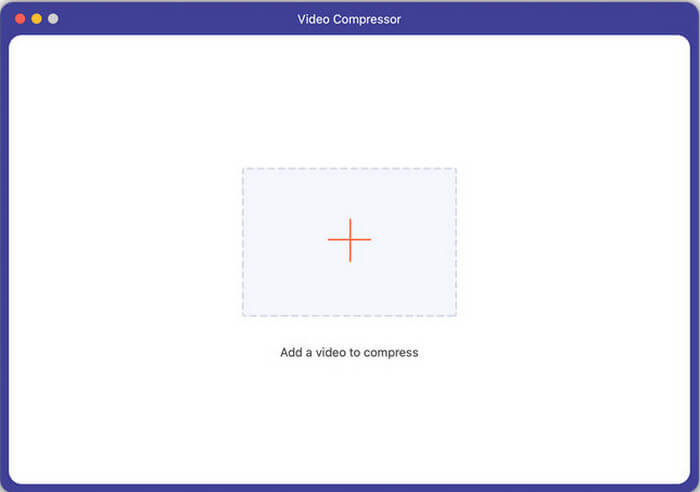
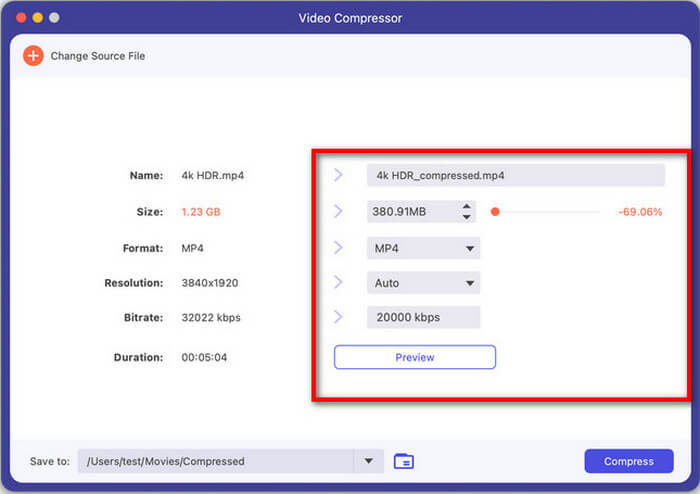
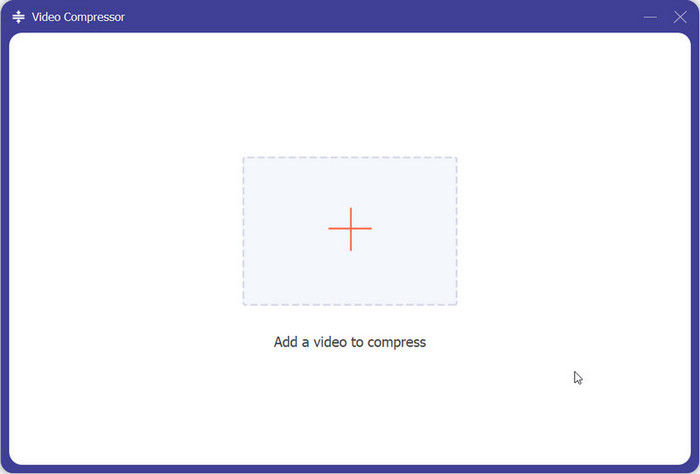
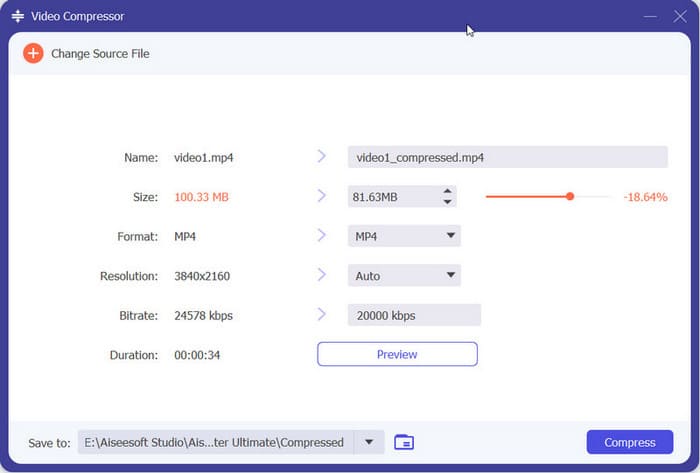
Video Compressor
Enter this section and compress your video files with little effort.
Step 1: Add a video in the central area.
Step 2: Reset the related index of your file from name to duration. Click Preview to check the effect.
Step 3: Select a proper channel for your works and start Compress button to save.
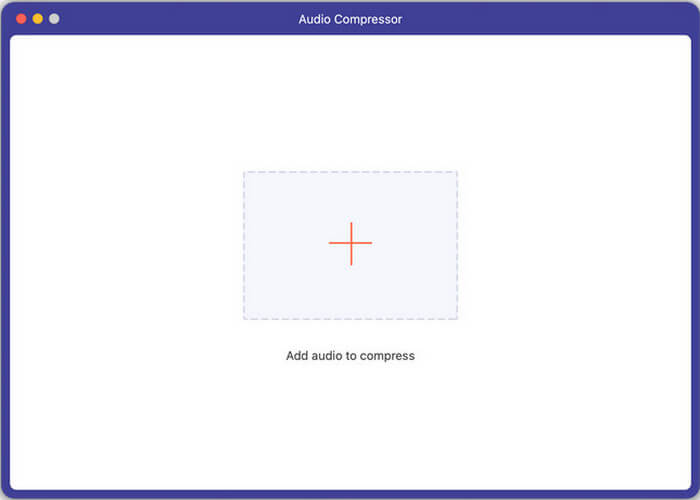
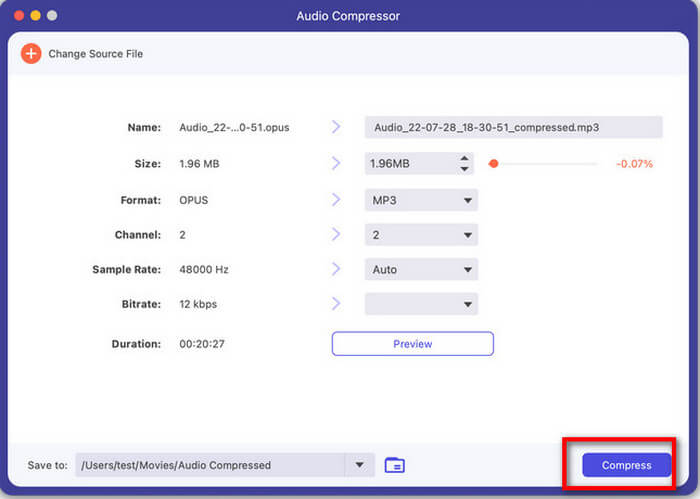
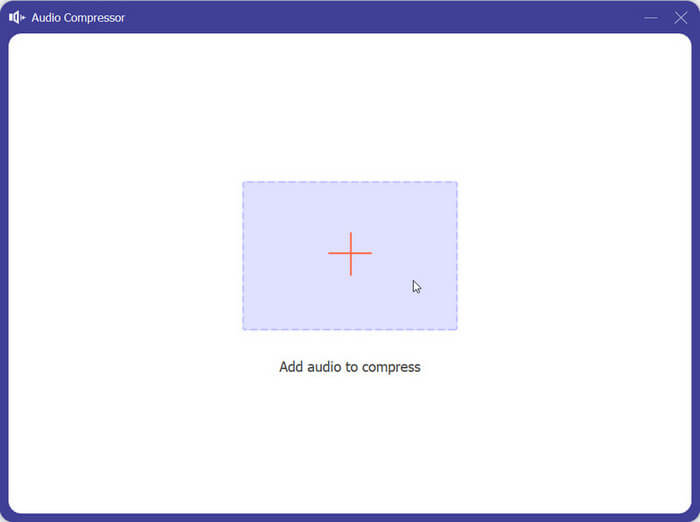
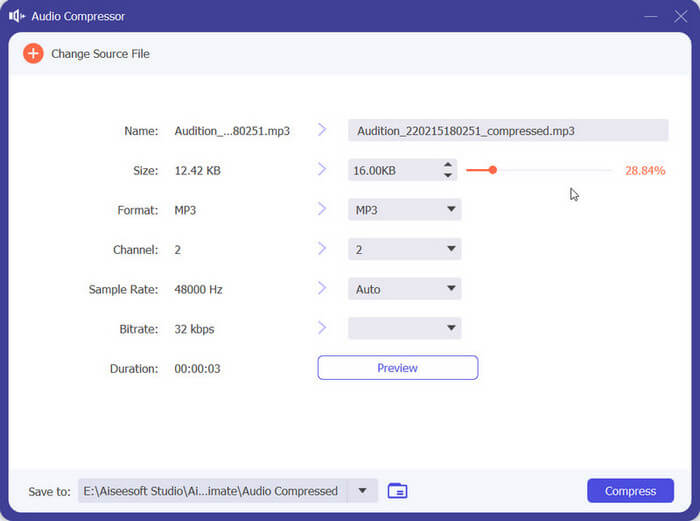
Audio Compressor
Audio files are enabled to compress if you choose this tool.
Step 1: Import your file in the central area.
Step 2: Head to Size bar to adjust your file as you wish. Then finish other settings orderly and click the Compress button to save.
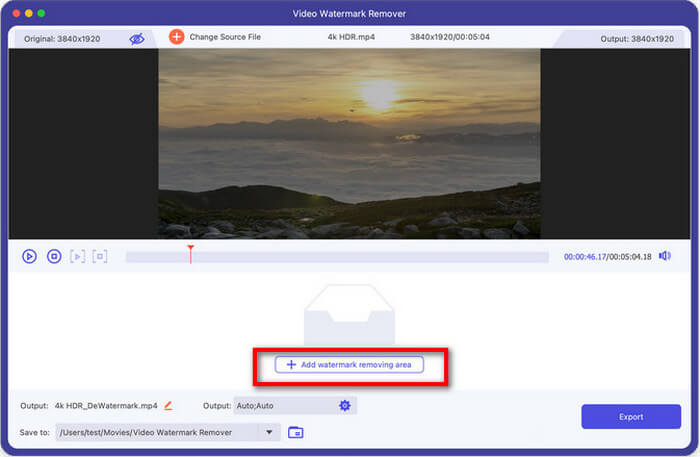
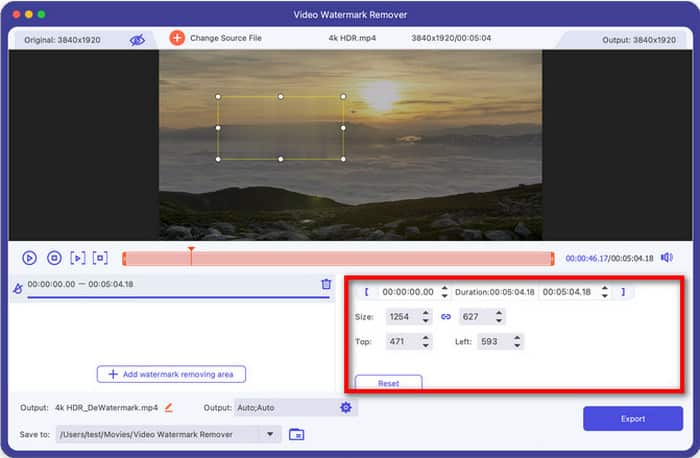
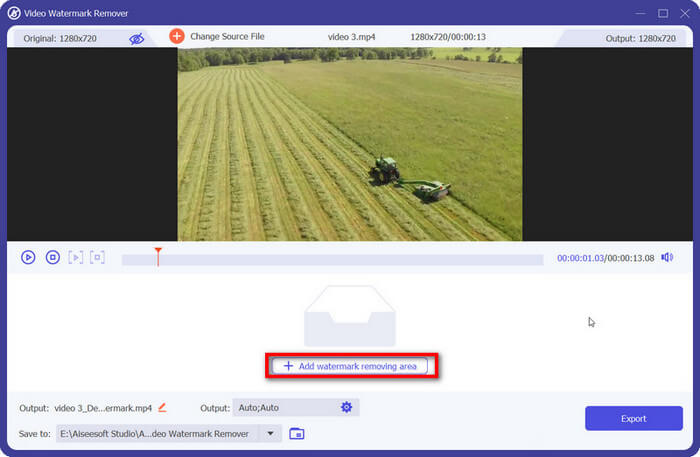
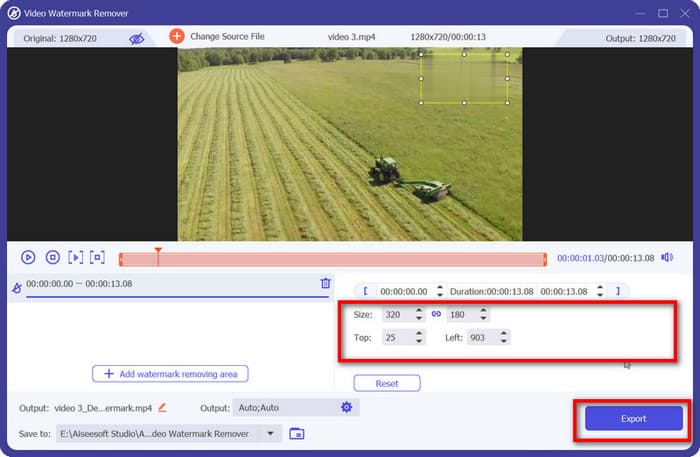
Video Watermark Remover
You cannot miss this tool if you are looking for an easy solution to remove watermarks on your video.
Step 1: Select a video to add on the functional area.
Step 2: Click Add watermark removing area button to decide the area you want to get off your video. In the meantime, adjust its size and location to the ideal effect.
After putting all elements in the right place, hit the Export button to save changes.
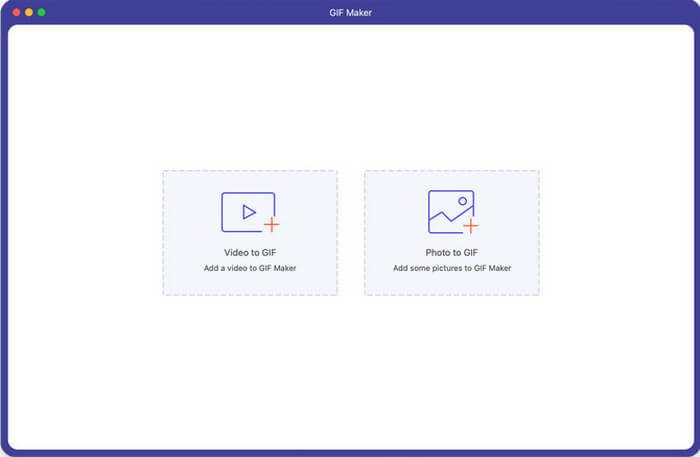
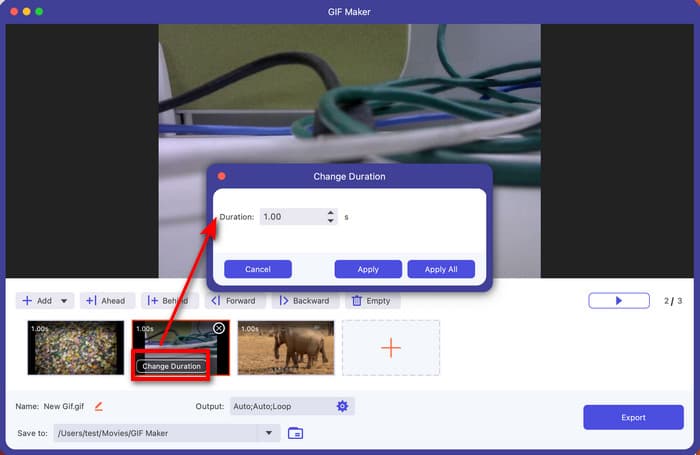
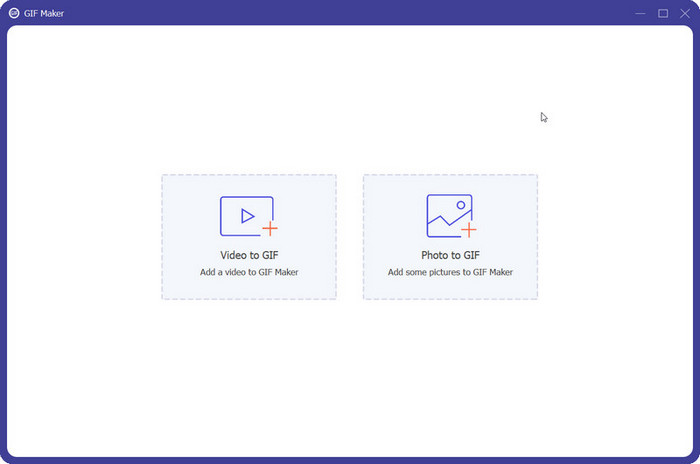
GIF Maker
Now make your unique GIF with your video or photo files and have fun.
Step 1: Add your file to GIF Maker based on its format.
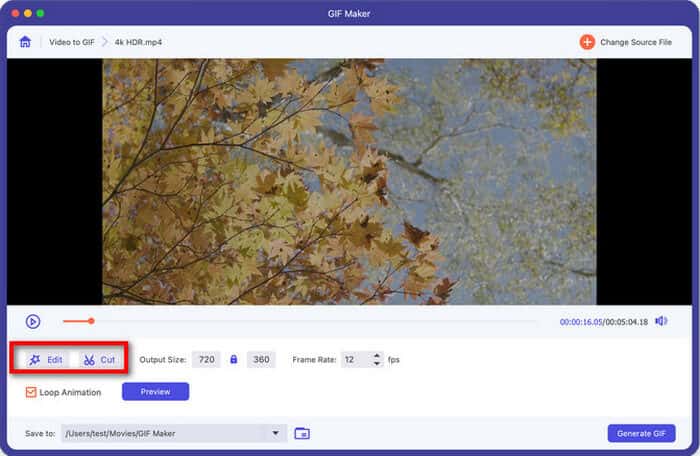
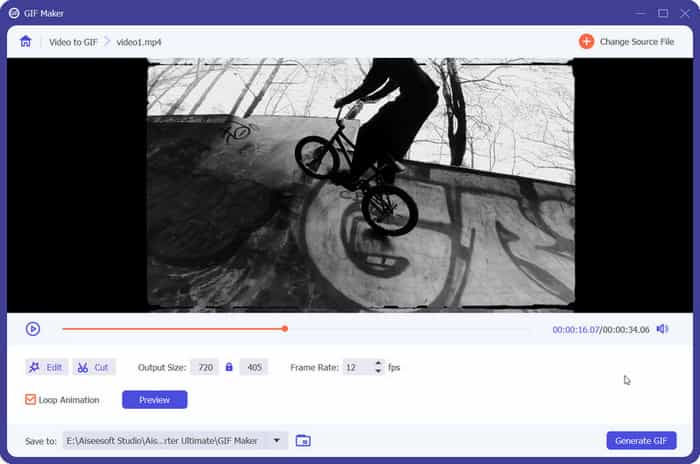
Step 2: As for a video GIF Maker, click Edit button to apply various features like Rotate & Crop, Effect & Filter, Watermark, Audio, and Subtitle or Cut button to decide the area you want for a GIF.
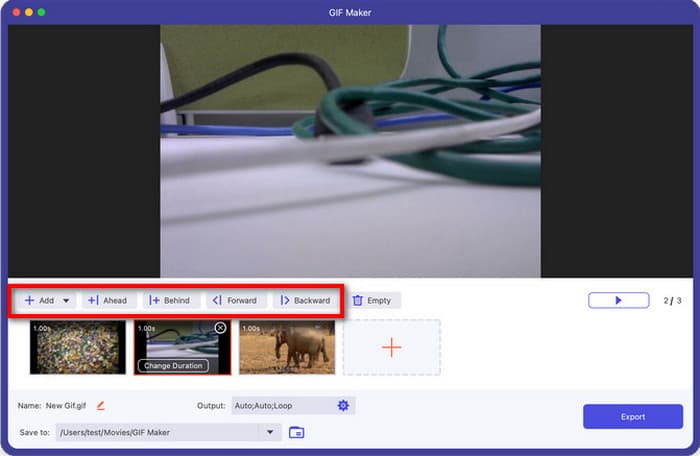
If you choose a photo as the original format, just follow on-screen tips to make output settings on format, resolution, zoom mode and more. Then you can add files through the Add button or insert them through Ahead or Behind. Here we also enable you to reorder photos through Forward or Backward button.
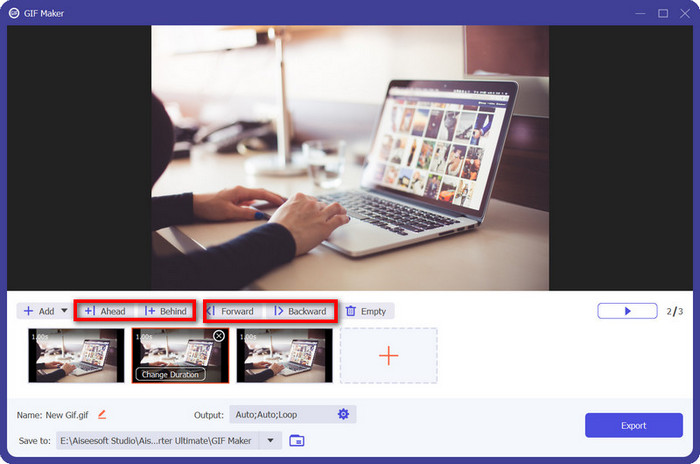
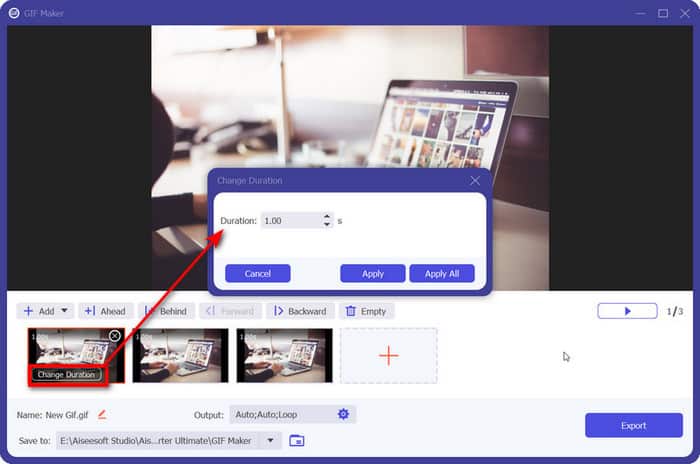
If you are making changes on the duration of each photo, move your mouse over the target and click Change Duration to reset the timing.
Step 3: Click Generate GIF for videos or Export for photos to create your animated GIF.
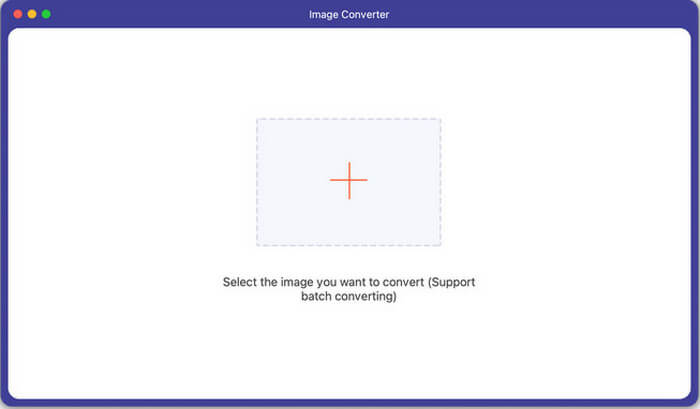
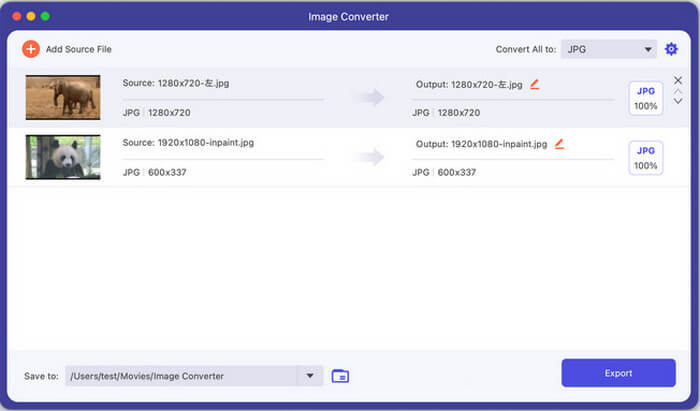
Image Converter
Try this tool to convert your pictures without any blocks.
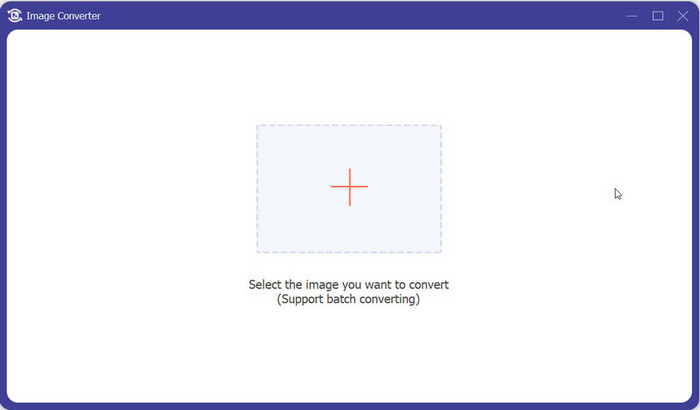
Step 1: Select the target image to add in the center. Batch converting is supported if you have a group of files to be done.
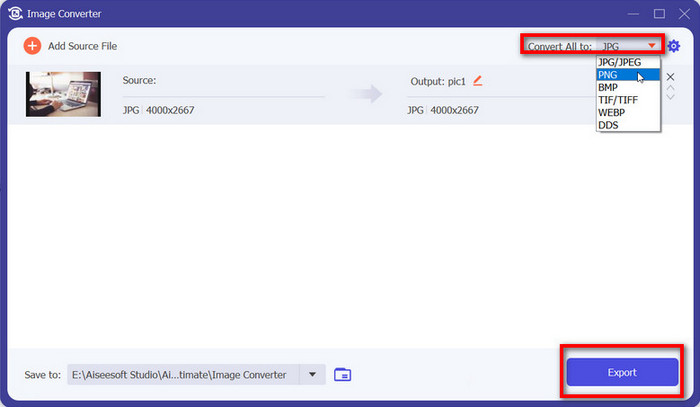
Step 2: Undraw the list next to Convert All and find the format you want. For adjusting the zoom, quality or background color, try the wheel icon or JPG button below.
Step 3: When all set, tap on Export button to complete.
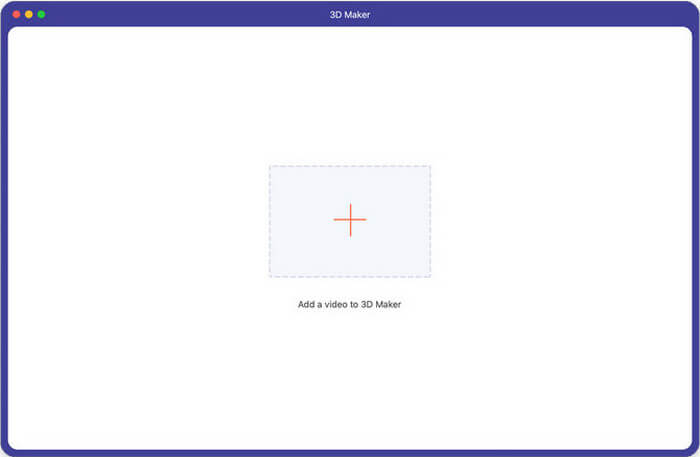
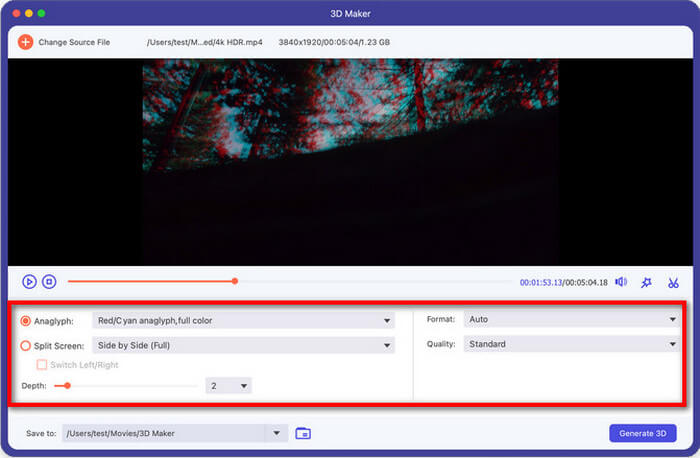
3D Maker
This program turns 3D video making into possible and adds more fun.
Step 1: Add your video as required.

Step 2: After entering the 3D marker window, you can edit the video by resetting Anaglyph, Format, Split Screen, Quality and Depth. Preview the effect shown above at the same time.
Step 3: Select a suitable path to save your adjusted file, then click Generate 3D to produce the new version.

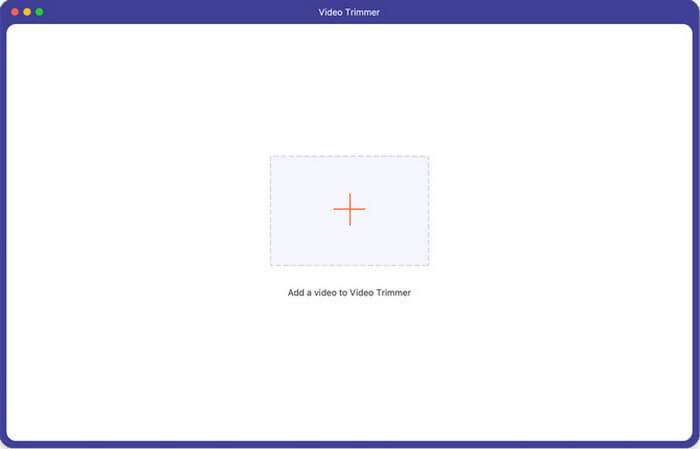
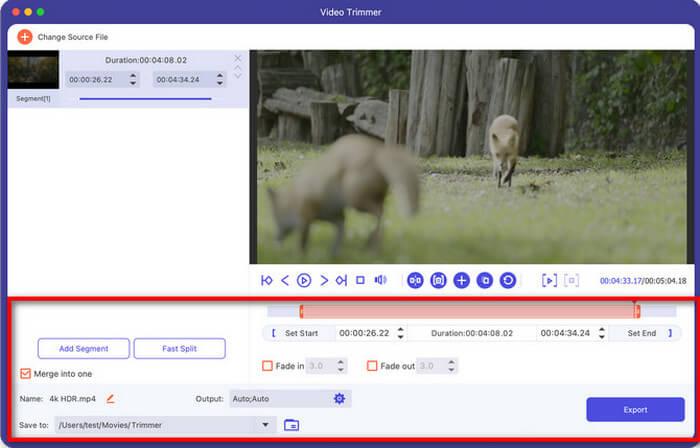
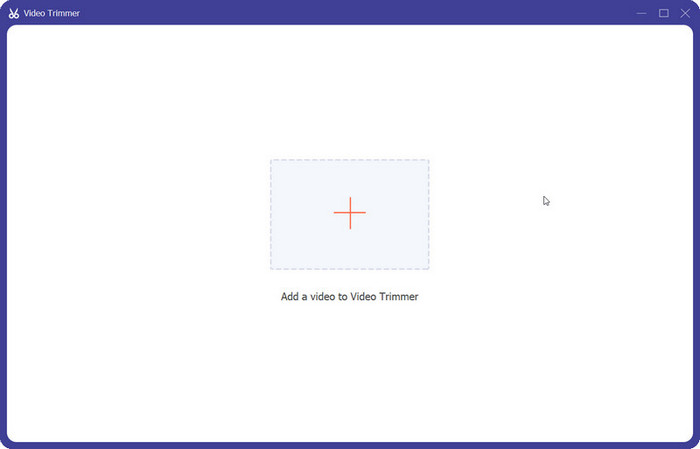
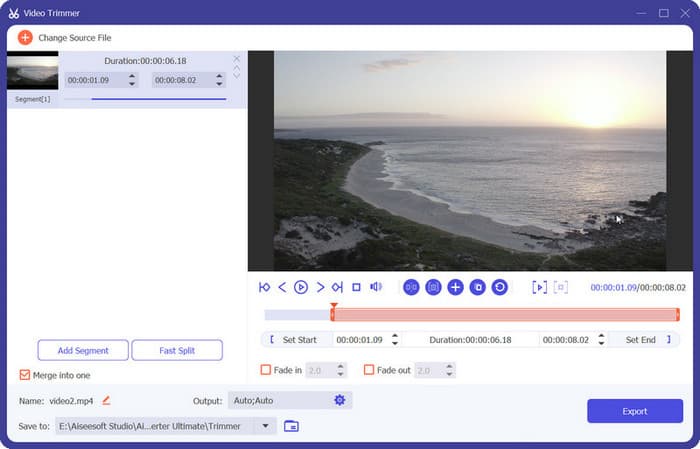
Video Trimmer
Use this tool to trim or cut your video to the perfect length.
Step 1: Upload a video in the central area.
Step 2: Drag the progressing bar below the preview video to adjust the length. You can also change the time in Set Start and Set End and Add Segment or Fast Split the video clips. After that, tick the box of Merge into one if you want and hit the Export button.
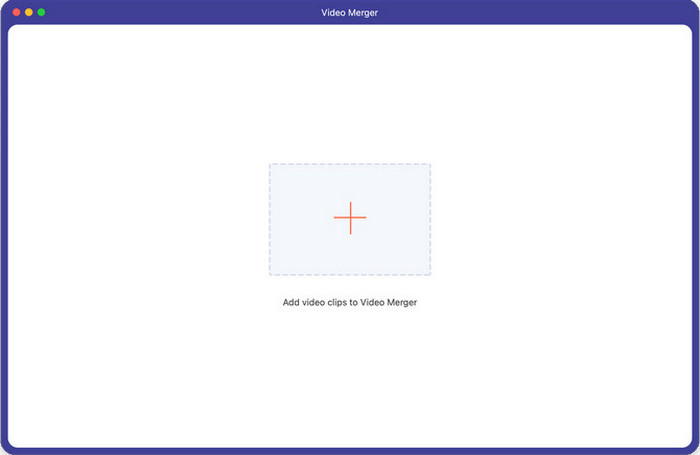
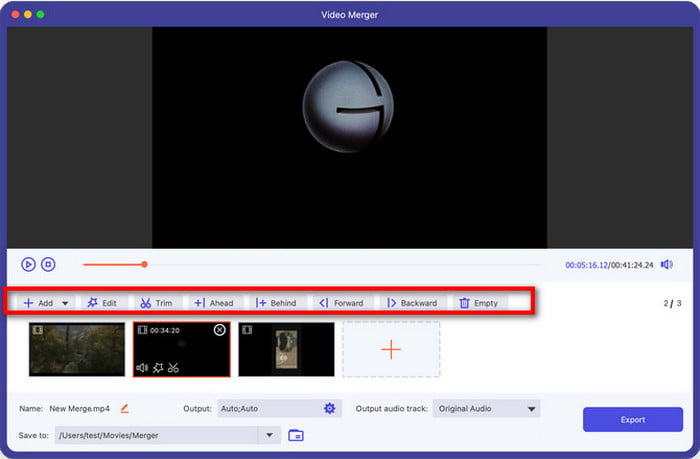
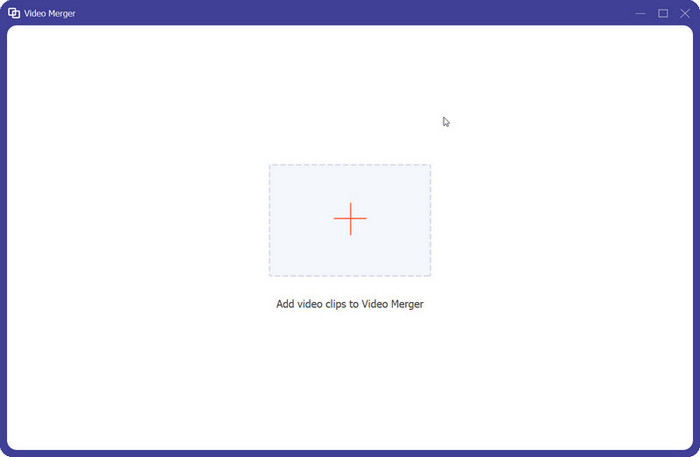
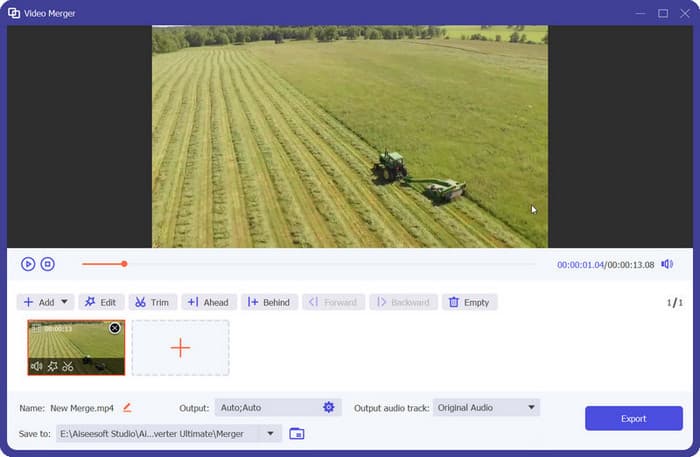
Video Merger
Integrate your video clips easily and quickly.
Step 1: Select a video and add it to the central area.
Step 2: To import additional videos, you can press the plus icon next to the previous video or the Add sign from the menu bar. Moreover, choose Edit and Trim to edit the videos and change the order by clicking Behind or Backward.
Step 3: Click Export to save,
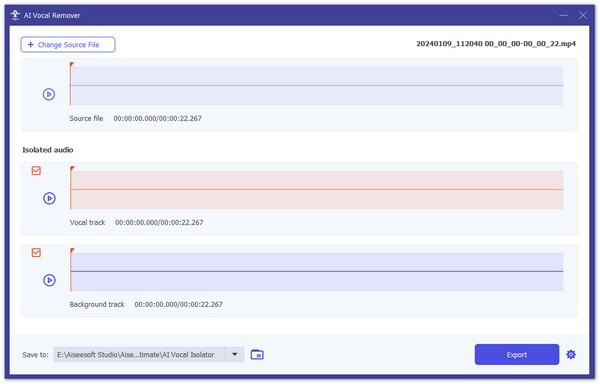
AI Vocal Remover
Separate your human voice from the background sound with precise and advanced AI technology.
Step 1. Choose the AI Vocal Remover under More Tools.
Step 2. Click the main rectangular area to add your audio or video file.
Step 3. It will download the corresponding AI models and start analyzing and separating your audio automatically.
Step 4. Now, you can listen to the separated audio content and check it before exporting.
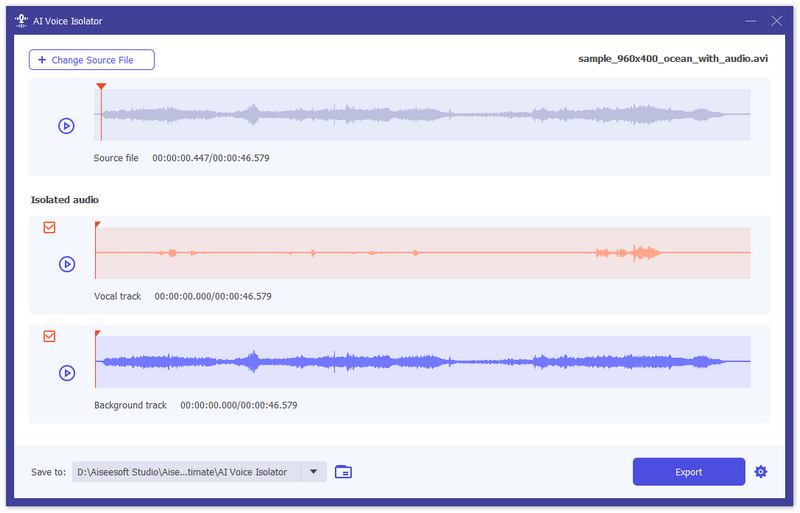
AI Vocal Isolator
Step 1: Choose the AI Vocal Isolator under More Tools.
Step 2: Add your audio or video file with soundtrack(s) into this tool.
Step 3: Then, the AI will auto-analyze your video/music to remove the background sound and keep the vocal track only.
Step 4: Click the Save to drop-down menu to choose a destination folder, then click Export to save the file.”
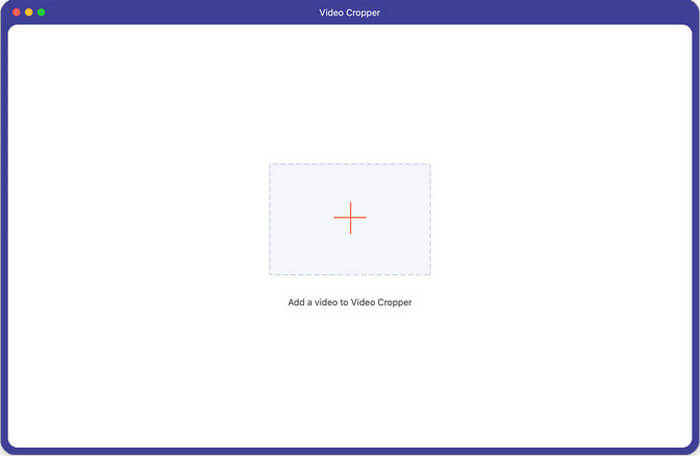
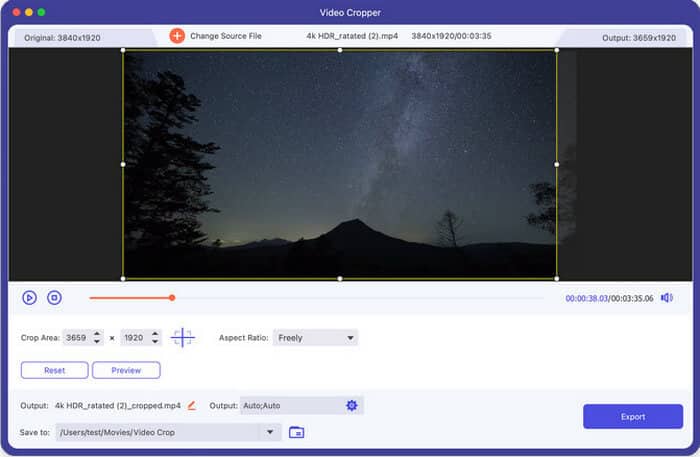
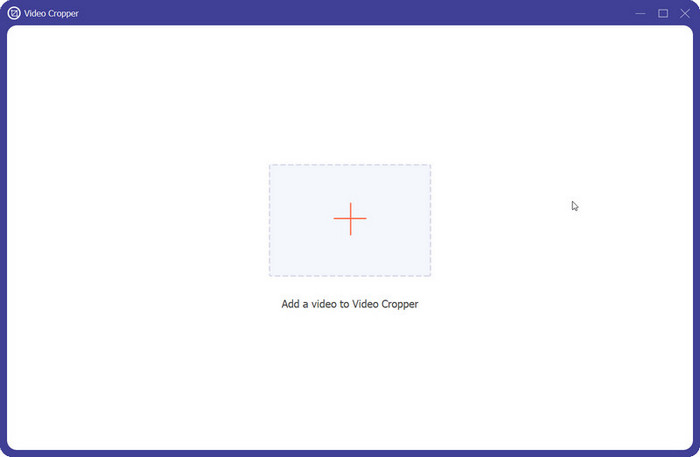
Video Cropper
Take the tool to crop your video as you desire.
Step 1: Add the video to the specific area.
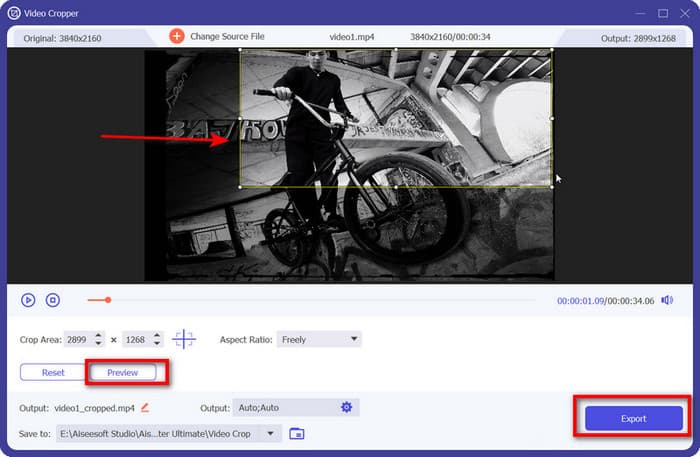
Step 2: Place the frame with your mouse to areas you desire and reset the index on Crop Area and Aspect Ratio when needed. Click Preview button to view the result whenever you want and hit Export button to generate the result.
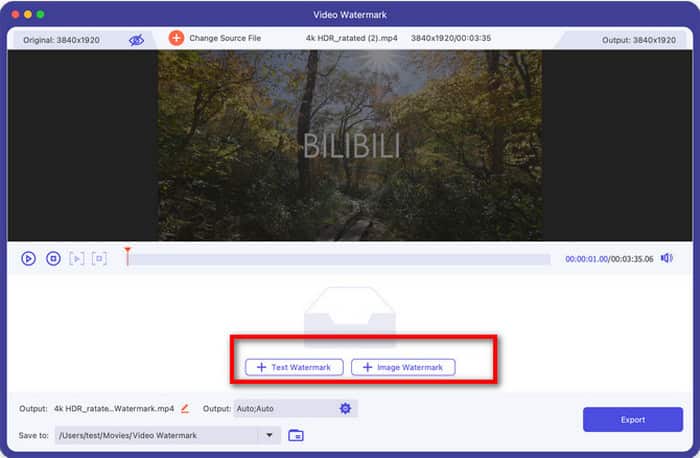
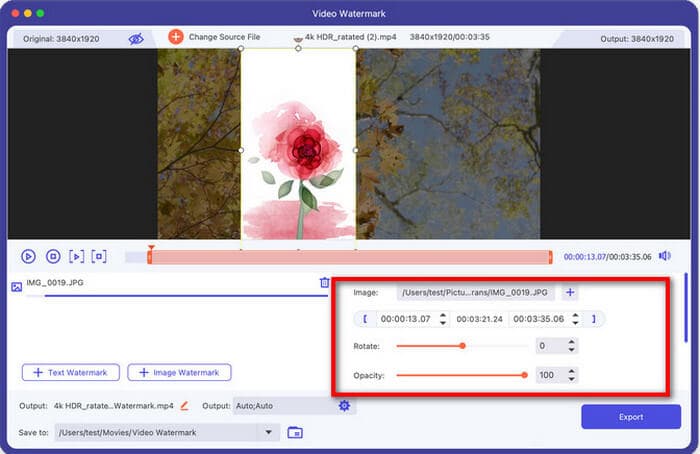
Video Watermark
This section would be a golden choice if you are looking forward to better guarding your copyright.
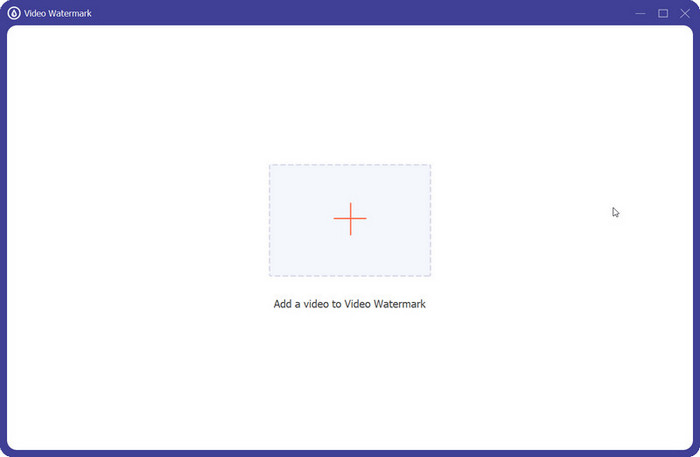
Step 1: Prepare a video file and add it in the central area
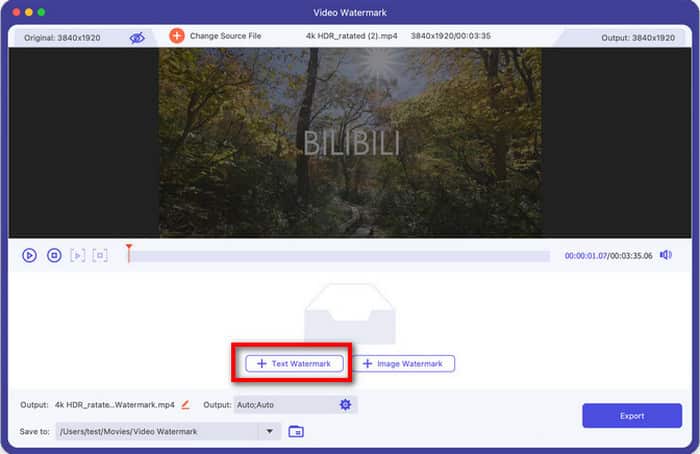
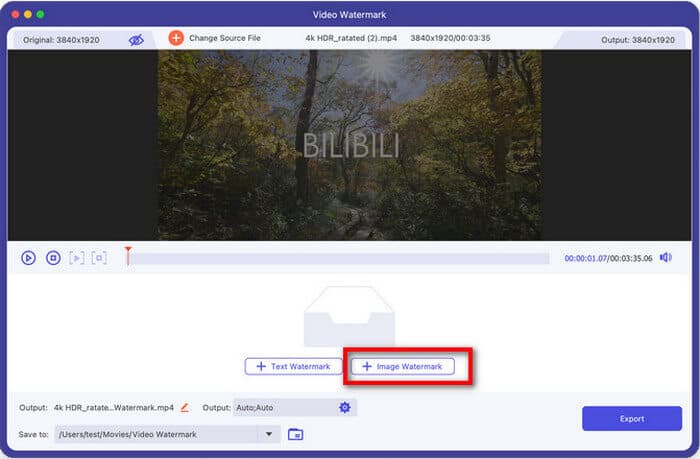
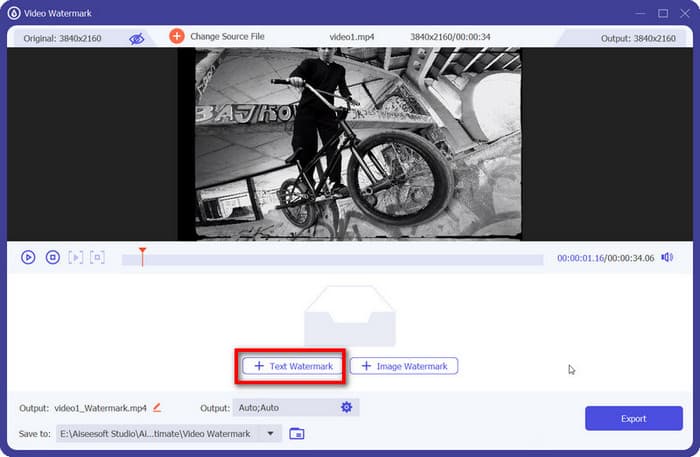
Step 2: Choose the related watermarks to correspond. Here are two sorts in total: text watermark and image watermark.
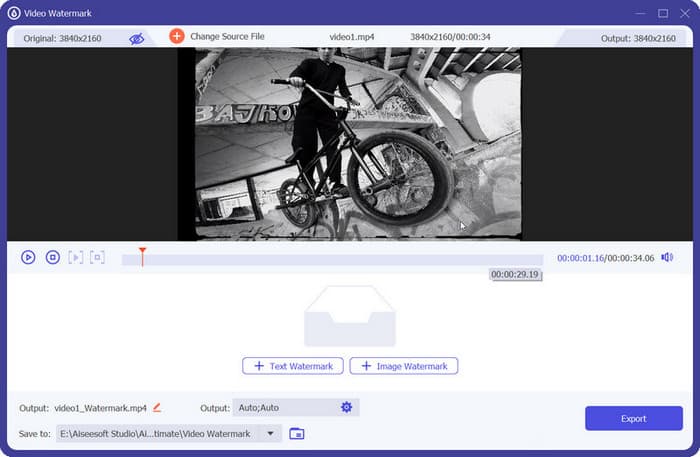
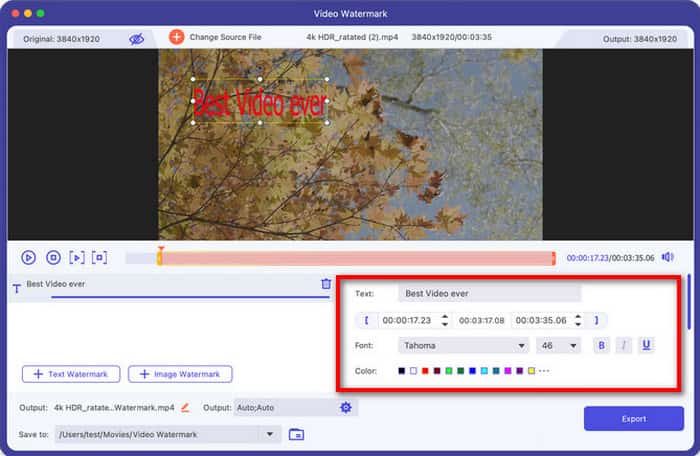
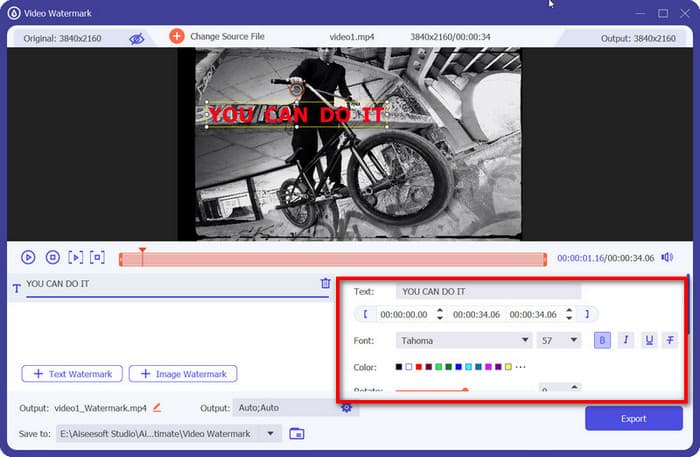
a. Click the Text Watermark button if you want your watermark in text.
Then you will see a window where you can edit the content, font style and more.
b. If you want an image watermark, then choose the Image Watermark button.
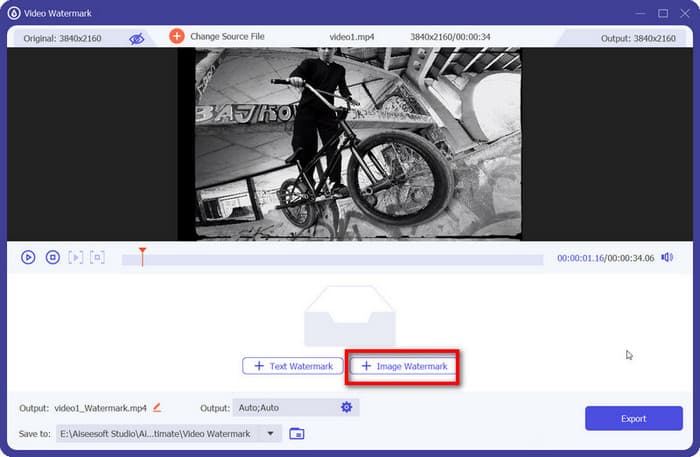
In the pop-up window following you can modify it by adjusting the configurations following Rotate, Opacity and Size.
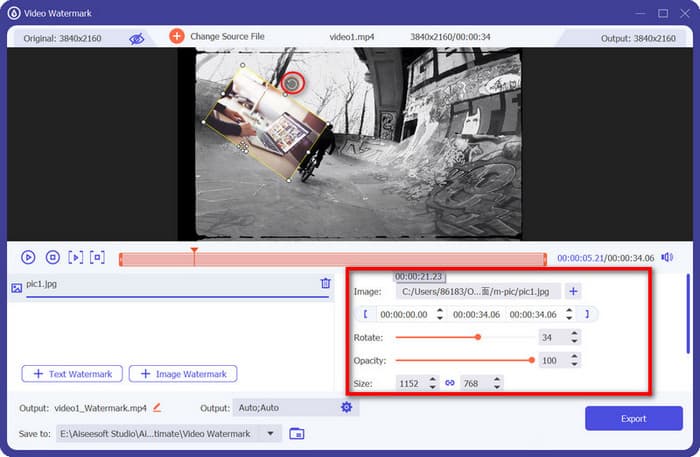
Step 3: Hit the Export button to produce the adjusted file.
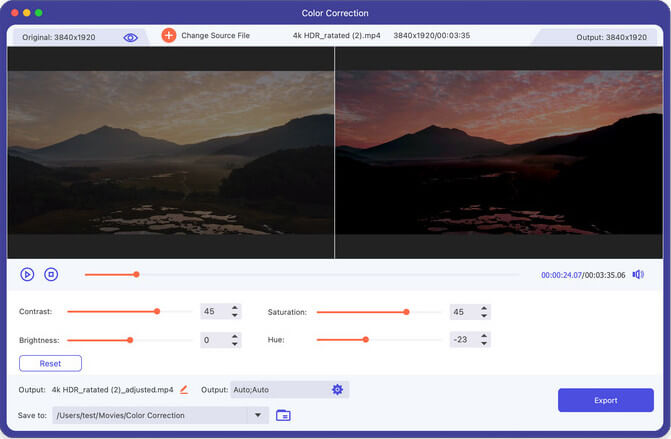
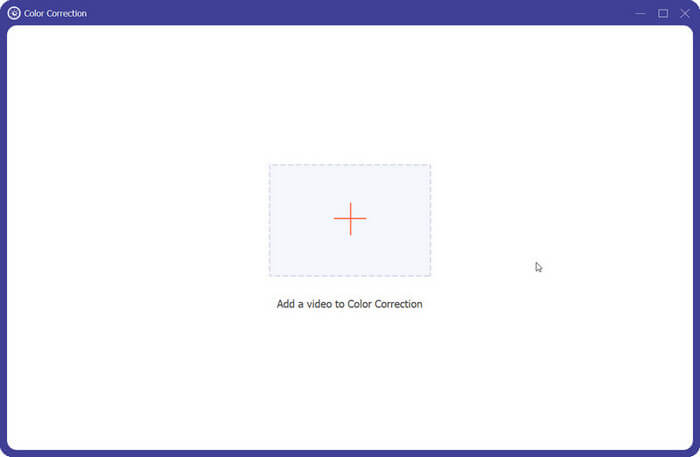
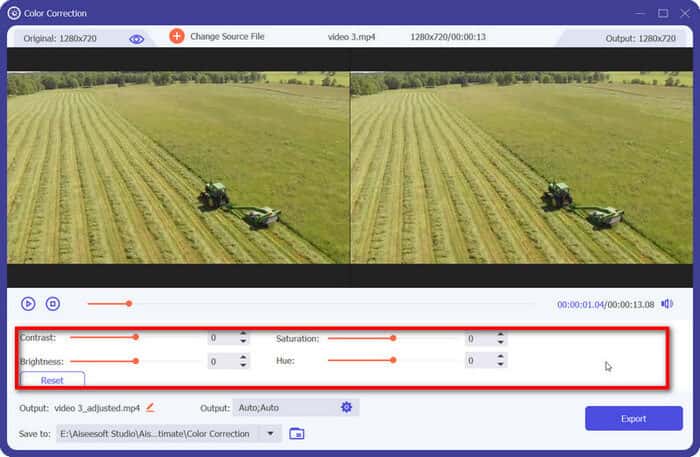
Color Correction
Enter this section and correct your video colors from various aspects.
Step 1: Tap on the + sign to add your video.
Step 2: Find the working area below and correct your video color from Contrast, Saturation, Hue, and Brightness by moving the bar or inputting the figure on the box followed. Then head to Export button to finish the process.
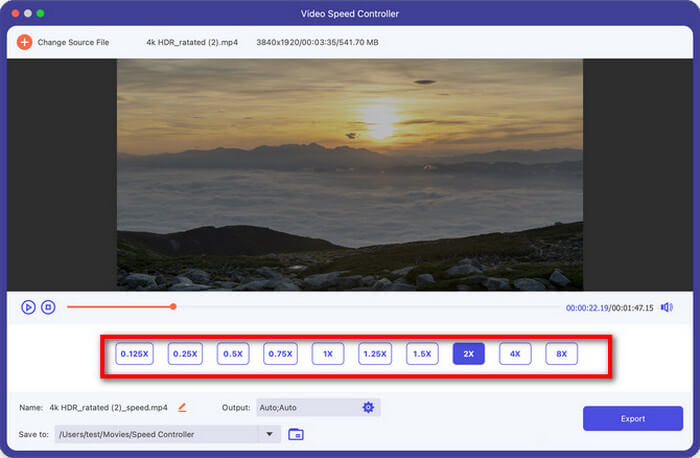
Video Speed Controller
Use this tool to speed up or slow down your file at ease.
Step 1: Import the video file on the controller.

Step 2: Click the speed you want down below and preview the effect. Finally, tap on the Export button to save.

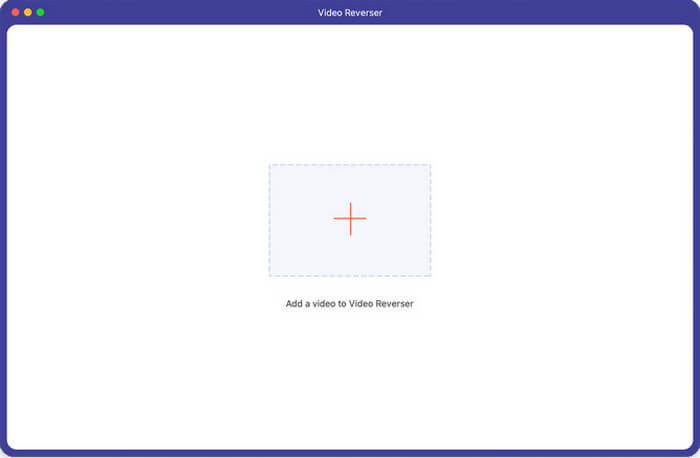
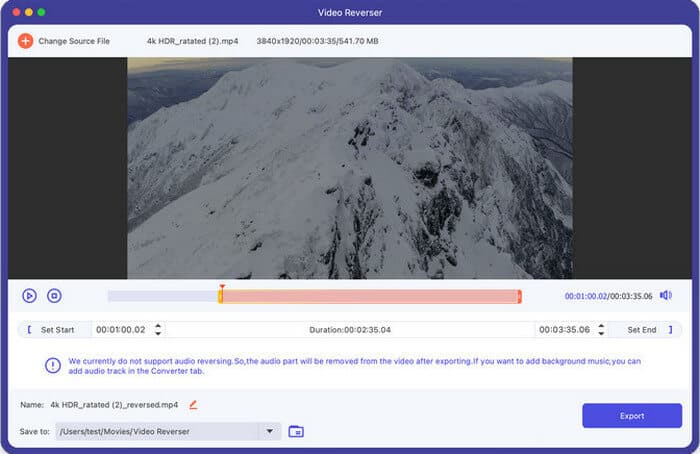
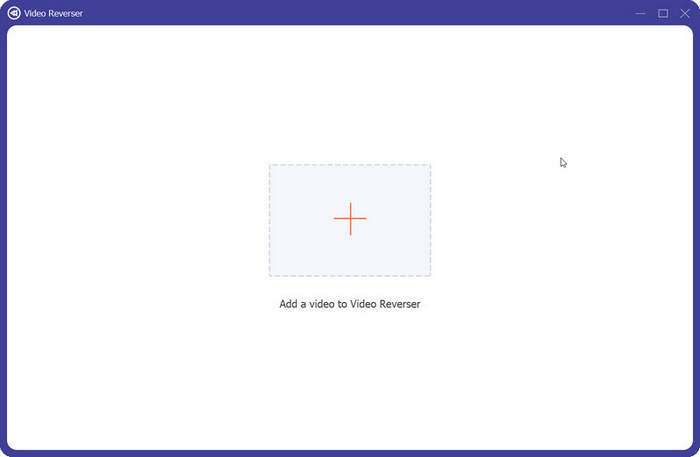
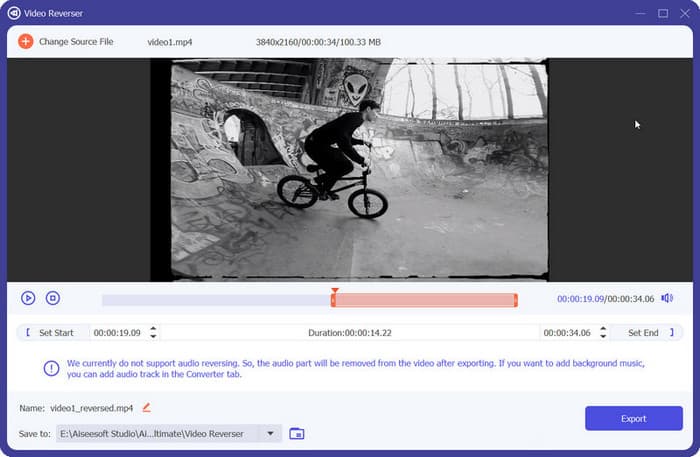
Video Reverser
Reverse your video with this one-stop service.
Step 1: Add the video you want to reverse in the central area.
Step 2: If you need to change the time, drag the progressing bar or reset Set Start and Set End to pick up the wanted parts. Then tap on Export to save the final result.
Notice: Audio reversing is not available for current use. Try adding the audio track in the Converter tab.
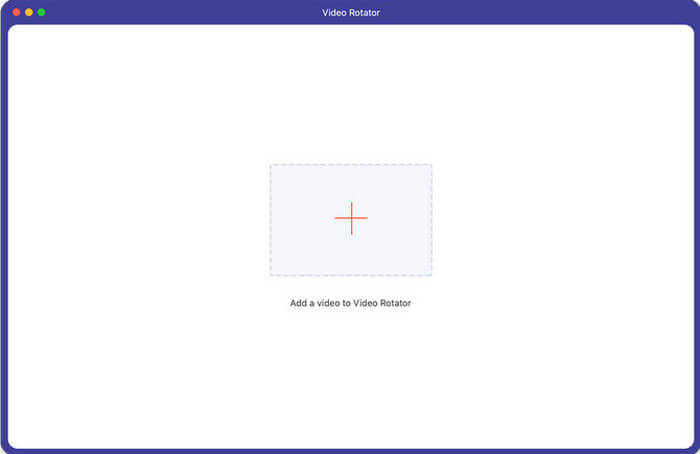
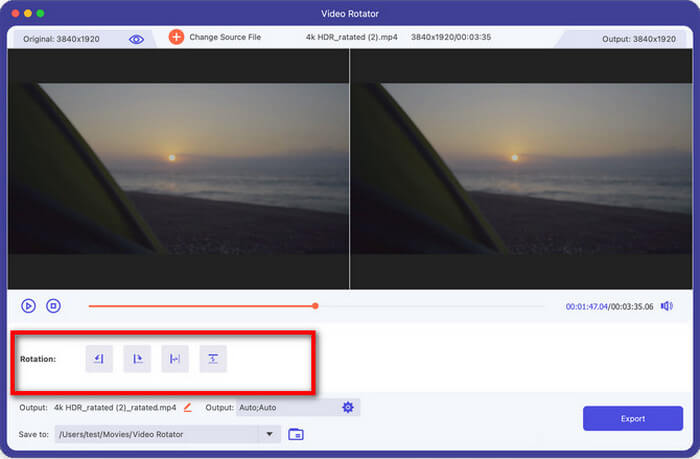
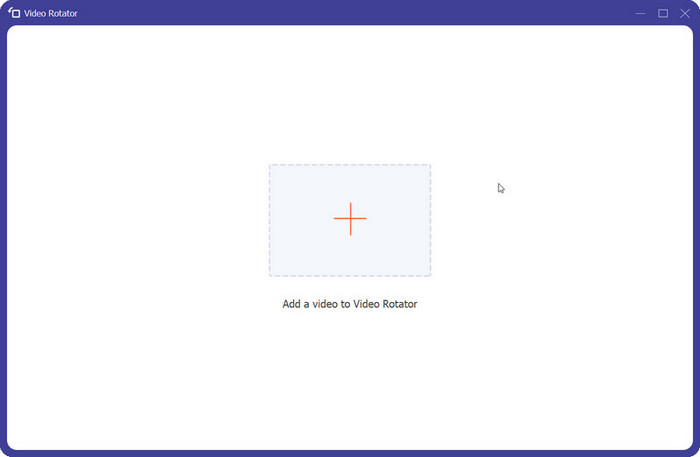
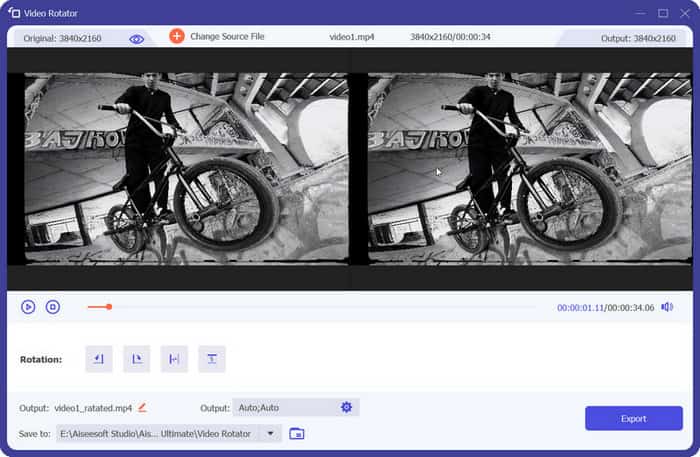
Video Rotator
Start the program and flip your video through simple steps.
Step 1: Add a video to the central panel.
Step 2: Move your mouse to Rotation and choose the direction you want as the new version. The output effect can be previewed directly above.
In the end, go to Export and generate the rotated video.
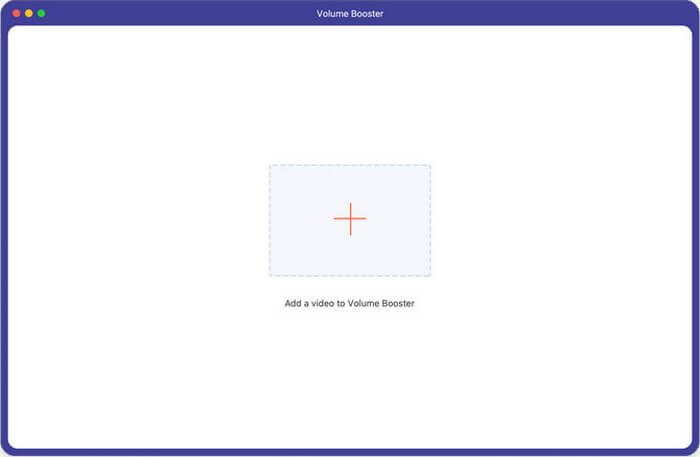
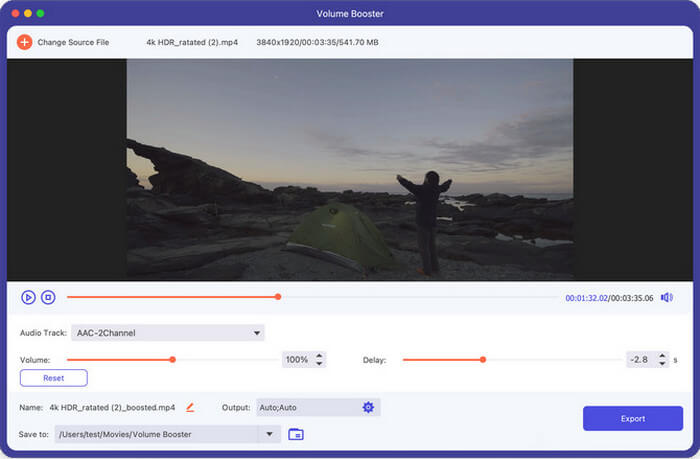
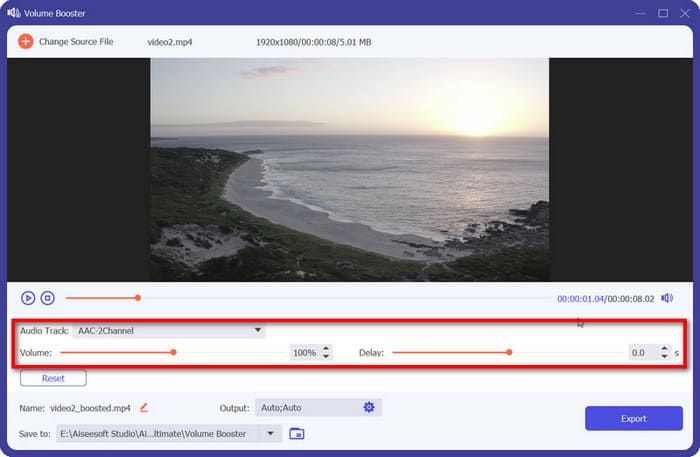
Volume Booster
Enter this channel to adjust your video volume.
Step 1: Select a video and add it by + button.

Step 2: Go through the options available for use and change the Audio Track, Volume and Delay part to fit. Then select a path to save your profile and click Export.
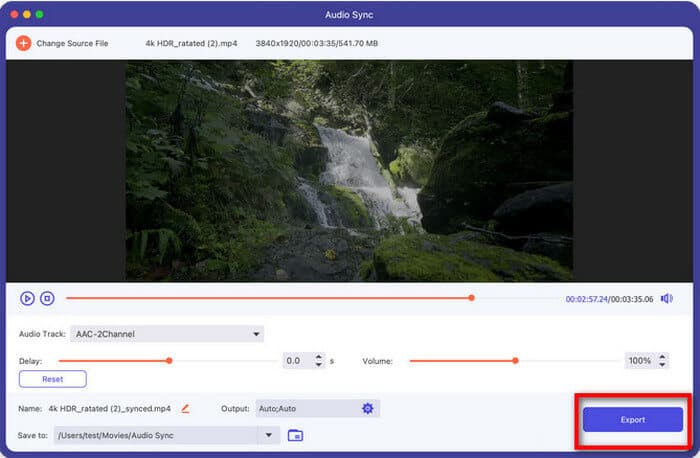
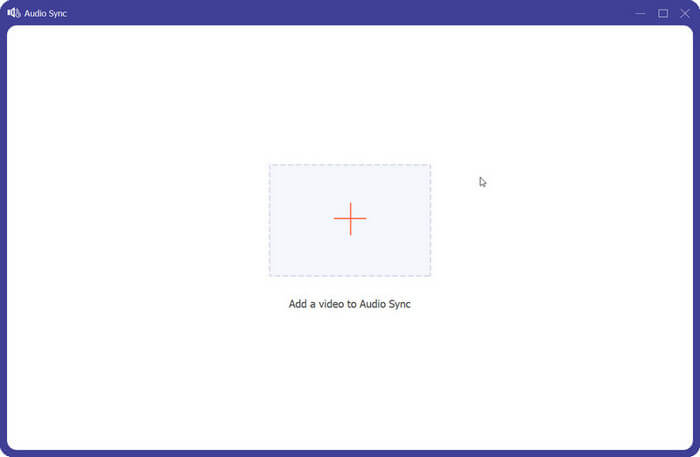
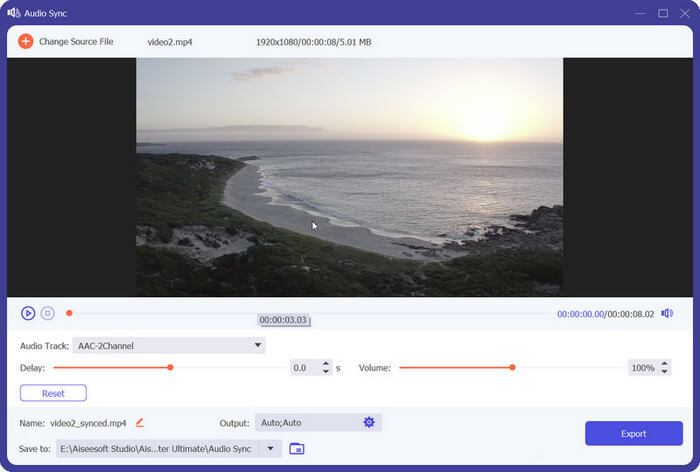
Audio Sync
Find easy solutions to syncing your video and audio.
Step 1: Upload your video to this tool.
Step 2: Click the audio bar and drag it to fit in with the motion above. Then tap on Export to get the new version done.
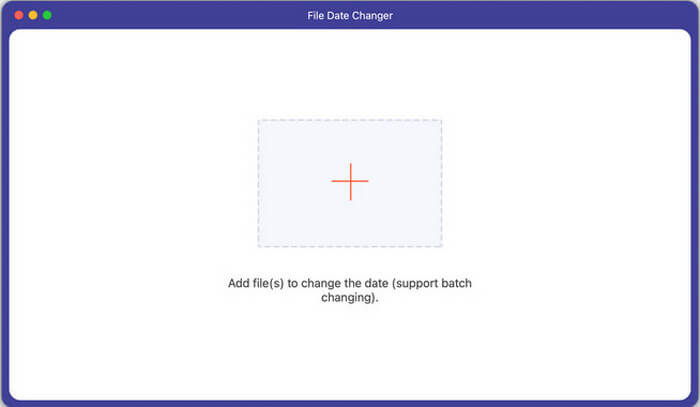
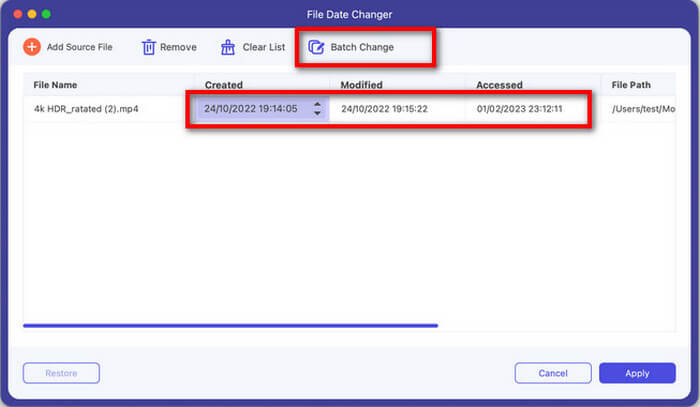
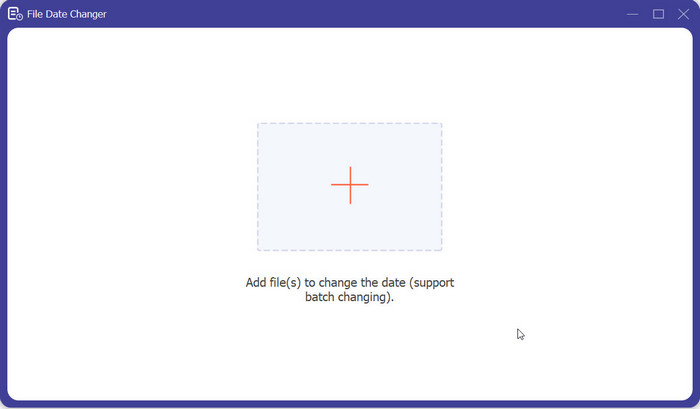
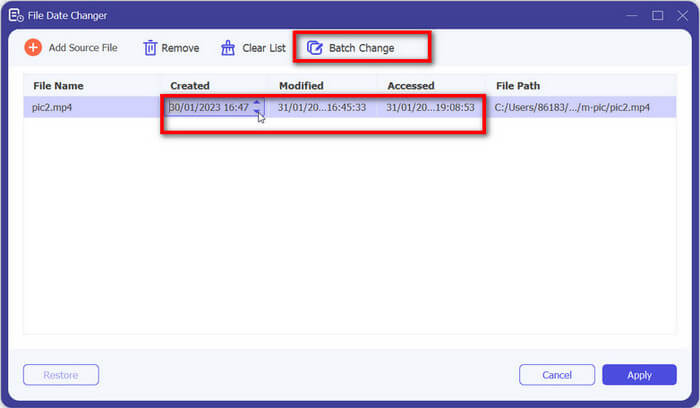
File Date Changer
Reset the file date details for your personal demands either individually or in batches.
Step 1: Add your file to the specific area.
Step 2: Choose the date box and change it based on your needs. It’s worthwhile to note that you can turn to Batch change above if you want a quicker solution.
Step 3: Click Apply button to reach the latest file.
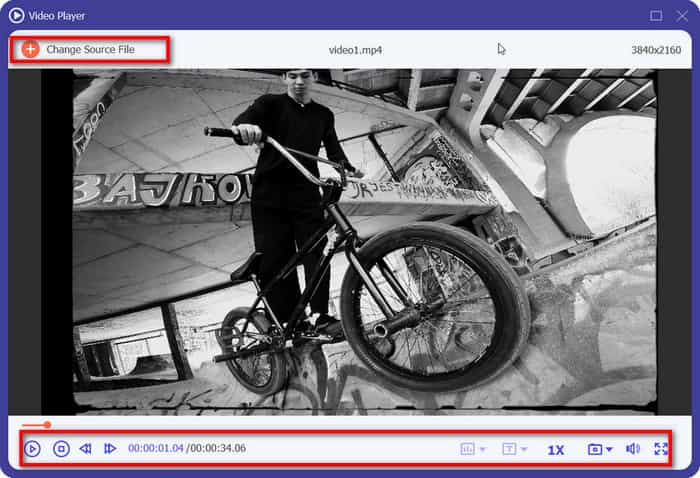
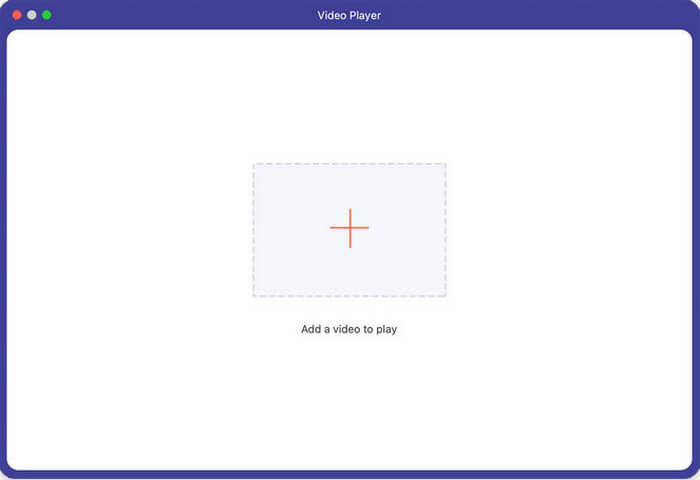
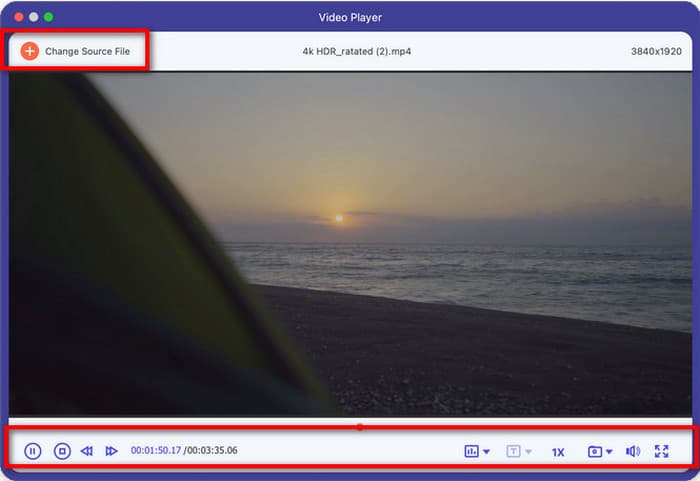
Video Player
Play your video in diverse formats.
Step 1: Select a video and add it to the player.
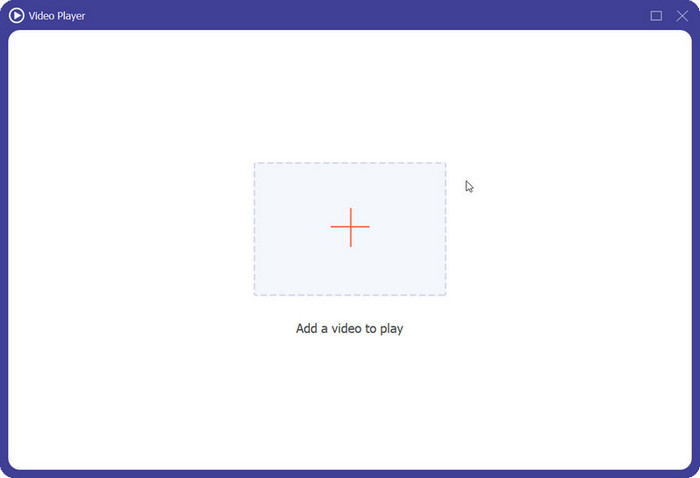
Step 2: Move your mouse and click the buttons to Play and Pause or Stop the video. Or choose Previous 5 seconds or Next 5 seconds to jump to different parts. Meanwhile, you can make options for channel, text, playing speed and more on the right.
If you want to play another video, tap on Change Source File and switch to a new target.