


How to Take Scrolling Screenshots on Windows: 6 Tools
Snipping tool is a built-in tool designed for taking screenshots on Windows computer screens. With this tool, users can easily capture any content on their screens within seconds and with a few clicks. Currently, Snipping Tool is available only on Windows 11; however, in older Windows versions like Windows 10, there’s the same tool, but it is called Snip and Sketch. If you’re wondering how to use the Snipping Tool on your Windows computer, we’ve got you covered. This article will teach you the easiest way to capture a screen using this tool. Moreover, don’t miss the chance to discover other alternatives if you want a more advanced snipping tool. Scroll down to read more!

Part 1. How to Use Snipping Tool on Windows 10/11?
Taking screenshots on Windows is easy with the Snipping Tool, but the steps can vary a bit between Windows 10 and Windows 11. In Windows 10, you might be using the classic Snipping Tool or Snip & Sketch. In Windows 11, both tools have been combined into one updated version with a cleaner look and new features. Below are the two ways on how you can take a screenshot using the Windows Snipping Tool:
Windows 11
Step 1. First, access the Snipping Tool by going to the Windows icon, also known as the Start. After clicking it, in the search bar above, type in Snipping Tool and look for it.

Step 2. Once it appears, access it and click on the Snipping Mode icon. You have 3 options you choose from: Rectangle, Freeform, Window, and Full Screen.
Step 3. Now, to start taking screenshots, click on Ctrl + Windows + S to easily access the snipping tool, and choose how you want to take your screenshot.

Step 4. If you want to take a part of your screen, you can choose the Rectangle from the options. If you want to screenshot the whole Window, choose Window. Meanwhile, if you want to snip the whole screen of your computer, choose Full Screen. Lastly, if you want to be creative, you can choose the Free Form to take a creative screenshot.
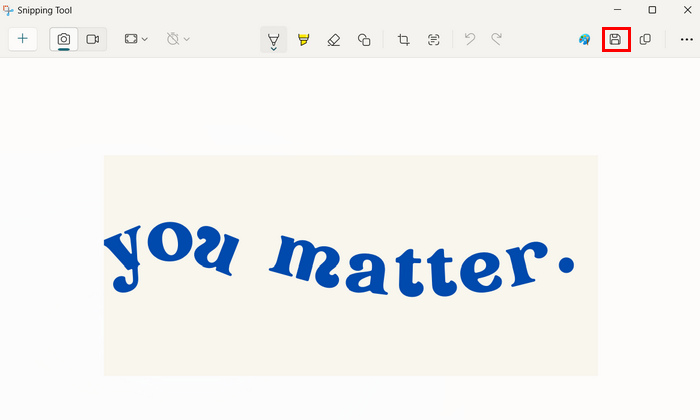
Step 5. Once you’ve taken a screenshot, you can save the file by clicking the Save button above.
Windows 10
Step 1. First, on your computer, you need to access Snip and Sketch by simply pressing Ctrl + Window + S.
Step 2. After that, you’ll notice the screen will gray out slightly. From that, select the area you want to take a screenshot of by clicking and holding the left mouse button down and then dragging the window around the area.
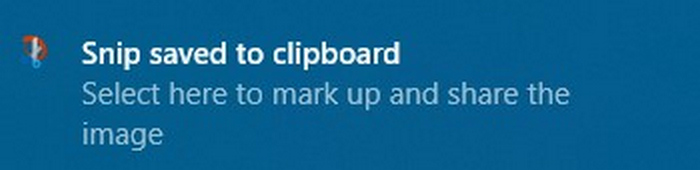
Step 3. Now, you’ll be notified that your screen has been screenshot, and it will appear at the lower right corner of the screen, saying that the screenshot has been saved to the clipboard.
Step 4. Right after that, paste the screenshot into the document by pressing the Ctrl + V keys at the same time or by right-clicking in the document and selecting Paste in the context menu.
Step 5. You can also save the screenshot as a file by clicking the notification at the lower right corner. A Snip & Sketch window will appear, and just click the Save icon to save your screenshot image.

The methods in how to take a screenshot on Windows Snipping Tools, regardless if it is Windows 10 or 11, are almost the same.
Part 2. Where Does Snipping Tool Save?
By default, the Windows Snipping Tool does not automatically save screenshots as image files. Instead, when you take a snip, it is copied to your clipboard, allowing you to paste it directly into a document, email, or image editor using Ctrl + V.
However, if you want to save the screenshot as a file, you need to click the notification that appears after taking the snip. This opens the image in the Snipping Tool, where you can click the Save icon to choose a location, file name, and format such as PNG, JPG, or GIF files.
Part 3. Can Snipping Tool Screen Record?
Yes, you can record the screen using the Windows Snipping Tool on your computer. However, take note that it is only available if you're using Windows 11 with the latest updates. The new version of the Snipping Tool includes a built-in screen recording feature, which allows you to capture video of your screen without needing any extra software.
To use it, open the Snipping Tool and click on the Record icon. Then, select the part of the screen you want to record and hit Start. Once you're done, click Stop, and the recording will be available for preview and saving.
Part 4. Best Alternative to Snipping Tool
If you’re looking for an alternative tool for Windows Snipping Tool, you can try the FVC Screen Recorder. This screen recorder tool allows you to easily take screenshots on your computer. Just like the Snipping Tool, you can capture any part of your screen, whether it’s the full screen, a specific window, or a custom area. Unlike some free tools, it doesn’t add watermarks to your screenshots or recordings, which means your images and videos look clean and professional.
One standout feature is its real-time editing tools. You can add text, draw shapes, or highlight parts of your screenshot while capturing. Moreover, it supports high-quality screen recording with audio from your system or microphone. Lastly, it supports multiple output formats and image formats.
To use this, follow the steps below:
Step 1. First, download and install the FVC Screen recorder on your Windows.
Free DownloadFor Windows 7 or laterSecure Download
Free DownloadFor MacOS 10.7 or laterSecure Download
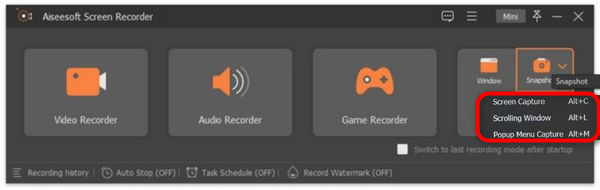
Step 2. Now, click on the Snapshot icon in the right corner after you’ve launched the tool. After clicking the Snapshot icon, you have three options on how you will take a screenshot. You can choose either Screen Capture, Scrolling Window, or Pop-up Menu Capture.
Step 3. Now, drag the cursor to the area of the screen on your Windows device to select the part that you want to screenshot.
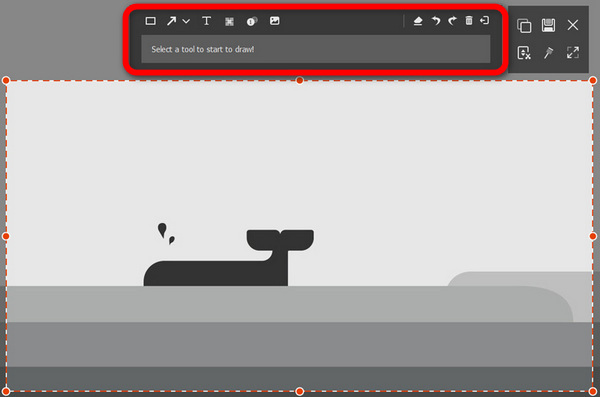
Step 4. After that, if you want to edit your image, access the menu above. Customize your screenshot image depending on your needs. Finally, click the Save button.
FVC Screen Recorder is indeed one of the best Windows Snipping Tool alternatives. It’s very easy to use, the interface is intuitive, and it can easily be navigated. It has other advanced features that the Snipping tool doesn’t have.
Part 5. FAQs about Snipping Tool on Windows
Can I annotate screenshots directly in the Snipping Tool?
Yes. After taking a snip, you can use the built-in feature within the Windows Snipping tool to highlight, draw, or write directly on the image before saving or copying it. This is especially helpful for adding quick notes or visual emphasis.
Can I change the default file format when saving with Snipping Tool?
No, the Windows Snipping Tool doesn’t allow you to set a default file format. You have to manually choose the format, either PNG, JPG, JPEG, or GIF, every time you save your photo. By default, it suggests PNG.
Is it possible to capture a scrolling window with Snipping Tool?
No, the Windows Snipping Tool does not support scrolling window capture. If you need to capture an entire webpage or a long document, you’ll need to use a third-party tool like FVC Screen Recorder for scrolling screenshots.
Now that you know how to use Snipping Tool on Windows 10 and 11, you can start taking screenshots on your computer’s screen. However, this tool doesn’t offer more advanced features that you might need when taking a screenshot. In case you need one, you can use the FVC Screen Recorder to enjoy some advanced screenshot features to satisfy and cater to your needs.
-
 How to Get 4K Quality on OBS: Most Detailed Description
 If you're playing a high-resolution game and want to record the clearest video of your actions, read this guide. We'll teach you how to get 4K quality on OBS.
-
 Tella Online Screen Recorder Review: Features, Pros & Cons
 Tella Online Screen Recorder review with key features, pros, and cons. Discover if this browser-based tool is right for your recording and editing needs.
-
 Loom Review: Is it A Worth Trying Screen Recorder for You
 Discover Loom's key features, pricing, pros, and cons in this in-depth Loom review to see if it's the right fit for your video recording and sharing needs.