

How to Capture Gameplay on PC Quickly and Effectively
If you are a gamer and you want to record your gameplay, it’s necessary to have a screen recorder tool that can capture high-quality video. Don’t fret because you’re not alone, many gamers today record their gameplay.
In this article, learn four methods on how to capture gameplay on PC easily, and don’t miss the chance to learn other essential things that you need to remember when recording your gameplay. So what are you waiting for? Let’s dive into the best ways to start recording your PC gameplay today.

Part 1. How to Record Gameplay on PC?
There are various ways about how to record gameplay on PC, and each method offers a different set of features, functionalities, advantages, and level of complexity. Whether you're looking for something simple and built-in or a more advanced tool for high-quality streaming and editing, there's a solution that fits your needs.
Below, we’ll explore four of them, four of the best methods and tools that you can use to capture your gameplay.
Best Way to Record Games on PC
First on our list is the FVC Screen Recorder. This tool is one of the best screen recorder tools that can be used to capture gameplay on PC because of its user-friendly interface, flexible recording options, and high-quality output. But aside from that, what makes this tool a standout is its ability to record gameplay with both system and microphone audio, integrate webcam overlay, and support multiple export formats such as MP4, MOV, and AVI. Moreover, this tool includes drawing tools that are useful for annotating in real-time, a task scheduler for automated recordings, and options to adjust the resolution and frame rate depending on your system’s performance. Lastly, this tool supports multiple video formats.
Here’s how to capture gameplay on PC using the FVC Screen Recorder:
Step 1. Download and install the FVC Screen Recorder on your computer. It is available for Windows and macOS.
Free DownloadFor Windows 7 or laterSecure Download
Free DownloadFor MacOS 10.7 or laterSecure Download
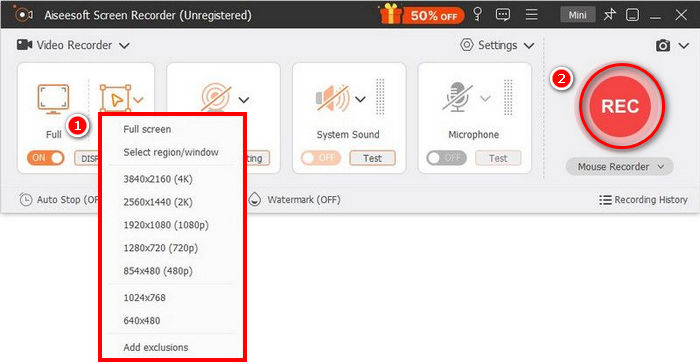
Step 2. After that, launch the tool and click the REC button to start recording your screen. You can choose the size or method of recording your screen. Once you’re done, just click the stop button.
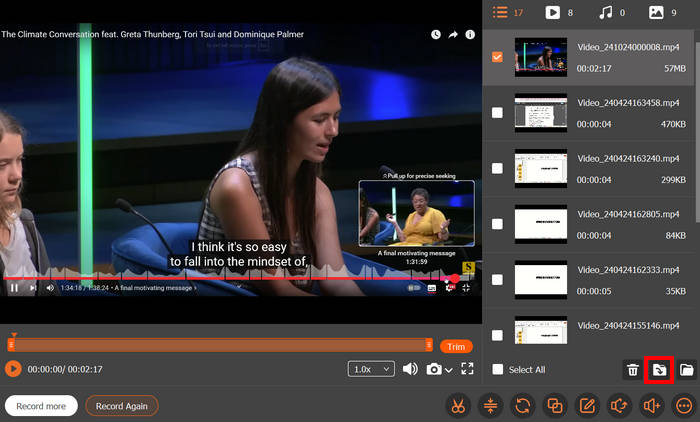
Step 3. Now, you have options to edit the video. Once you’re satisfied, click the Import button to save your recorded video.
With FVC Screen Recorder, you don’t need to worry about complicated features and interface in order to record high-quality videos. Its simple interface, advanced screen recording features, and support for multiple output formats make it one of the best options for gamers who want a seamless recording experience. Whether you're just starting out or already streaming content online, this tool gives you everything you need to record high-quality gameplay effortlessly.
How to Capture Gameplay on PC with Xbox Game Bar
Another method that you can use to capture gameplay on PC is through the Xbox Game Bar. This tool is ideal if you’re a Windows user since it is a built-in overlay feature in Windows 10 and 11 that allows users to record gameplay, take screenshots, etc. Moreover, you can easily access the tool by pressing the Windows logo key + Alt + G simultaneously. Here’s how to capture gameplay on PC with Xbox Game Bar:
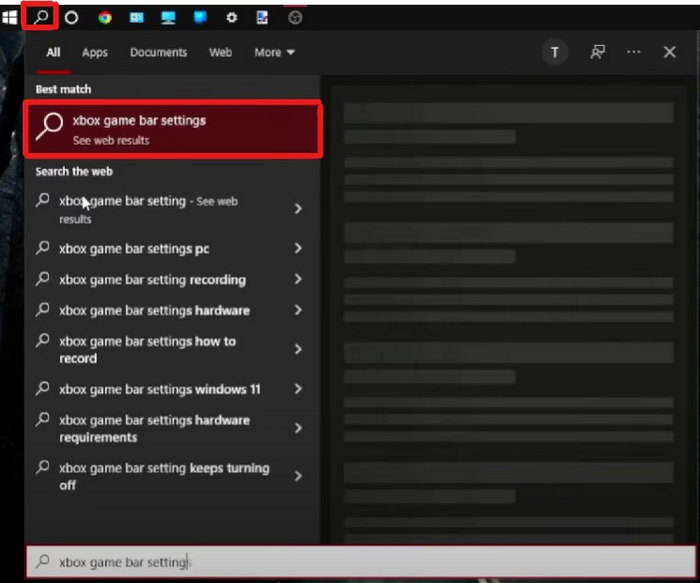
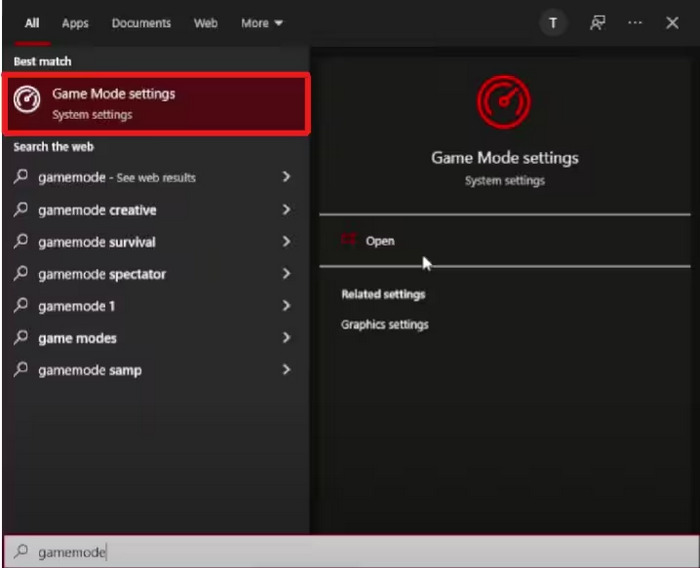
Step 1. First, on your computer, on the Taskbar below your screen, click the Search icon and look for the Xbox Game Bar settings.
Step 2. Next, look for the Game Mode Settings and click the Open button to access it.
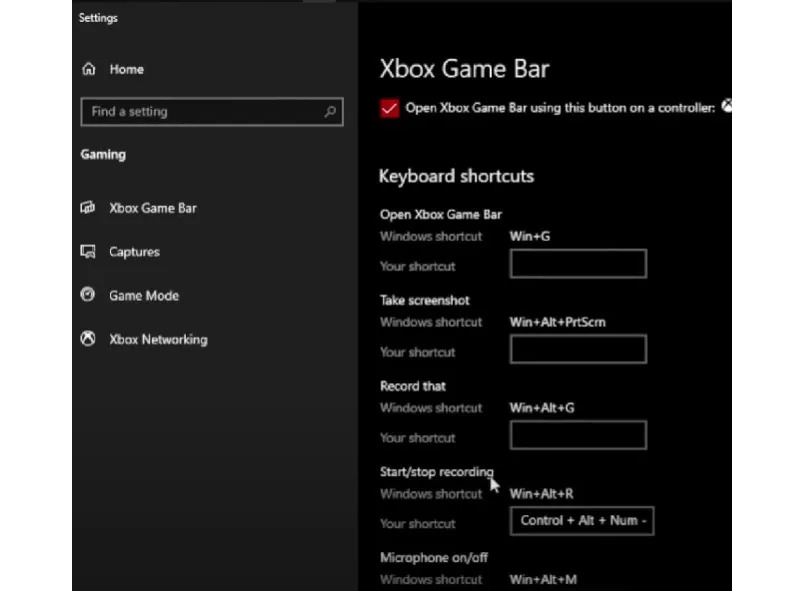
Step 3. Now, under the Xbox Game Bar, you can customize the Keyboard Shortcuts depending on your preference.
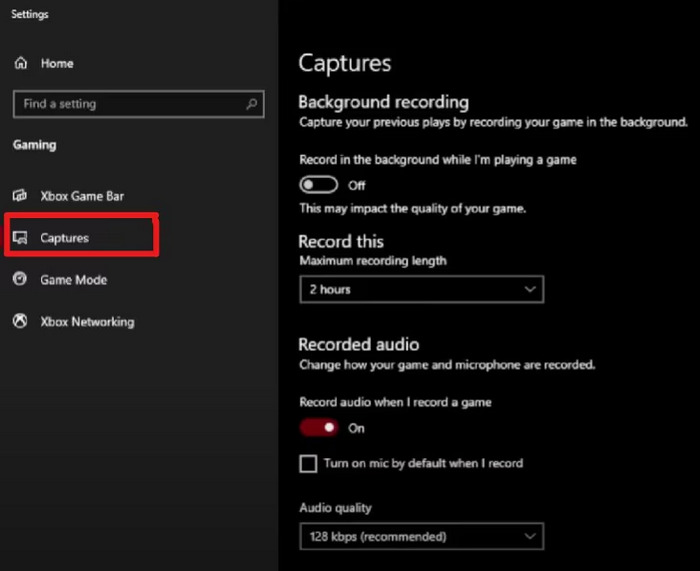
Step 4. Once you are done, you can now proceed and choose the Captures section. From there, you can customize the Background based on your needs and preferences.
Step 5. Lastly, if you are now settled in, you now start recording your gameplay.

Xbox Game Bar is a simple and convenient tool for recording gameplay on Windows. Since it’s built-in, there’s no need to install anything. It’s easy to use and great for quick recordings, making it ideal for casual gamers.
How to Record Computer Gameplay Using OBS Studio
OBS Studio, or the Open Broadcaster Software, is a free and open-source program widely used for screen recording and live streaming. It’s popular among gamers, content creators, and streamers because of its powerful features, customizable settings, and support for high-quality output. With this software, you can excellently record your gameplay. However, it might not be beginner-friendly for those who are not technical in this aspect. Nevertheless, it’s a great tool. and below are the steps on how to record computer gameplay using OBS Studio:
Step 1. First, you need to download and install OBS Studio on your computer. This software is available on Windows, macOS, and Linux.
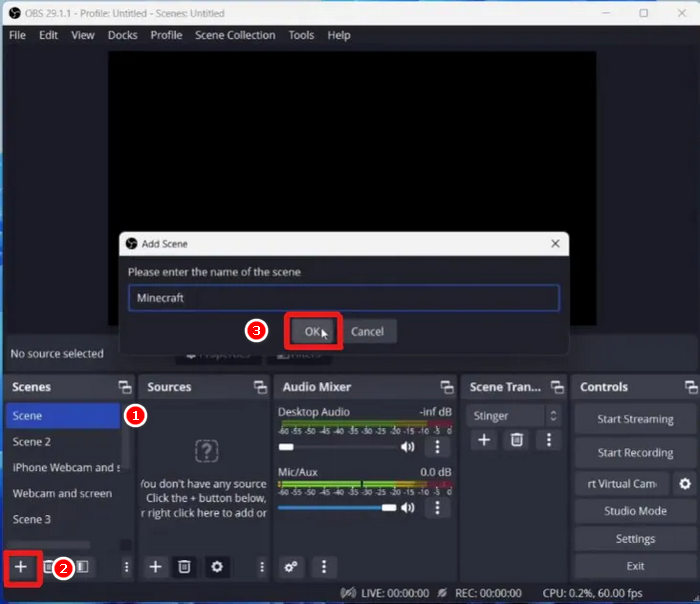
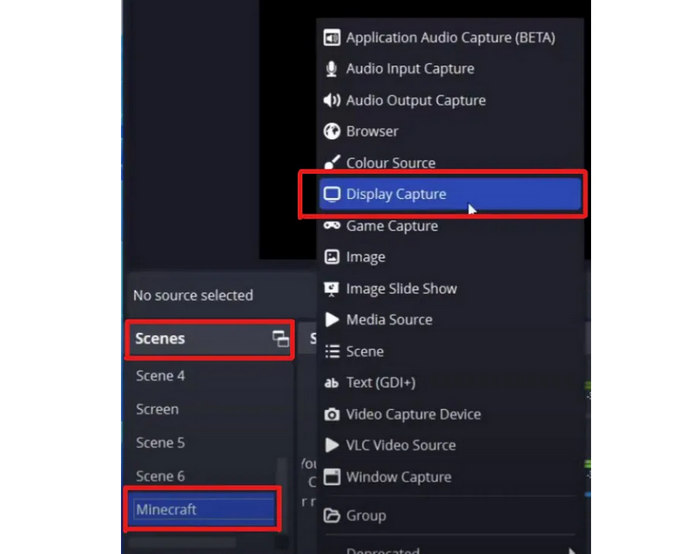
Step 2. Secondly, once done with the installation, open the tool and go to the Scene. After that, click the + icon. From there, you can rename the scene and then click OK.
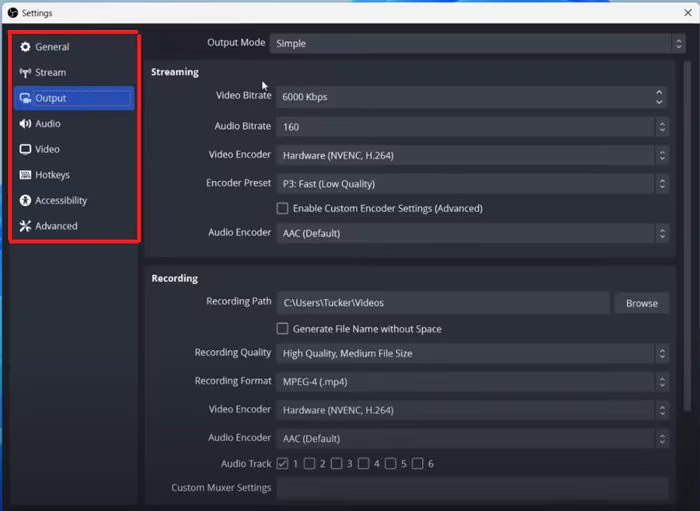
Step 3. Next, go to the Settings if you have anything to customize before starting to record your gameplay.
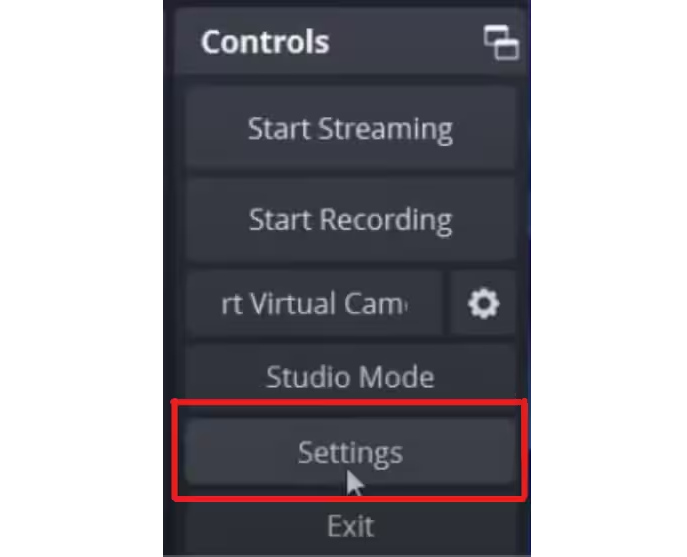
Step 4. You can now edit your output, audio, video, and other things that you want to customize.
Step 5. Once you’re done, go to the Scenes, look for the scene you added earlier, and make some adjustments to your recordings.
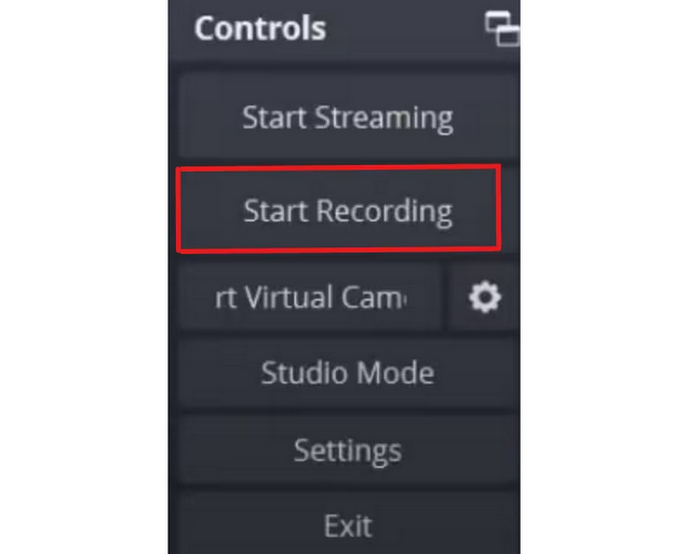
Step 6. Once settled in, you can now start recording your gameplay by clicking the Start Recording button.
OBS Studio is one of the best ways to record gameplay on PC if you’re looking for high-quality results and complete control over your recordings. While it may take a bit of time to learn, it's a reliable and powerful recording software for gaming that suits both professionals and serious hobbyists.
How to Record Games on PC with Radeon Relive
If you're using an AMD graphics card, Radeon ReLive is a convenient and efficient way to capture your gameplay on PC. This free built-in recording tool from AMD is similar to Nvidia’s ShadowPlay, offering hardware-accelerated recording that uses your GPU instead of your CPU, allowing for smoother performance while you game. One of its standout features is the ability to record in resolutions up to 4K, even if you're playing on a 1080p monitor.
Radeon ReLive is ideal for gamers who want a simple recording tool. While it may not have as many advanced features or editing tools as some third-party software, it gets the job done with minimal impact on system performance.
Here’s how to record games on PC with Radeon Relive:
Step 1. First, you need to download and install the AMD Radeon Software Adrenalin on your PC. To do that, you download the Radeon software package from their AMD Drivers and Support Page.
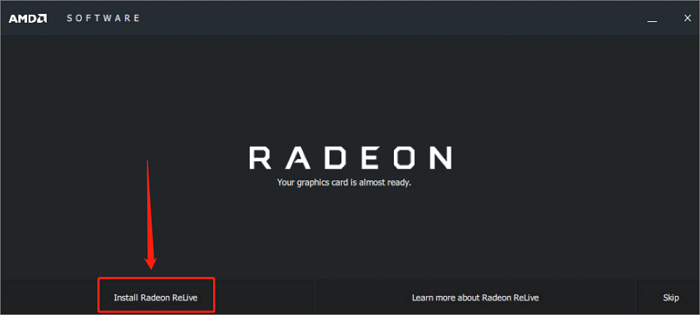
Step 2. Once done, run the AMD Installer and select Install Radeon Relive at the end.
Step 3. Next, you need to restart your system, then open the AMD Radeon Settings, and turn on the ReLive option.

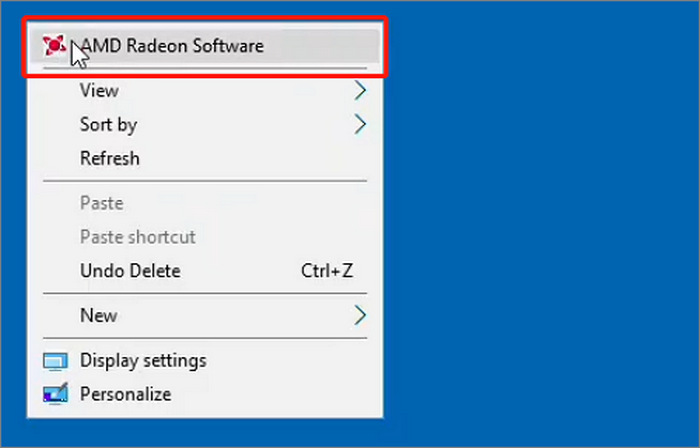
Step 4. Once done, on your PC, right-click using your mouse and choose the AMD Radeon Software option.
Step 5. After that, click the Gear icon and select the General option on the pop-up window.
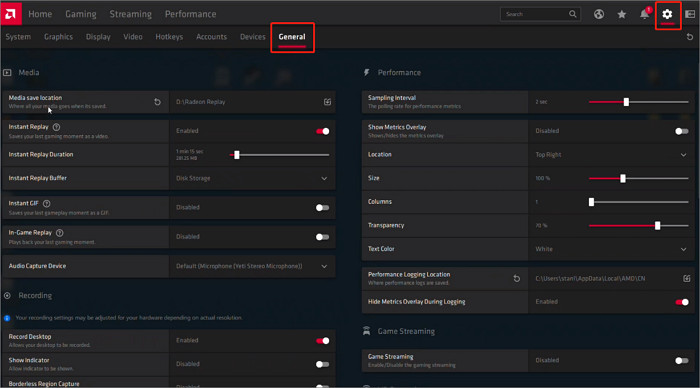
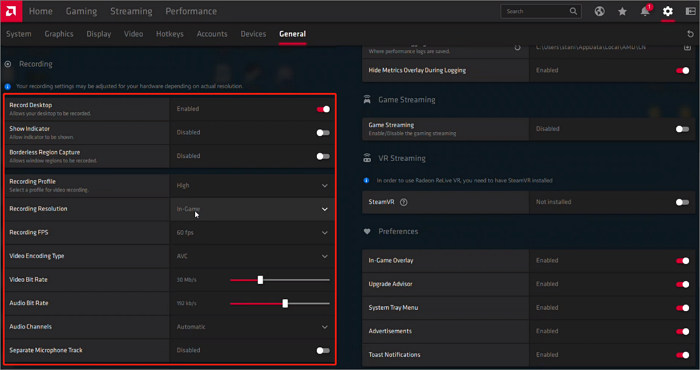
Step 6. Now, you have the option to customize your recording.
Step 7. Also, if you want to customize your Hotkeys, just go to the Hotkeys tab and customize it. Once done, you can now start recording your gameplay using Radeon Relive.
If you have an AMD graphics card, Radeon ReLive is a practical option to record gameplay on PC. It’s easy to use, delivers high-quality results up to 4K, and doesn’t put much strain on your system. While it may not offer as many features as other tools, it’s a solid built-in choice for AMD users.
Part 2. Best Settings for Recording Gameplays
In order to ensure high quality when recording gameplay on PC, using the right settings is crucial. Below are the recommended settings if you want to use any of those tools when finally recording your gameplay:
FVC Screen Recorder
Resolution: Select full screen or specific window, and 1080p is recommended.
Frame Rate: Adjustable, choose 60 FPS for fast-paced games.
Output Format: MP4 for compatibility.
Audio: Record both system sound and microphone.
Xbox Game Bar
Resolution: Matches your screen resolution, usually 1080p.
Frame Rate: 30 or 60 FPS set in Captures settings.
Video Quality: High for better clarity.
Audio: Record system audio and mic if needed.
OBS Studio
Resolution: 1920x1080 (1080p)
Frame Rate: 60 FPS for smooth gameplay
Encoder: Use Hardware (NVENC/AMD) if available to reduce CPU load
Bitrate: 6000 kbps for 1080p 60fps and 10,000 kbps or higher for 1440p/4K
Recording Format: MP4 or MKV
Audio Bitrate: 160-320 kbps
Radeon Relive
Resolution: Up to 4K, even if you have a 1080p monitor.
FPS: 60 FPS
Bitrate: 50 Mbps for high-quality and 10-20 Mbps for standard uploads
Recording Format: AVC or HEVC (HEVC is better for file size)
Audio: 192 kbps or higher
Part 3. FAQs about Recording Gameplay on PC
Does Nvidia automatically record gameplay?
Yes, if you enable features like NVIDIA Highlights or Instant Replay in GeForce Experience, it can automatically capture your gameplay moments. Or you can get yourself a professional game recorder.
Why won't NVIDIA record gameplay?
NVIDIA might not record gameplay if GeForce Experience isn't running, your PC doesn't meet the system requirements, or recording features like Instant Replay are turned off. The game you're playing might also not be supported.
How to record gameplay with GeForce Experience
To enable NVIDIA recording, open GeForce Experience, click on the gear icon to go to Settings, and make sure the In-Game Overlay is turned on. Then press Alt + Z to open the overlay, where you can access recording options. From there, you can start recording, turn on Instant Replay, or customize your settings.
Conclusion
Recording gameplay on your PC doesn't have to be complicated. With the right tools and settings, you can easily do it. Now that you know how to capture gameplay on PC, just choose what tool and method works for you. But before you start, remember to adjust your settings for the best quality and performance.
-
 2 Preferred Ways on How to Record External Audio from Mac
 If you’re wondering how to record external audio from a Mac, read this article and be guided by two quality audio recording tools that you can easily use.
-
 3 Best Alternatives to Kodi to Easily Stream/ Play Videos
 Are you using Kodi and you find it hard to use it? Read this article now and learn about 3 Kodi alternatives that you can easily use for your streaming needs.
-
 How to Record on PS4: 3 Great Methods You Must Learn
 If you want to know the optimal ways to learn how to record a PS4 screen, then tick on this post. Learn to do the task via default and alternatively from here.